Example - Setting Up Visor
Using one of the scenes in the content we will make use of Visor. Load the Bullet Mars Explorer scene and reduce the resolution to speed up rendering for this example (set the Multiplier to 50% in Camera Properties).
- Load the scene and add a null object called Visor (to make it easy to find). In the Geometry tab of the Object Properties window add Visor from the dropdown. Also, use F4 to split the viewport in two and make the left side bigger than the right.
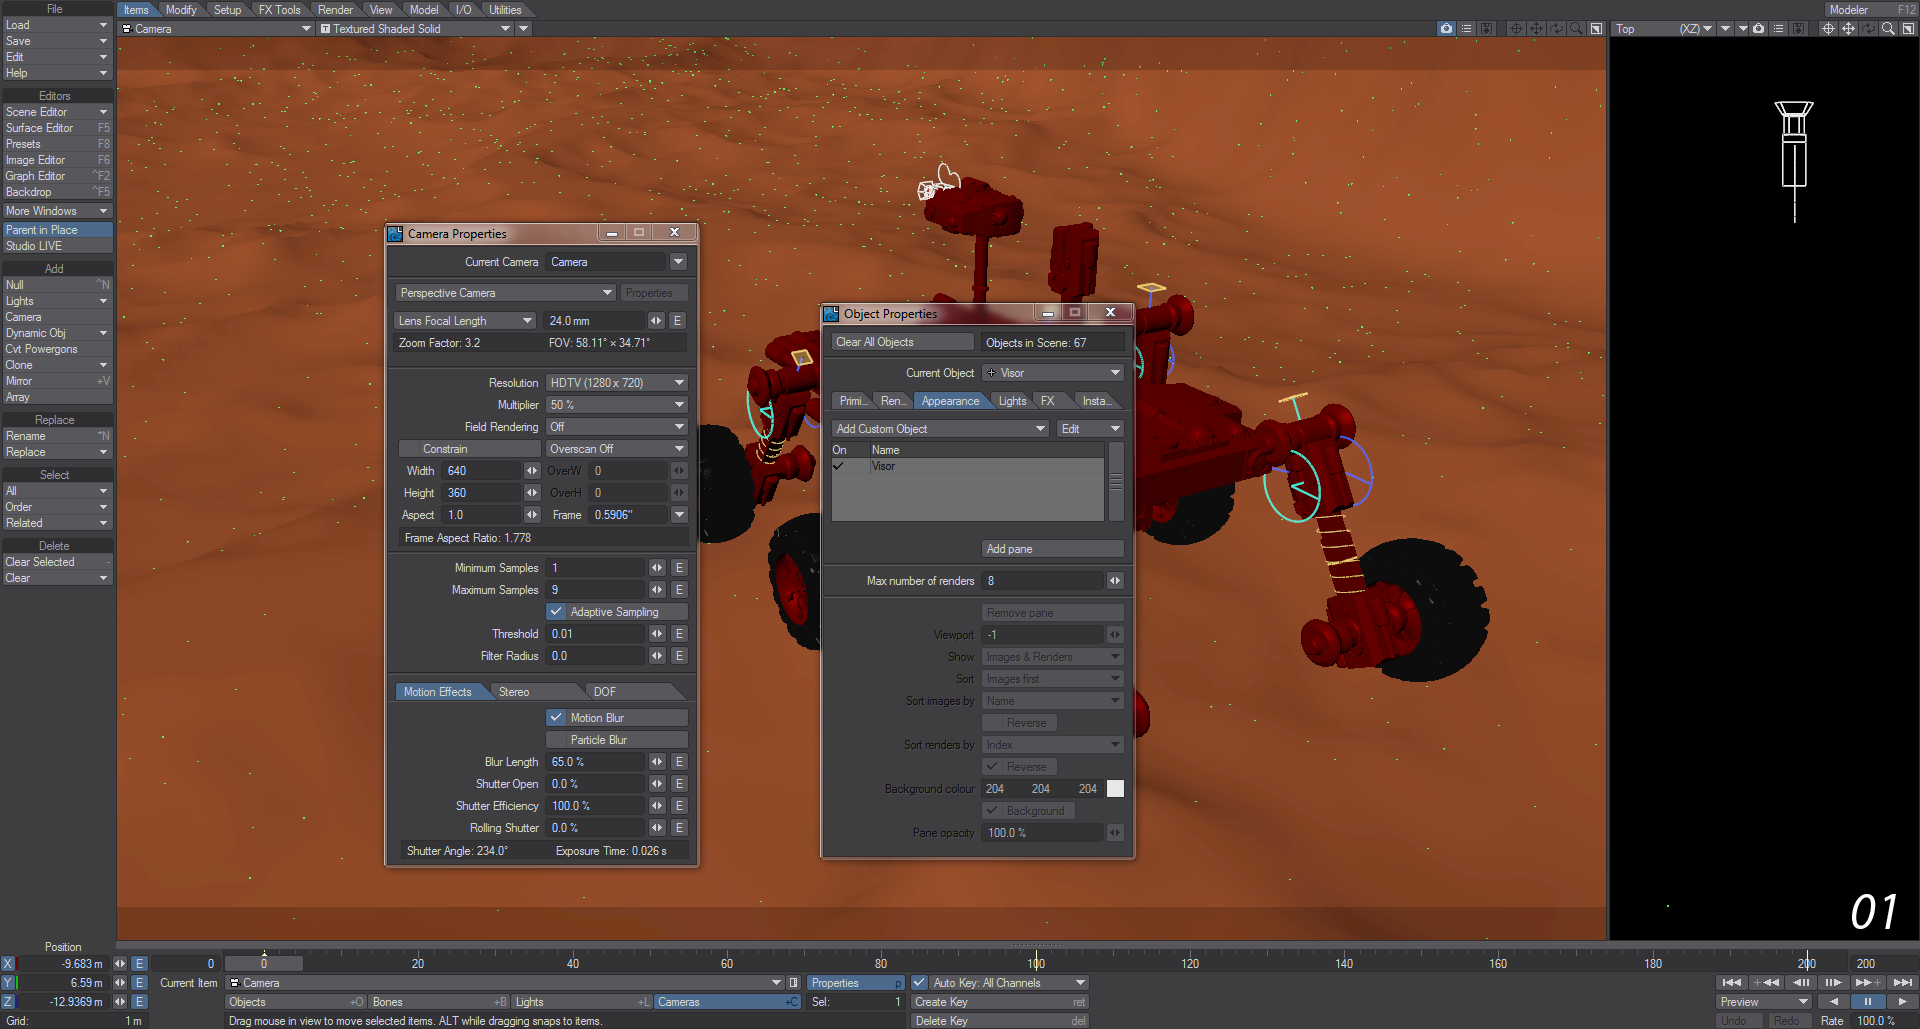
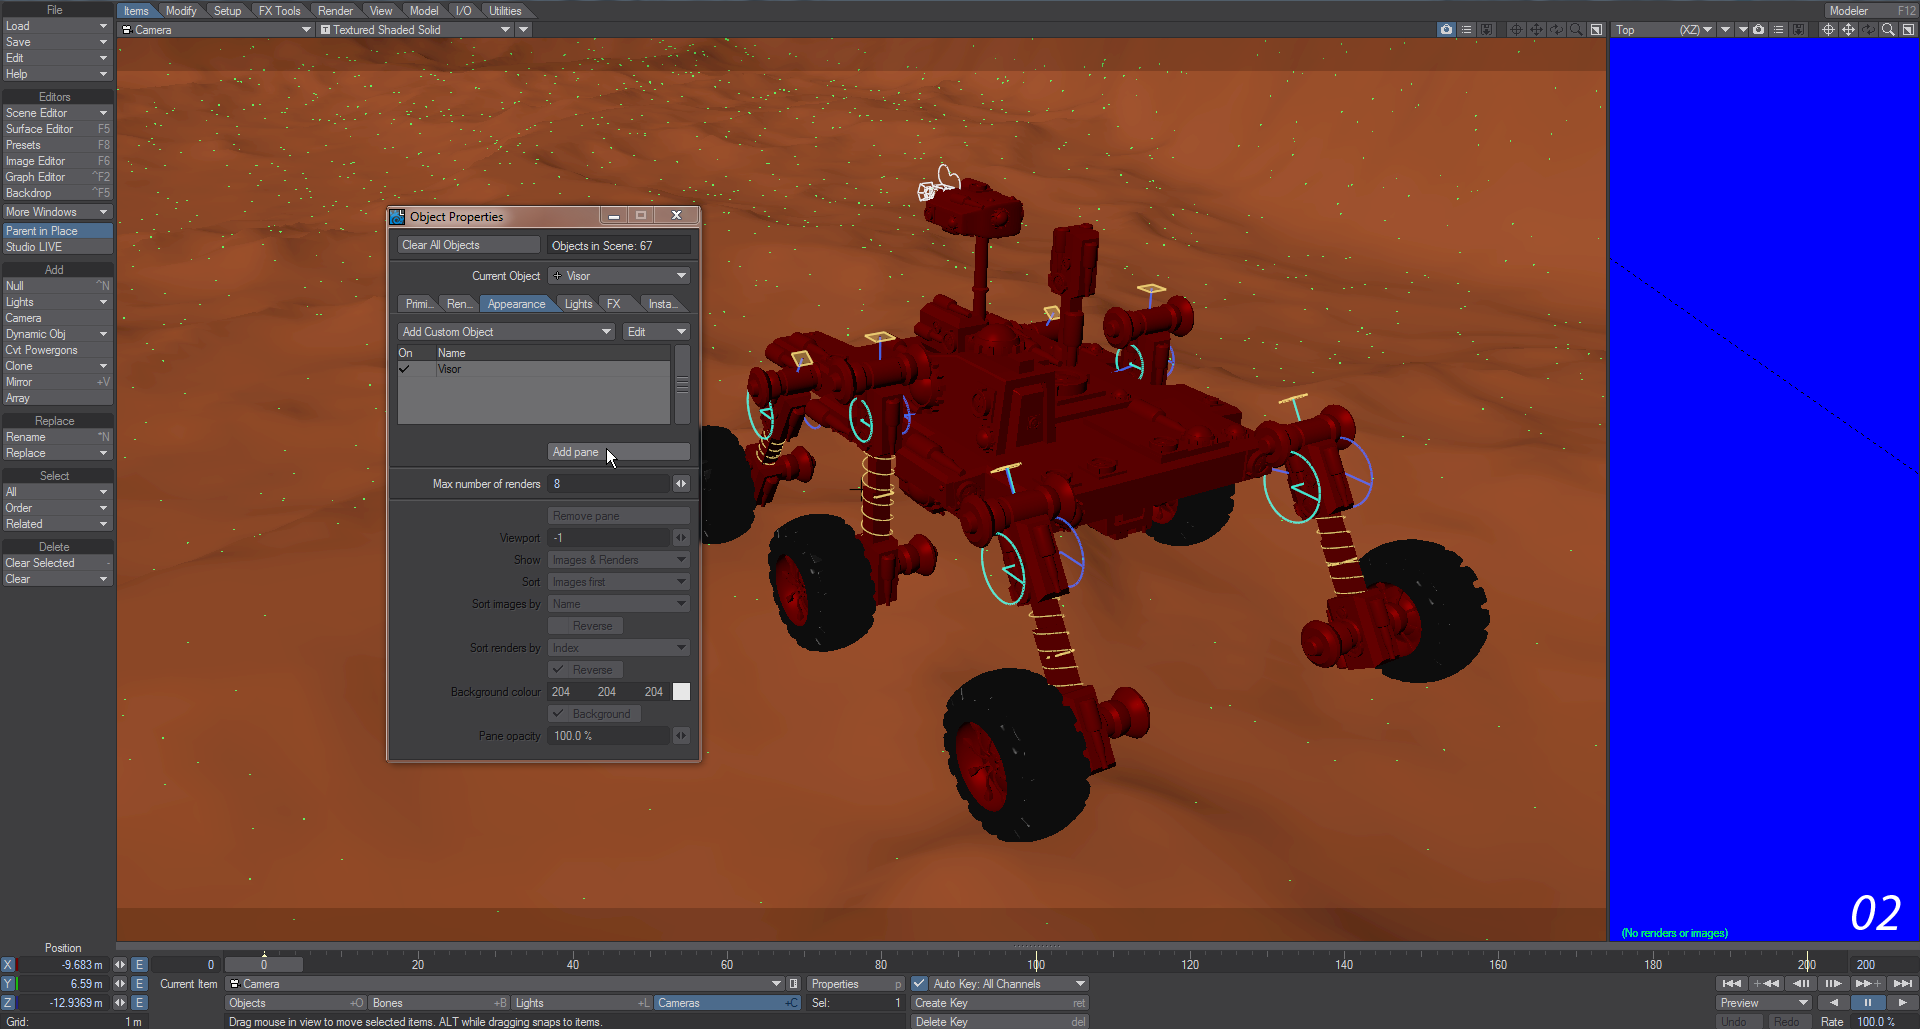
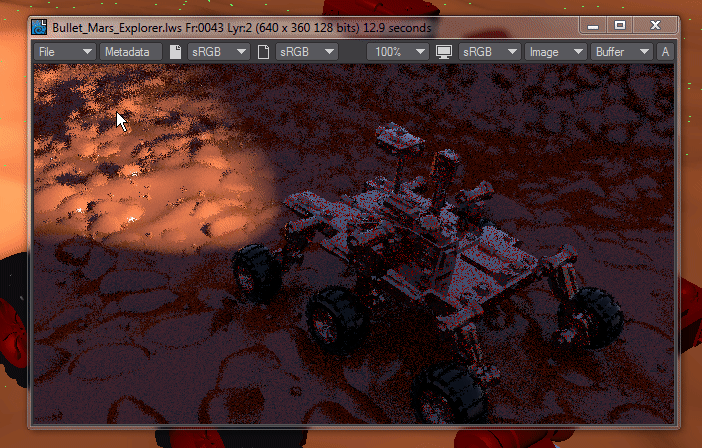
- Make sure you are in Object mode and that the Visor object is selected, then double click on the Visor entry in the Object Properties > Appearance > Add Custom Object dropdown. In the new window that opens choose Add Pane . A new blue pane will be placed in the right-hand viewport. The one here has finished renders in it to show what they will look like.
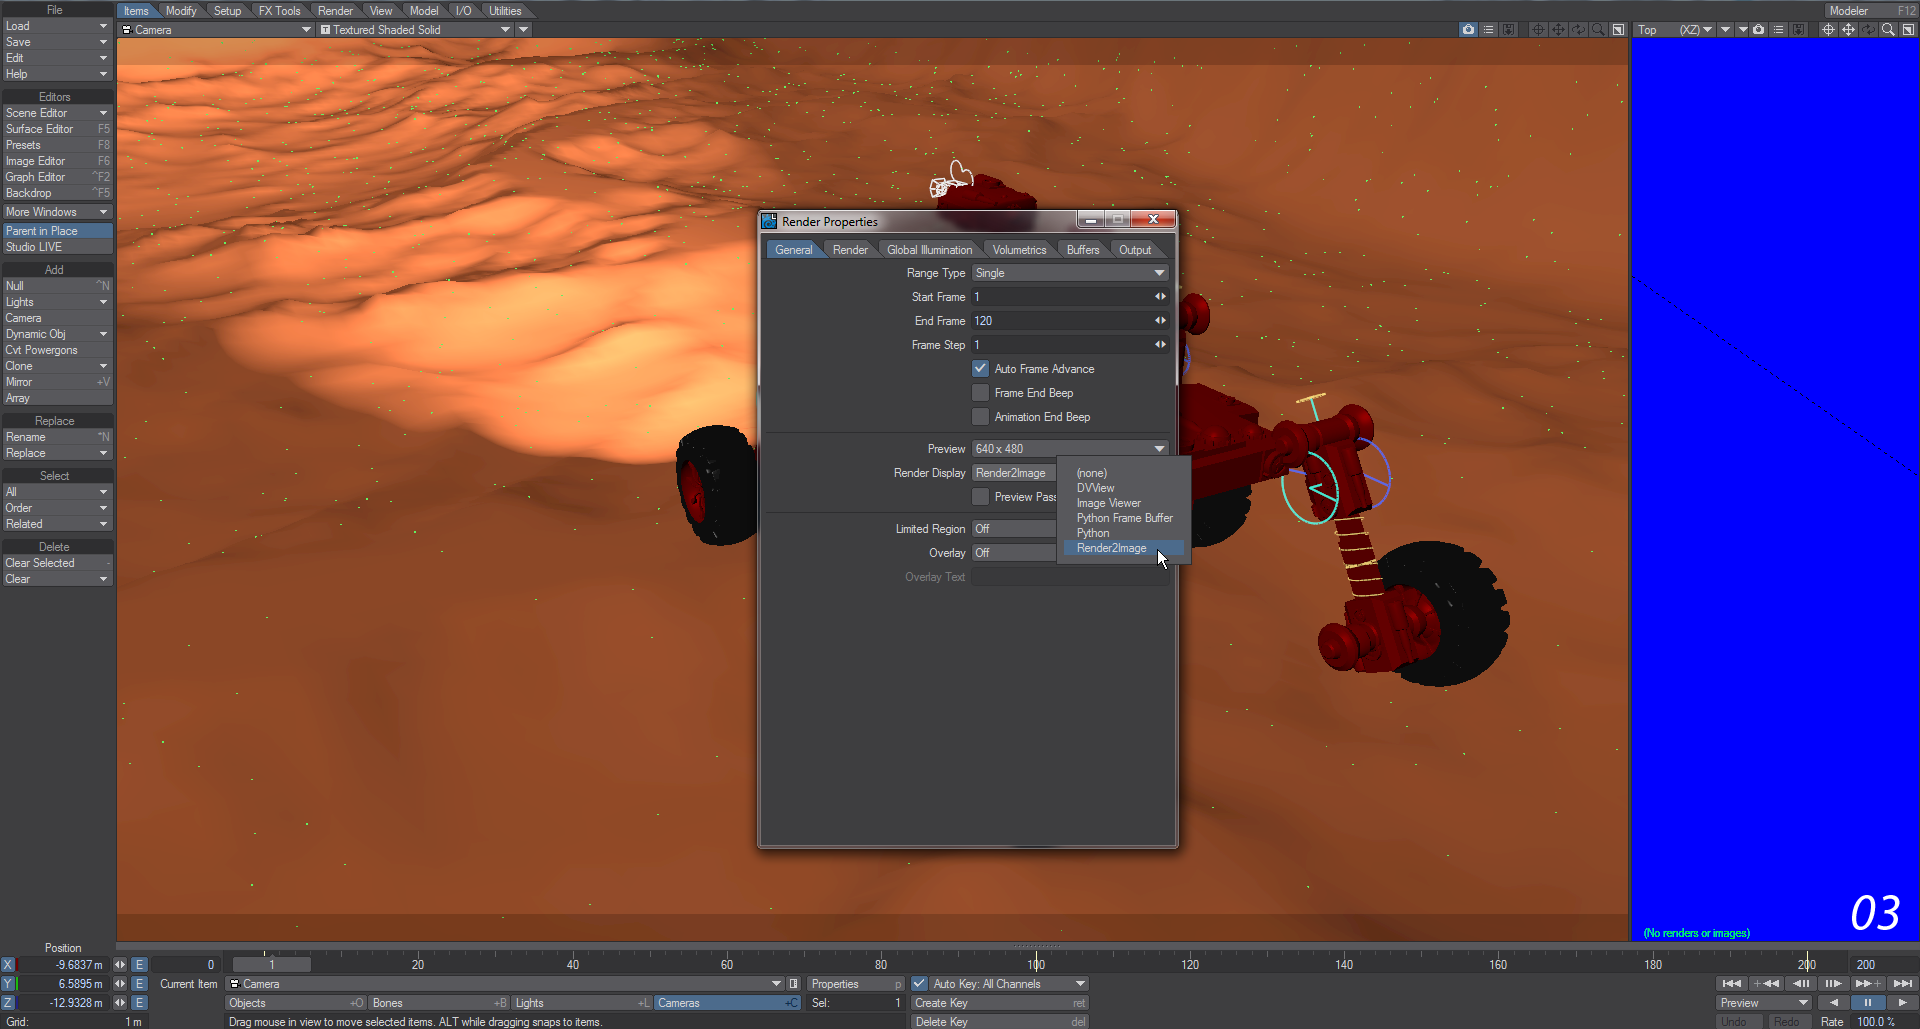
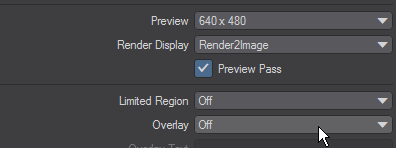
- In order to push renders to Visor you have two options. You can choose Render2Image in Render Globals > General > Render Display or you can leave it at Image Viewer and pass finished renders from there. For your first tests, set the Render Display to Render2Image.
- Render a couple of pictures so that you can see your pane filling up, then change the Render Display back to Image Viewer. Do another render and when the Image Viewer appears go to File > Frame Buffer > Render2Image and also choose Auto-Send Image.
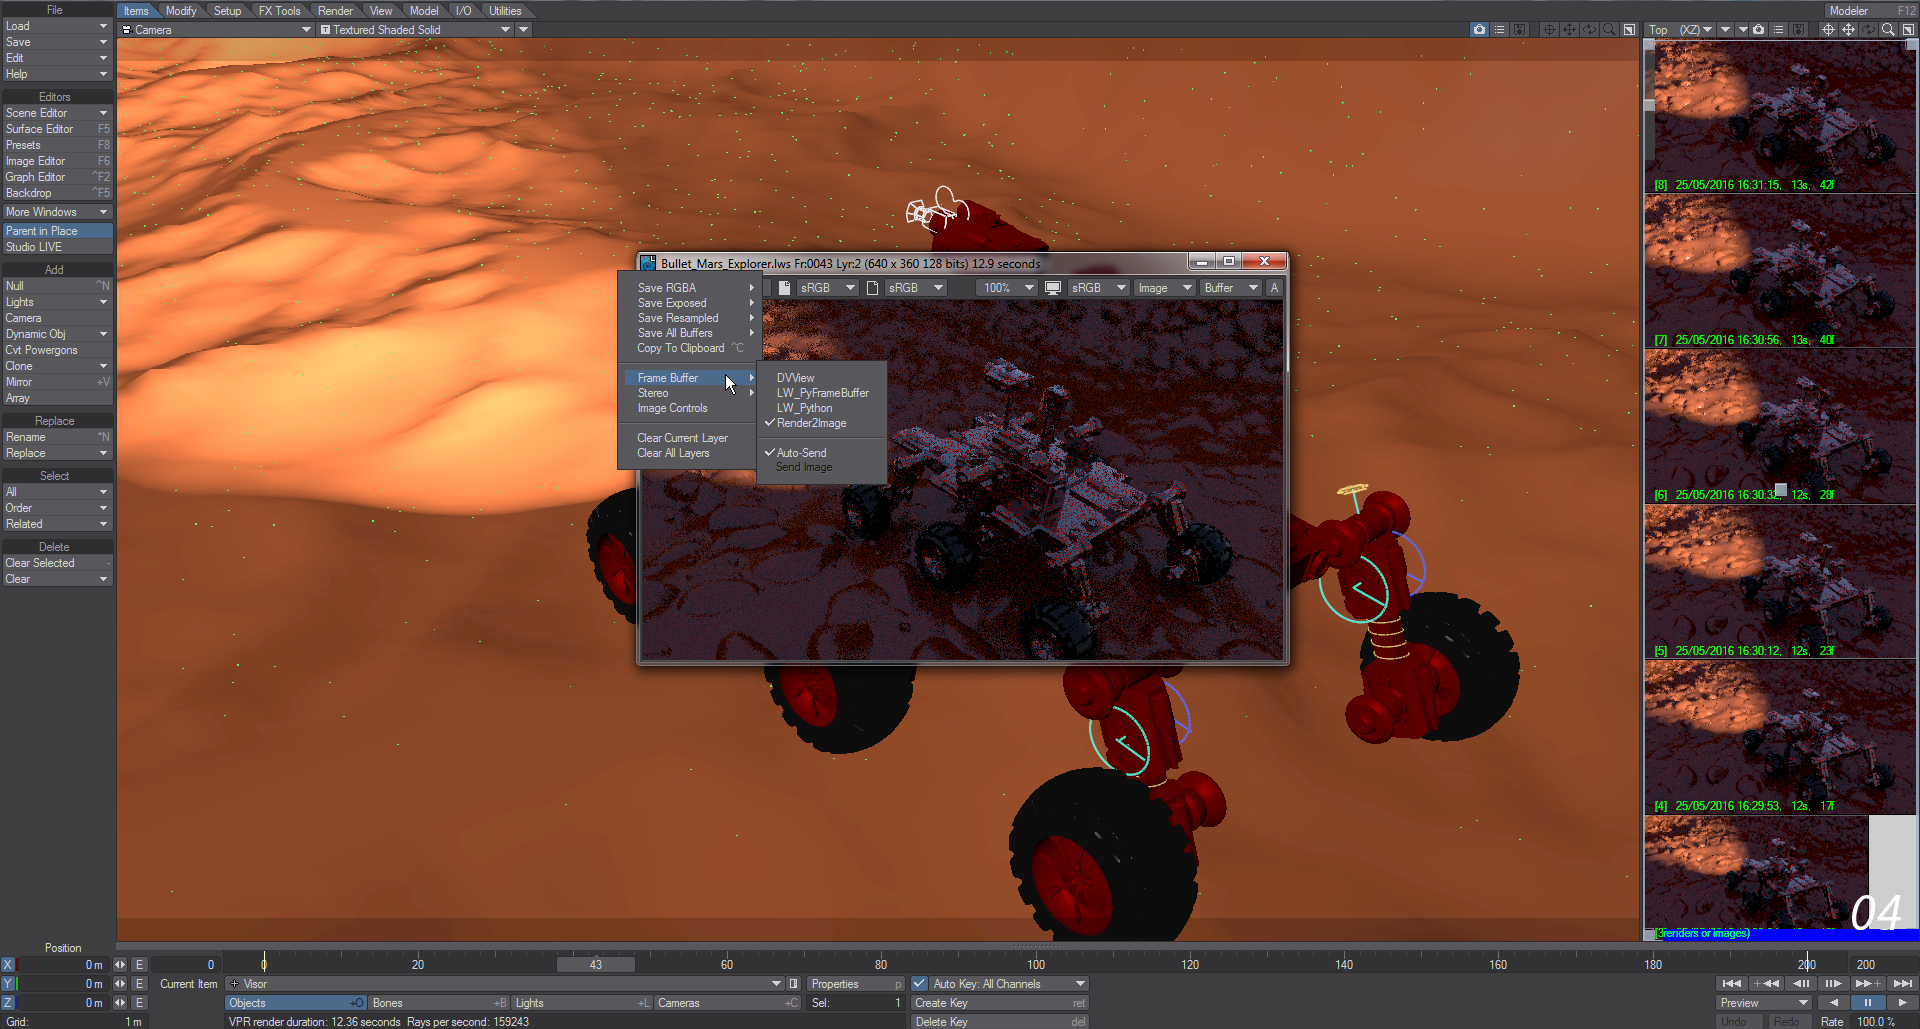
Visor keeps renders in RAM, so if you find yourself running short and/or you want to save your renders, you can go into Image Editor (F6) and delete or save images there with names starting !Render...