Light Properties
Light Color and Intensity
The Light Color setting on the Light Properties Panel modifies the color for the current light.
Distant and Area lights
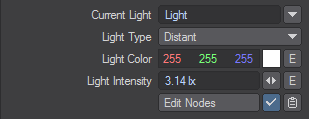
- Current Light - The currently selected light in Layout. Using the dropdown will present a list of scene lights. Lights can be renamed in the Current Light field
- Light Type - Choose the type of light you wish to use. The options below this light choice might change depending on the light chosen
- Light Color - What color your light shines with
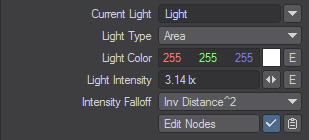
- Light Intensity - lets you set the brightness for the current light. This value is in Lux (Lumen^m2). The E button next to this value can change it over time
- Intensity Falloff - All lights apart from Distant, Environment, and Photometric have falloff and it is set to Inv Distance^2 by default. It can be set to Off and the Node Editor just below can be used to create falloffs that would never be feasible in the real world.
All lights have an intensity of 3.14 lx and an Intensity Falloff when added. The Distant, Environment and Photometric lights have no Falloff.
Light intensity is additive, so if multiple lights hit a surface, their intensities are added together. As such, too high a Light Intensity value tends to wash out a scene, particularly when you have multiple lights. Eventually, the rendered image becomes solid white when the values of light sources exceed a certain brightness.
Node Editor

The node editor in the Light Properties window has two nodes already present when you open it, as shown. They are:
Input
Provides Direction (Vector) and Distance (Scalar).
Light Shader
- Luminaire Color - Colors the light when visible to the camera
- Illumination Color - The color of the light emitted by the light item
- Volumetric Color - The color of volumetric rays
All three can be hooked up with different elements or all use the same for complete control over the appearance and effect of a light
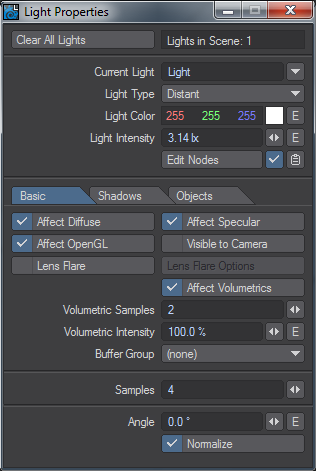
Basic Tab settings

Not all settings below are on every light type:
- Affect Diffuse - Deactivate to prevent a light from affecting the general color or brightness of a scene. This is particularly useful when you add lights to a scene for creating specular highlights. Often you want a light that creates a nice specular highlight on a surface, but you don’t want it to affect the rest of the lighting.
- Affect Specular - Deactivate to prevent the light from creating specular highlights; the light still affects the color and brightness of the scene, however. This is very nice for adding lights in a scene to approximate the look of radiosity. A scene often needs a very high number of lights to give it the appropriate realism and warmth. However, adding too many lights can cause objects with a high Specularity setting to reveal the light’s presence with multiple hot spots. By disabling specularity for these lights you can overcome the problem.
- Affect OpenGL - This option is for display purposes only. It will not change the effect a light has on a rendered image. With this option you can prevent the light from affecting Layout’s display, which uses OpenGL. This is important since the number of lights that can affect an OpenGL display is usually limited to 8 depending on the graphics card (if your card supports more, see the GL options tab of the Preferences Panel to increase your maximum).
- Lens Flare - Engaging this toggle makes the Lens Flares options panel available.
- Affect Volumetrics - This switch determines which, if any, scene lights affect volumetric effects. You need at least one for volumetrics to work.
- Volumetric Samples - How many samples will be used for volumetric effects on a per-light basis.
- Samples - The number of samples to use for the selected light.
- Image - Applies an image to a light as a projector. With lights other than Spotlight, the image will tint the color of the light emanating. With a spotlight, the image will be recognizably projected.
- Portal - This turns the light into a concentrator, rather than a light in its own right. It is used for filling openings, like windows, for directing outside light into the room.
Use powers of 2 for ANY sample setting. LightWave does a better job with 2, 4, 8... 256, 512, 1024, etc.
Light Display Size
Now that lights have a scale of their own, the old system of lights being displayed on the Layout screen in a size relative to the Grid no longer works. Lights retain their scale much like objects. Cameras do still scale with the grid. Also, the true light source is actually located at a center point within the visual representation of the light. For lights that can be resized (Linear, Spherical, Spot in the Properties panel; Area and NGon using the Size tool) the visual representation of the light indicates its size.
To add a light
Choose Items > Add > Lights and select the desired light type from the dropdown.

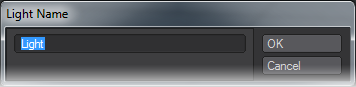
A dialog prompts you for a name when you add lights. Click OK or hit Return if you wish to accept the default.
You can also select Light mode and use the Viewport Options menu Match Viewport Perspective item to move an existing light to look in the same direction as the Perspective view, or add a new light that does. The new light will be of the same type as the light that is active.
To Remove a Light
Select the light and choose Items > Delete > Clear Selected or Clear All Lights, or use the keyboard shortcut -.
To Adjust a Light’s Properties
Select the light and open its Properties Panel (P). If the panel is open, you can choose different lights to adjust using the Current Light pop-up menu.
Shadows Tab
In LightWave, the light goes through objects unless the light is set to generate shadows. So unless you use a light with Intensity Falloff, the light will continue on forever. By default, LightWave engages Intensity Falloff.
When a light generates shadows, it respects objects that block the beam, which keeps the light from continuing on its merry way. A shadow is created when you have a lighted area next to an unlighted or partially lighted area.

With Shadows Inactive or RayTrace Shadows in the Render Properties > Render panel turned off
Say you have a scene containing a house with a fully-detailed interior. Without shadows, if you have a light emulating the sun, its light always affects the interior of the house, even if you position the light itself outside the house.
In order for an object to cast ray-traced shadows onto other objects, it must contain polygons that face the object receiving the shadow. In other words, the surface normal of a polygon must face the surface receiving the shadow. This is rarely a problem with solid objects, but if you cast shadows of flat planes, and do not see a shadow, make sure to use the Double Sided surfaces attribute or build the object with polygons facing both ways.
The Cast Shadows option on this tab allows a light to cast a shadow, whether Visible to Camera on the Basic tab is on or off.
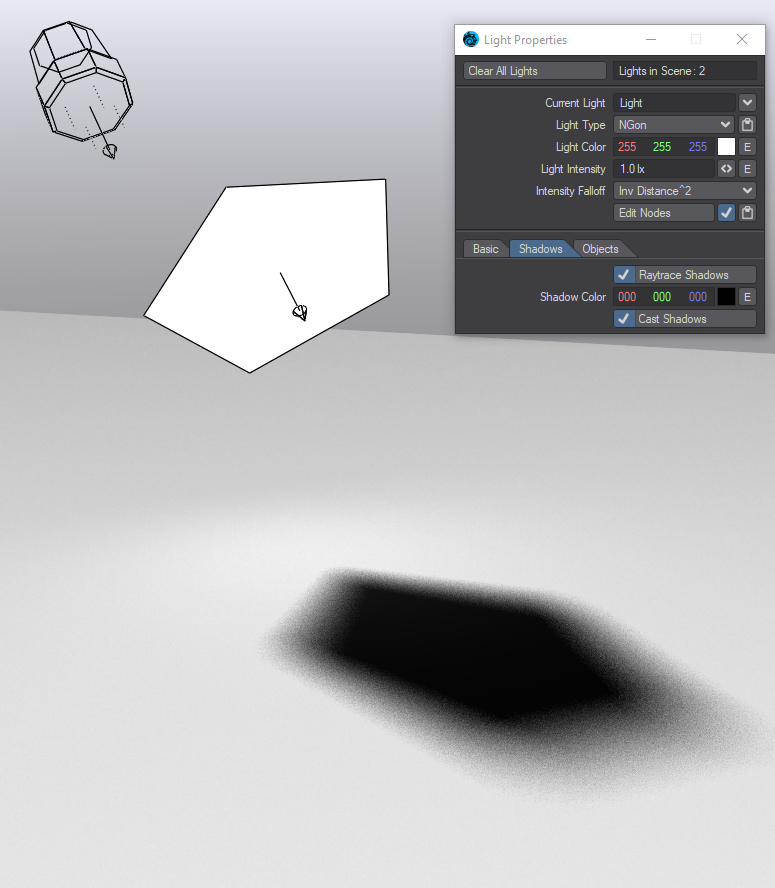
For this example, here are two lights - a Distant and an Ngon - with the distant light being strong. The Light Properties panel shown is for the lower, Ngon light
Shadow Type
You initially set lights to generate shadows via the Shadow Type setting. By default, any light added to a scene has its Shadow Type set to Ray Trace. Ray tracing a light produces accurate shadows. Distant, Point, and Spotlights produce ray-traced shadows with hard edges unless they are sized above 0. Area, Linear, NGon, Photometric and Spherical lights produce ray-traced shadows with physically accurate shadow edges that are hard near the object casting them and softer further away.
Shadow Color
A Shadow Color setting is available on the Light Properties Panel. If a shadow-casting light uses the default black color (0, 0, 0), it will have no direct effect on areas that are blocked by opaque objects. This matches the behavior of previous versions of LightWave (and the real world). Using colors lets you tint shadows without having to adjust ambient lighting.
The original light color dissolves into the shadow color as the amount of shadow increases from zero to 100%. To change the density of shadows without tinting them, set the Shadow Color to be the same as the Light Color (Light Properties) and then adjust the Shadow Color value (using the HSV colorspace controls).
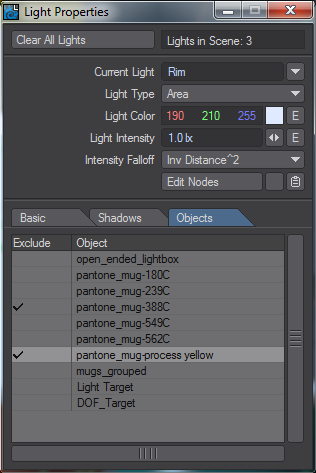
Objects Tab
You can exclude any light or lights from the shading of any object. Simply click in the Exclude column to activate the exclusion.
You can also exclude or include all lights in the objects properties panel or all objects in the lights properties panel or invert your selection by right-clicking on the Lights heading.

Video