Unity
Unity Interchange

LightWave can save scenes for Unity to enable a seamless transfer between the two programs.
It is important to note, to avoid disappointment, that Unity is a very different beast to LightWave, with different restrictions and benefits. There is a certain workflow to follow to ensure that your Unity scene works as well as your original LightWave scene.
First things first, Unity is a game engine. It can create beautiful imagery but:
- Everything is dependent on UV mapping;
- A maximum of two UV maps per object are allowed;
- Procedurals, gradients, clip maps and nodes will not carry across - everything needs to be baked to image maps.
LightWave’s node system is a great benefit here. If you can texture your scene as you would like using nodes, then bake out those textures to use as image maps in LightWave’s layered system then you can keep both ways of texturing in the same scene. If not, then you will probably want to set up a second content directory containing your scene repurposed for Unity.
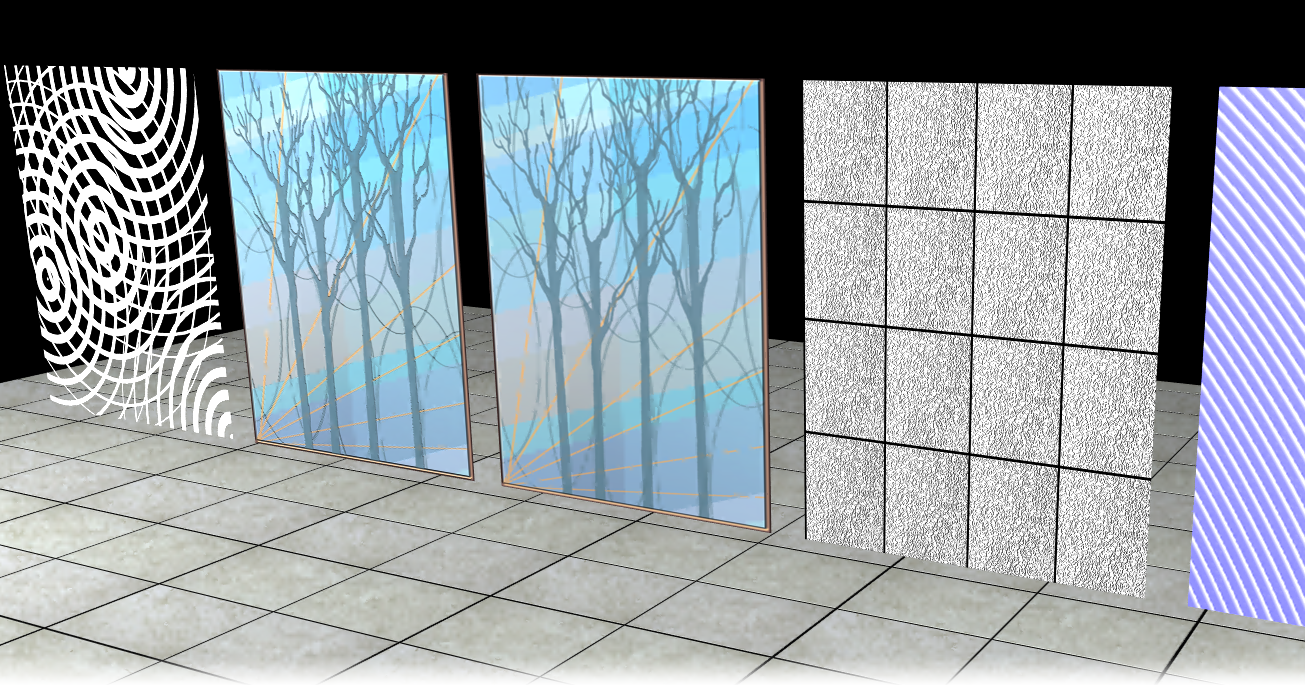
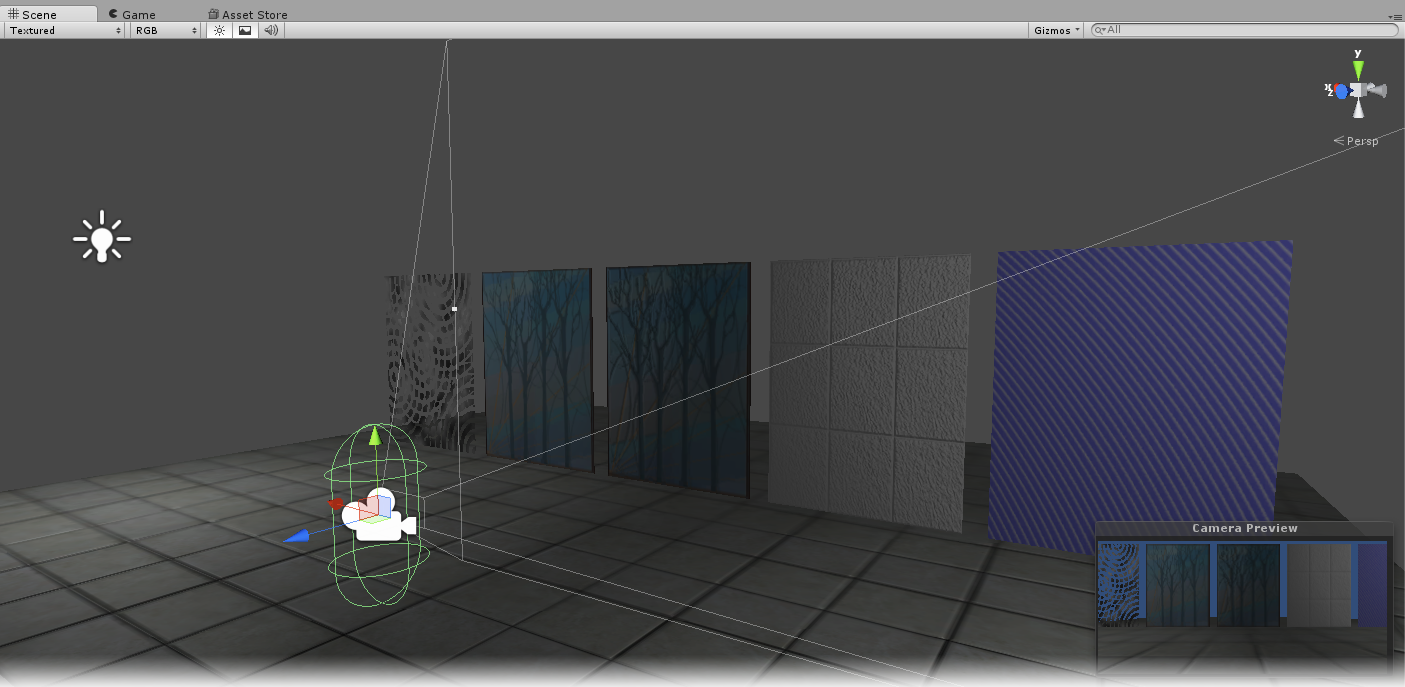
It is probably best not to assume that your delicate surfacing in LightWave will carry across and actually texture in Unity where possible, using LightWave to model the geometry and place lights, etc. Transferring surfaces between LightWave and Unity will use LightWave’s Color channel (Diffuse in Unity) and Luminosity channel (a second channel in Unity, usually used for Lightmaps, but also for Bump/Normal maps). The example scene provided in the 11.5 content shows various surfacing techniques in LightWave and how they translate.
 Example: Texturing in Unity
- We’ll use this scene to get to grips with how texturing works in Unity. If this is your first taste of Unity, install it as usual and then go to the support/3rdparty_support/Unity3D folder of your LightWave3D installation directory where you will find a Unity package labeled LightWaveAppLink.unitypackage . This needs to be copied to your Unity installation’s Editor/Standard Packages folder. Under Windows, this is usually here: C:\Program Files\Unity\Editor\Standard Packages (for machines running a 64-bit version of Windows) and on a Mac here: Applications/Unity/Standard Packages.
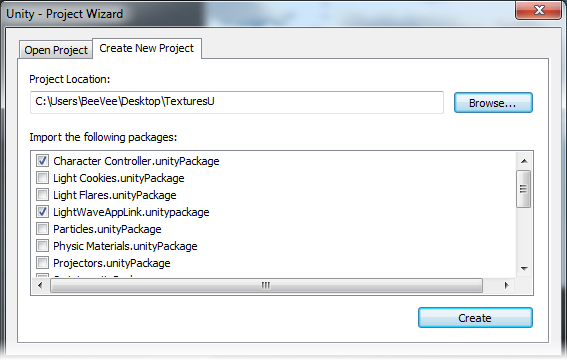
- Open Unity and select New Project. It will ask where, so create a new folder where you would like Unity to run from. Also import the following packages:
- Character Controller.unitypackage
- LightWaveAppLink.unitypackage
- Go to the folder you have created for this project and you will find an Assets directory in it. Copy the Textures content from the 11.5 content folder into it. You should only use this version of the scene when you want to modify your Unity project.
- Open the scene in Layout and hit s . This saves the scene and tells Unity that something has changed. Unity will re-import the scene as an FBX file.

- In Unity, click the FBX version of the scene file and in the Inspector panel on the right set the Scale Factor to 1.0. Drag the icon into the Hierarchy window on the left side of the screen. The FBX version is the icon with the image of the scene rather than the LightWave logo and is highlighted in the image above.
- Now we will go through the textures in Unity, because you can see right away that they are not the same as those in LightWave.
- Clip - Change the shader to Transparent/Cutout/Diffuse and you should get a clipmap-like behavior.
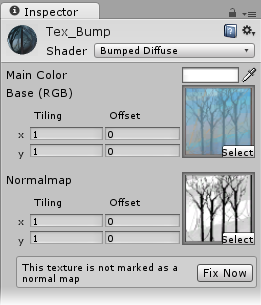
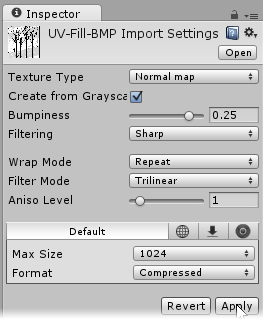
- Tex_Bump - This is the most awkward one. Unity has assumed that this and the Tex material are the same because they have the same image in the Color channel in LightWave. We need to make a new Material in Unity. Do so by right-clicking in the Project window and selecting Create/Material . This will put a new material in the Assets/Texture/Scenes/Materials folder ready to be named. Call it Tex_Bump , change its Shader to Bumped Diffuse , select the UV-Fill image as the Base (RGB) image and the UV-Fill_BMP image as the Normalmap. You will be told that the image chosen isn’t a Normal map, but do not click the Fix Now button. Instead, find the image and click on it and change its type to Normal map in the Inspector and hit Apply .
Lastly, go back to the Materials folder and drag and drop your new Tex_Bump material onto the appropriate polygon in the viewport. There is a second way of importing the scene so that this issue doesn’t come up. Before you drag the scene into the Hierarchy list in step 5, click on the scene and look at the Inspector pane.

Note the Material Naming dropdown at the bottom of the image. By default it is set to Base Texture Name , but set it to From Model’s Material and you shouldn’t have the problem described above. - Tex - This one should have come in okay. You should just change the Shader to Diffuse .
- Bump - This one is nearly okay. Change the Shader to Bumped Diffuse, clear the image in the first slot and put the same image in the second slot. The same warning will appear about it not being a Normal map, so repeat the process from before of finding the image, changing it to Normal map and hitting Apply .
- Proc - As you know, procedural textures don’t travel between applications so they have to be baked, so for Unity this surface is the same as the Tex surface. You should just change the Shader to Diffuse .
- Floor - Change the Shader to Bumped Specular and set the Normal map to FlrTile-Bump . You will need to change it as per Bump and Tex_Bump .
- You have now brought your LightWave scene into Unity and converted the surfaces into Unity materials. Any time you make a change in LightWave and save the scene it will be reflected in Unity, but this means that you may have to revisit some of the steps listed above to get things right again. To take things further and create a walkthrough, you can add the following Components:
- Camera:
- Character/Character Controller
- Character/FPS Input Controller
- Camera-Control/Mouse Look
- Floor Object:
- Physics/Mesh Collider
- Now you can hit the Edit > Play command and your camera should fall to the floor where you can pilot it using the FPS controls of the WASD keys and your mouse.
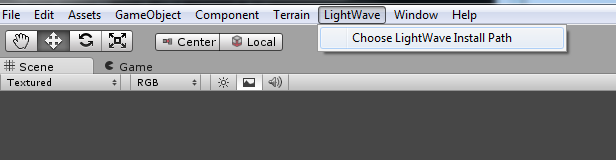
The first time Unity uses the LWS importer it will ask for the path to your LightWave directory and the path you specify will be remembered across sessions. If you would like to use a different path, use the “Unity > LightWave > Choose LightWave Install Path” menu button:
Additional Unity Interchange notes
- Unity does not support animations with a scale of 0. For scenes where you will have explosions or other things that require a scale of 0 in LightWave, use a very small but non-zero value.
- LightWave lights and cameras are not carried across. The items only serve as place holders for Unity lights and cameras in the hierarchy view if needed.
- Textures for your LightWave scene should be baked to UV maps for the most faithful duplication inside Unity. Unity only allows two UV maps per object. The first should be used in the Color channel, the second in the Luminosity channel, even if the LightWave textures are not intended for these channels.
- Because LightWave saves objects separately from scene files, you need to save both when you make texturing changes in LightWave. Unity’s surfacing isn’t as dense as LightWave so you will have to bake your surfaces (and lighting) to image maps since procedurals and nodes don’t translate.
- While you don’t absolutely have to stick to sizes at “power of 2” values (256, 512, 1024, 2048, etc.), if you don’t use them Unity will not be able to compress your images, meaning they will make the binary game file larger and might use more texture memory.
- Use the Inspector before you bring in your LightWave scene. You can change your scene’s Scale , turn on Mesh Colliders for all your objects so that you don’t need to enable them piecemeal as you create your Unity scene, and also use the From Model’s Material Material naming setting to better match your LightWave surfaces.