3D Display
3D Display
LightWave 11.6 added a 3D viewing mode for people with the right hardware. If you have a 3D monitor or television and a graphics card capable of quad-buffering a display (for NVidia this means a Quadro graphics card but most AMD/ATI cards work), then you can see your scene in stereoscopic 3D. The display works both in OpenGL and VPR and supports both anaglyph and active or passive 3D (shutter glasses or RealD 3D glasses) depending on your hardware capabilities.
To enable the display 3D Plugin in a full-screen window.
- Load a scene;
- Pick Texture Shaded Solid / Texture Shaded Wireframe ( for color OpenGL );
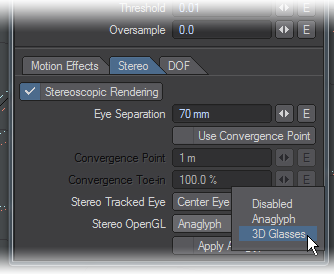
- In Camera Properties go to the Stereo tab and enable Stereoscopic Rendering ;
- In the Stereo OpenGL dropdown pick 3D Glasses ;
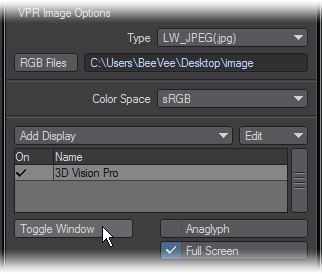
- Set your viewport to VPR and in VPR Options choose Add Display / 3DVisionPro ;
- Edit Properties or double click 3DVisionPro ;
- Check Full Screen if necessary for your graphics card
Esc closes the 3D display or you can click Toggle Window in the VPR options window.
CgFX Shaders
LightWave 11.6 added CgFX hardware shaders for viewing and manipulating shaders written in the industry-standard CgFX format. They are often used by artists working in previz or the games industry. CgFX hardware shaders only affect OpenGL viewports in Layout and not VPR, F9, F10 or LWSN and are implemented as a Surface Editor shader on a per-surface basis to allow you to share your shaders as assets between various 3D applications and 3D engines.
Users can download free Cg shaders from these sites among many others:http://developer.download.nvidia.com/shaderlibrary/webpages/cgfx_shaders.htmlhttp://blog.leocov.com/p/downloads.html
Downloaded shaders have often been developed to work on a specific range of graphics cards or drivers. Especially if you own an ATI card modifications to the shader code may be necessary to make it run on your machine. Checking the CGFX code and changing profiles to GLSL profiles is a step that often works.
All possible profiles are currently:
arbfp1, arbvp1, fp20, fp30, fp30unlimited, fp40, fp40unlimited, glslf, glslv, gp4fp, gp4gp, gp4vp, gpu_fp, gpu_gp, gpu_vp, vp20, vp30
and
vp40
and only
glslf
and
glslv
are known to work reliably on ATI cards.
This means that for any given shader code, you can search within looking for:“
FragmentProgram = compile
”and“
VertexProgram = compile
”
For example, in this snippet:
VertexProgram = compile vp40 VS(true);<br />FragmentProgram = compile fp40 PSFull();<br /><br />vp40
should be replaced with
glslv
and
fp40
should be replaced with
glslf
.
The LightWave 3D Group cannot take responsibility for third party CgFX code, nor offer support on coding CgFX shaders for LightWave.
Example - Adding a Cgfx Hardware Shader
Note that the check buttons marked with >>>>>... are merely separators, they serve no function.
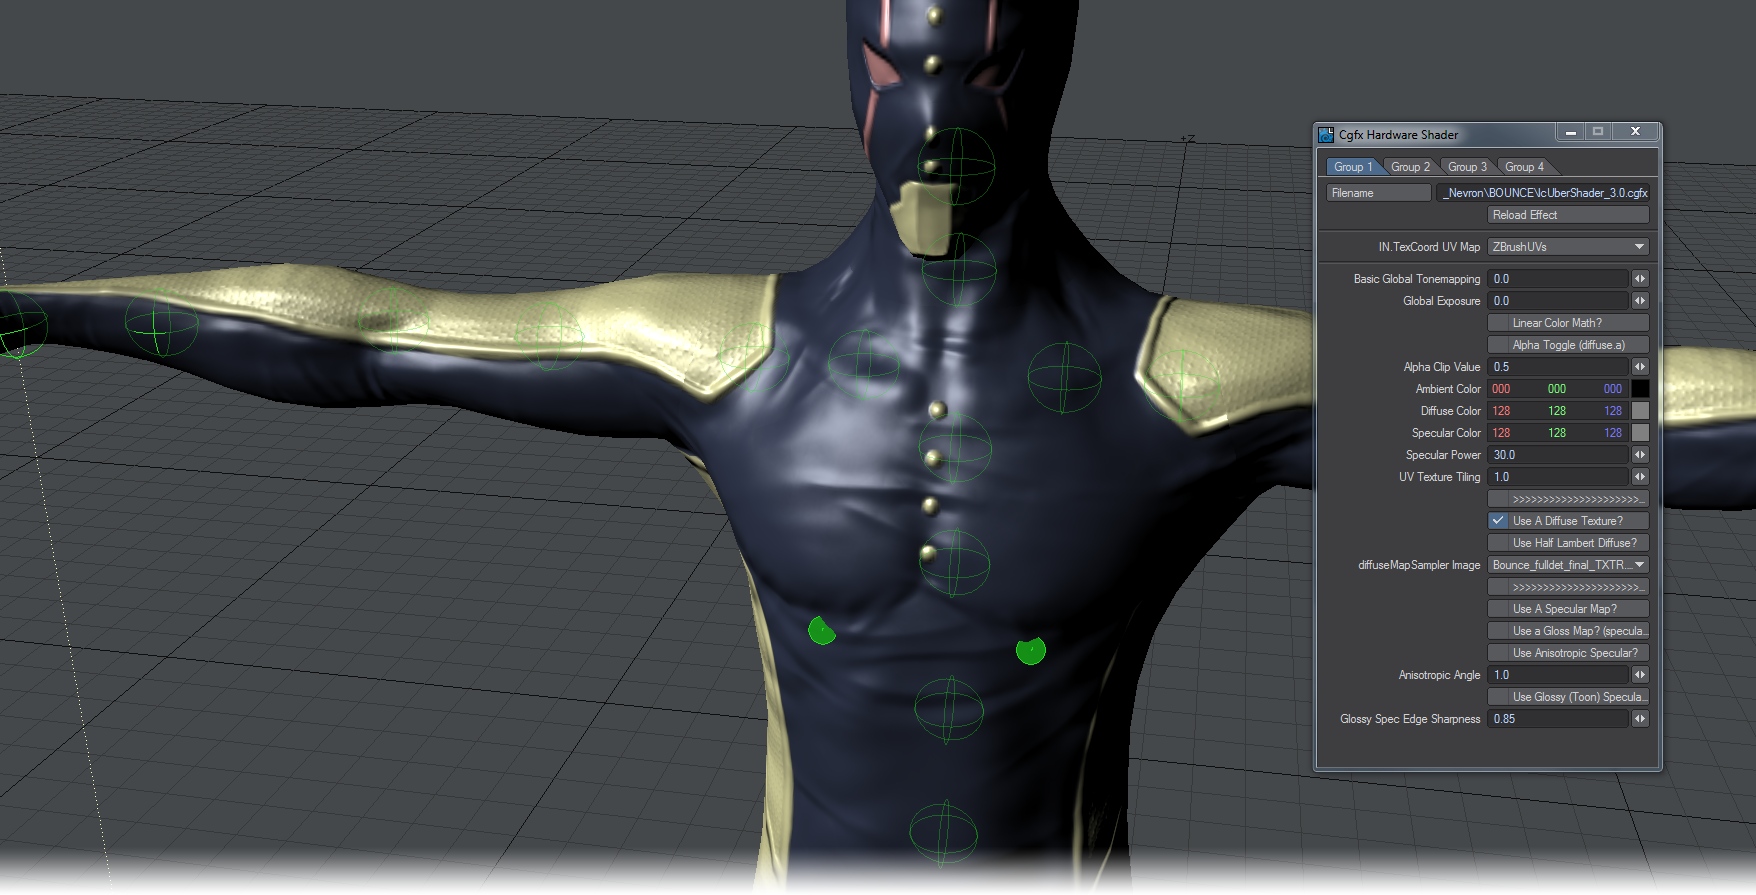
- Load an object with a normal map (here we are using the NevronMotion Bounce character). Open the surface panel and go to the Shaders tab where you should add a Cgfx Hardware Shader .
- Load the lcUberShader_3.0.cgfx available from http://blog.leocov.com/p/downloads.html
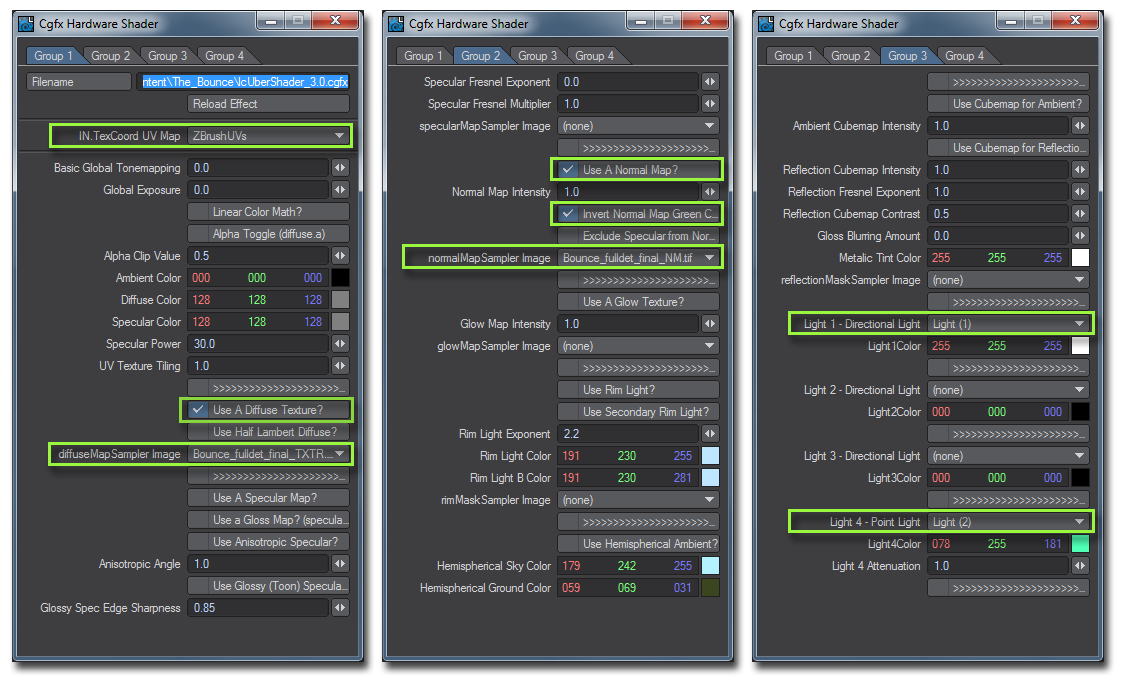
- On the Group 1 tab, select the UV map from the TexCoord UV Map dropdown
- Check Use A Diffuse Texture and choose the diffuseMapSampler Image from the drop-down.
- On the Group 2 tab, check Use a Normal Map, check the Invert Normal Map Green Channel checkbox for normal maps originating from ZBrush and choose the map using the normalMapSampler Image drop-down.
- In Group (and 4, not pictured), you can set lights for your Cgfx surface, setting color; and attenuation for point lights.