Point Color
This button allows you to assign a color to any selected points. To use it, select the points you would like to add the color to. (If no points are selected, this tool won’t do anything.)
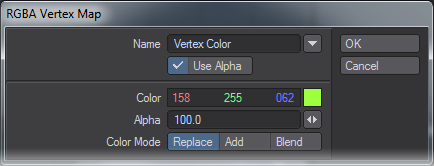
Name
Type the name of the Vertex Color Map you would like to work on into the Name field, or choose it from the drop down list to the right. The list contains all the names of all the Color Maps used during the current session, whether or not the objects remain open, and whether or not the maps have any points assigned to them.
You can start a new map either by typing the new name into the field, or by choosing (new) from the list, and then typing a new name into the field. However, be aware that this map won’t be assigned to any surface, so you won’t be able to see the results of your choices until you assign it to one. (You’ll have to open the Surface Editor, and assign the map to a visible surface by selecting the surface, and then choosing this map from the Vertex Color Map list in the Advanced Tab).
So be careful. If you don’t see any change, don’t assume that the tool didn’t work. Check to make sure that the map has been assigned to a surface that’s visible in one of your viewports.
Use Alpha
Decide whether or not to use an Alpha Map with the selection.
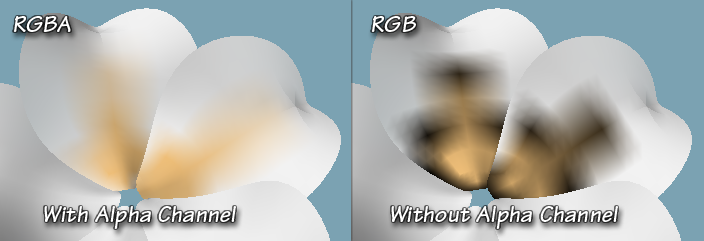
If you are making a new map, it’s recommended that you do, unless you intend to completely color the object. Although the color will look fine, and blend nicely when using this tool, if you ever use the Airbrush on this map, you’ll have black artifacts around the edges where the color doesn’t feather properly.
If you are using an already existing, you must choose to use the Alpha if it has one, or not to use it if it doesn’t. The choice will not be disabled; but if you disable Use Alpha on an RGBA Map, or enable it on an RGB Map, Point Color will simply make a new map with the same name, and follow your choices. Since that map hasn’t been assigned to any surface, you won’t be able to see any results.
(But, you can see them if you go to the Surface Editor Advanced Tab, find the other map with the same name, and assign it to the surface).
Color
Pick a color to put on all the points, using the normal LightWave Color Requester. Drag the numbers to choose an RGB color, or right-click to toggle to HSV and then drag, or click on the color swatch to open the Color Picker you have chosen to use.
Color Mode
In the Color Mode field, you can choose how this color will be applied to the points.
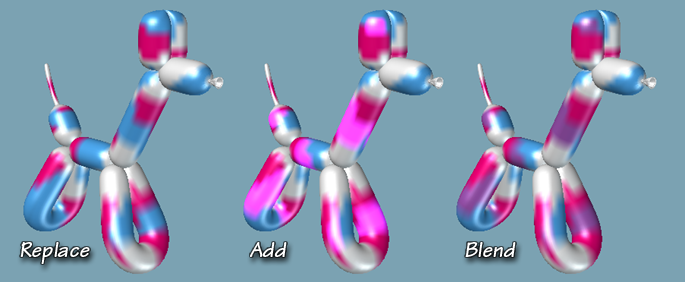
Replace
Replace removes any color currently there, and replaces it with this one.
Add
Adds the RGB value of the current color to the RGB value of the color already there, if any. This may result in RGB values higher than 255, of course, which gives you ultra-bright colors.
Blend
Adds the RGB values of both new and existing colors and averages them by dividing the result by two. The value won’t exceed 255, unless the existing color did.
Alpha
Finally, if you enabled Use Alpha, specify the amount of alpha you want to use.
Unlike most of the other Alpha fields, this one isn’t a percentage. That means that 1 is equivalent to 100%. So, if you want “normal” coverage, enter 1 in this field. (If you enter 100, you’ll really get 10000%, and your color will be far darker than you expect.) If you enter 0, which is the default, you won’t be able to see any color at all, because it will be totally masked. (You can see if it’s really there, though, by checking the Point Information (I). You can also change the alpha there, so you can see the color.)
(It’s important to enter the Alpha last if you are in the habit of using Return or Enter to move to the next field, because in this case it closes the dialog. If, on the other hand, you use the Tab key to move from field to field, go ahead and fill in the box in order, then click OK.)