Translate - More
This group contain tools that are no longer so required, but could still prove useful in the right circumstances.
Move Plus
The Move Plus tool (Modify > Translate > More > Move Plus) is a detailed version of the Move tool used to reposition geometry.
This tool is almost identical to LightWave’s interactive Move tool. However, it provides two additional features. When dragging your selection with the RMB, the selection will be translated along the local normals. When dragging with the right mouse button with Shift held down, the selection will be translated along the averaged normal.

Before Move Plus


Move Plus LMB Move Plus RMB
Move Plus doesn’t replace the Move tool as it doesn’t have the Falloff settings that are found in the Move tool.
Translate Plus Tool
Translate Plus is found in Modify > Translate > More and functions as a detailed Move, Rotate, and Scale tool. You can use a point’s normal, a segment, or a segment’s normal to define how to move, rotate, scale a selection. You can even just use global X, Y, or Z. Each of these operations can have a falloff.

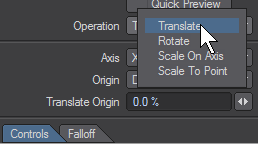
- Quick Preview Mode - The Quick Preview Mode will show a temporary blue outline of the translation and the action won’t take place until you have applied ( RMB ) the action. This is particularly handy when working with very heavy meshes.
- Operation - This setting defines what will be performed on the object. Options are: Translate, Rotate, Scale on Axis, Scale to Point.
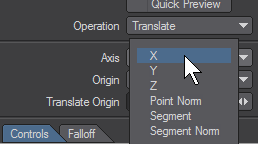
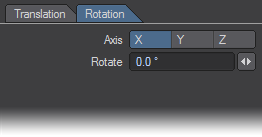
- Axis - What axis will be used to determine how selection is “Operated” on. X, Y, and Z are just the default axes. The other options are Point Normal, Segment, and Segment Normal.
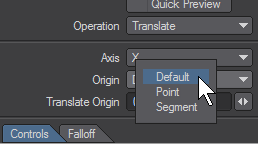
- Origin - Refers to where the Axis originates. By default it is placed at center of whatever the Axis is. There are times when it needs to be somewhere else. Generally, there won’t be a need to change this unless the operation is Scale on Axis. The options are Default, Point , or Segment.
When Point and Segment are selected, the object will display blue circles over each point. Select one point for Point mode and select two points for Segment mode.

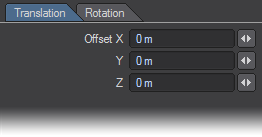
- Translate Origin - Enables moving of the Origin. For example, if Point Normal was the axis chosen, it will move the Origin along the normal.
- Controls Tab - Whichever Operation is selected will be editable and the others will be grayed out. Generally, there is no need to use the controls because it is easier to click on the screen itself to move selections.
- Falloff Tab - The options for falloff are Internal and None. Internal means that the falloff is only within the selection. Falloff settings can be edited by using the options at the bottom of the panel.
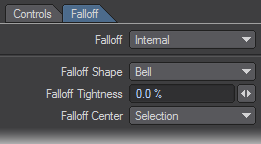
- Falloff Shape - Defaults to Linear , but there are also Bell , Curve Down , and Curve Up . The shape can be modified further by using Falloff Tightness.
- Falloff Tightness - Determines whether points in falloff range will be closer to selection (or origin) or closer to their original position.
- Falloff Center - Same as the Origin settings except instead of Default it is a Selection .
Even though holding Ctrl or using the MMB will constrain movement, sometimes that is hard to do in perspective. Also, if moving selections with LightWave’s Move tool is slow (due to large poly count), this tool is handy because it moves in real time.
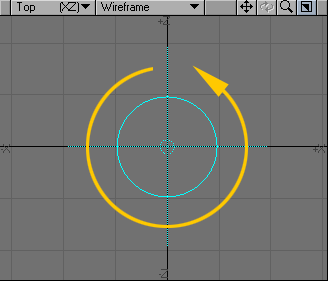
Rove Tool
The Rove tool (Modify >More > Rove) allows you to move and rotate with a single tool!
- Position Rove Tool - Click and drag off the tool’s widget to place it where you want the action center to be.
- Translation - To move an object, simply click and drag. Dragging on an axis constrains movement to that axis.
- Rotation - Rotate the object about the center of the tool by clicking and dragging the rotation ring. The center of rotation can be repositioned by dragging the center of the tool.
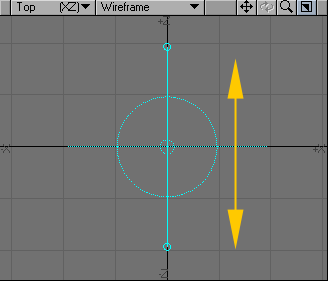
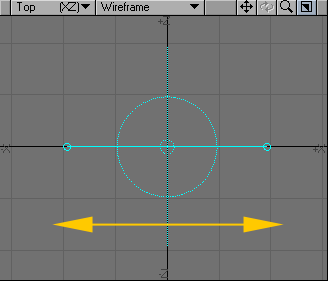
Point Normal Move
Point Normal Move is located under the Modify Tab and allows you to move points along their normals.

The yellow lines in the image above represent the normals for some of the points on the ball object. Using Point Normal Move would move each point along its normals.
You can move points along their normals on multiple foreground layers at once and the moves will be on the same layer as the original points.
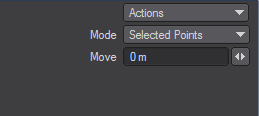
Mode:
- Single Point - allows you to run it without selecting points first and then you can move any points you want without selecting them.
- Selected Points - select the points you want to move, select Point Normal Move tool and then click and drag anywhere on the screen to move them in and out.
The Rove tool only works in one Layer.
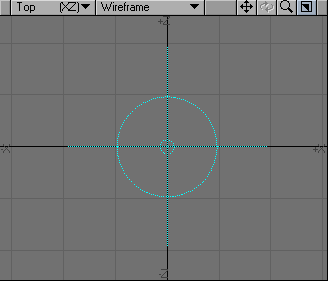
Untangle
When a polygon is selected, this tool will make it circular. The more sides the polygon has, the closer to a perfect circle it will become.