Add/Edit PGons
Before we discuss Powergons, it is important to understand Layout commands. If you have ever customized keyboard shortcuts or menus, you have touched on Layout’s underlying command structure. Nearly all of your actions in Layout are executed by sending discrete commands.
The commands listed in the keyboard shortcut and menu configuration panels only show the command name, but not any parameters the command might support. For example, the Render Options command causes the Render Option Panel to display. It obviously needs no additional information to execute. The Add Spotlight command, on the other hand, can take an optional argument that names the added light. Thus, executing “Add Spotlight CoolLight” would add a light named CoolLight.
You can get a much better idea of what we are talking about here by choosing Utilities > Commands: Cmd History (In Layout). This opens the Command History window. Leave it open and execute some operations in Layout. You will see commands whiz by as you click buttons and drag scene items. Here, you can see not only the command names, but also any parameters. You’ll also see some commands that are not listed in the keyboard shortcut and menu configuration panels, like Position and Rotation.

What are Powergons?
Powergons allow you to execute a short Layout command script, which is attached to selected polygons in Modeler. You can use this feature to quickly add, say, lights using polygons for positioning. Moreover, all of the light’s properties can be defined as well.
Once the script is executed in Layout, you can clear the object if it is not needed otherwise. However, the Default command parents the lights to the object, so be careful since you don’t want to delete the children.
To Attach Commands
To attach a Powergon command script to polygons, first select the target polygons in Modeler.
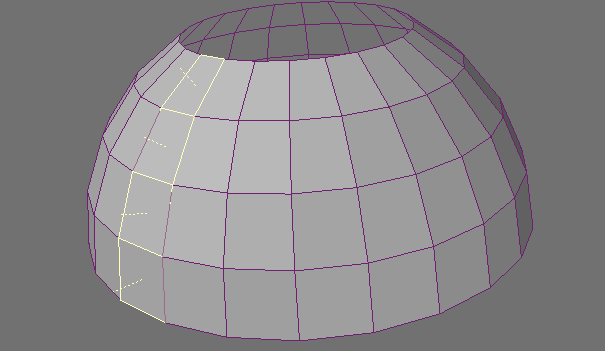
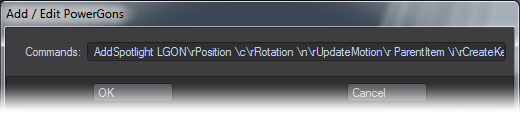
Then choose Setup > Layout Tools > Add/Edit PGons. This brings up a dialog where you can enter the command script.
There are certain special “escape” characters you can use:
\a- Returns the area of the polygon.\c- Returns the position of the polygon’s center in the form “x y z”.\d- Returns the polygon’s normal vector as “nx ny nz”.\i- Returns the item ID of the object containing the polygon.\n- Returns the polygon’s normal converted into heading, pitch and bank angles (bank is always 0) in the form “h p b”.\r- Creates a line return to signify the end of the current command and the start of the next. Note that it is not needed at the very end of the last command.
The default command is “AddSpotlight LGON\rPosition \c\rRotation \n\r UpdateMotion\r ParentItem \i\rCreateKey 0”. This adds a spotlight named LGON, positions it at the center of the polygon, rotates it to match the polygon’s normal, parents the light to the object, and creates a keyframe at frame 0.
Once you click OK, the command script is attached to the selected polygons. (Technically, this action adds a PWRG type polygon tag to the polygons.)
To Clear Commands
To clear Powergon commands from polygons, simply select the polygons and choose Setup > Layout Tools > Clear Powergons. Activate the General Powergon option and click OK.
![]()
Executing the Commands
Once the Powergon commands are attached, load the object into Layout. Then choose Items> Cvt Powergons. This executes any command scripts attached to the selected object.