Plugins Group
Add Plugins Command
(default keyboard shortcut F11)
To add plugins from Modeler, choose Utilities > Plugins > Add Plugins. Navigate to the location of the plugins you want to add. Select the plugins, hold the Shift key to select an entire range or hold Ctrl to select multiple non-contiguous files. In Modeler, the Add Plugins Panel appears after you select the .p file(s).
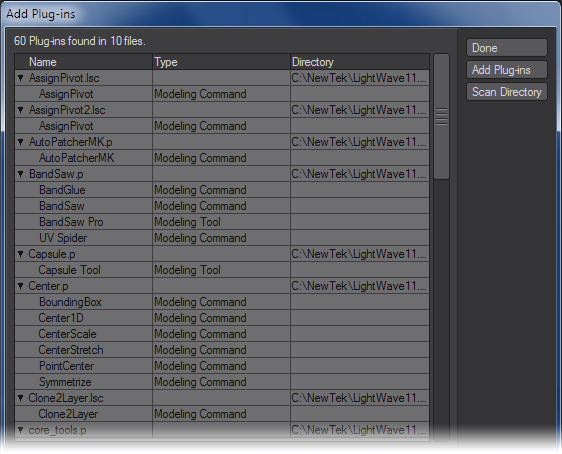
The number of individual plugins found will appear in an informational dialog. The added plugins, their type and related .p filenames are then listed in the window.
Re-adding a plugin that is already added will not do any harm.
To add additional plugins from the Add Plugins Panel
Click the Add Plugins button and select one or more .p plugin files from a directory.
A single plugin file can have many functions, some internal and not directly accessible by you. Thus, when you add one, it may report back that it has added more than one plugin. This is normal.
To add a directory of plugins
You can quickly add all of the plugins in a directory (including subdirectories) using the Scan Directory button. (It may take a few seconds to scan all of your plugin files. Be patient!)
You can access the Scan Directory feature from the Edit Plugins Panel .
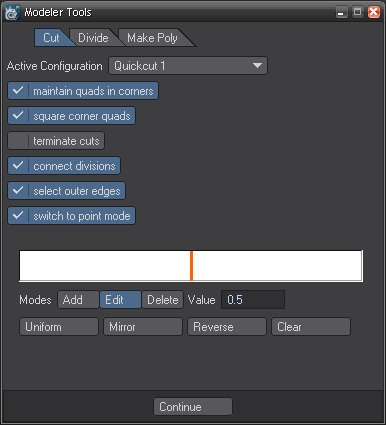
Edit Modeler Tools
This button duplicates the one in the Edit Menu at the top left of Modeler.
This Options Panel gives you the ability to set new default settings on Cut, Divide, and Make Poly. Also, this is where you will need to set the settings for the three Quick Cut tools. By default the Quick Cut tools all have the same setting and you will need to define them in this panel.
Additional
The Additional drop down menu (Utilities> Additional) will contain any tools added to Modeler that haven’t been assigned places in the menu.
Quantize UVs
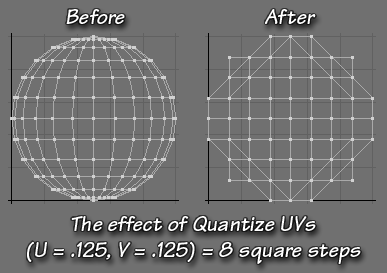
This button divides the UV space into a grid of the specified size, and then snaps selected points to the closest intersection of the grid. If no points are selected, it will snap all visible points to those lines.
How do I use this tool?
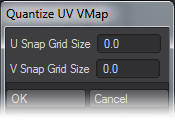
To use this tool, select the points you want to quantize, and click the button. (Once again, if you don’t select anything, all points will be quantized.) A dialog will open that allows you to specify the size of the Grid Snap, from 0.0 to 1.0. To find the number to enter, divide 1 by the number of squares you want in the grid. For instance, if you want 16 squares, you’d use 0.0625, If you want 5 squares, you’d use 0.2, and so on.
Enter the number for both the U (horizontal) and V (vertical) axis. If you don’t want any adjustment on one axis, just leave it at zero.
Then click OK. The points will snap to the closest grid intersection.
Absolute Measure
Script to find the length of a curve. If you only want to find the length of a segment, select the points making up the segment.