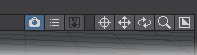
Create Preview
Creating a Preview Animation
In addition to playing a scene using the transport controls, you can also create special preview animations. In most cases, these will give you a more accurate preview of your final animation.
To Create a Preview Animation:
- If you are using multiple viewports, you will be asked which you wish to use. You can indicate the viewport for the preview by clicking the small camera icon that appears when you have multiple viewports.
- Make sure the viewport’s Maximum Render Level is set as desired. If you would like a full-rendered preview, set the viewport to VPR (there are other options if you do so).
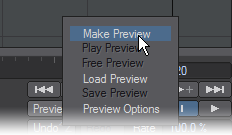
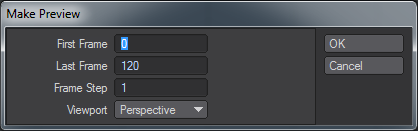
- Select Make Preview from the Preview pop-up menu. A dialog will appear asking you for first and last frame settings, as well as Step. This initially defaults to the scene settings, but may be set independently. Click OK and the preview animation will be created.
- When the preview is complete, the Preview Playback Controls Panel will appear.
You can press the Esc key to stop creating the preview animation. The animation will still be playable up to the point of termination.
Here’s a rundown of the Preview Playback Controls:
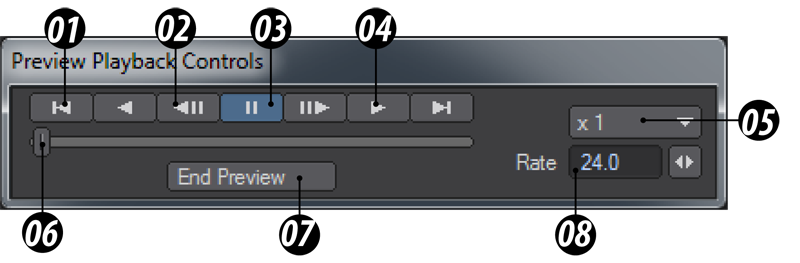
01 Go to the end of playback, 02 Step, 03 Pause, 04 Play, 05 Multiplier, 06 Slider, 07 End Preview, 08 Playback rate
To save time creating a preview animation for a complex scene, do the Texas Two Step: use a Step of 2 and playback using a frame rate one-half the desired rate.
Preview Options
Also from the Preview pop-up menu, you can replay the preview currently in memory, free it from memory, and load/save a preview animation file. Selecting Preview Options from the Preview pop-up menu will display a dialog.

Here, you can select a compression level for preview animations, as well as select the format and codec used when you save them. Compressed previews use much less memory, thus you can have a lot more frames before virtual memory starts being used, which bogs down playback.
Compressed preview files are also smaller when saved to disk. You can also set whether or not to use virtual memory for preview animations.
Using the Make Preview Buffer option, you can choose to record the OpenGL back (offscreen) or front (on screen) display buffer. Other options may be available (e.g., Direct Draw). You may get better performance with different settings, depending on your video card.
When Virtual Memory is set to Disabled, LightWave attempts to use only RAM for storage and playback. (Your operating system can still ultimately swap the data to virtual memory, however.)Setting Screen Size to Stretch to Fit causes the image to fit the window, even if it is a different size than what was used when the preview was made.
You will want to install additional codecs, especially on Windows systems. The only codecs built into Windows tend to be very old. Consider XViD, QuickTime and Lagarith codecs.