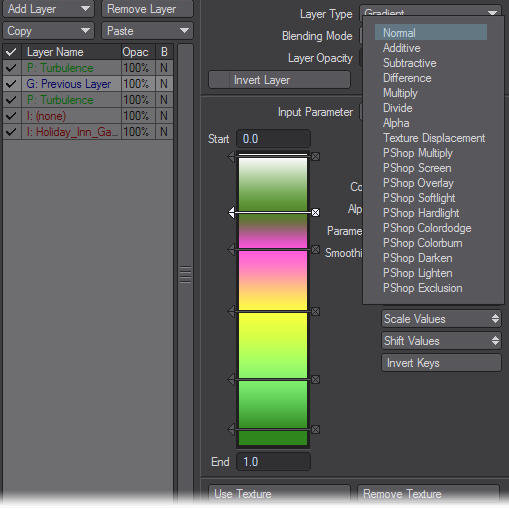
Layer Type: Gradient
While Envelopes let you vary a setting based on time, a Gradient lets you vary a setting (Color, Luminosity, etc.) based on features like height of surface bumps, or distance to another object. So, for example, with an Envelope, you can make the Diffuse level 20% at frame 23. With a Gradient, you can make the Diffuse level 20% if a surface is 3.23 meters from the Cow object or the slope angle of the surface is 26.2 degrees.
The Input Parameter determines what feature the setting varies over. Think of Gradients as filters for the selected Input Parameter. For example, if the surface is bumpy, colors can be different based on the height of the surface being colored if the Bump option is used. You can even use the preceding texture layer.
Gradients use gradient ramps (the colored bar) to depict the value change. You define different values along the bar. LightWave automatically determines the in-between values. Essentially, the different colors along the gradient correspond to texture color/values for the related Input Parameter. The gradient is just a colorful (and clever) way to create a graph.The Input Parameter defines what item will dynamically control the parameter.
- Previous Layer - uses the brightness data from the immediately underlying layer.
- Bump - uses the height of a surface using Layout’s Default Unit on the General Options Tab of the Preferences Panel.
- Slope - changes the parameter based on the angle (in degrees) of the surface relative to the ground (flat on Y axis).
- Incidence Angle - uses the angle (in degrees) of the surface relative to the Camera.
- Light Incidence - is similar to Incidence Angle, but the angle is relative to the selected light. Use the Light pop-up menu that appears.
- Local Density (HyperVoxels only) - uses the density of the HyperVoxel .
- Distance to… - settings change the parameter independently based on the distance from the surface to the selected camera or object. The X, Y, and Z Distance settings measure the distance only along the respective axis. If you select the distance to an object, an Object Selection pop-up menu will appear.
- Weight Map - uses the Weight Map selected on the Weight Map pop-up menu.
- Surface Thickness - is a method of faking sub-surface scattering. IMPORTANT: The surface must be set to double-sided and Trace Transparency needs to be activated.
Other Input Parameter options may be available depending on what feature the Gradient texture controls.
The Gradient Bar
Once you have determined your Input Parameter, you need to set the value of the new texture color/value. The Gradient Bar allows you topographically set your Key values. (A Key is characterised by three numbers: its Value, Parameter, and Alpha.) As with Envelopes, you can create, edit, and delete keys. The Keys change the color of the Gradient and ultimately the Parameter values.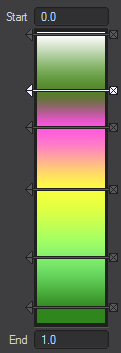
If the parameter is a color, the bar is in color and color transitions appear from one key to the next. If the parameter relates to numeric values, the bar appears in greyscale. The lowest set Key value is black and the highest is white.
The Start and End fields, at the top and bottom of the Gradient Bar, respectively, set the beginning and end of the visible area of the gradient. Whether or not these values are editable, depends on the Input Parameter you selected; however, their default values should work for most situations. Also, you can set keys outside this range.
To add a key:
- Click on the Gradient Bar and hold down your LMB. A key marker that looks like an arrow will appear. If you continue to hold the mouse button down, you can drag to refine the position of your key. The Parameter field will change as you drag your mouse. Note that this value is not limited to whole numbers.
To prevent accidentally adding a new key, you can drag the key using the arrowhead.
- Release the mouse button to create the key.
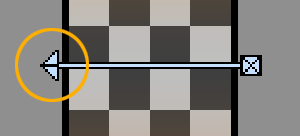
To delete an existing key:
Click on the end of the arrow with the square.
The Current Key
The Value/Color, Alpha, and Parameter fields show the corresponding settings for the current key. This is the key that is highlighted in the Gradient Bar. Click on a key’s arrowhead to select it as the current key. When the panel is active, you can also use your Up and Down Cursor keys to select the preceding or next key as the current key. (Make sure that you do not also have an input field active.)
When you edit a surface Color, the value is a color selector. All other types of textures have a numeric input field for value.
The Parameter setting determines the current key’s numerical position on the bar. Note that this setting can have decimals. The Value/Color is the texture value or color for the current key.The Alpha setting is the amount of opacity. Higher values are more opaque: 100% is fully opaque and 0% is fully transparent. You can see a background checkerboard when you use Alpha settings below 100%.

Changing Key Values
You can change the current key’s Color or Value, as the case may be, by adjusting that setting. You see the Gradient Bar change as you adjust the setting.
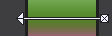
To prevent a key from being changed:
Right-click on the arrowhead. It will invert, indicating the key is fixed and cannot be altered.
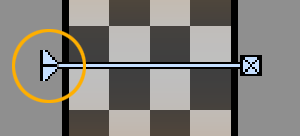
Right: Unlocked / Left: Locked
Changing Key Positions
You can move a key - but not past a neighboring key - by dragging the key’s arrowhead with your mouse.
Although you can also drag the middle of the arrow, it’s not recommended because you can accidentally add a new key.
You can also numerically move a key by entering a value (including a decimal if needed) into the Parameter field. Note that you still cannot move the key past a neighbouring key.
Smoothing Between Keys
By default, the values between a key and the preceding key (next one above it on bar) are transitions in a Spline fashion with an ease-in/ease-out transition to the preceding key. Setting the Smoothing pop-up menu to Linear will apply a straight-line transition. The Step setting will hold the preceding key value until the next key.
Scale and Shift
You can scale and shift the key positions by dragging up and down on the Scale Keys and Shift Keys buttons. Similarly, you can scale and shift the key values by dragging on the Scale Values and Shift Values buttons. Invert Keys reverses the values of the keys. This will not affect the position of keys on the bar, however.