UV Projection
UV Texture Maps
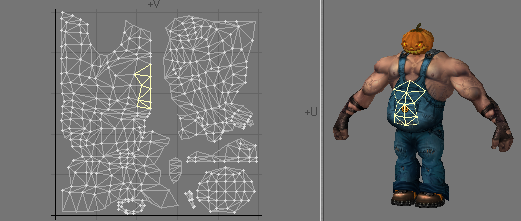
The U and V refer to Texture Map coordinates and are really not very different from the XYZ coordinates you are familiar with. In fact, UV Mapping is the process of setting up a relationship between the two dimensions of an image, U and V, with the three dimensions of an object surface, XYZ.
Once this relationship is set up, changing any parameter (i.e., U, V, X, Y, or Z) will also relatively change the appearance of the Texture Mapping. With UV Mapping, the object provides additional information for Texture Mapping, which can be different for any given point on the surface. The texture is more or less stuck to points on the surface using a relationship that you define.
UVs and Projection
UVs have to come from somewhere. For existing polygonal models, the choices are limited to setting the UV coordinates for each point in the object manually, or applying some projection, which automatically generates the 2D Texture coordinates from the given 3D point positions. In LightWave, you can create UVs by using projections, which also happen to be the same as the standard projections for Texture Mapping (i.e., Planar, Cylindrical, and Spherical).Usually, the projection for the UV Map is not suitable for the whole model. The projected UV Map must be tweaked - eyes and nostrils moved over the right parts of a face, or texture features matched to geometry features.
Keep in mind that standard Projection Mapping is more accurate because it has some exact, continuous value over the entire surface. UV Mapping, on the other hand, is technically accurate only at small sample points. The surface for the large areas in between the sample points is interpolated. Adjusting the sample points so that the interpolated areas look right is difficult and the reason why UVs are more difficult to use.
For illustration purposes, let’s say you had your texture image printed on a piece of very flexible rubber and wanted to fit it on a toy car made of wood. You could conform the rubber material to contours of the car by tacking it down with thumbtacks. That is more or less what UV Mapping does. However, it is slightly reversed: what you do is tack the UV points down onto the image. Alternatively, imagine that your image is printed onto flat paper and you use an advanced form of Origami to fold it into shape.

