Noise Filter Options
Noise Filter Options
This system, added in LightWave 2018, allows you to control a bilateral filtering of your render to give a smoother effect without needing endless anti-aliasing. Meant to remove fine grain that would take too long for the renderer to deal with, it won't work effectively on high contrast grain.If you open the window for this image filter before performing a render you will get a message:

The controls are:
- Filter Size - Small filter windows should be used; for example 1, 2, or 3 will be enough in most cases
- Tolerance - By default 0.1 and should be raised slowly as necessary. If the tolerance goes too high you'll get unwanted blurring across edges. A tolerance of 1 is equivalent to Photoshop's Gaussian filter.
The following two options are used to mask filtering by limiting it to pixels of a similar depth and/or Normal angles. - Use Depth Tolerance - This compares pixels that are within the given tolerance for difference in depth in the scene
- Use Poly Normal Tolerance - This compares the cosines of the angles between scene object normals
In both cases Pixel values under these tolerances get blurred, those exceeding the tolerances don't - Buffer name - The name of the buffer you are editing
- Scale - The scale of the rendered image preview below
- Process and Send to Image Viewer - This will send a processed render to the Image Viewer with a name that reflects the settings used in the Noise Reduction Filter.
- Blend - A slider to blend between the unfiltered and filtered render
Below these controls is an image window in which a preview of your render appears so that the image quality can be fine-tuned. The view can be dragged around while holding a mouse button down. The slider above the window shows the filtering interactively. To the left of the vertical line is the filtered version, to the right is unfiltered.

The Image Viewer window titlebar indicates that we used a size 3 filter, at a Tolerance of 0.1; with Depth Tolerance of 0.05 and Poly Normal Tolerance at 0.02
Using the Noise Filter
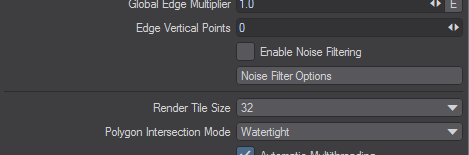
To enable the Noise Filter, you need to turn it on in several places. First, visit the Render Properties panel (Ctrl P), and go to the Render tab. Towards the bottom of the panel, you will see the option Enable Noise Filtering.
Enabling the Noise Filter here is the start of operations, but needs to be backed up with Buffers to be filtered. Visit the Buffers tab and check Noise Filtering for the buffers you want to be filtered.
Note that some buffers might be better unflitered - things like Object ID, Material ID, Depth and other "programmatic" buffers are usually best left unfiltered.