Using the Ray Type Switch node to control exactly how and what is reflected, refracted, or used in radiosity

In the past, something similar to this here could be done with additional copies of ‘unseen’ geometry, separate materials and lots of additional object render settings... It worked but was messy compared to the simplicity of the solution presented here, where there is just one material.
This is one of those things you should use by default from now on, whenever luminous textured geometry is involved.
- A simple scene: a facade textured with an 8-bit photo. ground and objects are 64 grey, everything is 50% specular, 30% rough. the left sphere is 5% rough glass. all Principled BSDF material. we will only use radiosity to light the scene with the luminous facade and a very dark backdrop for a little ambient.
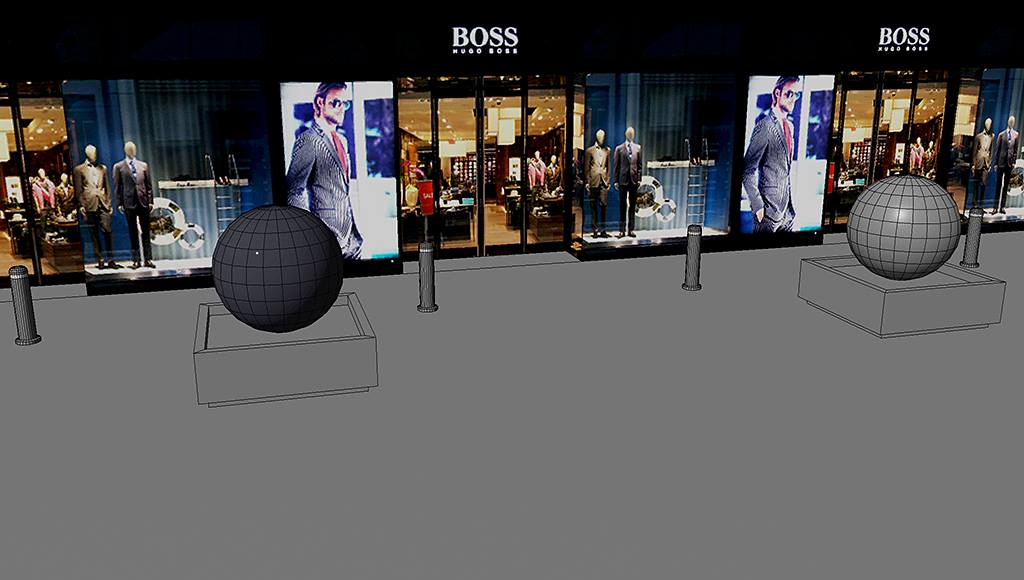
1. a simple scene - Simple nodes for the facade. Material luminosity is 90% - this will be our ‘Default Material’. This is not how you would properly texture an entire facade but only the luminous parts like windows, interiors, neon signs, etc. It’s just simpler for this tutorial.

2. simple nodes for the facade - ‘Default’ Material rendered. looks nice overall, but because the photo is an 8bit image, it only looks good on the facade itself and lacks intensity and saturation in reflections, refractions, and radiosity. Let’s try a second material version to compensate for this. This would all be different with precisely made and edited HDRI textures, which in most cases we do not have.

3. ‘Default’ Material rendered - We now send the image through the ‘Color Tool’ node first, to boost saturation 150%, contrast 10%. Material luminosity is increased to 300%. this will become our ‘Switch Material’. These values depend on your own image and taste, of course.

4. This second 'Switch' material could also consist of an HDR image, even one 'handmade' in Photoshop, but for simplicity, let's do it all with one common type of image here.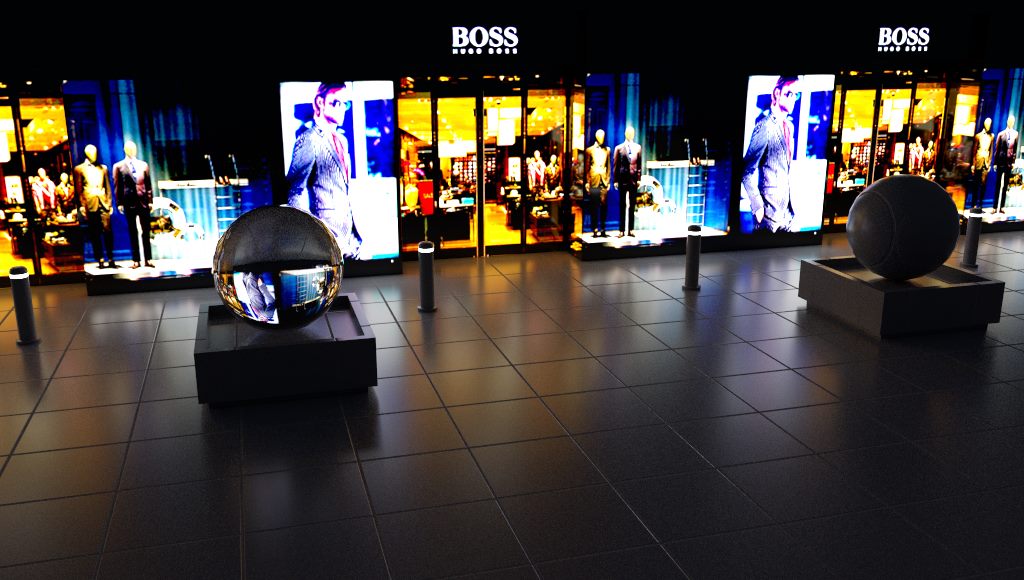
4. ‘Switch’ Material rendered. looks good in reflections, refractions, and radiosity... but not on the facade itself. Time to combine both things into one with ‘Ray Type Switch’. - Both material versions, our ‘Default’ and our ‘Switch’ are plugged into the ‘Ray Type Switch’ node, as shown in the image below. Every material input could have its own completely different material - you could have an object with an 'Apples' material, reflect as 'Oranges' material, refract as 'Chocolate' material, and emit light as 'Banana' material, different materials for different ray trace aspects. We will only use two here.

5. The 'Ray Type Switch' setup. >>> according to the manual, the pink ‘Ray Type’ connection from the 'Input' node is needed, but it seems to work without, but better safe than sorry. <<< - ‘Default’ + ‘Switch’ Material rendered. Looking very very niiiice. I like!


6. ‘Default’ + ‘Switch’ Material rendered. hint: center door looks slightly more saturated because it illuminates itself with its 'Switch' material version.
6b. Original render for comparison.