DopeTrack
DopeTrack
Just above the time slider that shows all the frames in a LightWave scene there is a thick bar. Clicking on this seems to open a new time slider, it’s actually a tool called the DopeTrack, to help the workflow of animators.
The DopeTrack allows you to play with keys. Not only their position in time and the scene, but also to alter their properties. You can set up markers here to tell you when things should happen in the scene and bake ranges of keys to set your animation from frame to frame.
You’ll notice that when the DopeTrack is closed and your mouse pointer is over the thick bar, your mouse pointer will change from being a cross hair to an arrow pointing upwards. When DopeTrack is open and the mouse is over the thick bar, it will be a downwards-pointing arrow.
What’s the point of DopeTrack? Let’s say you have an animation and there’s a keyframe at frame 13 that you really want at frame 12. You could open the Graph Editor and move the keys there. If you have a lot of items in your scene, it may take a while to find the object you want to edit.
Let’s say you’ve moved this frame, but then your boss decides he wants an identical keyframe a bit later in the animation – say ten frames on. Then, being the indecisive management type he is, he wants to have those two keyframes moved along a bit in the animation. You could do this in the Graph Editor, but instead, you can just sit there nonchalantly, with a breezy “no problem, boss!”, and just use the DopeTrack…

From left to right these animations show: Move a keyframe by first swiping over it with the LMB to highlight, then drag it to where you want. To delete one or more keys, select it/them and hit RMB and choose Delete Key. To copy a key or keys, select them, hit the RMB and choose Copy. Move the playhead to where you want to paste. The second method copies selected keys by holding down Alt and dragging the keys where you want them.
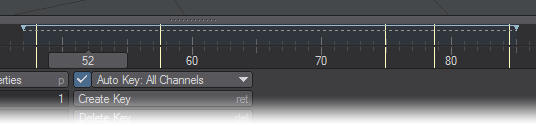
When you first open the DopeTrack it just looks like another timeline. The difference is that you can grab any keys on the DopeTrack and shift them about. Moreover you can grab a section of the timeline and any keyframes in that area will be selected. You will then be able to move all the selected keyframes at once. By default, the lines representing the keys are simple pale yellow lines, but if you click the right mouse button over the DopeTrack, a menu will pop-up where you can enter Channel Edit Mode, where the three channels that make up a keyframes X, Y and Z coordinates are represented by the red, green and blue lines. If you are in Rotate Mode the red, green and blue represent the Heading, Pitch and Bank channels. If you turn off some of the channels over on the left, you can then select just the channels you wish to move.If this were all DopeTrack could do, it would be enough, but there’s more. A right click on the DopeTrack itself will reveal a menu that gives even more options.

- Select All Keys - Selects all the keyframes visible on the timeline
- Clear Selection - Deselects all selected keyframes
- Add Marker - This adds a marker to your timeline that is visible no matter which item you have selected in the scene. You can also set a text that appears in the normal info window under the timeline. You can select this menu item, or you can hold down the Shift key and double click to set a marker. You can set a marker anywhere on the DopeTrack, regardless of the location of the timeline cursor.
- Delete Marker - Position the timeline cursor on a marker and this option becomes available.
- Clear All Markers - Clears all the Markers you have placed on the DopeTrack.
- Set Marker Text… - Put your timeline cursor on a marker and it will become bright yellow and this menu item will become available. A marker is visible whichever item you select - it is based on the scene rather than an individual item. Whenever the time slider is on the frame where a marker is placed, and the DopeTrack is open, the marker will light up in bright yellow and the Marker text will appear in the status window. There is a limit of 62 characters visible in this status window, although there is no limit on the quantity of characters you can put in the Set Marker Text… window.
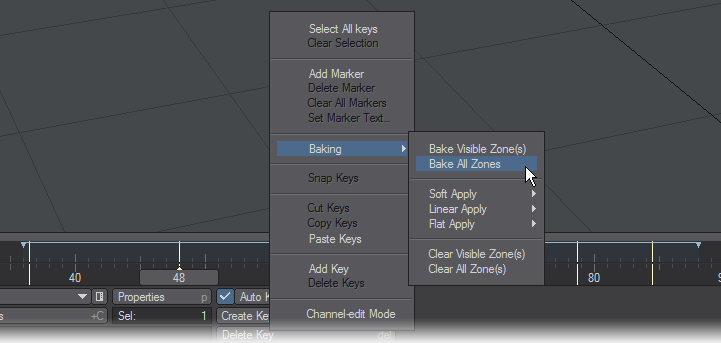
Baking
If you right click and drag a selection on the DopeTrack this menu option will become available to you. Baking allows you to generate keyframes at every frame over the region you specify, to make sure of your animation or for export to another package.
You can set a local or global bake zone. A local one bakes the current item and is shown in the same color as the keyframe markers on the DopeTrack, whereas a global bake zone will bake all items through those keyframes and is shown in blue. You can resize a bake zone by dragging the arrows at either end of it to make it shorter or longer, or move it in time by dragging on the line between them.
You can also hold down the Alt key and LMB drag on the time line and this will create a local bake zone immediately. There will be no need to even use the menu to set it.
Either way, when you have selected a zone to bake, the next thing is to know exactly what “baking” means. It means that you will create a keyframe at every frame in the zone you’ve selected. This sets in concrete your motion path, which can be useful if you have something precise to follow, or you need to export your motion to another application, like a game engine, for instance. Game engines don’t usually like IK, so by baking the motion your character goes through; you can replicate the effects of using inverse kinematics, without actually using it.
If you have local bake zone(s) marked, but want to clear them, you can choose Clear Current Zone from the Baking sub-menu by right clicking on the DopeTrack again. Clear All Zones will remove both local and global zones.
We now have our baked keys, let’s move onto the Apply sub-menus. All three Apply sub-menus use the first and last keyframe in a range as boundaries, and the keyframe that the slider is currently sitting on as a control point. The slider should be sitting inside the baked range.
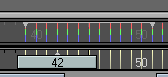
Baking a section of our animation. First a baking zone is set with Alt-LMB; then the zone is baked. We can still alter the shape of the baked animation by choosing an Apply method - Soft, Linear or Flat. The "Applys" are based on where the frame head is.
Now, here’s the scene with the various “Applies” applied. Remember the shape that results depends on the position of the frame slider. For demonstration purposes we will continue to leave ours on 42, even if the results could be more dramatic with it elsewhere. Also to be noted is that if you don’t like the results of a particular Apply, you can change it for one of the others with no penalty.
However, you can’t go back to the previous unapplied state, so make sure you save your scene before you use Apply, then you can use File > Revert Scene to Last Saved
Soft Apply
In the case of Soft Apply, a Hermite spline using default Hermite co-efficients is generated using these three keyframes as points to smooth out the intervening keyframes. We baked the Y Channel.
Linear Apply
Linear Apply uses the same keyframes, but simply "increments" the keyframe values between the control points. We baked the Y Channel. Note the break in the slope of the baked keyframes. It is centered on where the playhead is.
Flat Apply
Snaps all intervening keyframes to the value of the control keyframe (the one the slider is currently on). We baked the Y Channel.

To get rid of a set of baked keyframes, select them all by wiping over them using the left mouse button to select them all and then click the right mouse button to access the Delete Keys menu item - the Del key will bring up the Delete Keys window that will force you to delete the keys one by one.
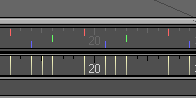
DopeTrack Apply Zones
The Apply Zones in Dope Track use a CMY (Cyan , Magenta, Yellow) color scheme.

Local Zones are represented with Cyan. Global Zones are represented with Magenta. Proxy Zones, such as IK Booster , are represented in Yellow in this montage image (Normally you can only have the first two or the last one at a time).
Snap Keys
If you have received a scene that uses fractional frames, but you don’t want to use all or part of those keys, you can select the keys that are off-integer frame numbers that you wish to adjust, and use Snap Keys to quantise them to the nearest whole frame number.
Cut, Copy, Paste Keys
As you might expect, these allow you to move keys around the scene by cutting or copying them from where they are, and pasting them where you want them. If a group of keys are selected and you copy them, you will paste them starting at the time slider position.
Add and Delete Keys
The Add function will create a keyframe in the DopeTrack where the mouse is at the time, so if you have an item at frame 10 in the scene and you Add key at frame 40, it will duplicate your object’s position from frame 10 at frame 40.
Channel-edit Mode
By default, the keyframe marks in DopeTrack are the same shade of yellow as the keyframes in the normal time slider. By switching to Channel-edit Mode you can choose individual channels by turning off the ones you do not wish to select in the bottom left-hand corner of the Layout window. When you switch back to Keyframe edit mode, any channels you have separated in time will become new keyframe lines in their own right.
Once you’ve shifted the channels separately, new keys appear in the normal timeline.
Turn off individual channels to move the remaining keys where you want them.
You can combine the keyboard and mouse to make DopeTrack even easier to use:
- Alt LMB copies a keyframe
- LMB doubleclick creates a keyframe
- Shift LMB doubleclick creates a marker
- Alt LMB Drag creates a local zone for baking
Multiselect Copy/Paste keys in DopeTrack
The Dopetrack clipboard was designed to contain channel information for only a single object. It has been re-factored to contain copied channel information for as many objects as are selected within the current edit mode. Clipboard data can be subsequently pasted on to multiple selected objects, as long as the clipboard data lasts (i.e., which ever is exhausted first: selected objects or clipboard data).
It should be noted that clipboard data is not cognizant of the edit mode that was active when it was stored. This means that, for example, data copied during a position edit can subsequently be pasted into the rotation channels of selected objects if the edit mode is changed, whether intentionally or not.