Edit Group
Copy Hierarchy
When invoked, the selected bone and all of its children are copied along with goals and targets if you choose. The copied hierarchy will appear next to the selected bone but slightly offset. The parent of the newly created copy will be the same as the copied bone’s parent.
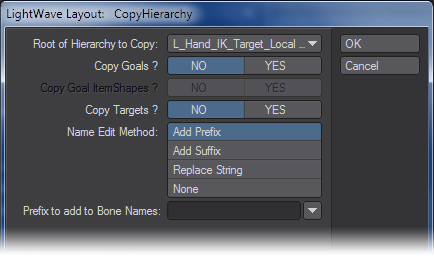
- Root of Hierarchy to Copy - Displays the selected bone that is the root of the hierarchy that you want to copy.
- Copy Goals, Item Shapes, Targets - Select YES if you want any of these copied and NO if you only want the bones in the hierarchy copied.
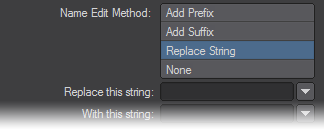
- Name Edit Method -
- Add Prefix/Add Suffix - The user interface panel allows you to add a Prefix or Suffix. You can type in your own into the Prefix/Suffix to add to Bone Names text box. Or choose one from the Prefix/Suffix to add to Bone Names pop up menu.
- Replace String - You also can choose to replace an existing text string in the original hierarchy with a new text string. Type the string you wish to replace into the Replace this String text box and the string you want to replace it with into the With this String text box.
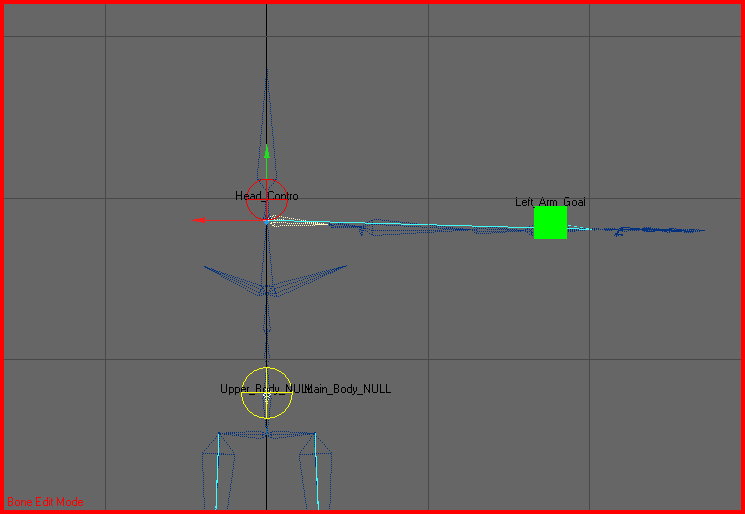
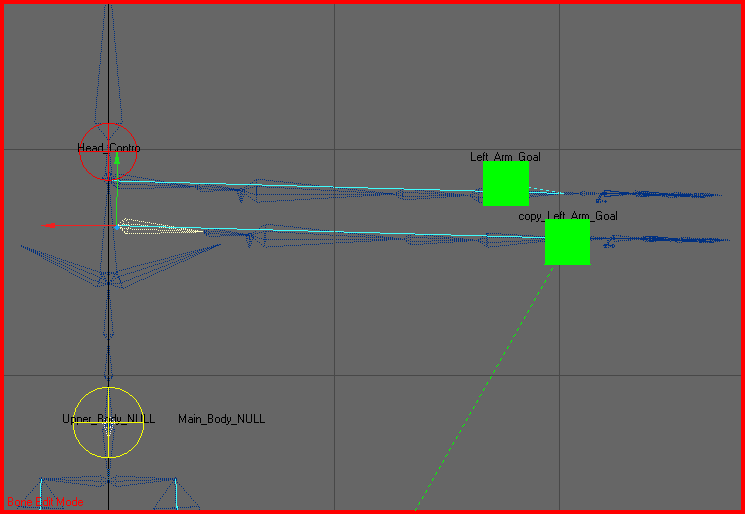
Example: Copying a Hierarchy
- Select the root bone of the hierarchy that you want to copy. Run Setup > Edit > Copy Hierarchy and select your options and set the Name Edit Method.
- The copied hierarchy will be placed right below the original and parented to the same bone as the original.
Mirror Hierarchy
(default keyboard shortcut Ctrl W)
When invoked, the selected bone and all of its children are mirrored about a plane.
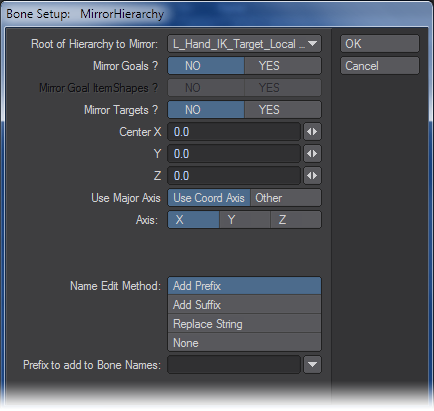
- Root of the Hierarchy - This displays the selected bone whose hierarchy will be mirrored.
- Mirror Goals, Goal Item Shapes, Mirror Targets - Select YES if you want any of these mirrored along with the hierarchy and NO if you only want the bones in the hierarchy copied.
- Center - Allows you to add an offset from the center.
- Use Major Axis - Two choices are presented:
- Use Coord Axis - You can choose this option to mirror across the X, Y or Z axis.
- Other - This option will allow you to mirror using compound angles. Every unit you add to each axis adds to the angle of the resulting mirror
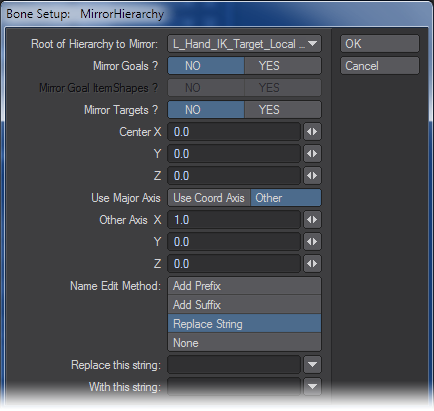
- Name Edit Method - Four choices:
- Add Prefix/Add Suffix - The user interface panel allows you to add a Prefix or Suffix. You can type in your own into the Prefix/Suffix to add to Bone Names text box. Or choose one from the Add Prefix/Suffix to add to Bone Names pop up menu.
- Replace String - You can also choose to replace an existing text string in the original hierarchy with a new text string. Type the string you wish to replace into the Replace this String text box and the string you want to replace it with into the With this String text box.
- None - No user-defined rename.
Rename Hierarchy
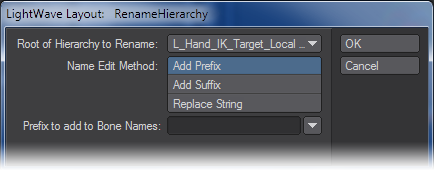
When invoked, the selected bone’s hierarchy can be renamed. The options are Add Prefix, Add Suffix, or Replace String.
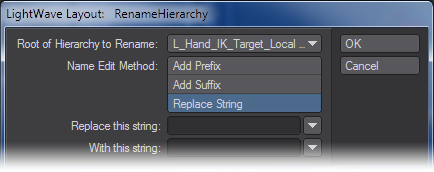
Name Edit Method
- Add Prefix/Add Suffix - The user interface panel allows you to add a Prefix or Suffix. You can type in your own into the Prefix/Suffix to add to Bone Names text box. Or choose one from the Prefix/Suffix to add to Bone Names pop up menu.
- Replace String - You also can choose to replace an existing text string in the original hierarchy with a new text string. Type the string you wish to replace into the Replace this String text box and the string you want to replace it with into the With this String text box.
Import RIG
(default keyboard shortcut Shift I)
(Setup > Edit > Import RIG) Import RIG will read files saved in the RIG file format (See the RIG SDK for more information) and load them into LightWave.
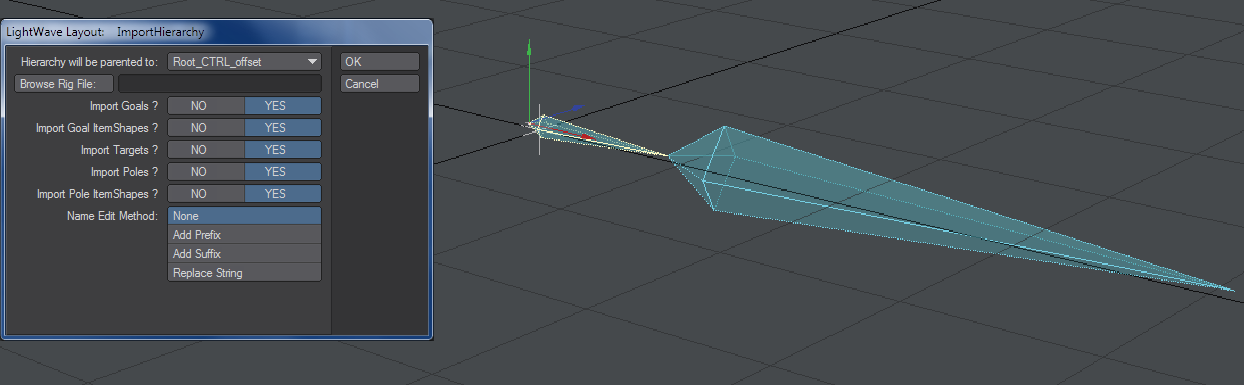
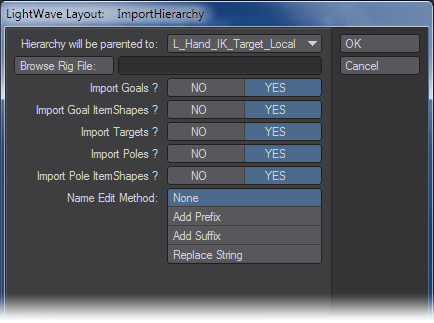
Hierarchy will be parented to:
Displays the bone or item that the imported hierarchy will become a child of.
Browse Rig File:
This will open a file requester so you can navigate to the location of the RIG file that you want to import.
Import Goals, ItemShapes, Targets
Select YES if you want to import goals and targets along with the bones.
Name Edit Method
- Add Prefix/AddSuffix - The user interface panel allows you to add a Prefix or Suffix. You can type in your own into the Prefix/Suffix to add to Bone Names text box. Or choose one from the Prefix/Suffix to add to Bone Names pop up menu.
- Replace String - You can also choose to replace an existing text string in the original hierarchy with a new text string. Type the string you wish to replace into the Replace this String text box and the string you want to replace it with into the With this String text box. To use Import RIG to import a hierarchy:

- Select the bone or object you wish to import to be parented to and run Setup > Edit > I mport RIG.
- Browse to the folder that contains the RIG file you want to use.
- Select the import options.
- Click OK.
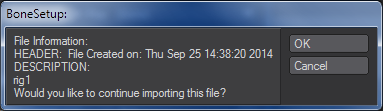
- The RIG information dialog will pop up. Press OK.
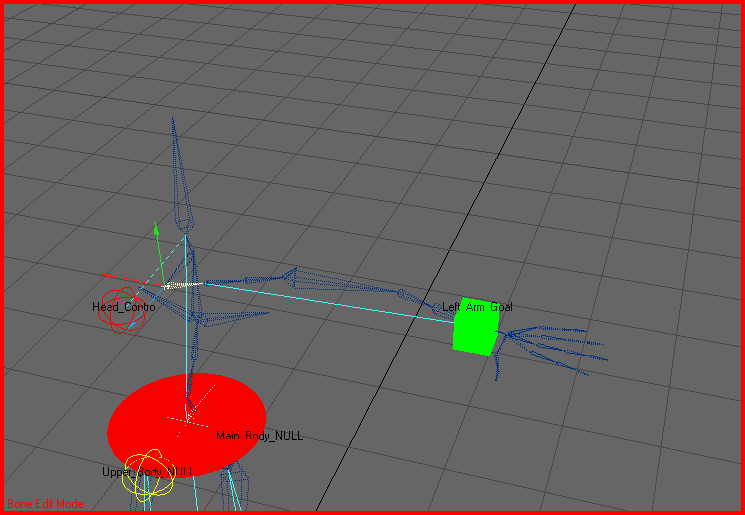
- The arm has been imported along with IK and custom object and parented to the selected bone.
Just enable IK and it will work.
Export RIG
(default keyboard shortcut Shift J)
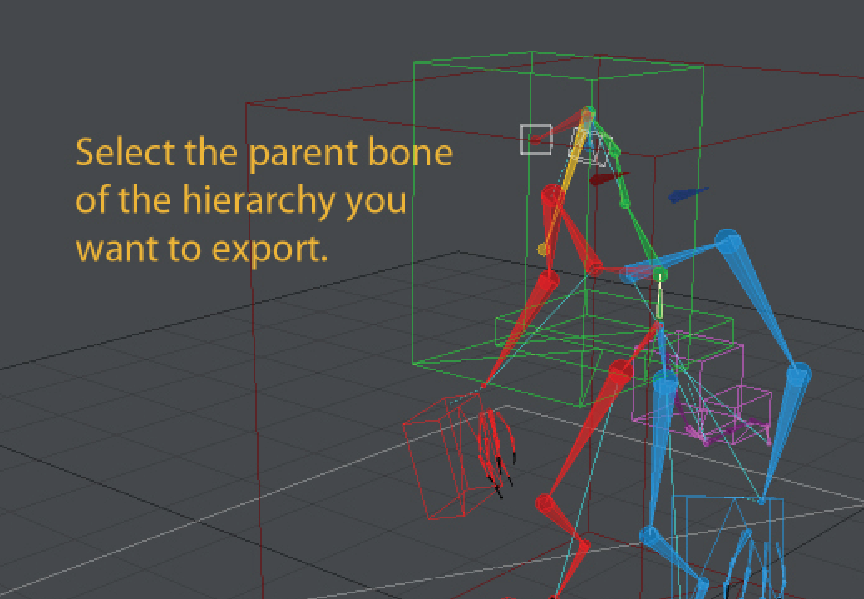
(Setup > Edit > Export RIG) With Export RIG (hierarchy) you can select a parent bone of a hierarchy or an object containing a hierarchy and export it for future use in another mesh. You can export goals, targets and keep the custom item’ shapes that may have been added.
What’s Exported?
Most settings applied to the hierarchy will be exported. IK settings and other properties will go along with the RIG file. See the note below for limitations.
There are limitations to what can be exported from the rig.
The motion modifiers that make up many of the rigs used right now are not supported, but will be very soon. A new scheme to allow plugins to communicate and share their settings data will be added. The first to have this done is the ItemShape plugin that allows you to customise the way Nulls and other objects are displayed. This allows the RIG file format to read the data directly from the plugin. As the other plugins add this feature, the RIG file format will be able to export and import ALL items and settings used in rigging a character.
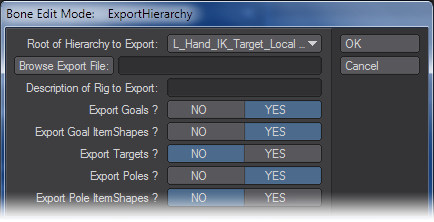
Root of Hierarchy to Export
Displays the parent or root of the hierarchy to be exported.
Browse Export File:
This will open a file requester so you can choose a place to save your export.
Description of Rig to Export
Enter a useful description about the export so you will know what you have when you import this file back into LightWave.
Export Goals, ItemShapes, Targets.
Select YES if you want to export goals and targets along with the bones. To export a hierarchy from a selected bone:
- Select the bone that is the parent of the hierarchy you wish to export.
Run Setup > Edit > Export RIG and the dialog box will appear.
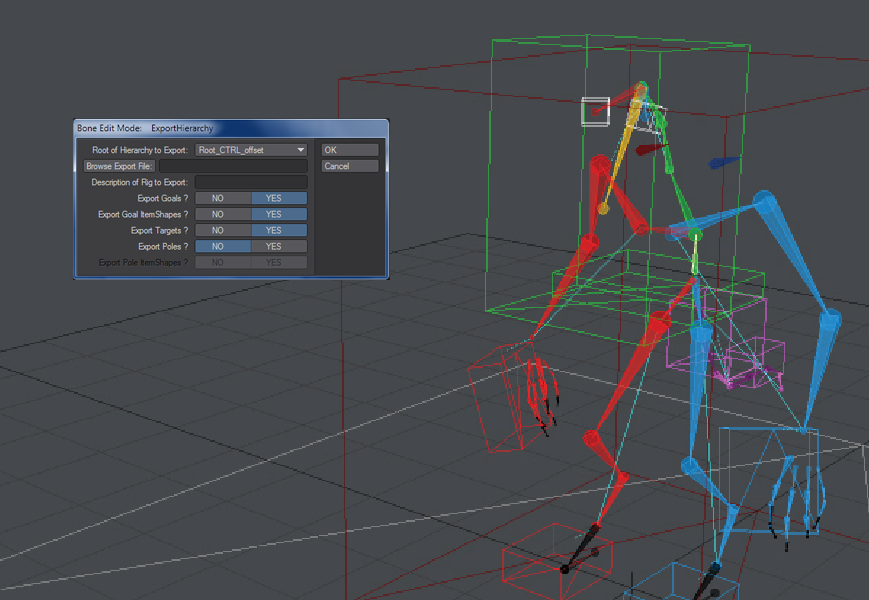
Browse to the folder you wish to export to and choose the settings.
Click OK.
Delete
Delete Hierarchy
(Setup > Edit > Delete > Delete Hierarchy).
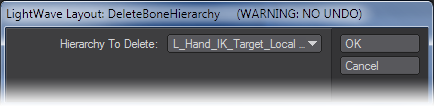
When invoked, the selected bone and all of its children and grandchildren, etc. are deleted, leaving all other bones in place.
Delete Bone
Delete Bone will delete the selected bone without causing the remaining bone to move.

- Bone To Delete - Displays the name of the selected bone.
- Parent Child Bones -
- to Deleted’s Parent - Will parent the remaining bones (if there are any) to the deleted bone’s parent.
- to Object - Will parent the remaining bones (if there are any) to the object.
This operation cannot be undone.