Spray Points
Creating one or two points is not hard, but what happens when you need to create hundreds or even thousands of random points for objects such as stars, gasses or bubbles? Enter the Spray Points tool, (Create > Points: Spray Points), which works like a splatter gun to create a random assortment of single point polygons.
After selecting the tool, click in any viewport (including the perspective viewport!). A blue crosshair appears surrounded by a larger blue circle. The crosshair represents the center position of the Spray Points tool. The circle represents the radius within which points will be created.
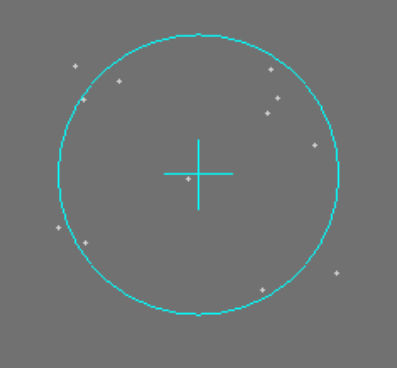
The radius can be adjusted either numerically or interactively. To adjust the radius numerically, open the Numeric window (N).

Click in the field entitled Radius, type a new number and press Enter. (You can also use the slider to the right of the numeric field to make the radius larger or smaller).
To adjust the radius interactively, click the RMB in any viewport and drag. The radius circle will jump to the position of your mouse cursor. To make the radius smaller, drag your mouse towards the crosshair. To make the radius bigger, drag it away from the crosshair.
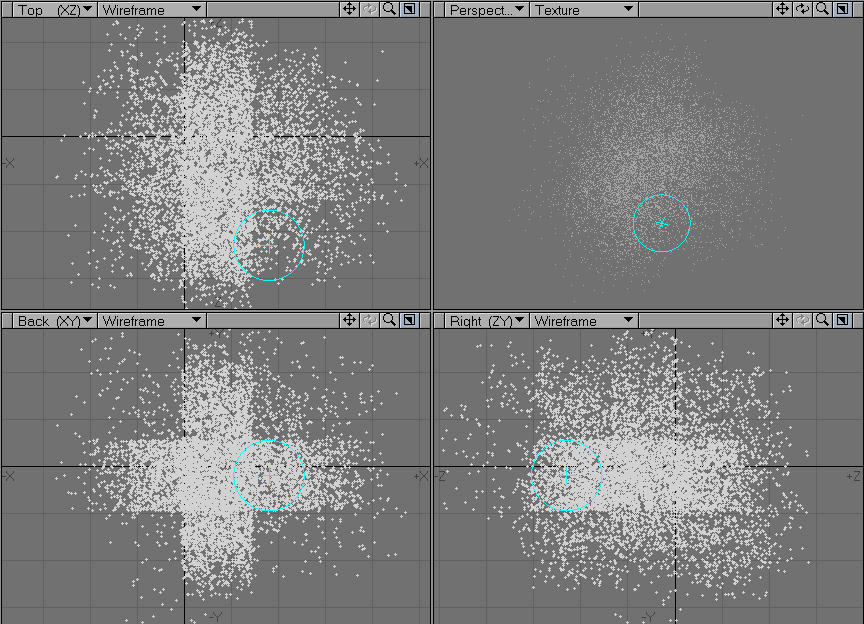
To create points, drag your mouse while the LMB is held down. Simply clicking the LMB will not result in the permanent creation of new points. To see this in action, try clicking once, then moving your mouse to a new location and clicking again. You’ll notice that the points from your previous click disappeared and a new set of points was created under your mouse pointer. For the tool to generate permanent points, you must continue to hold down the LMB while dragging in a viewport.
The number of points created as you drag can be adjusted by the Rate setting on the Numeric Panel. A low rate setting will cause fewer points to be created as you move your mouse. A high rate setting will cause more points to be created.
The Spray Points tool doesn’t just create points, it creates single point polygons (also known as Particles), which means they can have Vertex Color Maps applied to them and will be visible in a render with those assigned characteristics. Points themselves can have vertex maps assigned to them regardless of whether they have polygons attached to them or not. In the case of color maps those cannot be seen unless the points are attached to polygons.
If you would like to use a Color Map with the Spray Points tool, simply click the Add Vertex Color checkbox and type a name for it into the Map field. If you have already created one or more Vertex Maps, you can use the drop down arrow to select one from the list.
Modeler will not display the Vertex Map in any of its viewport displays, however you can see the effect of the Color Map by running Vertex Paint from Modeler’s Map menu.