Detail - Edges - More
This group contain tools that are no longer so required, but could still prove useful in the right circumstances.
Add Edges
Add Edges (Detail > Edges > Add Edges) is part of the Edge Tools toolkit that gives you the ability to interactively place new edges on your geometry.
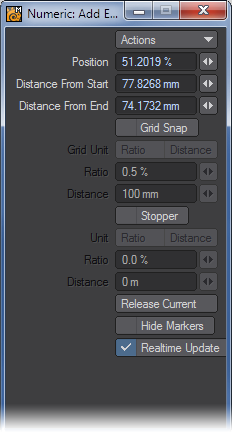
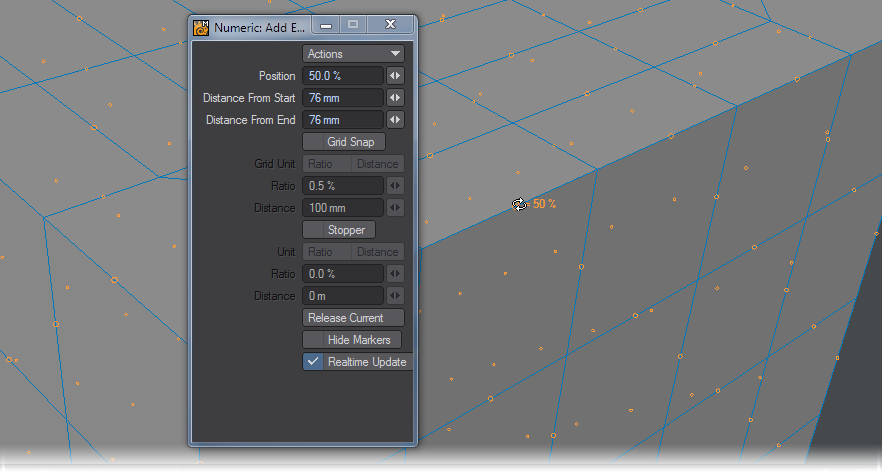
- Position - Each edge is assigned a marker located at the center of the edge (50%). Use the mini-slider next to the input field or interactively move the position of the marker in the viewport with the LMB .
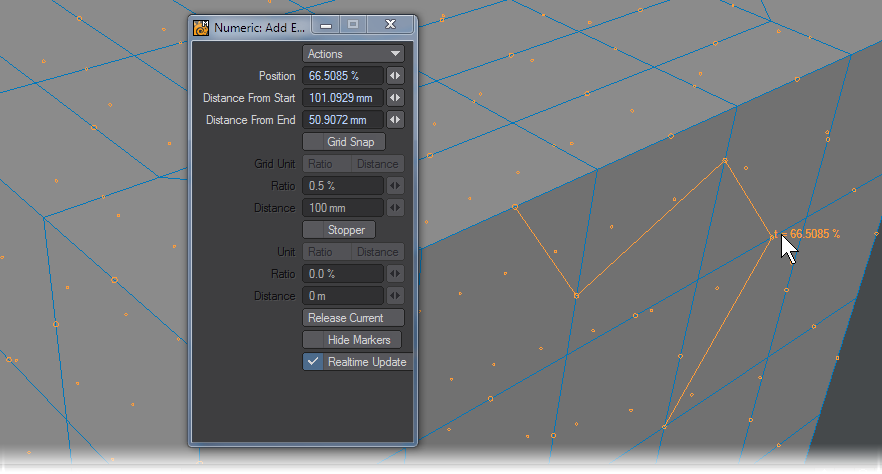
- Distance From Start - This field will display the distance from the Start point of the selected edge to the marker on the edge. Distance From End - This field will display the distance from the End point of the selected edge to the marker on the edge.
- Grid Snap - Checking this will activate Grid Snap. Using Grid Snap will limit movement of the marker based on the Ratio or Distance found under Grid Snap.
- Grid Unit - Choose between Ratio and Distance to control Grid Snap.
- Ratio - Grid Snap is set in percentage from 0% to 100%. Limit the movement in x% increments.
- Distance - Grid Snap is set in Units . Limit the movement in n unit increments.
- Stopper - Stopper sets up limits on marker movement.
- Unit - Choose between Ratio and Distance to control Stopper settings.
- Ratio - Marker Limits are set in percentage from 0% to 100%. Limit the movement in n% increments.
- Distance - Marker Limits are set in Units . Limit the movement in x unit increments.
- Release Current - This option will undo the last edge drawn.
- Hide Markers - This option will hide the markers but will still allow edges to be created.
- Realtime Update - When checked, this option will apply the edge to the geometry. When this option is off, it will not place the edge, but rather will place a preview of the edge. This can be very helpful with heavy geometry on slower machines.
Steps to Add Edges:
- Left click from marker to marker to draw edges.
- Add the quantity you need. You can adjust the distances for the different connections as you go.
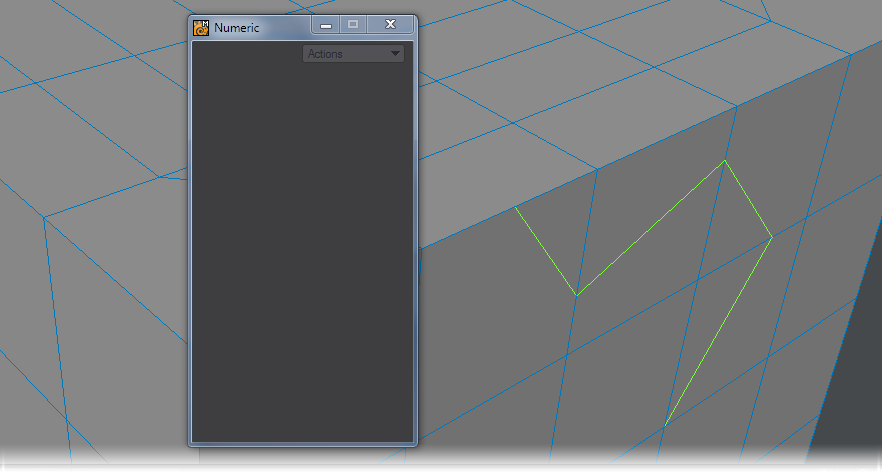
- Press Enter on the keyboard to apply newly created edges.
ExtendEdges
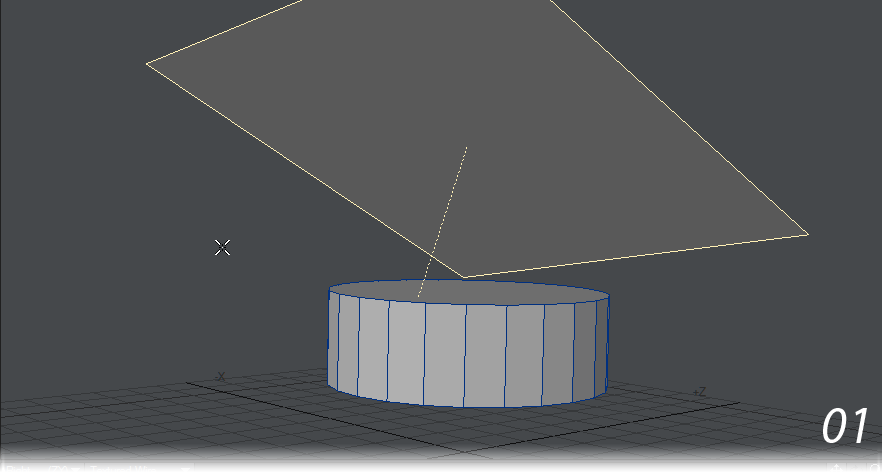
ExtendEdges will extend the selected edges to a polygon you have selected, with the length of the edges matching the rotation of the selected polygon. If no polygon is selected, the edges will match the ground plane. The selection of the edges is important, see the following example.
- In Polygon mode, the polygon of the plane is selected.
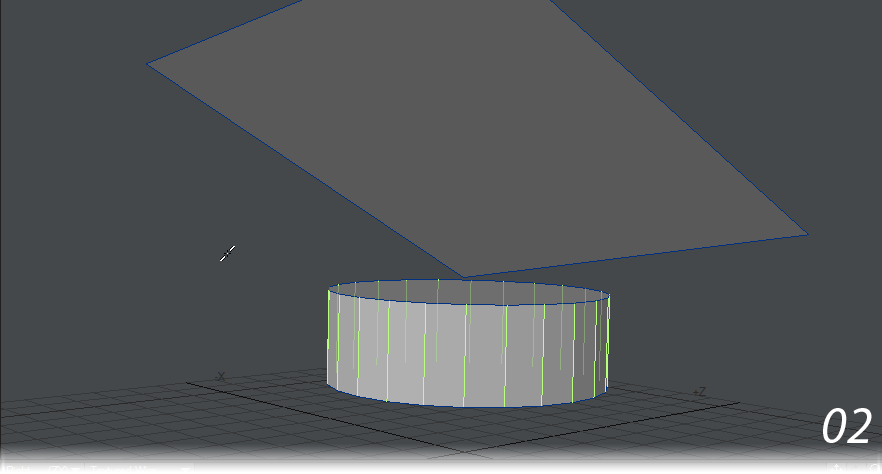
- Switching to Edge mode, the edges on the side of the disc are selected. (Note that the edges along the top are not selected.)
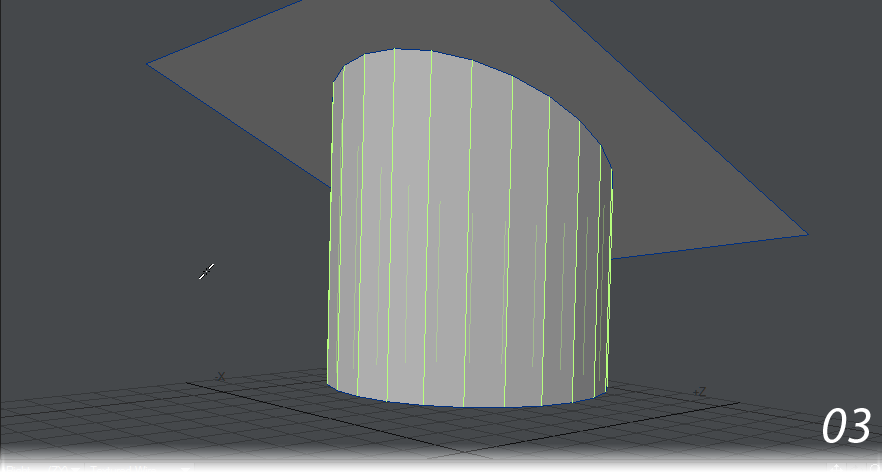
- ExtendEdges is activated and the edges stretch to match the angle of the plane.
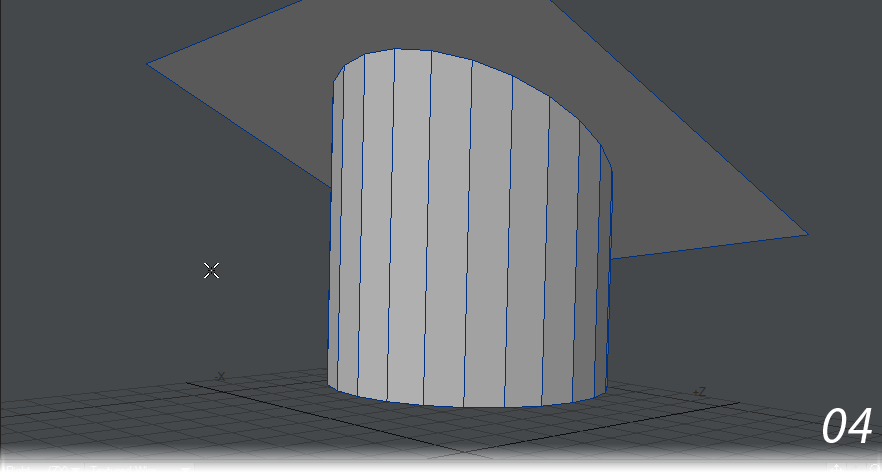
- After deselecting the plane polygon, ExtendEdges is activated again and the disc’s edges extend to the ground plane.
EdgeWalk
When two contiguous edges are selected, EdgeWalk will create a new polygon from the selected edges. EdgeWalk works best with edges that are at an angle with each other.


01-04 Edges selected, then EdgeWalk activated multiple times. Note how it “walks” around corners.
Set CC Sharpness
Sets the sharpness value. For example, a value of 100% will create a sharp edge, while a value of 25% will result in a softer edge.

Left: Value=0% Right: Value=100%
Increase / Decrease Sharpness
Increases or decreases the sharpness of an edge. This allows for harder or softer corners between two polygons.
The effect of the edge weighting is only visible when in weight shade mode or when CC subdivisions are turned on for the given polygons.