Rotate Skelegons
Rotate Skelegons( Setup > Skelegons > Rotate Skelegons) allows you to quickly adjust the bank handles of Skelegons as well as preview rotational deformations. This includes the deformation of sub-patches. This is a great tool to test your Weight Maps and deformations in Modeler.
Using Rotate Skelegons
Load a model which contains Skelegons and make sure that both the Skelegons and the mesh are in the primary layer (the primary layer is the lowest numbered active foreground layer). Make sure that the Skelegons are not hidden, but it doesn’t matter whether any points or polygons are selected.

Now click on Rotate Skelegons and open up the Numeric Panel (N)
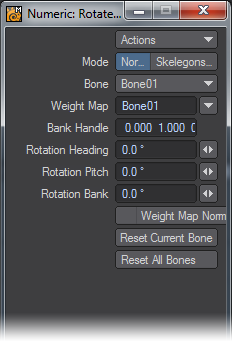
The first entry of the Numeric Panel is the Mode options. Normal will allow you to rotate the Skelegons as well as the mesh. Choosing the Skelegons Only option will move the Skelegons without moving the mesh.
The second entry is Bone. Bone is the Skelegon that is currently active. You can select other Skelegons by selecting from the drop down list or by clicking onto the small orange circles in the middle of each Skelegon.
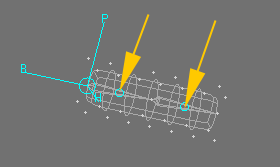
The third entry is Weight Map. Weight Map is the name of the Weight Map assigned to the Skelegon. The currently selected Skelegon has three lines with the letters H, P and B as well as a bigger circle attached to its stubby end. Holding the mouse down over one of the letters and dragging to the left or right rotates the Skelegon and its children and (if the associated Weight Maps contain non-zero values) deforms the mesh.
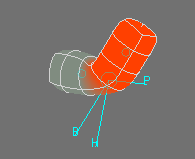
While you are in Normal Mode, you can have multiple Skelegons rotated around any axes. You can rotate the Skelegons also by changing the corresponding values in the Numeric Panel.
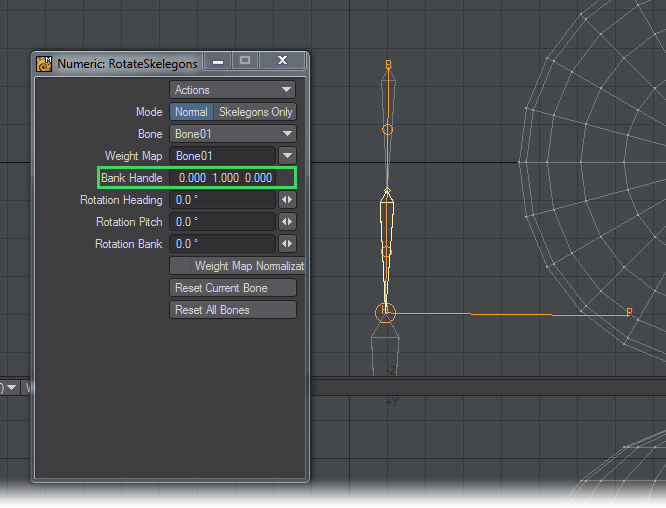
The Bank Handle (sometimes also the term Pitch Plane is used) determines how the rotational axes are aligned when the model is loaded into Layout and the pivot rotation for every bone is recorded. You can align the Bank Handle with the tool by holding the mouse down over the stubby end of the selected bone (inside the bigger circle) and dragging to the left or right.
The Heading and Pitch axes will circle around the bone, i.e. these axes are now aligned differently. The Bank Handle alignment will be shown in the Numeric Panel as well.
If you click the button Reset Current Bone in the Numeric Panel, the Skelegon will be reset to its rest position (i.e. the position it had when the tool was activated). The value of the Bank Handle will be reset as well.
If you click Reset All Bones, all Skelegons will be reset. If you hit the Space bar or the Return key the rotational changes will be assigned to the mesh and the tool will be deactivated.
If you hit Modeler’s Undo button or click in an inactive toolbar area all Skelegons will be reset and the tool handles disappear, but the tool is still active. By simply clicking into one of Modeler’s viewports the handles will become visible again.