UV Spider
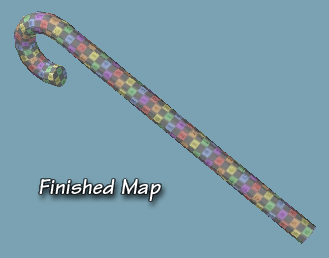
This command will crawl along a line of selected quads, no matter how much it twists and turns, and map it flat onto a specified section of UV space. Think Bandsaw, but mapping instead of cutting.
How do I use this tool?
This tool is really interesting. You can use it to unwrap any regular quad surface, even if you have twisted, turned, bent and vortexed it! But it does take some planning.
The tool works by crawling along a line of quads, and depositing them neatly onto a UV Map. But it only crawls along one line at a time. So, in order to unwrap an object, you have to select a couple of quads to get it started, just like you would with Bandsaw. However, it will put the first quad you select against the edge of the map. So, if you want a usable map, you have to start with the right quad, every time. In other words, if you’re unwrapping horizontally, you need to start with the next quad in the vertical row in order to get a good map. Now, if the piece has been twisted and turned, that’s not simple to do. (If it hasn’t, you don’t need this tool; there are easier ways to map straight things.)
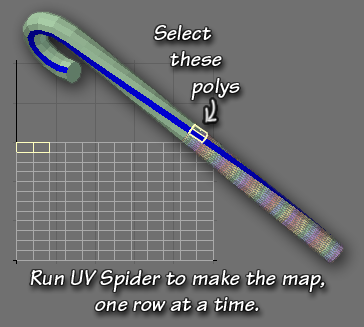
You should begin by selecting a line of quads running perpendicular to the direction you plan to map. You can do that easily by selecting a couple of quads in the correct direction (vertically, in our example) and using Select > Select Loop, or using the keyboard shortcut Right Cursor. Once you have it, change the surface to something that will contrast nicely with the other surface. (Tap Q or click Surface at the bottom of the screen.) It’s only for mapping, and you can change it back later; but it will help you keep your place.
Then, select two quads horizontally in the bottom row of the area you want to map, and click the button.
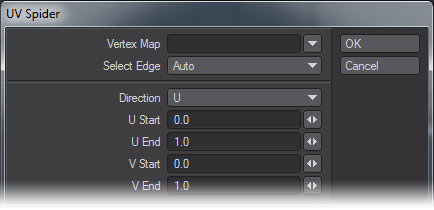
Vertex Map
Choose which UV Map to work on by typing the name into the Text field, or selecting it from the drop down list. The list contains all the names of all the UV Maps used during the current session, whether or not the objects remain open, and whether or not the maps have any points assigned to them. If you type a new name into the field, a new map will be created. If the map you pick (or create) isn’t chosen in the VMap Bar at the bottom of the screen, it will be when you click OK.
Select Edge
This option allows you to choose in which direction the Spider will run. Like similar tools in LightWave, if you’ve chosen two polys, Auto will give you the correct direction. Otherwise, you can choose Odd or Even by using the menu (but it's more predictable - and therefore faster - just to grab two polys.)
Direction
Choose the direction you want the UVs to run in. If you are mapping horizontal polys, choose the U direction. If you are mapping vertical polys, choose V.
U Start, U End
Choose the place on the map for the polys to be laid down. You can safely leave this at 0.0 to Start and 1.0 to End for the direction you are mapping. So, in our example, where we're mapping in U, we would leave U Start at 0.0, and U End at 1.0.
V Start, V End
Use small increments in the other direction, so the polys will be laid down row by row. In our example, if we started with V Start at 0.0 and V End at 0.05, we’d get one row of polys, the width of the map, and one twentieth of its height. Click OK, and the row is made. Drop the polys.
Select the first two polys of the next row, and click the command again. The dialog box opens with the last settings intact, so you can see where you are. Simply change the V Start to .05, and the V End to .1, and make another row. Continue in that fashion, increasing both numbers by the same increment, until you have mapped the entire area.
When you are finished, you may notice two things. First, your map may be longer than the UV space. Second, there aren’t any points on it at all. That may be fine with you; in which case you’re done.
But, if you need to further manipulate the map, it’s easy to do. Just use the Unweld command (Detail > Points > Unweld). This will put points on all the polys, and allow you to use all the Modify tools, as you normally would. If your models are simple enough, you can Unweld selected points; if not, you can effectively Unweld the entire model. Just be sure not to move anything in X,Y,Z space, and the Merge command (M) will put it all back together again when you’re finished mapping.
(Don’t merge until you finish, though, so wait until you go though the next step.) Once you have points, you can use the Stretch tool (Modify > Transform > Stretch or H) to pull the polys down so they fit in the UV space, and your image won’t wrap.