NRC Preferences
The NRC Preferences are well-explained in the interface:
Tasks
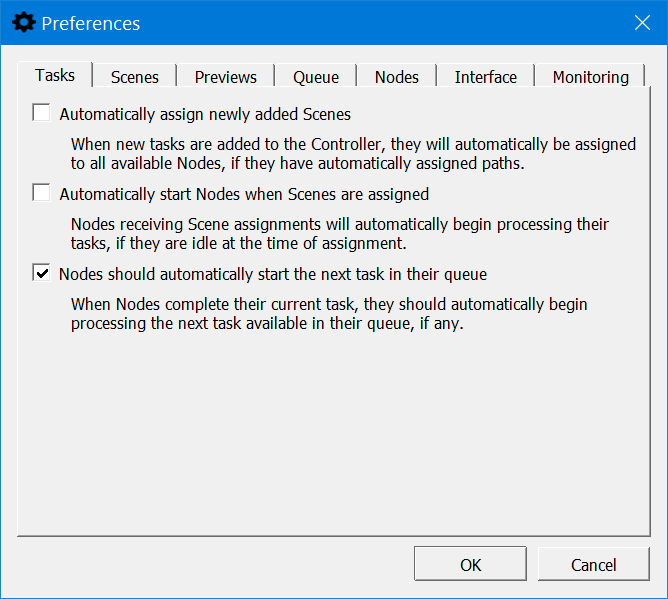
If you tick the first two boxes here, you can have an automatically-fired renderfarm. In Layout, on the Render tab, there is a command Send to NRC. Loading a scene in Layout and setting it up for a network render then hitting that button will result in your scene getting "sent to the farm" and rendering starting leaving Layout free to carry on. No more waiting for a render before you can carry on working.
Scenes sent to NRC through Layout should be in complete content directories, otherwise, the NRC Scene Content Directory entry won't be filled, and nodes won't get assigned scenes or automatically start rendering
Scenes

Scenes can have their path settings overridden by the options here.
The Organize output into subfolders by task name option will render the auto-assigned Output path unique per task by appending the task name. Output for the task will then go into that subfolder in the common output path to avoid name collisions (and likely file overwriting). It only applies when the Output auto-assign option is enabled.
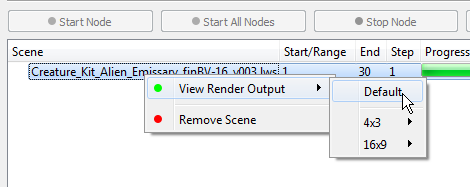
Previews
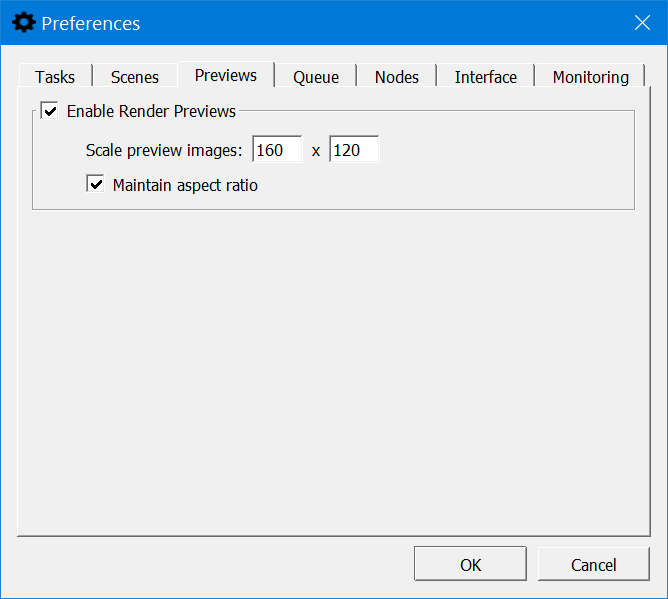
This option, enabled by default, means that right-clicking on a selected scene while it is rendering will give you a preview of frames completed.
The Render Output will only be available only if all the following conditions are met:
- The Controller can access your image output path
- The format used is supported for the preview (JPG, PNG, TGA, TIFF or BMP)
Queue
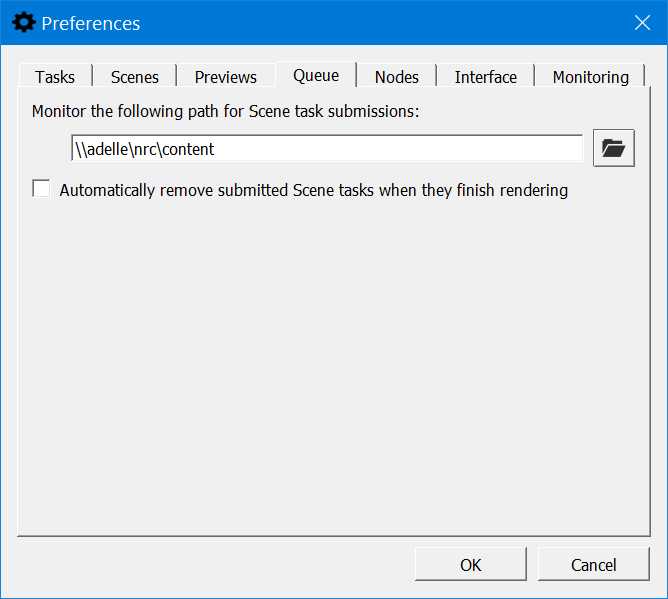
The Controller can be configured to watch a folder for submissions (from the Layout "Send to NRC" script). The Controller must be running, and that folder setting must have been written into the Controller's config so the script can read it and know where to send scenes for rendering. There is an option to remove finished scenes. This kind of automatic setting is best used in conjunction with the settings on the Tasks tab.
Nodes
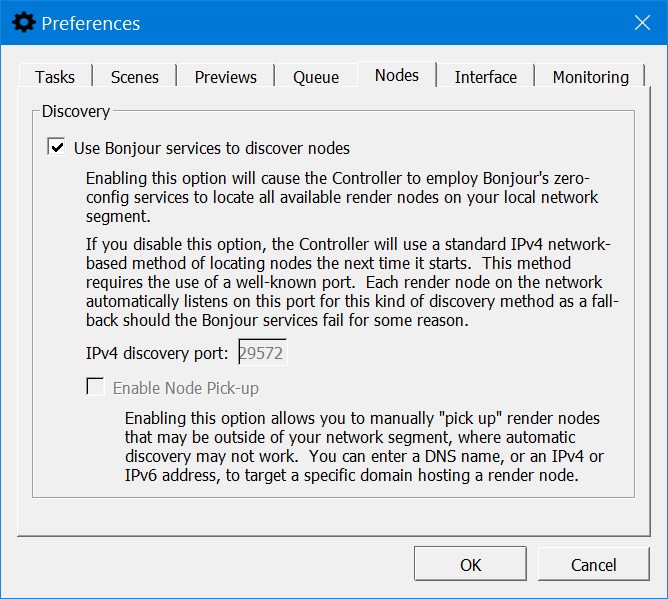
![]() The next tab used to be called Discovery and is now called Nodes. By default, NRC uses the Bonjour service for discovery, but you can turn this service off (a restart of the NRC controller is required) if for some reason Bonjour fails to operate properly, or you would prefer to use a standard IPv4 way of locating nodes. A default port number is provided.
The next tab used to be called Discovery and is now called Nodes. By default, NRC uses the Bonjour service for discovery, but you can turn this service off (a restart of the NRC controller is required) if for some reason Bonjour fails to operate properly, or you would prefer to use a standard IPv4 way of locating nodes. A default port number is provided.
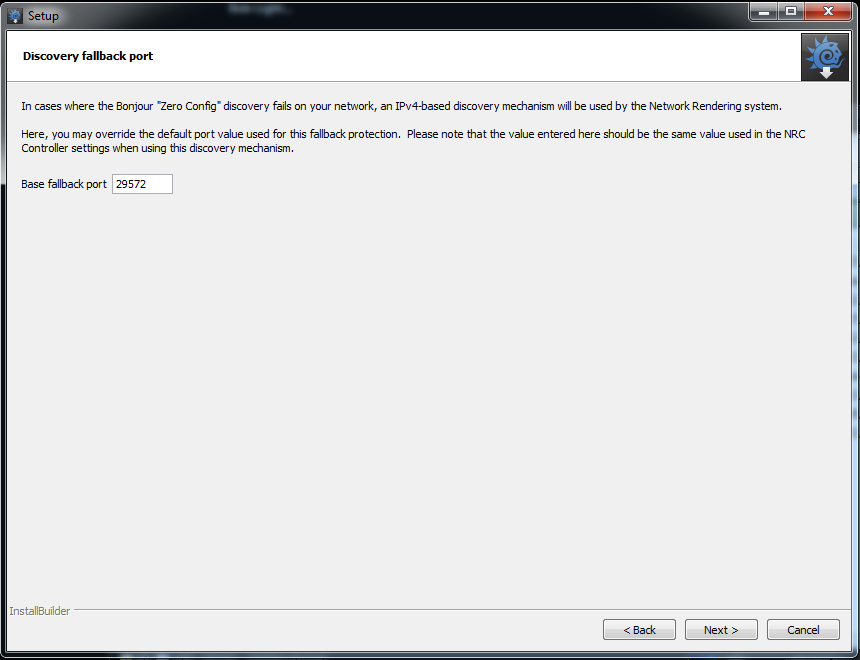
If this number is not suitable for your network, render nodes will need to be reinstalled with an appropriate port number chosen during installation in the advanced NRC options.
If you have turned off Bonjour, an option new to 2019.1 becomes available, Enable Pick Up Nodes. As the explanatory text states, checking this button allows you to enter an IP address (v4 or v6) in the main NRC Controller interface to access a machine anywhere on the Internet and was added to allow people within a corporate intranet to access a different segment where their render machines may be sitting. It is not designed to create a global render network, although you can try.
When Enable Pick Up Nodes is checked, a new button appears in the Controller window called Discover Nodes. Discover Nodes uses a "well-known" port (which is the default value in prefs). If you change the port number in Preferences, you have to be sure to match it on each build slave, or you won't see anything. The Pick-Up node field can take an ip address, a range (IPv4 only) or a URL and you can add subnets with a dash (e.g., 10.38.1.110-115). This replaces the previous Scan for Nodes button that manually forced a scan for IPv4 nodes.
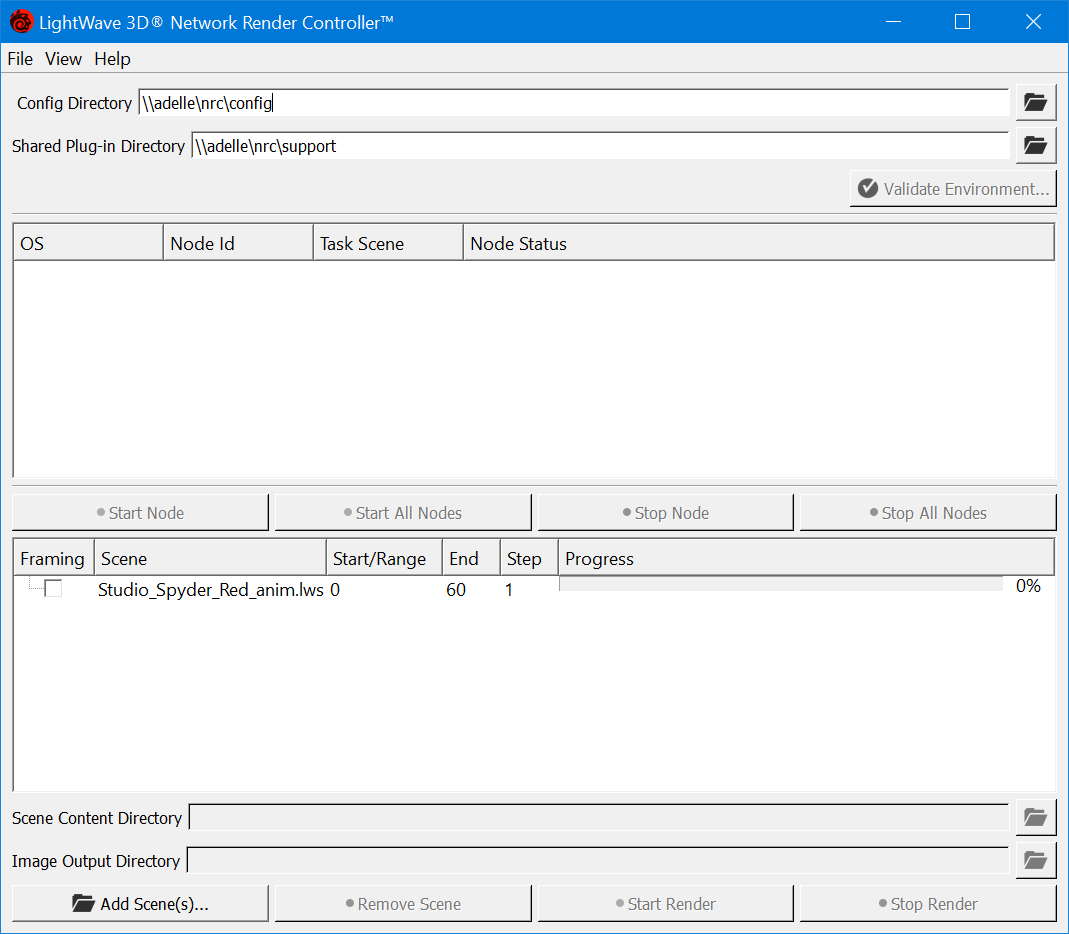
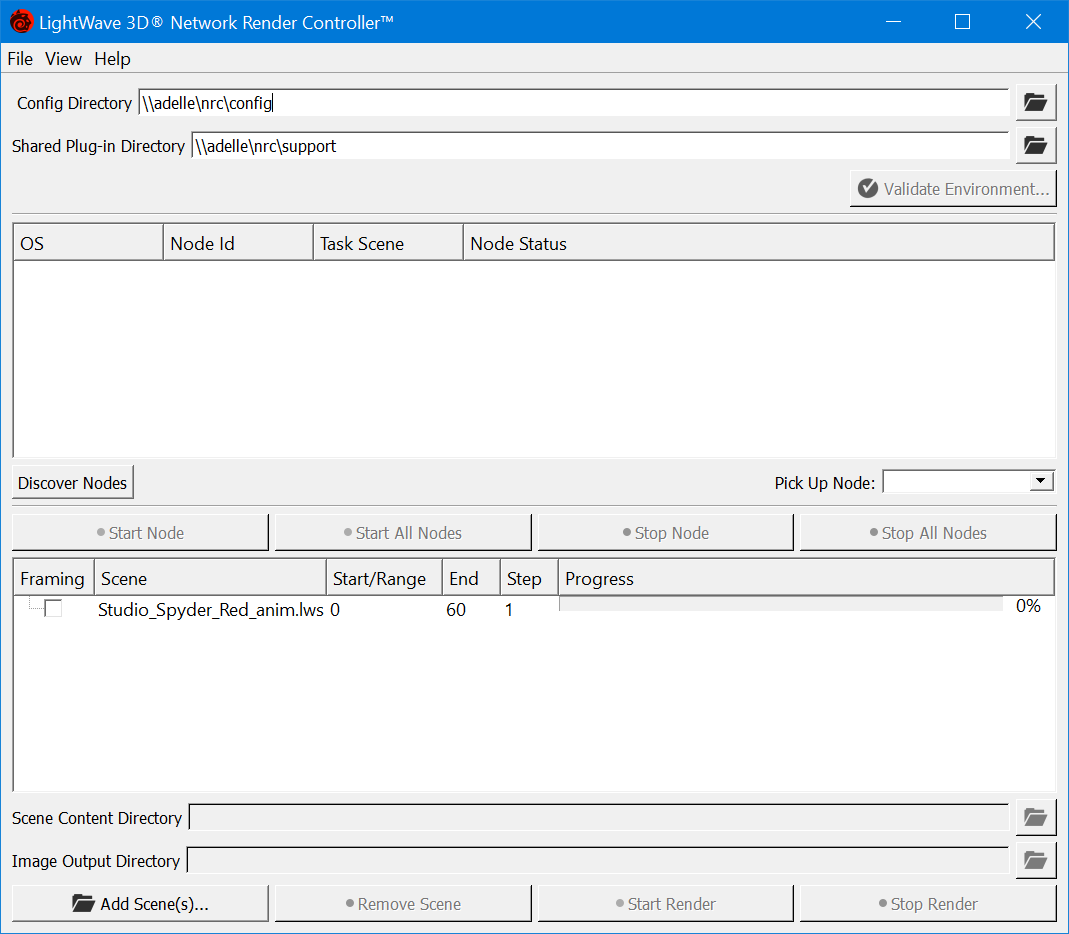
Bonjour on, Bonjour off
Interface
The penultimate tab relates to NRC Interface options:
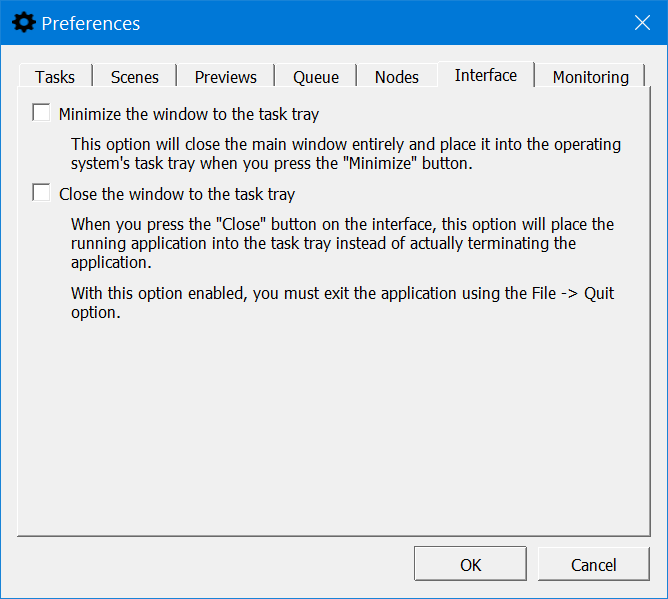
The options provided deal with minimizing the window to the taskbar on minimize or close.
Monitoring
![]() Added in LightWave is a page for controlling how you will monitor your NRC with an Android or Apple phone or tablet.
Added in LightWave is a page for controlling how you will monitor your NRC with an Android or Apple phone or tablet.
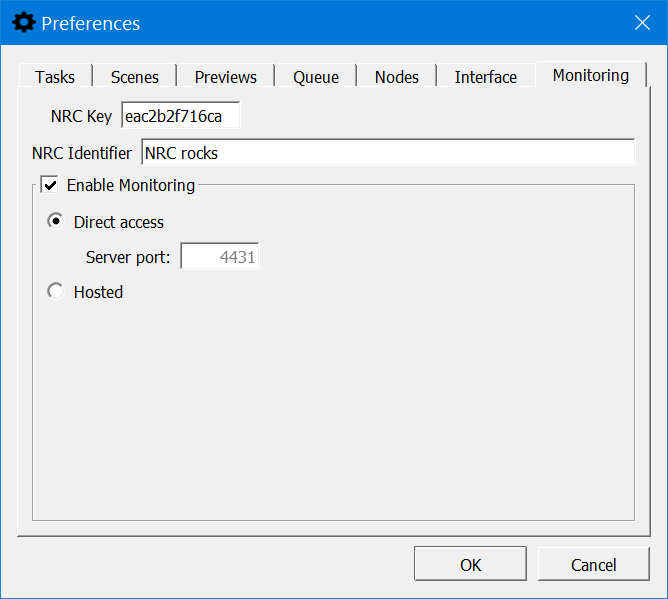
- NRC Key - Unique identifier for the NRC Controller generated on the first run
- NRC Identifier - Human-readable name for the controller (optional). If none is set here or in the mobile app, the NRC key value will be used instead
- Enable Monitoring - This needs to be checked for monitoring to work at all, and should be checked before you start rendering. Once checked, there are two further options:
- Direct Access - The default access method for monitoring; this requires that you open an IP address and specific port in your Windows services.msc tool. This method allows viewing of rendered images
- Server Port - The default port number is 4431
- Hosted - A more limited way of monitoring. Image viewing is not available with this method. Hosted links to an NT-hosted NoSQL server that keeps the log results of NRC. If you choose Hosted, further options appear:
- Manually - Only when you request an update
- Automatically - You can specify an interval between 5 and 60 seconds (default 10 seconds)
- Direct Access - The default access method for monitoring; this requires that you open an IP address and specific port in your Windows services.msc tool. This method allows viewing of rendered images
Getting started with the app
Android
The Google Play store has the application under the name NRC Monitor. It is free and will only work with LightWave's distributed rendering method NRC.
iOS
The App Store is where to go to get the iOS version of NRC Monitor. It is free and will only work with LightWave's distributed rendering method NRC.
Starting the app for Android or iOS for the first time presents a screen urging the user to create a server to monitor:

As the message says, hitting the + icon at the bottom of the screen will open a new window where you can add an NRC Key - all that's necessary for the monitor to function. Adding an Identifier is optional, and in any case, your device will refer to the specific controller by its NRC key. If you enter an Identifier here, it will propagate to the Controller on your Windows or Mac desktop machine where you are running NRC; the same is true in the other direction.

To add a controller, you need an NRC key first, which can be found in the NRC Controller preferences window > Monitoring tab. Copy this carefully onto the app and then proceed with your choice of Direct, or Hosted modes
Direct
You will need to enter an IP address along with the port number to be used. Until you have something that the NRC Monitor is happy with, you will see the following icon on the controller card:
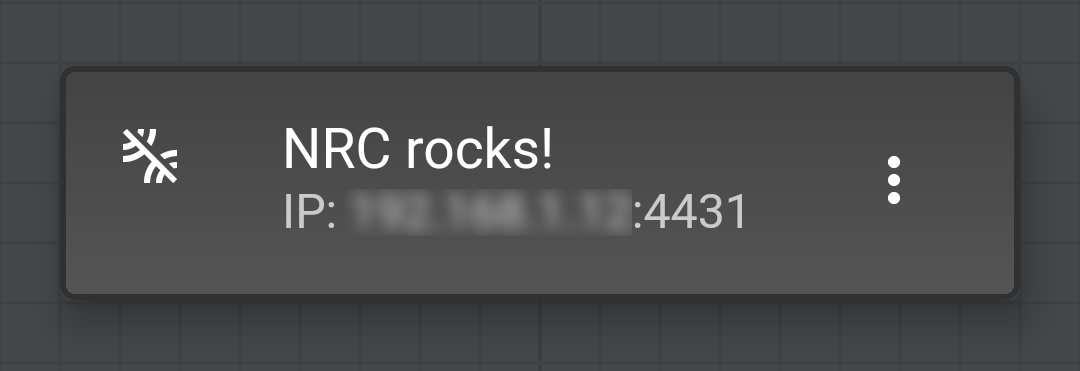
Once the connection is made, the bar will be removed:
If your controller resolutely refuses to connect and you can't get rid of the bar even though you're sure you've done everything right, shut down the app and the NRC Controller and restart both. That usually unblocks them.
Hosted
With Hosted mode, the NRC Monitor links to an NT-hosted NoSQL server that keeps the log results of NRC. The same iconography shows whether the connection has succeeded or not:


Here there have been no tasks assigned to the renderfarm yet.
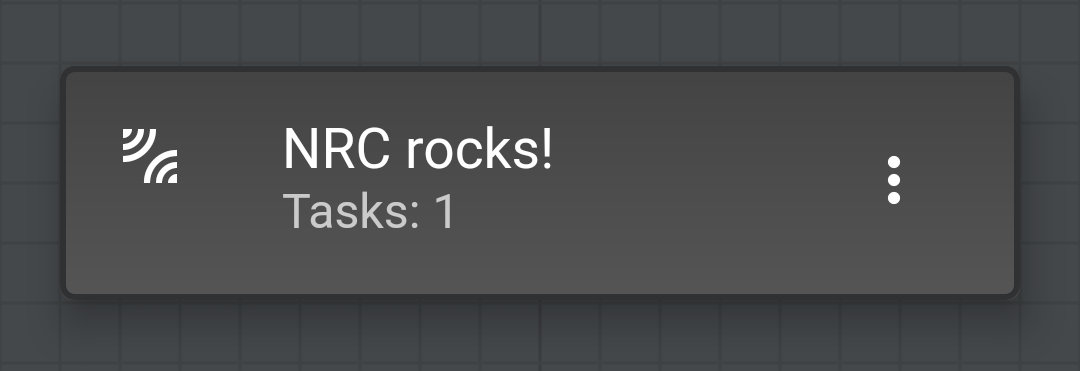
Using the App
Once you have your controller added, with no bar, it's time to start your scenes working. Both Direct and Hosted work the same way to begin with. Both have the same cards showing an overview of how many tasks have been assigned. You can tap on this card to see an overview of individual tasks:


When a task is started, as shown left above, it will have no renders to show hence the line through the eye icon. Once renders are available the eye will be unbarred and can be clicked on to show previews of rendered images, right. Each buffer is treated as a separate task inside the scene.
With Hosted mode, the eyeball will always be barred because images cannot be previewed. In Direct mode, when the eyeball becomes unbarred you can click on the card to see thumbnails of all images rendered so far, and clicking on a thumbnail will display a full-scale image.
The three-dot menu on the right of each card will show the log for the task

NRC Log