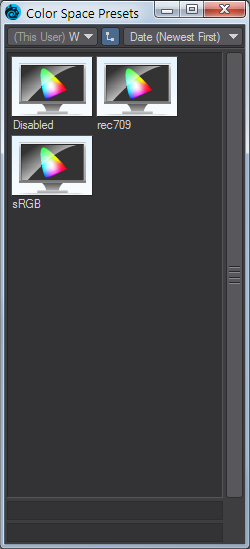
Preset Shelf
The Preset Shelf is a resizable floating window that holds a list of previews along with all of the associated settings in Modeler and Layout. It can be used for settings with surfaces, volumetric lights, HyperVoxels, Bullet Dynamics, Flocking, Navigation devices and more. It is accessed using the Presets button (Windows > Presets) or from some plugin panels. You add to the shelf by double-clicking on the preview, if one exists on the panel (e.g., Surface Editor), or by using the Save Preset button found on panels supporting Presets. The shelf survives from session to session.

Third Party tools can take advantage of the Preset Shelf as seen in the plugin Bevel ++ for example.
The window is context sensitive, so if you are working on surfaces, surface presets are displayed, if you are working on HyperVoxels, those presets are shown, and so on. If you have no windows that accommodate Presets, the Presets Shelf will still open, but will appear to be empty. Each editor has a default library named Workspace - a library is a grouping of presets for a particular editor.
Libraries
You can create a custom library by right-clicking over a preview and choosing Library > Create Library. For example, using the Surface Editor, you might make a library of Wood presets, a library of Stone, etc. Library > Delete Library will do just that, and Library > Discard Presets menu clears all of the presets from the displayed library.
Hierarchy View
The small L-shaped button in-between the Library list and the ordering dropdown switches how libraries will be shown. With the Hierarchy display active, preset libraries will be presented as sub-menus. With it off, everything is in a long list.
To apply one of the presets:
Double-click on a preview or select Preset > Open from the RMB pop-up menu.Click the Yes button on the confirmation dialog.
Preset > Open w/Parameters works with certain preset groups, like HyperVoxels, and allows you to pick which part of the settings you want to use.

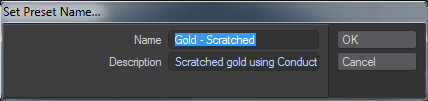
From the Presets menu choose Set Name to open a dialog box where you can set a Name to be used for the sample, it appears underneath the sample image. You can add a longer string of text in the Description field, which appears at the bottom of the panel when your mouse pointer is over a preview.
There are also options to Move/Copy presets between libraries. The Delete option removes the sample from the shelf.
Keeping your Presets organized will pay off in the end. After a while you may find that you have quite a large collection.
The Presets Panel has been updated with all available menus listed. Each library is listed in a separate category. The light colored lines indicate available 'library containers' and their lock state, which depends upon design decisions and folder permissions.
The 'Bundled' container refers to presets stored inside the Layout application (inside the application bundle); these would be specific to that application and provided solely by NewTek. The "Built-In" container refers to presets stored in the "SharedSupport" folder, which is shared among all the LightWave applications; these would be provided solely by NewTek and is not modified by the user or third party installers. There is a "This Network" container (not shown here) that would refer to presets shared among members of a Mac network The "This Machine" container refers to presets stored on the local machine and shared among all users that can log into this machine. This is where third party presets would normally go (so that they can be shared among all users on the machine). The "This User" container refers to presets stored specific to current logged in user and are not shared with any other users. The "Custom" container (not shown here) refers to the user define preset folder that can be specified within Layout. The lock symbol means there is no write access allowed to the container. For the current library, you will also see the lock state if that particular library has not write access.
Double-clicking on the preset image (like before) will activate that preset. One difference now is that double-clicking on the name will open up the editing dialog to set the name and description of that preset.
Changes to the preset folder made outside of LightWave are okay and will be realized when the preset shelf is brought to the foreground.
This new capability removes a restriction and allows LightWave to be operated from a read-only device such as a DVD, a network application server (educational environments), a mounted DMG file. In many environments, users do not have write access to the previous single preset folder, so having these other locations is useful. Also, third party UB installers now have a reliable location to place their preset updates. Also, when updates to the Universal Binary version of LightWave are made via the intended drag-drop install, the previous Applications/LightWave3D folder will be totally replaced; so it is important not to make third party or user modifications to that folder.
Preset Location List
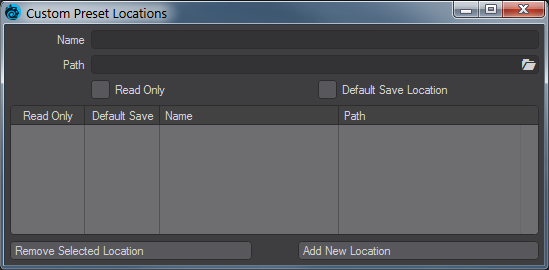
The Preset Location List replaces the single Custom Preset location in previous versions so that you can define multiple preset locations.
A custom location can be marked as Read Only, this means that presets cannot be created or removed from this location. For instance a team might have a set of shared presets residing on a network share, marking the location as Read Only would prevent a team member from making changes to those shared presets.
The Preset Shelf's Add New Preset right-click menu entry will attempt to create a new preset for the current Preset Shelf client, this new preset will be created in the currently viewed location and folder. This option is only active if the location can be written to. Read Only locations are denoted will a lock icon in the locations popup.
When creating a preset from somewhere other than the Preset Shelf's Add New Preset entry, for instance from the Surface Editor's Preset popup menu, then the Default Save Location in the Preset Location List marks the custom location as the one to use when saving a new preset.
You can remove and add new locations with the buttons at the bottom of this panel.
Presets normally reside in three locations as shown in this image:
