Subpatch Modeling - Four
Combining Form
The first step in combining form is in the creation of the original form or forms. Here is a rough outline of some of thethe methodsof creating your original starting shape.
Create a primitive.
Draw out a multi-sided flat polygon.
Create a spline patch.
There are two general ways to combine form:
Start with a basic shape and alter it to create a more complex shape.
Start with two or more shapes and join them.
Or of course a combination of the two.
Method One: Altering An Existing Shape
Box Modeling
Box Modeling is basically the process of taking a single box and altering it into an organic shape such as a head.
The most common practice of Box Modeling is to work primarily in Subpatch Mode and use tools such as Multishift that keep the object in quads and with the aid of SpinQuads to redirectflow. For people with a sculptingbackground this has the appearance of sculpting more than other methods of subpatchmodeling. In theendhowever you still have to wind up with a certain type of poly flow. So understanding what that should be is essential to using this technique successfully. We are not going to go into this technique but it is one of the ways it can be done.
Old School
Point to Point
Some prefer what is called a Point to Point method where you start out with one small detail and work your way out literally a few points at a time poly-by-poly creating and joining your mesh into its final form. This is a valid method. Generally it is not a good idea to start out small and work big. But this still is a good method to use in some cases. This concept of adding geometry from existing geometry uses tools such as ExtenderPlus and Multishift which are real time savers.
Spline Modeling
This is sort of a carry over from when there was no other way to get curved shapes in LightWave other than to create spline patched models. For somethingsthis is still a good technique to have and use.
Plotting out Polyfowby Hand
I have seen a method evolve which uses the concept of drawing poly flow onto existing geometry by hand sometimes completing all of the poly flow before even starting on defining the form. Many people including myself have seemed to simultaneously and separately develop this working method.
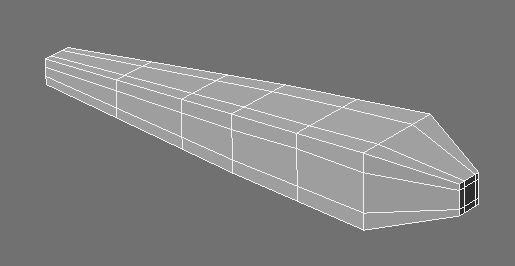
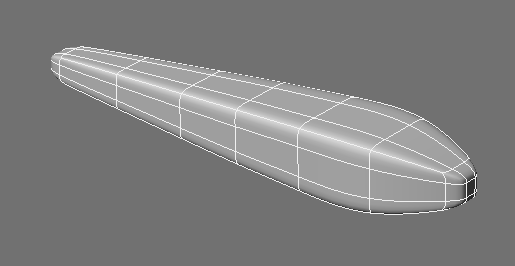
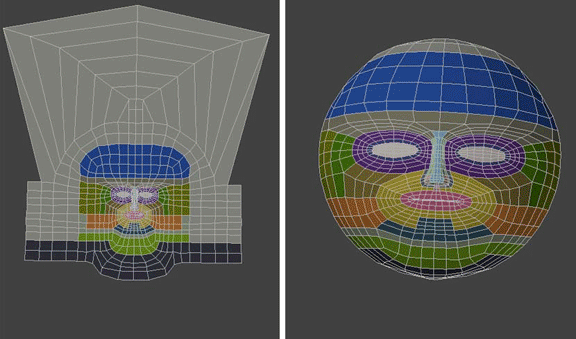
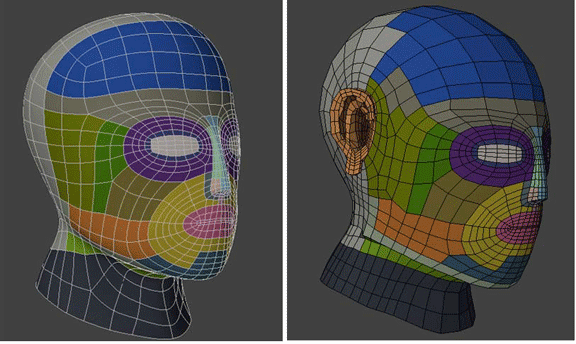
Here is an example of poly flow plotted out for a head on a flat polygon then shaped into the form of a head for editing.
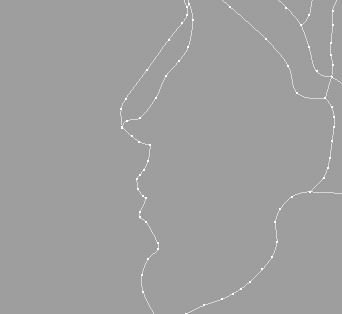
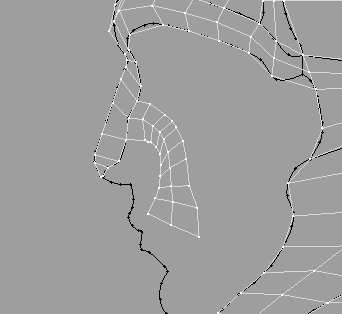
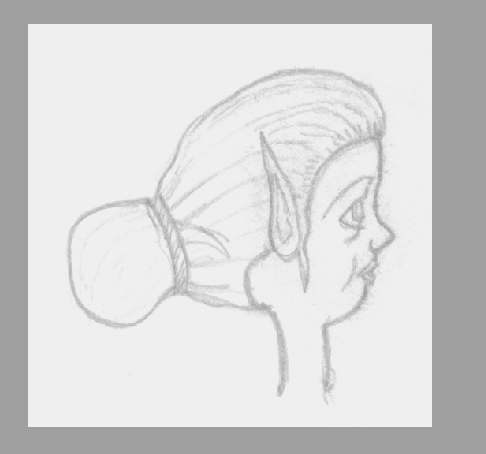
And another approach from the side view using a sketch as a reference.
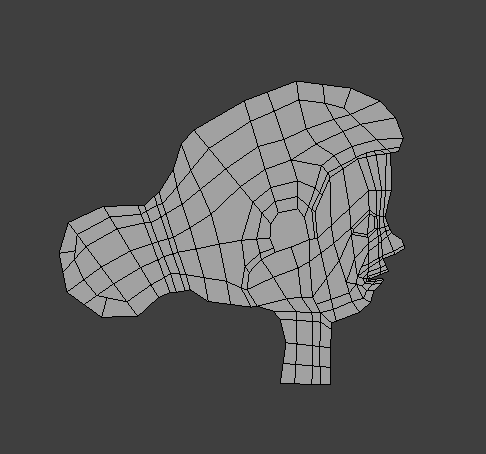
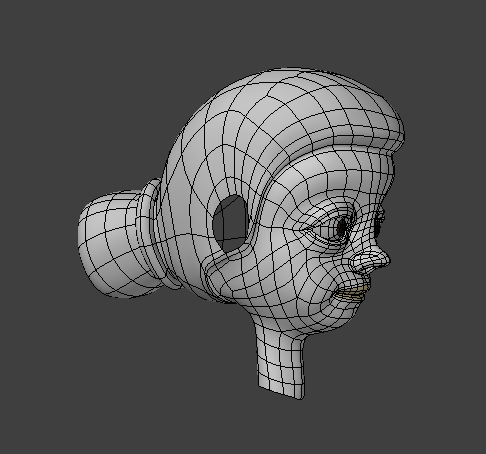
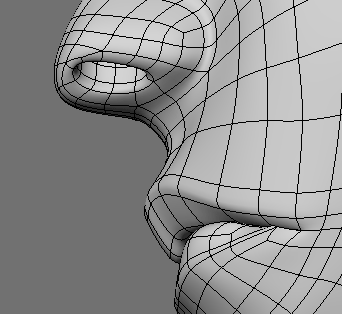
This method works from the concept of working with original shapes that are close to the form you are going to create.
Method Two: Joining Shapes
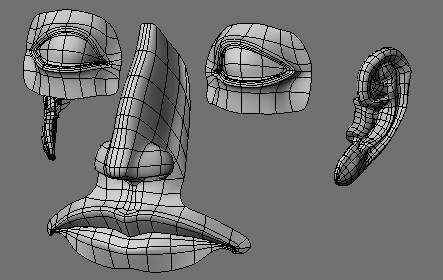
It is sometimes easier to create shapes separately and thenjointhem. This allows us to concentrate on the poly flow of a ball, forinstance,and then joining that with a cube, thus allowing precision work on each shape and concentrating on creating a smooth joint between the two. As an example, I almost always create an earina separate layer then join it to the head.
Summary
In both cases of altering existing shapes and joiningshapeswe have this basic 4-step process.
- Creating the poly flow of an overall shape.
- Creating a poly flow for the detail
- Creating the poly flow that joins the two and
- Tweaking the shape as necessary to smooth it out or further refine the form and detail. Or simplyadding-onfrom that new geometry.
Let's get started with some basic shapes to get the hang of it.
A Circle In A Square
The following technique is a hybrid of the two methods of combining form.
Additional tools you will need to be familiar with:
Drill (Shift R) Template inBackground layer.
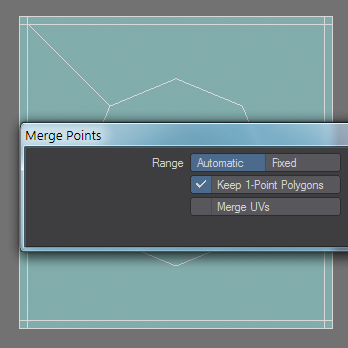
Merge Points (M) Leave at default settings.
Split Polygons (Ctrl L) Select Polygon to split, select two points that define the new edge. Run tool.
Again if you need more help with these tools consult the manual and as before, you may have other methods.
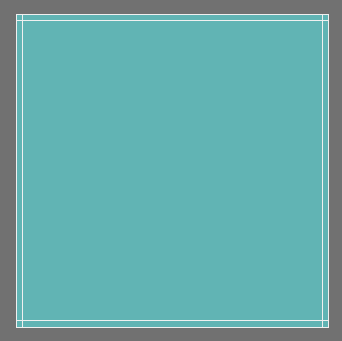
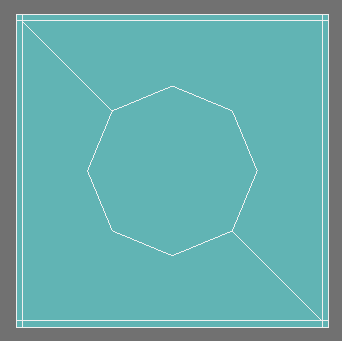
Start with a subpatch square.
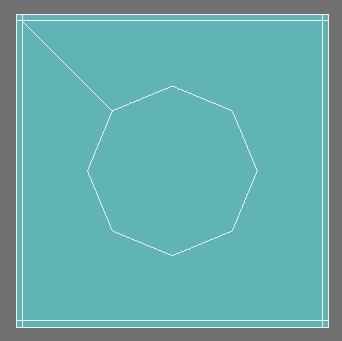
An 8-sided disc. (single poly)

Drill tool -stencil.
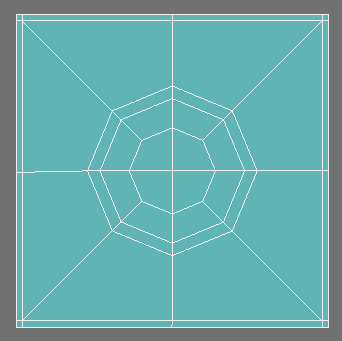
Merge Points (always do this after a Boolean operation).
Add edges will fail.
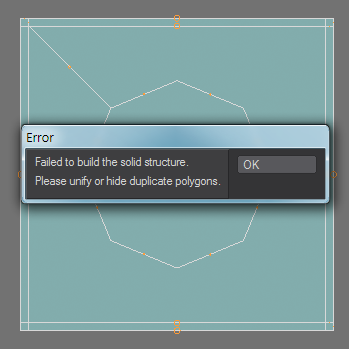
This poly needs to be split into two.
Using bevel and add edges make this geometry.
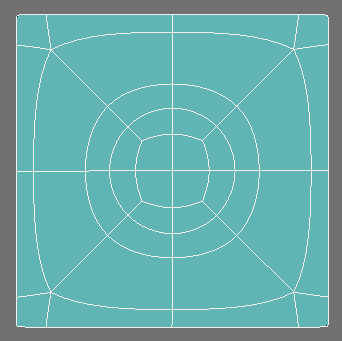
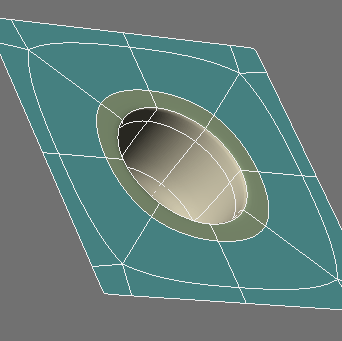
Subpatch.
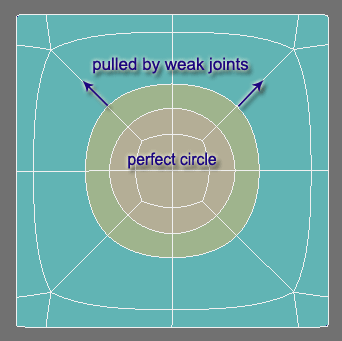
Notice that thecentercircle (tan color) is the only one that is perfect. The outer circle is being pulled at the corners by the edges connected to the weak joints.
I think of this as the Buffer Edge.
And in between the inner circle which is made up of the 3 poly points and the outer Buffer Edge is our Editable Edge - the perfect circle.
This is the edge I would then build from if I wanted to have a perfectly round hole or protruding geometry.
Use ExtenderPlus (E) tool to build on to the above circle square object. Hit E to create new geometry; use the Move tool (T) to move geometry; hit E again to make new geometry, move it and so on.
Other Shapes In The Square
Box In Square
The challenge here is simply keeping the box square. However using what we have learned this is easy.
Triangle In Square
If you are having trouble remembering the steps refer to the first example.
Also, notice that I am fanning out my lines keeping the geometry as even as possible. This is a good habit to get into especially when you get into shapes that have a curved surface.
Creating Multi-sided Polygons
We will now explore the creation of more complex original shapes forsubpatching.
Additional Tools Needed:
Pen Tool (Create Tab/Polygons/Pen) Text Tool (Shift W) DragNet Tool (;)
Create an S with a simple font.

Use it in a background layer as a reference and draw out a simple S with the Pen tool. Make sure and create the same number of points on each side of the S so you can join them later.
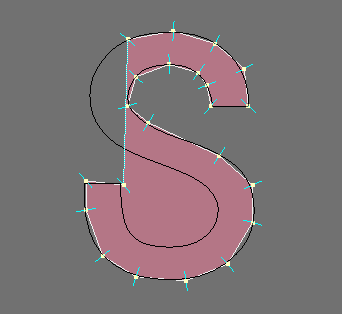

Use Catmull Clark subdivision surfaces - if you have LightWave 9 or higher - to make sure that your curves match the S. Use the TAB key to toggle it on and off to adjust the points where needed to make it conform.
Bevel tool.
Fix the ends of the letter so that they will be sharp and not curved. You can use the Add Edges tool and the Merge Polys tool. (Shift Z)
Fill in the quads in the center. (Add Edges tool)
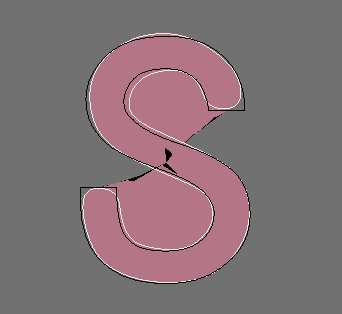
Subpatch and make final adjustments with the DragNet tool.
With the DragNet tool (and many other modify tools) you can right click to adjust a small blue circle that will give you the range of influence. This is a great feature and a perfect way to drag lines that are close together without having to do each one by hand.
Once you have the shape lined up with the reference, you are done.
More Complex Poly Flow
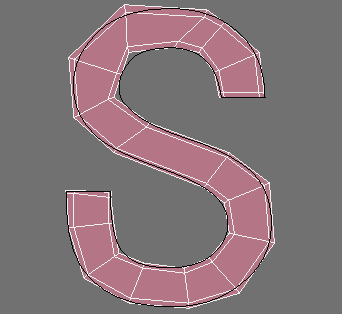
S In Square
For this exercise we will make another S shape, but leave it at this point:
Just make sure it is at a point that it is done in the sense that it complies to the curves we want. We won't be tweaking and editing it later.
This example takes a little bit more thought as now we have a more complex curve and many more polygons. But rather than give you a step-by-step explanation, simply look at the progress of this as a reference to do it yourself.
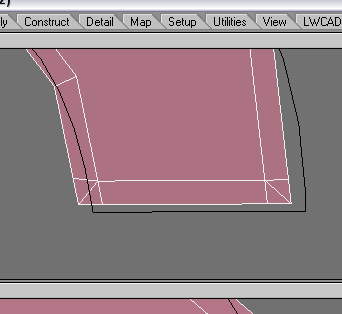
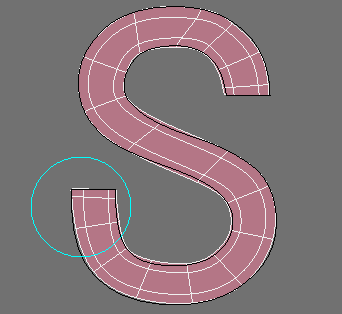
In Review:
- Use only quads.
- Keep the 5 Poly Points away from the Editable Edge
- Be sure to create a Buffer Edge around the S's Editable Edge so that it holds its shape.
To do this I use primarily the Add Edges tool and Merge Polys and I am using many of the techniques we have covered in previous sections.
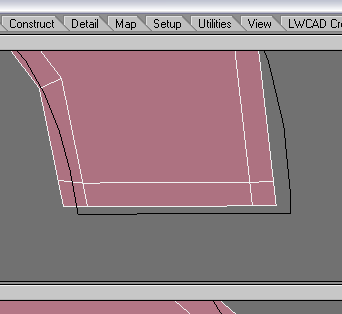
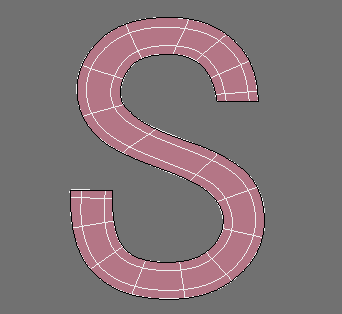
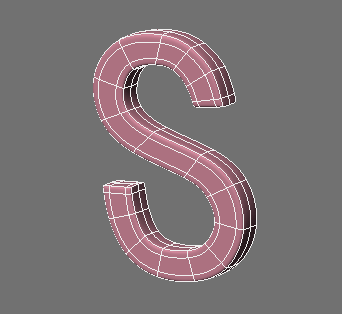
Nice clean lines and a smooth but crisp transition from one shape to the next. Very simple and easy to achieve in subpatch with these techniques.
Let's look at some solid shapes.
Combining Solids
Ball and Cube
OK, we are going do a simple joining of two shapes with a Boolean function, then subpatch them.
Additional tool needed: Boolean (Shift B)
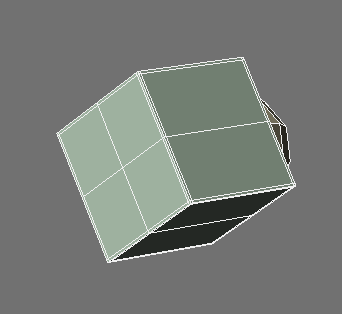
Start with a subpatch cube and half of an 8x8 subpatch ball in the background layer.
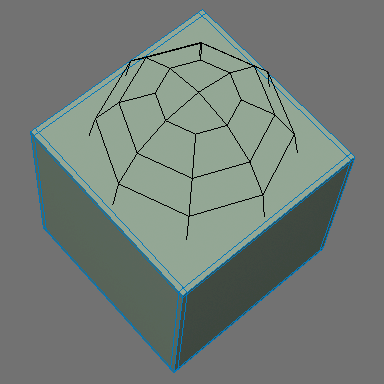
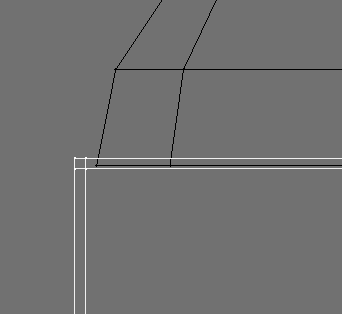
Line it up so the ball is just below the top of the cube.
 '
'
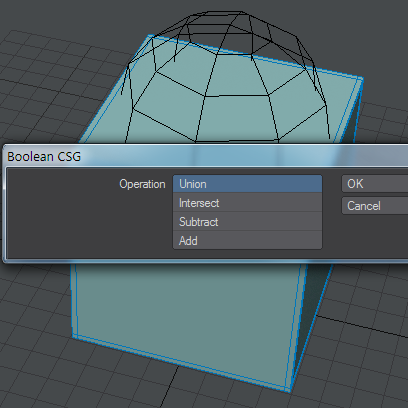
Run Boolean/Union.
Merge Points.
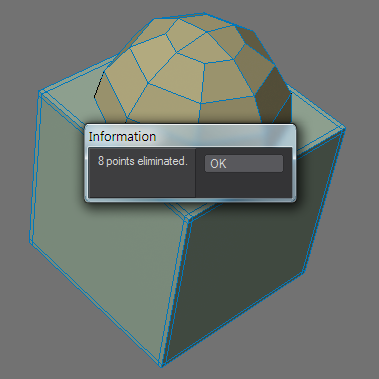
Split Poly.
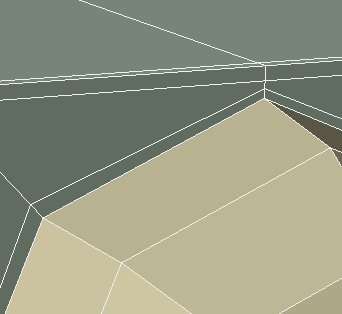
Run BandsawPro twice and it will stop at Ngons at the top of the cube.
Now we can add edges to the perfectly centered new lines.
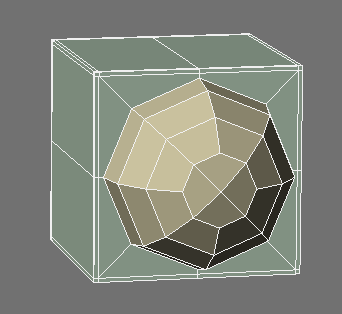
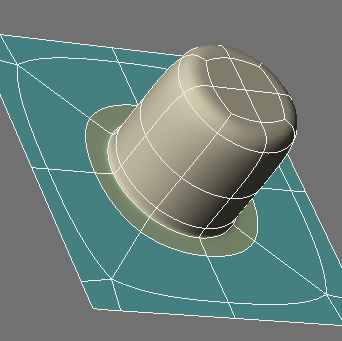
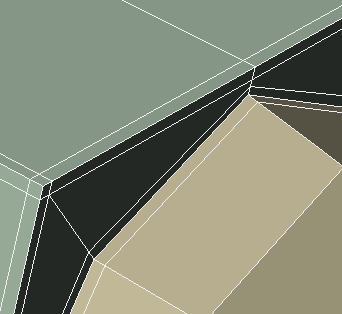
Add Edges tool to create Buffer Edge.
BandsawPro tool to create additional edge on ball.
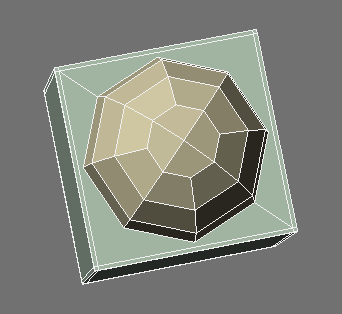
Subpatch.
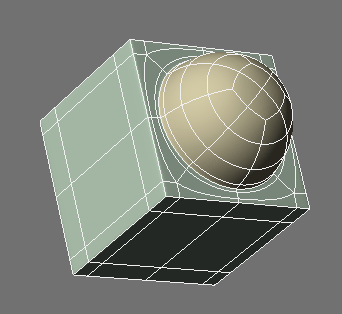
Looks nice.
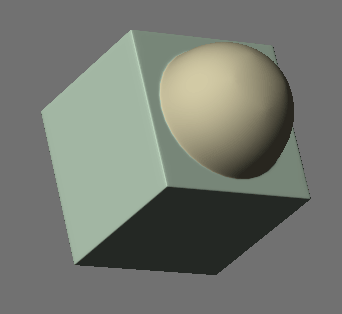
Now let's work on a curved surface.