Scene / Dope Editor - Item List
Introduction
The Item List allows the selection of various ‘items’ to work with. These include Objects, Lights, Cameras, Bones, Channels, Channel Groups, and Surfaces. Because of the similarities between Objects, Lights, Cameras, and Bones, they have been grouped together to form the Item List view. Surfaces have widely different characteristics and form the Surface List view. Each of these may contain Channels and Channel Groups and these channels and channel groups form the Channel List.
Items Tab
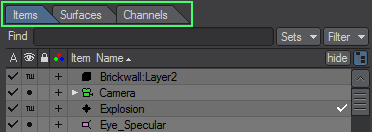
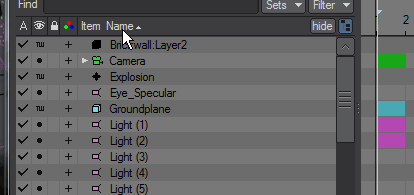
This view is used to view Objects, Lights, Cameras, Bones, and their associated channels, for modification within the Property and Dope Sheet views. It also allows manipulation of item hierarchies, names, existence, colors, lock states, selection status, channel selection, and more. The item view consists of an item list with each row representing a single item. Four columns extend throughout the list. These are Active, Visibility, Locked, and Name.
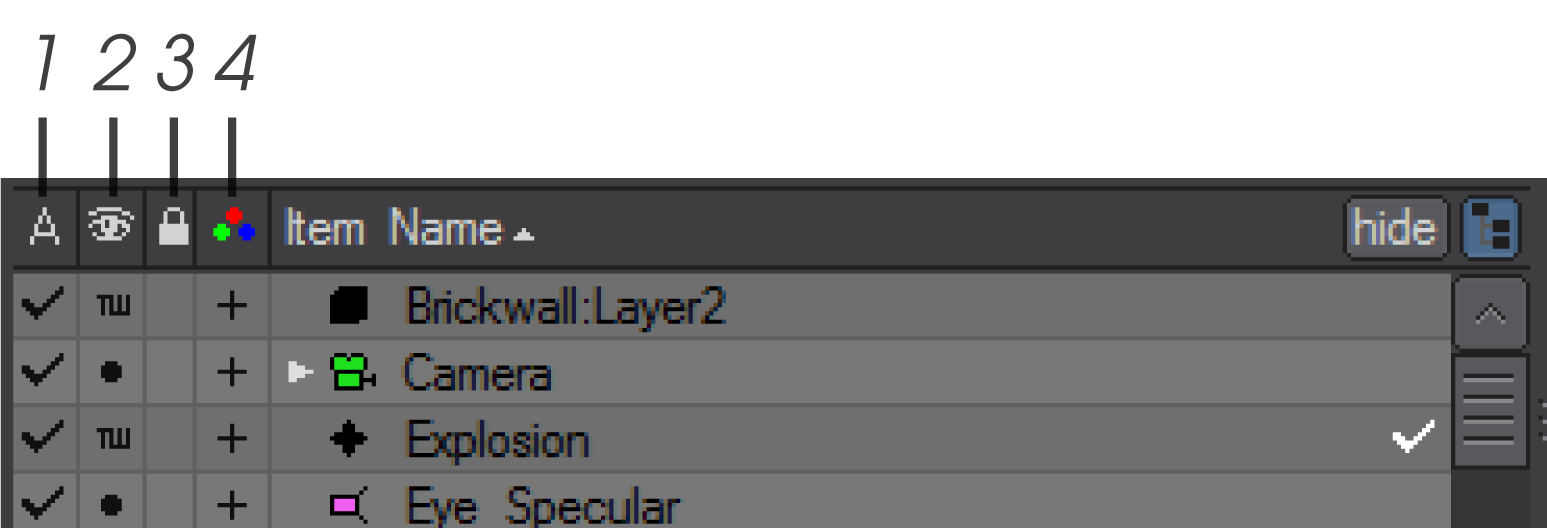
1 - Active, 2 - Visibility, 3 - Lock State, 4 - Channels
The Active column activates or deactivates items. Deactivating an object is like setting its Object Dissolve (Object Properties) to 100%, and deactivating a light is like setting its Light Intensity (Light Properties) to 0%. For a bone, this toggles its Bone Active state (Bone Properties).
This only applies to Lights, Cameras, Objects, and Bones, not Channels, or Channel Groups.
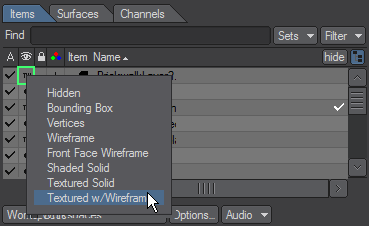
The Visibility (eye) column determines how the item will be displayed. For objects, clicking on this icon will display a pop-up menu where you can select how the object is displayed. This can range from making the object hidden all the way up to showing it as a textured shaded solid. For Objects, the choices are Hidden, Bounding Box, Vertices, Wireframe, Front Face Wireframe, Shaded Solid, Textured Solid and Textured w/Wireframe. For Lights, Cameras, and Bones there is only an on/off state for visibility.
You can override the Visibility setting to a certain extent by using the viewport’s Maximum Render Level pop-up menu located on the top left edge of a viewport. The Color and Visibility options affect only the appearance of items in the Layout view. They do not affect the final rendered image.
Clicking in the Lock State column will toggle the locking function on for that item. Locked items cannot be selected in the viewports. However, not all methods for manipulating items obey this flag.
The lock icon will also appear on the Current Item pop-up menu (on the main interface) next to the item’s name.
The Name column has more options than the other columns. It shows the item name, the type of item, item color. It also allows context menu options, hierarchy management, visibility (showing/hiding) of the hierarchy structure, channel visibility, shows and edits Layout item selection, and shows row selection.
Display/Hide Channels
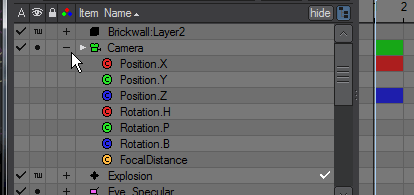
The plus/minus sign icon will display or hide the individual channels for the item. Most of the time, these are the position, rotation, and scale channels; however, other enveloped channels can also be included, like light intensity.
Expand/Collapse Groups
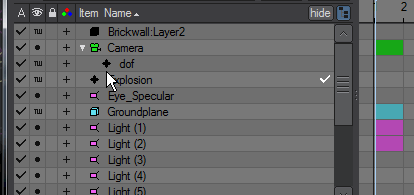
The scene list is a standard LightWave list window. You can expand and collapse groups as well as subordinate items (e.g., child objects) by clicking the arrow icon that appears to the left of the item name.
New Panel Hierarchies
New panels (like the Surface Editor, Render Properties, Scene Editor, Scene/Dope Editor and others) have collapsible hierarchies. Holding down the Ctrl key when clicking the expander arrow will open or close all children, holding down Shift will affect all siblings and holding down the Alt key when clicking a closed hierarchy will open that group and shut others. Holding Alt when there are several hierarchies open will maintain the one clicked on and close the others. All of the modifiers can be combined, they are not mutually exclusive.
Item Type and Color
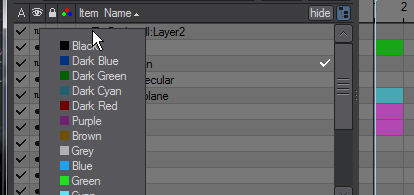
The item type icon indicates the type of item and the color used when the item appears in wireframe. You can change the color by clicking on the item and selecting a color from the pop-up menu. When working with complex scenes with overlapping objects, it can be beneficial to use different colors for certain items in the scene. Note also that objects are represented by cubes in this column, lights by light icons, cameras by camera icons and null objects by crosses.
Item Name
Simply displays the name of the item. Repeated clicks on this bar will change ordering and hierarchical levels.
Item Sorting
Clicking on each column heading can alter the order in which items in the item list are displayed. The columns are: Active, Visibility, Locked, and Name.
Clicking on the Active column will sort based on the active state of the item. Sorting toggles between increasing and decreasing active state. The Visibility and Locked columns sort the same way.
The Name column uses alphabetical sorting and applies to item names and channel names. However, lights and cameras are always separated from objects. Therefore, within each hierarchy level, all bones are presented before objects, which are presented before lights, which are presented before cameras. Channel hierarchies are always presented just below the item that owns them. Bone hierarchies are also always presented below the objects that own them and always after the object’s channel hierarchies.
There are really two hierarchies present here: one for items, and one for channels. They are managed separately and then incorporated into the final item list view. Item sorting may also support the ‘natural’ and ‘reverse natural’ order. This sorts an item’s ItemID.
The Active, Visibility, and Locked columns are always displayed on the left of the Name column so that they do not keep shifting position as the Scene Editor Panel resizes or the item view resizes.
The column heading of the Active column is an icon that looks like an ‘A’. If this column is used for sorting, an up or down arrow is displayed next to the column heading when increasing or decreasing sorting is used, respectively. When this column is not used for sorting, no such arrow appears.
The column heading of the Visibility column is an icon that looks like an eye. If this column is used for sorting, an up or down arrow is displayed next to the column heading when increasing or decreasing sorting is used, respectively. When this column is not used for sorting, no such arrow appears.
The column heading of the Locked column is an icon that looks like a pad lock. If this column is used for sorting, an up or down arrow is displayed next to the column heading when increasing or decreasing sorting is used, respectively. Not locked is lower than locked.
The column heading of the Name column is the word ‘Name’. If this column is used for sorting, an up or down arrow is displayed next to the column heading when increasing or decreasing sorting is used, respectively. When this column is not used for sorting, no such arrow appears. In addition, the use of ‘natural’ sorting is supported, and is indicated with an arrow that also has a sort indicator of ‘ID’.
Active Item Indicator
When an item is selected (active) in Layout a check mark will appear to the right of the item’s name.
Hide Unselected Toggle
This option allows you to hide any item that is not selected in the Scene Editor list. Clicking the button again will unhide all items. This can be very handy when working on complex scenes that contain many items.

This doesn’t affect the visibility in the viewport, it only affects the visibility in the item list.
Hierarchy Mode
At the top of the item list view is the Hierarchy Mode button that toggles the display of items hierarchically. When enabled, the items parenting information will be used to indent child items to the right of their parents. In addition, the ability exists to manipulate the parenting information via the mouse within the item list.


Ctrl-clicking on an arrow in the Scene Editor will unfold the complete hierarchy, then Alt-clicking on an item name will highlight it and its children recursively.
There are some rules that govern the hierarchical relationships:
- Object Item - Can be child of Object Item, Light Item, Camera Item, (none)
- Bone Item - Can be child of Bone Item, Object Item.
- Light Item - Can be child of Object Item, Light Item, Camera Item, (none)
- Camera Item - Can be child of Object Item, Light Item, Camera Item, (none)
- Channel - Can be child of Object Item, Bone Item, Light Item, Camera Item, Channel Group
- Channel Group - Can be child of Object Item, Bone Item, Light Item, Camera Item, Channel Group
Re-Parenting
Once some items are highlighted, use the mouse to drag and drop them onto an existing object, bone, light, or camera item to change the parent of the highlighted items. The mouse ‘drop’ point can also be below the desired parent item at the same indentation level of that parent. Visual markers appear in both cases. The visual aids are brightest when all the highlighted items are appropriate for the reparent operation and darkest when none are appropriate. As an example, trying to reparent a bone from it’s owner object to another object is an inappropriate reparent operation. Reparenting can only be performed when the item view is in ‘hierarchy display mode’.
The above animation shows parenting the highlighted items to the PiranhaAlien body and then unparenting them.
Re-ordering
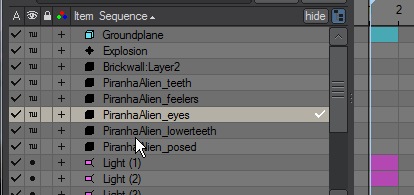
It is possible to change the internal storage sequence of lights, cameras, objects, and bones when a ‘Sequence’ sort modes is active. The sort modes are changed by mouse clicking on the item view’s item column. The mouse is used to drag and drop a highlighted selection between existing items. It is important to note that the sequence is implicitly defined as: all objects (for each object, all bones in that object) followed by all lights followed by all cameras. As such, it is not possible to reposition an object between two lights, for example. The horizontal mouse position is important in determining where to actually reorder items. A visual aid shows the desired insertion point, even if that insertion point is not valid for the highlighted items.

The above image shows inserting the highlighted items between ‘Null (1)’ and ‘Null (4)’
Of important note is that the instance part of the name (the “(2)” in “Null (2)” for example) can change when saving and reloading the scene. This is because the instance value assignment is based on the item sequence at during certain item updates internal to Layout. Instance identification is not part of a scene reference to an item. To best ensure item name display consistency, each item name should be unique.
Adjusting Hierarchy
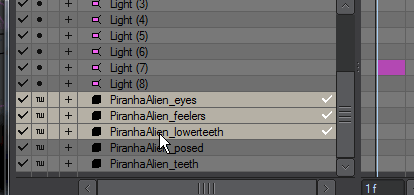
You can drag item names up and down to change the order and hierarchy (i.e., parent/child relationships). As you drag, a light green insert line will appear. You insert the item by releasing your mouse button at the line’s position. The line will cycle between different lengths as you drag; the different lengths indicate different levels of hierarchy. The relative length indicates the level the line becomes when you release the mouse button.
Holding down the LMB until the bar turns green shows that you are ready to adjust hierarchy. Here we changed the hierarchy of PiranhaAlien elements, finally unparenting all but the lower teeth and eyes.
General Rules
- Channels cannot be rearranged in either their hierarchy or top-down sequence.
- When moving an item, it must not be an ancestor to any new parent.
- An item cannot be moved to be a child of an item that it can have as a parent.
- If multiple items are selected for rearrangement, the selected parents of any selected children will be used for rearrangement. The selected children will not be rearranged directly, but will follow their parent automatically.
- Only the parenting/owner structure may be modified when any sort order display is used.
- Sorting applies to each level of hierarchy individually.
- Any child of a filtered item will also be filtered.
Item List Right Click Menu
Context menu options are available by RMB-clicking in the item view rows. The row context may change depending on what type of item is in that row. When combining the contexts of multiple highlighted rows, only the options available to all highlighted items will be available.


Selection:
- Select in viewports - applies current selection to Layout item selection.
- Select all - This selects all displayed items (after filtering).
- Select none - This unselects all displayed items.
- Invert selection - This will make all (displayed) items switch their selection state.
- Select channels - selects the displayed channels of selected items.
- Unselect channels - unselects all channels belonging to currently selected items.
- Select child items - selects the displayed child of the currently selected items.
- Select child items (recursive) - select all displayed children of currently selected items as well as their descendants.
- Unselect child items - unselects all displayed children of currently selected items.
- Unselect child items (recursive) - unselects all displayed children of currently selected items. This differs from a non-recursive form by affecting the expand state of deeper child levels as well as the selected items.
- Select similar - selects all displayed items that have a similar item type and name as the item right-clicked on.
- Highlight view port selection - all items selected in the viewport will become selected in the Scene Editor.
Hierarchy:
- Expand channels - This will show all channels for the selected items.
- Expand channels (recursive) - this will progressively un-nest channel hierarchies.
- Collapse channels - This will hide all channels for the selected items.
- Expand child items - This will make the children for all selected items visible.
- Expand child items (recursive) - This will make all descendants of the selected item as well as their descendants visible.
- Collapse child items - This will hide the children of all selected items.
- Collapse child items (recursive) - This will collapse all descendants of the selected items. This differs from a non-recursive form by affecting the expand state of deeper child levels as well as the selected items.
Manipulate:
- Motion property panel - opens the Motion Options Panel for the selected item.
- Item property panel - opens the Properties Panel for the selected item.
- Edit Channels - opens the Graph Editor Panel with all the channels of the selected items ready to be edited.
- Rename - Triggers a dialogue box to rename a single item. Renaming of multiple items at once is not supported.
- Rename Layer - Rather than renaming the object’s root name you can choose just to rename individual layers. Renaming of multiple layers at once is not supported.
Add:
- Add null object :- Activates the Null Object Name panel and adds a new null.
- Add object :- Activates the Load Object panel.
- Add object layer :- Activates the Load Object Layer panel.
- Add (root|child) bone : adds a single bone to either an object item or as a child to an existing bone item. The context determines which.
- Add camera :- allows adding a single camera to the scene.
- Add area light :- Opens the Light Name panel and adds an ‘area’ type light to the scene.
- Add distant light :- Opens the Light Name panel and adds a ‘distant’ type light to the scene.
- Add dome light :- Opens the Light Name panel and adds a ‘dome’ type light to the scene.
- Add linear light :- Opens the Light Name panel and adds a ‘linear’ type light to the scene.
- Add photometric light :- Opens the Light Name panel and adds a ‘photometric’ type light to the scene.
- Add point light :- Opens the Light Name panel and adds a ‘point’ type light to the scene.
- Add spherical light :- Opens the Light Name panel and adds a ‘spherical’ type light to the scene.
- Add spotlight :- Activates the Light Name panel and adds a ‘spotlight’ type light to the scene.
- Clone :- allows cloning of any item or selection of items.
- Clone hierarchy - clone a parent item with its children.
Clear:
- Remove/Clear :- Removes the selected items from the scene.
- Clear all objects :- Removes all objects from the scene.
- Clear all lights :- Removes all lights from the scene.
- Clear all cameras :- Removes all cameras from the scene.
- Clear all bones :- Removes all bones from the scene.
Item Searching
The Find tool at the top of the item view list is an option to perform item name and channel name searches. Enter a simple search string (the case does not matter), press the Enter or Return key, and the search begins.
If a match is found, the item cursor is placed there and any list scrolling or item expanding necessary to view the matched item will be performed as well. It may also be useful to have the perspective camera (or a special camera) change to view that item.
That may be accomplished indirectly by selecting the found item while the object centring feature is enabled in layout, which puts the selected item into the perspective camera’s view. The search iterates through each list item (regardless of what type it is) starting with the current item list cursor location, progressing to the list end, wrapping around to the list beginning, and winding up at the iteration starting point. The iteration is aborted once a string match is found. Filtered-out items do not get searched. If the search string used has more than one instance, all instances are selected.
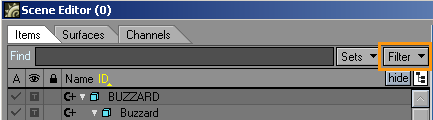
Filter
At the top of item view is a Filter option drop down button. These options allow the ‘weeding out’ of unwanted items and channels.
The drop down menu has the following options:
- Options… - This brings up a separate, but modeless, Options Panel used for selecting the filtering criteria for both items and channels. With the Options Panel previously used filtering criteria can be recalled easily as well. Making changes to the criteria can be viewed in the item list as the criteria changes.
- Enable/Disable Item Filter (Boolean) - Toggle to affect if item filtering is used on Object, Light, Camera, and Bone items.
- Enable/Disable Channel Filter (Boolean) - Toggle to affect if channel filtering is used on Channel items.
The Options Panel has a section for item criteria and a section for channel criteria. Checkboxes that enable/disable the filtering are duplicated here so that the dropdown toggles may be used in addition to these.
Filter Option Panel: Items Tab

For Items criteria, the following controls exist:
- Enable Item Filtering (Boolean) - Toggle to affect if item filtering is used on Object, Light, Camera, and Bone items.
- Stored filters dropdown - choose any stored filter. Once selected, it is loaded. You only need save filter settings you wish to use over and over again.
- Remove - this will remove the filter that is currently selected, if one exists.
- Save - this will overwrite the current filter choice with the current settings. If no filter is currently selected, this button acts as a ‘ Save As… ’ button.
- Save As… - click to save the current filter criteria to a filter name. The filter name is requested after clicking this button.
- Contains - This determines how to use the item name string. Choices include: contains, equals, starts with, ends with, does not contain, does not equal, does not start with, does not end with.

- Item name string field - Any string can be entered to be used to match against all Layout items (not just those currently in the item list).
- Ignore Case - enable and disable case sensitive compares.
- Include Object Items - enable to allow object items
- Include Bones Items - enable to allow bone items
- Include Lights Items - enable to allow light items
- Include Camera Items - enable to allow camera items
- Include Locked Items - enable to allow locked items
- Include Unlocked Items - enable to allow unlocked items
Filter Option Panel: Channels Tab

For channel criteria, the following controls exist:
- Enable Channel Filtering (Boolean) - Toggle to affect if channel filtering is used on Channel items.
- Stored filters dropdown - choose any stored filter. Once selected, it is loaded. You only need Save Filter settings you wish to use over and over again.
- Remove - this will remove the filter that is currently selected, if one exists.
- Save - this will overwrite the current filter choice with the current settings. If no filter is currently selected, this button acts as a ‘Save As…’ button.
- Save As… - click to save the current filter criteria to a filter name. The filter name is requested after clicking this button.
- Channel name string field - Any string can be entered to be used to match against all channels (allowed)
- Contains - This determines how to use the channel name string. Choices include: contains, equals, starts with, ends with, does not contain, does not equal, does not start with, and does not end with.
- Ignore case - This is used to enable case insensitive compares.
- Include Position Channels - enable to allow position channels, which include ‘Position.X’, ‘Position.Y’, and ‘Position.Z’
- Include Rotation Channels - enable to allow orientation channels, which include ‘Rotation.H’, ‘Rotation.P’, ‘Rotation.B’.
- Include Scale Channels - enable to allow scaling channels, which include ‘Scale.X’, ‘Scale.Y’, ‘Scale.Z’.
- Include Other Channels - enable to include any channels that are not the standard position, rotation, or scaling channels
Scene Editor Selection Sets
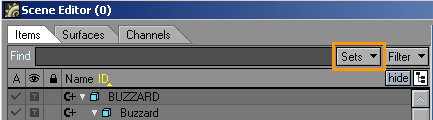
The currently selected items, which may include objects, lights, cameras, bones, channels, and groups of channels, can be remembered for later use via a Selection Set. This simply allows the current selection to be saved and later recalled. Selecting Save Selection will bring up the Specify Selection Set Name Panel.
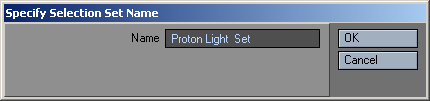
Once a name has been entered, click OK and the selection set will be added to the Sets drop down menu. Select the set name from the list when you would like to recall that selection. Select Remove Set to delete a selection set from the list.
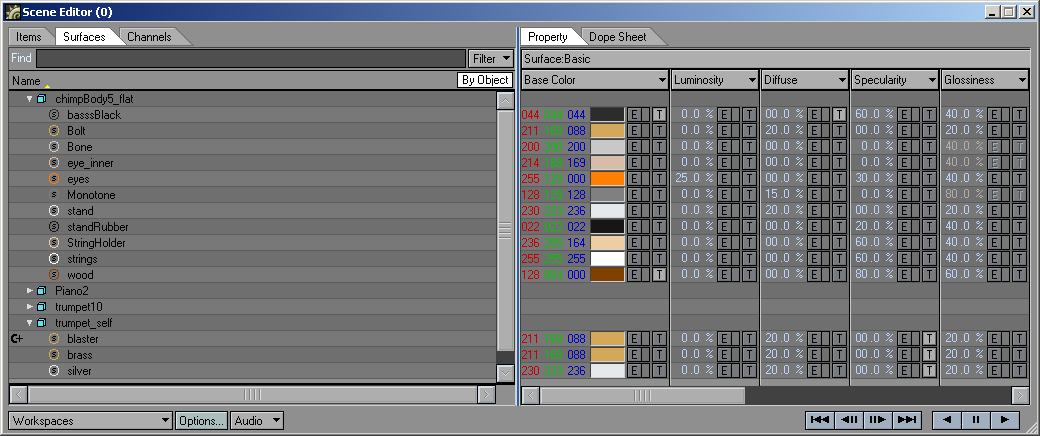
Surface List View: Surfaces Tab
This view displays the names and ownership of surfaces currently loaded in Layout. Surfaces always belong to objects. Some of the same behaviours that apply to the Item List View will also apply here.
Surface List Display
Surfaces may be displayed ‘By object’ or ‘By surface’. Display By Object groups all surfaces belonging to a single object as children of that object. Display By Surface groups all objects that contain a surface with the exact same name as children of the surface.


Either way, highlighting a surface will also select that surface in the Surface Editor window. The method of display is indicated within the column heading of the list as either ‘(By Object)’ or ‘(By Surface)’.
Surface items may also contain channels and groups of channels. For such surfaces, a channel expand icon will appear in that row and will operate as it does in the Item List View.
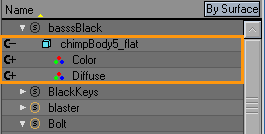
There is only one column in this list, the Name column. This column is sorted alphabetically by name, but can be reverse sorted as well by clicking on the column heading. A horizontal scroll bar located at the list bottom accommodates rows that are too wide to be fully seen.
Surface List Right Click Menu
RMB-click on a surface row presents context menu options.


The options are the same as for:
Selection
- Select all - This selects all displayed surfaces (after filtering).
- Select none - This unselects all displayed surfaces.
- Invert selection - This will make all (displayed) surfaces switch their selection state.
- Select channels - selects the displayed channels of selected items.
- Unselect channels - unselects all channels belonging to currently selected items.
- Select children - selects all displayed children of currently selected surface groups.
- Unselect children - unselects all displayed children of currently selected surface groups.
- Select similar - selects all displayed surfaces that have a similar name as the item right-clicked on.
Hierarchy
- Expand channels - This will show all channels for the selected surfaces.
- Collapse channels - This will hide all channels for the selected surfaces.
- Expand items - This will make the children for all selected surfaces visible.
- Collapse items - This will hide the children of all selected surfaces.
Manipulation
- Surface property panel - opens the Surface Editor.
- Edit in graph editor - opens the Graph Editor Panel with all the channels of the selected surfaces ready to be edited.
Filter Option Panel: Surfaces Tab
Surfaces and channels can be filtered much like they can for the Item List View. It is a way to prevent certain surface items from appearing in the list. The surface filtering is available via a drop down menu button at the top of the list:
- Options… - opens a panel used to select surface item and surface channel filtering options. With the Options Panel previously used, filtering criteria can be recalled easily as well. Making changes to the criteria can be viewed in the item list as the criteria changes.
- Enable/Disable Surfaces Filter - Toggles filtering of surface items
- Enable/Disable Channels Filter - Toggles filtering of surface channels
The Options Panel has a section for surface criteria and a section for channel criteria. Checkboxes that enable/disable the filtering are duplicated here so that the dropdown toggles may be used in addition to these.
Surface Filter Options Panel: Surfaces Tab
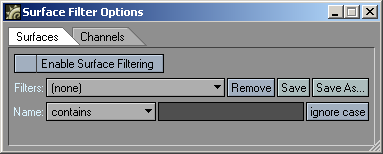
For Surface criteria, the following controls exist:
- Enable Surfaces Filtering - Toggles filtering of surface items.
- Stored filters dropdown - choose any stored filter. Once selected, it is loaded.
- Save - this will overwrite the current filter choice with the current settings. If no filter is currently selected, this button acts as a ‘Save As…’ button.
- Save As - click to save the current filter criteria to a filter name. The filter name is requested after clicking this button.
- Remove current filter button - click to remove the currently selected filter button. A confirmation requester is presented first.
- Contains - This determines how to use the string. Choices include: contains, equals, starts with, ends with, does not contain, does not equal, does not start with, does not end with.
- Name String Field - Any string can be entered to be used to match against all Layout surfaces (not just those currently in the item list).
- Ignore Case - This is used to enable case insensitive compares.
Surface Filter Options Panel: Channels Tab
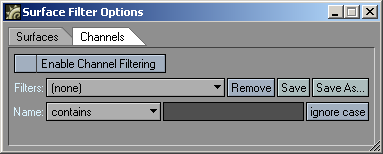
For channel criteria, the following controls exist:
- Enable Channels Filter - Toggles filtering of surface channels.
- Stored filters dropdown - choose any stored filter. Once selected, it is loaded.
- Save - this will overwrite the current filter choice with the current settings. If no filter is currently selected, this button acts as a ‘Save As…’ button.
- Save As - click to save the current filter criteria to a filter name. The filter name is requested after clicking this button.
- Remove current filter button - click to remove the currently selected filter button. A confirmation requester is presented first.
- Channel name string field - Any string can be entered to be used to match against all channels (allowed).
- Contains - This determines how to use the channel name string. Choices include: contains, equals, starts with, ends with, does not contain, does not equal, does not start with, does not end with.
- Ignore Case - This is used to enable case insensitive compares.
Channels List View: Channels Tab
This view displays the names and ownership of channels used through the entire scene. This can include channels that are not normally visible by other means.

The operation of this list is similar to that of the other list views. See Item List and Surface List View documentation above for more info.