FiberFX
FiberFX is LightWave’s native hair and fur system. Fibers using Solid Volume mode can be textured with nodes, and FiberFX contributes to alpha channels for all render modes.
FiberFX Window

The Information line will tell you how many fibers you have in your scene.
Activate - To add FiberFX to an object, select it in the list on the left and click the Activate button. Alternatively, you can double-click the entry in the list.
Deactivate - To remove FiberFX from an object click this button.
Edit - This brings up a menu with four options:
- Copy - Copies all FiberFX settings from an object.
- Paste - Pastes all copied FiberFX settings.
- Load - Loads saved settings.
- Save - Saves settings.
In previous versions of FiberFX, there was an Edit Nodes button. In 2018, all surfacing is done in the Surface Editor with the Hair material and the FiberInfo node.
The listview to the left of the panel shows FiberFX-bearing surfaces to make it easier to see at a glance which surfaces have hair and which do not. The checkmarks indicate which surfaces have hair and the red checkmark shows that while FiberFX has been activated for an object, the surface has not been chosen. If an object has a single surface you won't see the red checkmark, it will automatically be white.
If you right click on an object you will be presented with a dropdown menu like so:
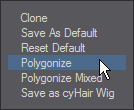
The options in this menu are as follows:
- Clone - Creates a new instance of the object on which the parameters can be changed. As an example, you make a short white undercoat and the another layer of sparse long guard hairs over them.
- Save as Default - Saves the current style as the default for FiberFX from now on.
- Reset Default - Puts the default back to the medium-length brown hair style.
- Polygonize - Creates a polygon mesh of your hair style. Choosing this option brings up the following interface:

Polygonize has the following parameters:
- Sides - 1-sided is a single poly chain; 2-sided is flat with polys on each side; >2 is an extrusion of n sides.
- Flatten - flattens the tube.
- Triangles - make triangles instead of quads.
- Billboard - makes crossed polygons suitable for mapping.
- Polygonize Mixed - Will use the guides on a surface object to make new mixed mesh object with guides attached to the mesh.
Polygonized Mixed generates two-point polygons. There are two ways to keep these two point polygons from showing up in the render. The artist can disable Render Lines in Render Properties > Render to prevent all two-point polygons in the scene from rendering. Alternatively, the artist can set the Particle/Line Thickness of the object containing two-point polygons to 0.0. Particle/Line Thickness is found under the Edges Tab of Object Properties.
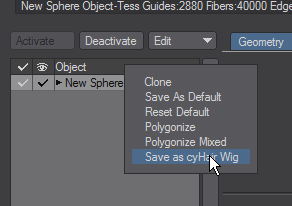
- Save as CyWig - Saves your FiberFX as a CyHair wig.
CyHair Support
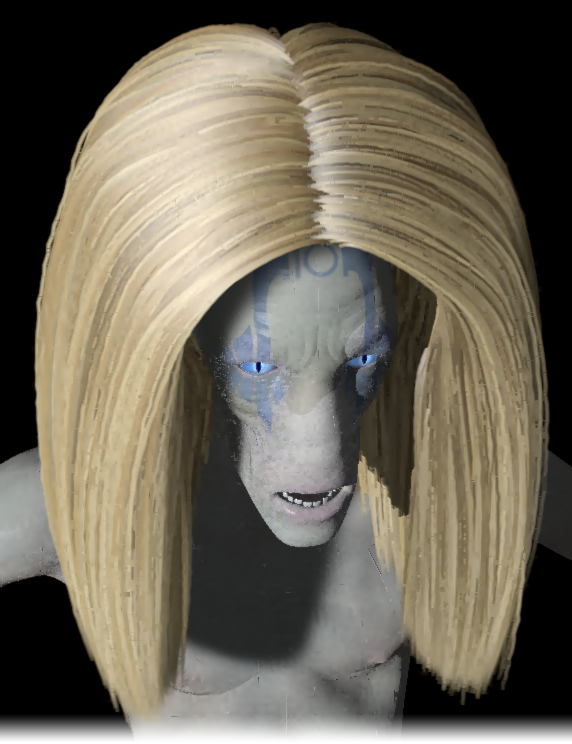
Alien Iggy Pop | FiberFX supports the cyHair hair model data format from Cem Yuksel. This means you can style hair in a variety of packages and import your hair into LightWave for rendering, or inversely export from FiberFX for use in other packages. Load a cyHair wig in Modeler as any other file. Keep it as a separate object or put it on a different layer to the rest of your geometry. When sent to Layout, apply FiberFX to it. If you have styled hair in FiberFX you wish to export as cyHair, right click on the hair in the FiberFX window and choose Save as cyHair Wig.
|
If you wish to clone objects with their corresponding FiberFX primitives make sure you use Clone Hierarchy.
There are four tabs in the FiberFX window, as follows: