Airbrush
The Airbrush tool allows you to “paint” directly on your Vertex Maps. How it works depends on which kind of map you’re working with.
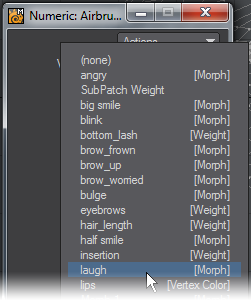
Choose the desired map from the Vertex Map drop down in the Numeric panel. All the maps available to the Airbrush will be listed here by name, with the type of map in brackets on the right.Whichever map you pick will be shown in any viewports capable of showing it, assuming it’s the same type of map chosen in the VMap Bar. (i.e. Weight Maps will be shown in viewports using the Weight Map Render Mode, Color Maps in Smooth Shade, Texture, and Textured Wire, etc.)
If you pick a different Weight or Color Map from the VMap Bar at the bottom of the screen while the Airbrush is open, that map will replace the one that’s showing, both in the viewports and the Airbrush Numeric panel, if it’s the same type.
The “same type” caveat is important. If you have a map of a different type showing in the Numeric panel and the VMap Bar, for instance, a Weight Map in the VMap Bar, and a Morph Map in the Numeric panel, any airbrush strokes will be applied to the map in the panel, in this case the Morph Map, and not to the one in the VMap Bar, even though that’s the one you will be looking at. So, if the airbrush seems to have no effect, check to make sure you are working on the right map.
Radius
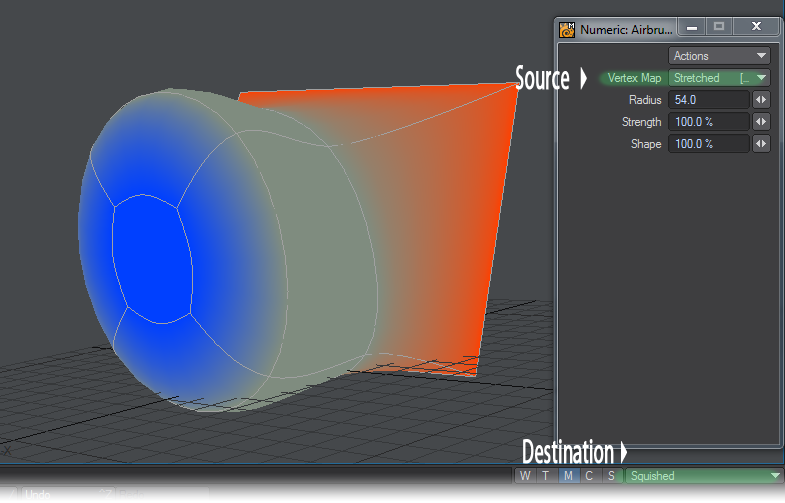
The Radius determines the relative Falloff for the tool. You can adjust it interactively with the RMB, as you can with the Falloff values of most tools. In order to change anything, the radius must touch a point on your map; bear that in mind as you adjust it.

Strength
The Strength determines the intensity of the effect. Small values are recommended; start with 10% and increase it if you need to.
This tool behaves like a real airbrush in some ways. If you move quickly, you’ll get less coverage than you would with a slow stroke, and going back over areas will increase coverage. However, unlike its real-world namesake, the tool must be moving in order to do anything. Don’t expect to get full coverage by holding it still over a point.
Also, remember that you are painting vertices, not polys. Running the Airbrush up and down the polys will have no effect unless the Airbrush radius touches a point. For best results, ignore the polys, and paint the points.
You can select points or polys to limit the effect to the selected vertices only; however, because of the nature of Vertex Maps, you’ll find that the effect is blended with adjacent points or polys. Each point can only have one value; so as you can imagine, the more points you have, the more detailed your painting can be.
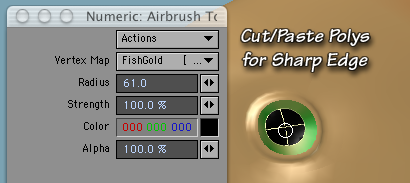
If you want a sharp edge between two polys, cut them, and paste them back in. Then either select the polys you wish to work with, or hide the others. In either case, since they are no longer sharing a point, there will be no blending. When you are finished, merge the points. They will keep their sharp edges.
Weight Value
To use the Airbrush with a Weight Map, it’s best to change one of the viewports to Weight Shade. (You don’t have to, unless you want to see what you’re doing; the tool will change the Weight value anyway.) Pick the Weight Map you want to work with from the list; it will automatically be shown in the viewports.
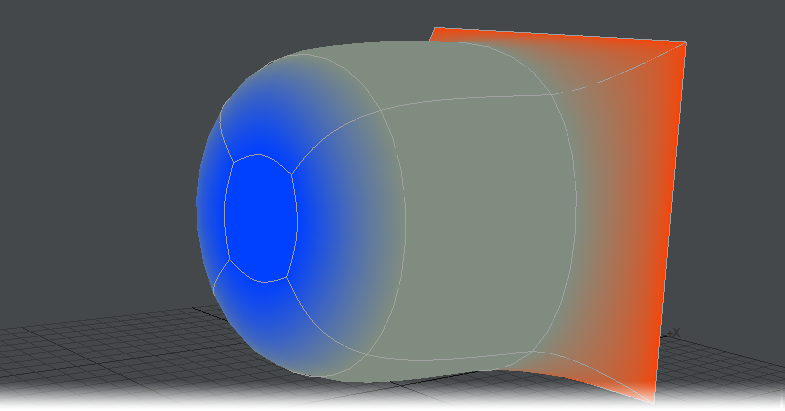
Weight Shade display mode shows red on the right for positive weight maps and blue for negative weightmaps.
Type the value you want to apply in the Weight Value field. This value will replace the current one. In other words, if you are painting with 10% weight, you don’t have to worry about any of the vertices exceeding that value. You can also paint with 0%, to eliminate positive weight without worrying about negative weight.
If you hold down the Shift key, you’ll paint with the inverse value. In other words, if you’re painting with 30%, holding down the Shift key will enable you to paint with -30%. If you’re using -50%, it will give you +50%.
If you hold down the Ctrl key, the weight will go towards zero, whether it’s currently negative or positive. (In other words, it will go up if it’s negative, or down if it’s positive.)
You can push the values far beyond 100% and -100%, if you are so inclined.
Airbrush and Morph Maps
To use the Airbrush with a Morph Map, select the morph you want to paint on from the VMap Bar at the bottom of the screen. Select the morph you want to paint from in the Vertex Map menu in the Airbrush Numeric panel.
Shape
Choose the percentage of the Shape that you want to apply from the Shape text field. You can change the current morph half way to another one, or change parts all the way, or just take 10% off the top. It’s very flexible.
You can also paint a morph onto the Base; but if you do, it will change all the relative morphs in your object. You are given a warning if you attempt it.
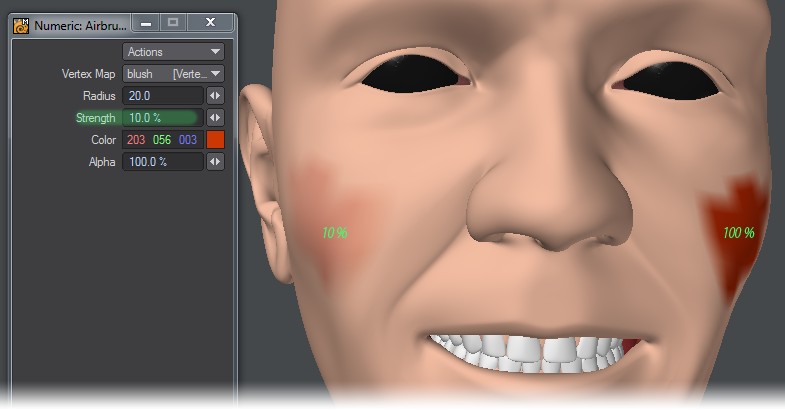
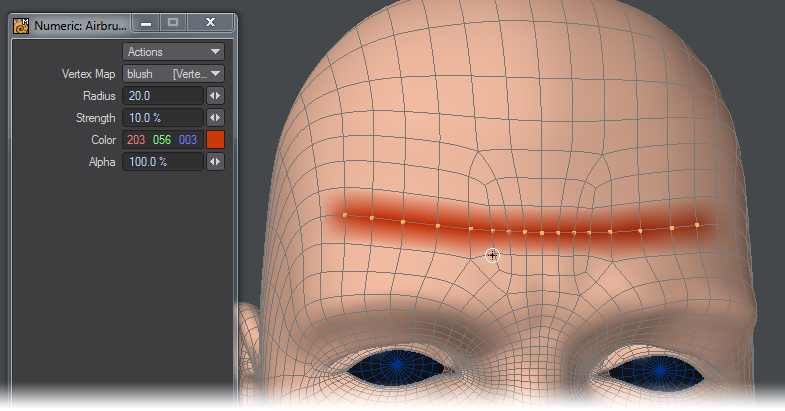
Airbrush and Color Maps
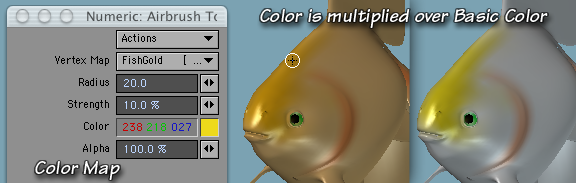
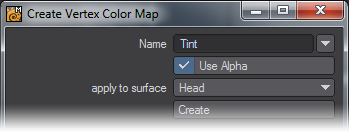
To use the Airbrush tool with a Color Map, choose the map you want to color from the drop down list. Make sure that it’s being used on a surface, and is visible, the Create Vertex Color Map requester asks which surface to apply it to. (Check the Advanced Tab of the Surface Editor for use.) The Airbrush will paint on maps that are not showing, so be careful. If you don’t see any effect, don’t assume that your settings are too weak.

Choose a color from the normal Color Requester. Be aware, though, that LightWave will apply the color over the base color of your object using the Multiply Blending Mode. If you are familiar with Photoshop, it’s very similar. Adding color will always make the base color darker, never lighter. (If that’s a problem, simply start with a white base color, of course.) The colors you paint on the map itself will replace whatever colors are there, so it’s easy to lighten them.
Alpha
If you are using an Alpha Channel in your map, (enabled when you created it,) then you can also adjust the Alpha with the Airbrush. Do this by either changing the number in the Alpha text field, or by holding down the Ctrl key as you paint. You can increase the Alpha by using the Alpha text field; but it will also add color. (Which is just as well, really, since uncolored points with 100% Alpha are black.)