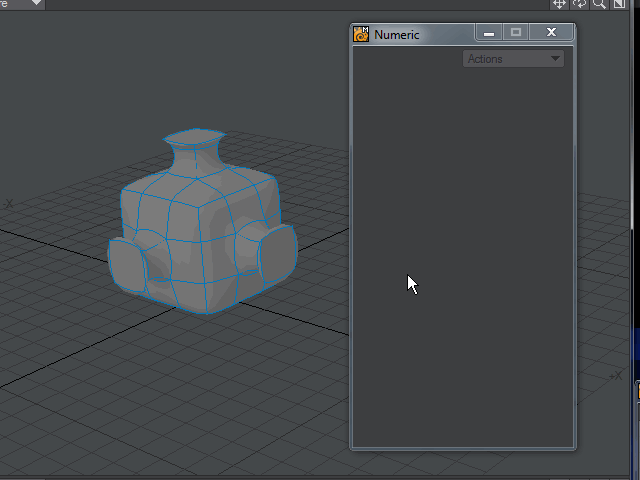
Transform - More
This group contain tools that are no longer so required, but could still prove useful in the right circumstances.
Set Scale
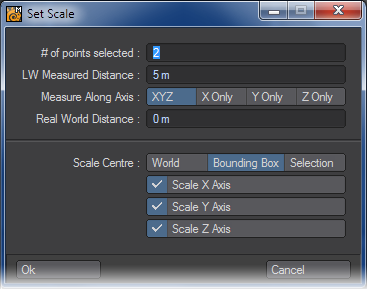
You need to have at least two points selected to use this tool to provide a base measurement. With the two points selected, choose Set Scale and you will be presented with a measurement in the LW Measurement Distance field. You can choose the scale you would like your object to assume by tapping it in the Real World Distance field. There are controls on how to take the measurement (Measure along Axis: XYZ, X Only, Y Only, Z Only) and how to apply it with the Scale Center or Axis choices.
Fit to Background
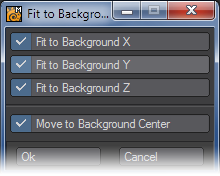
You need a foreground and background layer showing, then you can start this tool. The switches (Fit to Background X, Y and Z) can each be checked or unchecked and the foreground object will assume the same Bounding Box measurements on the axes you have chosen. The Move to Background Center option moves the foreground geometry to where the background geometry is sitting.
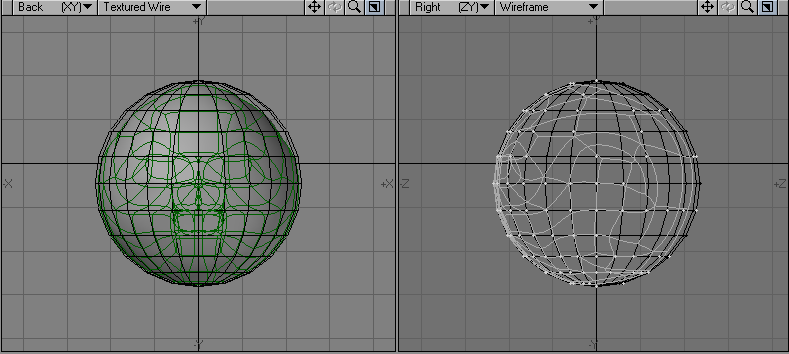
Background Conform (BG Conform)
The Background Conform function is available through the Legacy plugin Spherize.p. To install it and get the use of BGConform, Spherize and Squarize, use the Add Plugin command. To add it to your Modify tab, use the Edit Menu function( Alt F10). This function will take an object in the Foreground layer and fit it to an object in the Background layer.
Steps for using Background Conform:
- Place the object that you want manipulated in the Foreground and the “effector” object in the Background.
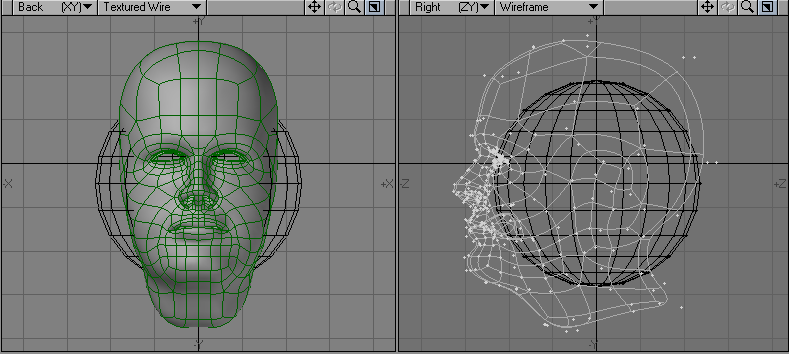
- Click on the Background Conform button and presto! Instant conform.
This is a handy tool for creating Morph Targets!
Absolute Size
Absolute Size (Modify > Transform > More) allows you to scale geometry with great flexibility and precision. With the Values setting set to Independent, the object can be scaled independently on each axis. If Locked is used, the aspect of the geometry is maintained, meaning you only need to change one value and the others will change accordingly, to keep the proper relative proportions of the geometry.
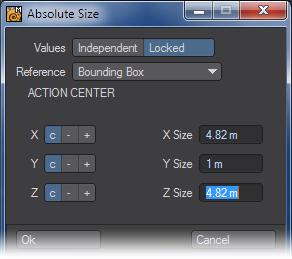
Reference
The Reference setting determines a reference for the selected Action Center. Bounding Box uses a bounding box around all of the geometry. World uses the Origin. B.G. Layer uses a bounding box around geometry in the background. Absolute lets you numerically set the center position. The c setting will scale using the center of the reference. The minus (-) or plus (+) setting will scale using the negative or positive side of the reference.
Pole Evenly Tool
The Pole Evenly tool (Modify > Transform > More > Pole Evenly) scales an area of an object along the vertical and horizontal axes.


To use the Pole Evenly tool:
Select Modify > Pole Evenly and drag your LMB in a viewport. The center of the effect is determined by the Action Center setting, discussed previously.
The information display indicates the Scale factor you applied.
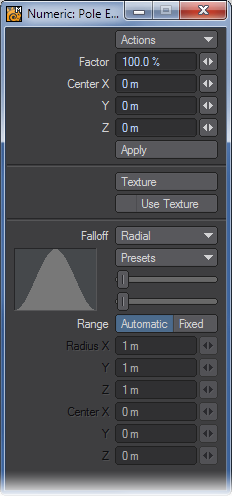
The Factor value on the numeric panel reflects the amount of scaling. The Center X, Y, and Z values indicate the center point of scaling. You can edit the values and then click the Apply button to apply them, which you can do multiple times.
The falloff modes for this tool are described on the Falloff Mode page.
Pole Tool
The Pole tool (Modify > Stretch > Pole) is identical to Pole Evenly, except that you can scale an area independently on the two axes - dragging your LMB left/right to affect horizontally and up/down to affect vertically.
The information display indicates the Scale factor you applied along the two relevant axes.

To use the Pole tool:
Select Modify > Pole and drag your LMB in a viewport. The center of the effect is determined by the Action Center setting, discussed previously.
The information display indicates the Scale factor you applied
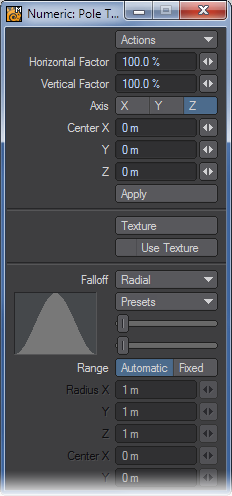
The Horizontal Factor and Vertical Factor values on the numeric panel reflect the amount of scaling in those directions in relation to the viewport used. The Axis buttons relate to the axis along which the effect occurs. If you use an arbitrary axis (i.e., use in a perspective viewport), no Axis buttons are selected. The Center X, Y, and Z values indicate the center point of scaling, through which the axis runs. You can edit the values and then click the Apply button to apply them, which you can do multiple times.
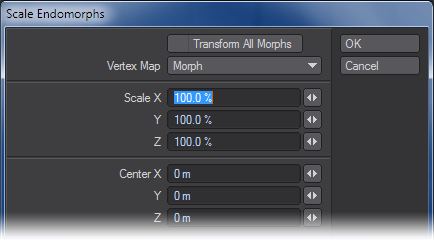
Scale Morph Tool
Scaling the base of an Endomorph with a normal sizing tool may not add the proper amount of scaling to its morph targets. You may get better results with the Scale Morph function (Modify > Scale Morph).
You can select an Endomorph to scale from the Vertex Map drop-down list, or selecting the Transform All Morphs option will apply the scale to all Endomorphs in the object (which is often the preferred option in many cases where the base has been altered on an object containing many morphs)
Smooth Scaling
A variant of the Stretch tool is the Smooth Scale command (Modify > Smooth Scale). This command will scale selected polygons, but attempt to smooth things out as it scales. No new geometry is added, so the smoothing is done using existing points and polygons. The scaling is done based on the normals in the selected geometry.
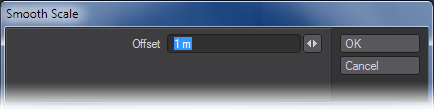
The Offset value, editable on the numeric panel, is the exact amount that the object will increase in size overall; however, due to the smoothing effect, not all parts will increase this much. Negative numbers are also allowed, which reverse the effect.
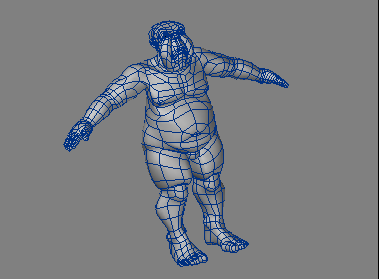
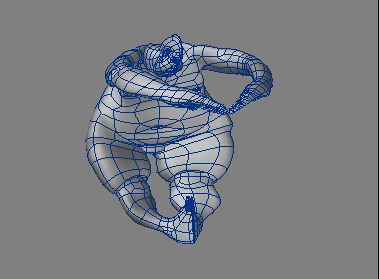
Smooth Scale is great for use on SubPatch objects. Use it on the stomach of a figure to give it a beer belly.
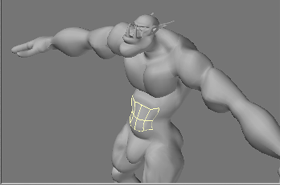
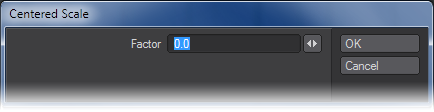
Center Scale
Center scale is located under the Modify Tab and will scale a selection around its center point. Factor is the value (percentage) of the scale operation.
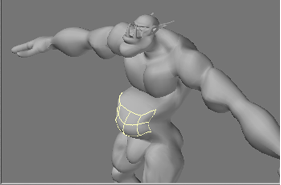
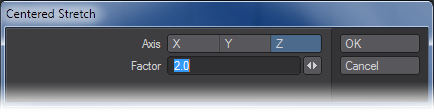
Center Stretch
Center Stretch is located in the Modify Tab and will stretch a selection on the X, Y, or Z axis around the selections center. Factor is the value (percentage) of the stretch operation.
Smooth
(default keyboard shortcut Shift M)
Live Smooth is an interactive version of the Smooth command and works in the same way. It has replaced Smooth in the menu. Be careful about adding Strength numbers larger than 3 as they may cause feedback loops in the smoothing that actually result in spikes forming in your mesh. The same can happen with Strength values approaching 3 with high levels of Iteration.
For dense meshes, turn Realtime off and hit Update to see changes.
Quantize Tool
The Quantize command (Modify > Transform > More > Quantize) will snap points to specific coordinate spacing intervals (like a grid).
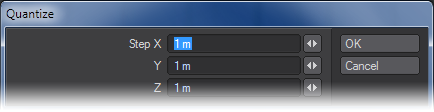
This is very useful for snapping a non-planar polygon into a specific plane or flattening one side of an organic or curved object.
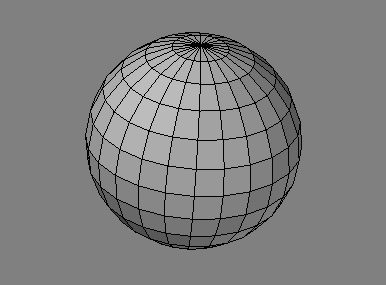
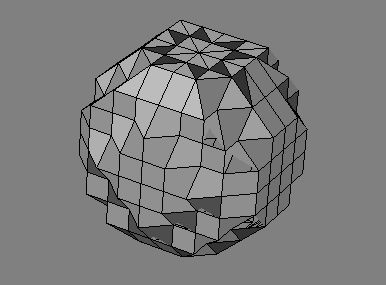
Wrap Sphere
The Wrap Sphere tool is located under the Modify Tab. Wrap Sphere will take the selected geometry (or all geometry) and deform it into a sphere. This is a great tool to use to create a Globe that unwraps into a flat map.
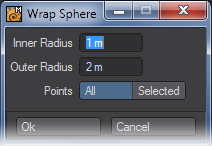
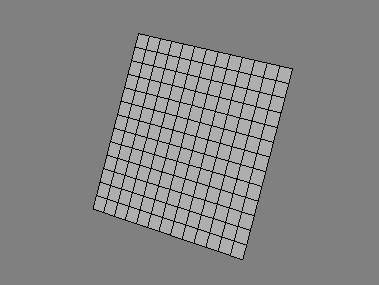
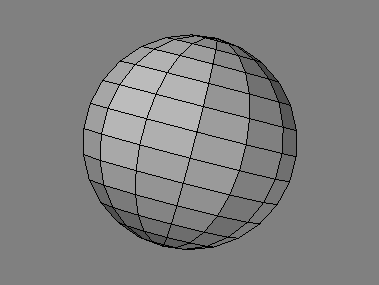
Results will vary depending on which objects Wrap Sphere is applied to.