Poly Norm UVs
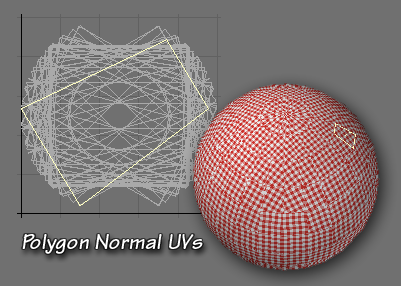
This command will take all the selected polygons, and project them onto a UV Map according to their normals, so they will be mapped flat on the image. It’s one of the old Per-polygon tools; it’s similar to mapping in Atlas mode, except the polys wind up all piled on top of each other, without any points.
How do I use this tool?
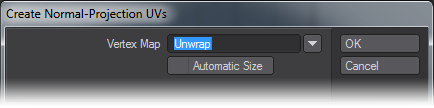
Select all the polys you want to map, polygons that aren’t selected won’t be mapped, and click on the command. A dialog will open.
Vertex Map
Type the name of the map into the Vertex Map field, or choose a name from the drop down list. The list contains all the names of all the UV Maps used during the current session, whether or not the objects remain open, and whether or not the maps have any points assigned to them. If you type a new name into the field, a new map will be created, and chosen from the VMap Bar. If you use a name from the list, that map will also be automatically selected. If you don’t use any name, you’ll make a Poly Map.
Automatic Size
Click the checkbox if you want the polys to be automatically sized. If you do, they’ll be centerd in the UV space, and come close to filling it. If you don’t, they’ll probably be tiny, and in the lower left corner.
Click OK, and they’ll be made. You’ll notice that they don’t have any points, which means that you can’t manipulate them directly. Fortunately, that’s easy to fix. Just use the Unweld command (Detail > Points > Unweld). This will put points on all the polys, allowing you to use all the Modify tools, as you normally would. If your models are simple enough, you can unweld selected points; if not, you can effectively Unweld the entire model. Just be sure not to move anything in X,Y,Z space, and the Merge command (M) will put it all back together again when you’re finished mapping.