Rendering and Compositing - Utilities
Network Render
LightWave allows you to use the processing power of other computers on a network to render scenes. This is called distributed rendering or sometimes a rendering farm. There are a few basic approaches to distributed rendering with LightWave.
Screamernet is now deprecated in favor of the NRC system, but instructions are left for people wishing to troubleshoot existing Screamernet installations or create new ones.
ScreamerNet uses Layout’s Network Rendering Panel (Render > Network Rendering) to control submitting scenes to networked computers running the ScreamerNet process. ScreamerNet can control up to 1,000 CPUs. Each will render a frame from the animation until the scene is rendered.
See the Distributed Rendering section for more information.
Batch Render on One Computer
You do not actually need a network in order to use ScreamerNet. Just follow the network instructions as if the computer was the node and control machine. It’s a little easier since you won’t have to worry about shared directories and volume names. ScreamerNet is useful for rendering a series of scene files unattended, and it is most beneficial if you are using a dual-processor system - each processor could be treated as a separate CPU for rendering.
Troubleshooting
If clicking the Screamer Init button doesn’t find the other CPUs, go back and start at the Host Machine Setup section.
If images seem to render unrealistically fast and no images are saved:
- Check to make sure that you have full sharing access across the network. You can check this by copying a file at random back and forth across the network.
- If the scene and/or objects were created without taking into consideration the new drive path names, rendering may occur on only the host machine.
The most common cause of ScreamerNet crashing is when too many computers try to write or read their information to/from the Host computers while the host renders.
Do not use ScreamerNet to render on the host machine, but rather use it only as a server where the hard drives are found. Map a drive from a different computer as drive Y:, for example, and set your scene to save the animations to that drive. The computers don’t know that drive Y: is not on the host, just that it’s present.
Another problem occurs when the hard drive where you save the images or animation is full. This problem creates an error in LightWave and on each ScreamerNet node.
Rendering Without LightWave
The LWSN program has a third option that lets you render a scene without running LightWave. There is no control machine and thus it is not a distributed rendering situation. You must tell the program specifically what to render. The method is run from a DOS prompt using the following syntax (one line):
LWSN -3 [-c<config dir>] [-d<content dir>] <scene file> <first frame> <last frame> [<frame step>]
As you can see, you supply the program with the basic information needed to render a scene. An example would be:
LWSN -3 -cD:\Lightwave\Configs -dM:\Newtek Spicegirls.lws 1 900 1
In the example, the program would render frames 1 through 900 of the Spicegirls.lws scene using the Lw.cfg file stored in the D:\Lightwave and using M:\Newtek as the Content Directory.
The configuration file specification is optional, if the Lw.cfg file is in the current directory. Likewise, if the Content Directory is correctly specified in the configuration file, you do not need to give that parameter.
You can get the syntax for ScreamerNet by simply typing LWSN with no arguments.
See the Distributed Rendering section for more information.
Compositing Options
(default keyboard shortcut Ctrl F7)
Effects > Compositing
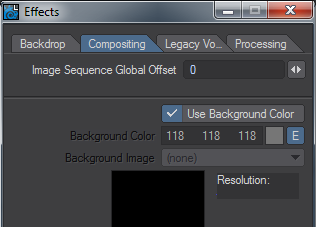
The Compositing tab of the Effects window has had a small but significant change. You can now set a background color that can be enveloped to be animated over time. The significant detail here is that it means there is no longer a need to use a small image to hide an HDRI used for reflections and lighting a scene. If you don’t check the Use Background Color box, then the old behavior is still available using a background image. Another benefit is that the Perspective viewport is affected in addition to the Camera viewport.
In addition, when you set an image as a background for the camera, the Display Preferences for LightWave automatically updates to set Camera View Background to Background Image.
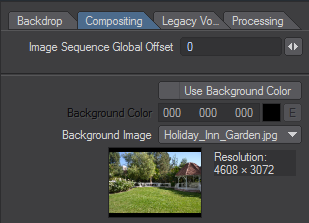
Background Image
The Background Image is similar to the gradient backdrop; however, it is always registered to the camera. That is, it will always appear in exactly the same position/location no matter which way you tilt or move the camera. You set this option on the Compositing Tab of the Effects Panel. Background images are considered infinitely distant from the camera. You can never have an object behind a background image, nor can you light a background image or cast shadows upon it.
Background images stretch to fit the Camera resolution and frame aspect that you are using. Make sure to use similar-sized background images if you wish them to match.
You often use background images to merge live action and 3D elements, like creating the illusion that a UFO crashed into the Empire State building. An image of the New York skyline would be the background image and the UFO would be a LightWave object.
Background images are visible only through the Camera View.
If you actually need your background image to interact with objects, use the image as a surface color texture-mapped on a flat plane object and place the plane at the back of your scene.
If you set Camera View Background on the Display Options Tab of the Preferences Panel (Display > Display Options) to Background Image, you will see the set Background Image in Layout’s Camera View. Of course, actually seeing the background in the Layout window is optional. The background image will always appear in the rendered frame.
Displaying background in the Layout window, particularly a color one, is processor intensive, so use this feature sparingly.
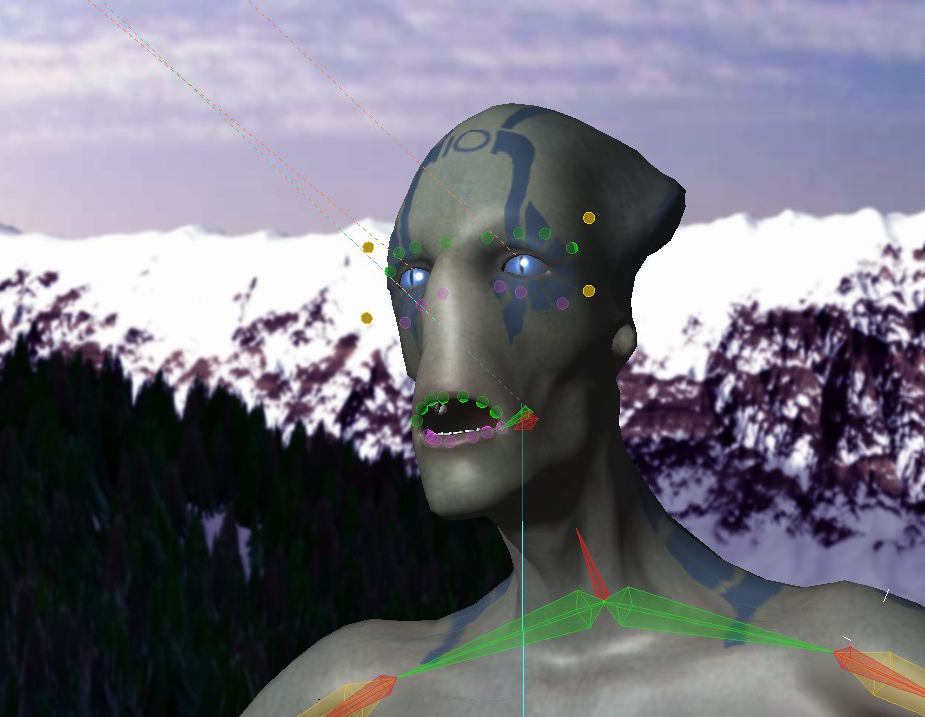
The whole idea behind traditional image compositing is quite simple: take two or more images, and merge them into a new composite image. LightWave lets you do this, but also takes it one step further by letting you throw objects into the mix.
The images can also be a sequence of pictures, so you may use captured video footage as a background for your objects. A simple example would be a modeled UFO moving against a real sky and trees. Images can appear behind all objects, in front of all objects, or a combination of the two with objects showing in-between.
Compositing can be a render time-saver. If you set up a scene with many objects, but only a few are moving, you could render one frame with only the inanimate objects, and then remove all of those objects and render the animated objects against the single frame saved earlier. This is especially useful when the still objects are complicated or involve radiosity, refraction and/or reflection.
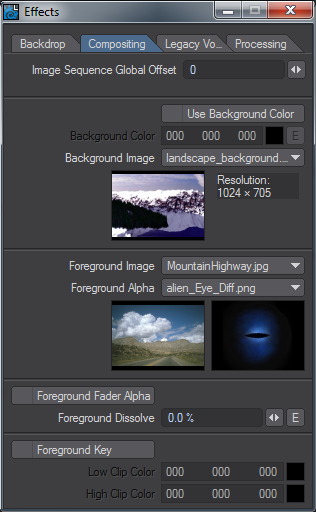
Foreground Images
Placing an image in front of everything may seem like a silly thing to do. However, some options let you cut parts of the image away so you can see through it. You can also make the image partially dissolved or even envelope the dissolve. Dissolving in a black image in the foreground will produce the common fade-to-black effect, or reverse the dissolve to fade in from black.
You can make holes in the foreground image based on a defined color range in the image. However, the biggest drawback to simply clipping out portions of the foreground image is that you will have hard edges. A color is either clipped or it isn’t, so you see either the foreground image or the background image.
Use the Foreground Image pop-up to set the foreground image.
Alpha Images
You may also use a special alpha image to merge the background and foreground images. This type of alpha image is very different from the type you use to set up a transparency surface texture. LightWave composites the foreground image over any objects or background by adding their colors to the foreground image. How much background is added is determined by the alpha image. The darker the area of an alpha image, the more background is added to the foreground. The pseudo-mathematical equation might look like: Foreground + (1 - Alpha) * Background
If you used the same exact image for both the background and foreground images, plus a solid black image as the alpha image, you will receive a final rendered image where every pixel is twice the color value it was. This results from the background image being completely added to the foreground image.
Creating Alpha Images
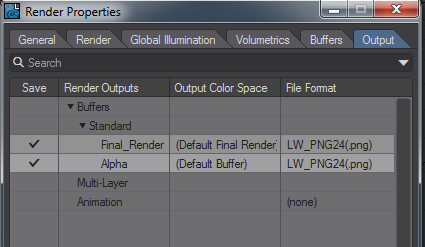
Generally, alpha images will be generated when you render a scene to create the foreground images. When you select Save Alpha on the Render Properties Panel’s Output Files Tab, LightWave will generate and save an alpha image in addition to the normal RGB output. The alpha image will be composed of grayscale values representing the opacity of any objects that were rendered in the scene.
An object that contains no transparent surfaces will be rendered as solid white. Transparent surfaces will render in some shade of grey depending on how transparent they are. One hundred percent transparent surfaces render as black. A 50-percent transparent surface will render as 50-percent grey. Using object dissolve, antialiasing, motion blur, and so on. will also give you values other than white in an alpha image. Any background (image or colors) will be black in the alpha image, as will any additive effects such as glow or lens flare.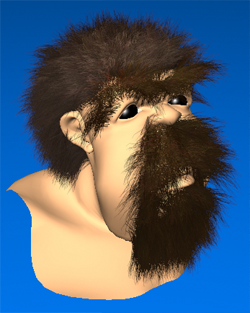
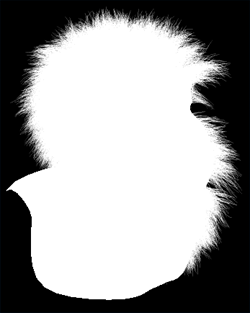
Image and Alpha
Since glows and lens flares are additive effects and are assigned a value of black in an alpha image, glows and lens flares in the actual foreground image will simply have the background values added, so they will appear brighter where the background is a value other than black.
Generally, due to LightWave’s additive compositing method, foreground images are created using a solid black backdrop. This allows the composited background to show through unaltered when it is mixed 100 percent with the foreground.
Foreground Fader Alpha
What happens if you want to composite a foreground element on top of objects or a background, but the foreground image was not rendered over black? In this case, LightWave provides a Foreground Fader Alpha button that can be selected. In this mode, LightWave will ignore any areas of the foreground image corresponding to black areas in the alpha Image. These areas of the foreground image will be faded away to nothing so you see 100 percent of the background instead.
When using Foreground Fader Alpha, glows and lens flares will not be added to the final rendered image (their corresponding alpha is black) unless you are using a different alpha image containing non-black areas in those locations. Additionally, antialiased object edges most likely will stand out because they contain bits of color from the original non-black background.
Foreground Key
Activate Foreground Key when you want to key out (i.e., not render or see) a color (or range of colors) from the foreground image. Use the same color value for both Low Clip Color and High Clip Color if you wish to key out one color only. Use different values to key out the Low Clip Color and High Clip Color values, and all those in between.

The Low Clip Color is the color value for the darkest color value that will be keyed out. High Clip Color is the brightest color value that will be keyed out.
If you want to create a giant space battle and lack the RAM to hold all of the objects and image files, you could composite layers of ships and achieve the same results. This is, in fact, how some broadcast TV shots were done using machines with only 32MB of RAM in the early days of LightWave.