Localization
Introduction
Since LightWave 2015, LightWave has had a localization system built in. For now, there are certain languages defined:
- (system defined)
- German
- US English
- British English
- Spanish
- French
- Italian
- Japanese
- Korean
- Russian
- Spanish
- Swedish
- Chinese (simplified)
By default, LightWave runs in US English because LightWave is American. You can choose (system defined) if you want to use the language your OS is set to. Very few of the provided languages have any content and adding a new language to the system requires us to enter it. Otherwise, if you'd like to create a version of one of these languages for yourself you are more than welcome - perhaps you might like to share it!
Localizing
To start a new localization, you need to know how the system works. In the LightWave support directory there is a folder named "l10n". It contains folders for all the mentioned language and over 200 .resource files. These files contain the text displayed in the LightWave interface. To create a localization, copy the resource files you want to change into the language folder of your choice and edit them.
As an example, in the l10n install directory you will find partial translations for the LightWave Color Picker into German, British English, French, Italian, Russian, Spanish and Swedish.
Switching locales
We've told you how to create new localizations for LightWave, but not how to access them. The answer is in the Hub. Normally, it is started with LightWave, but if you don't run the Hub, the way to change language is thus:
- Quit LightWave;
- Run Hub on its own, change language, quit Hub;
- Run LightWave (in no Hub or Isolation mode)
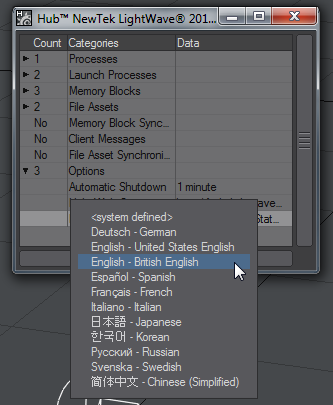
Open Hub. Open Options and click on Language to choose the language you wish to use. Restart LightWave for changes to take effect.
Once done, the areas that have been localized will be available in the language you have chosen. Anything that hasn't been localized will still be in the default US English.
Advanced
Character Literals
A character literal is a combination of ASCII bytes that result in zero or more raw data bytes. Literals are used to specify these data bytes when such bytes can not used when represented in other ways. For example, a newline character may be interpreted as the end of the data when the true intent was to place the newline character into the data. Placing a non-printable character into the data may only be possible with a literal.
Character literals for resource tags use a mechanism many are already familiar with: escape sequences. Although only a subset is supported, it should fill most translators' needs.
- \0 : null byte
- \a : alert byte
- \b : backspace
- \f : form feed
- \n : line feed (newline in OSX/Linux)
- \r : carriage return
- \t : horizontal tab
- \v : vertical tab
- \" : double quote
- \& : no byte
- \\ : backslash
- \xhh : 8-bit data where each h is a hex digit
- \ooo : 8-bit data where each o is an octal digit
- \<newline> : continue on next line (effectively skips the following newline byte)
You may encounter resource keys containing these literals. Your translations can also contain literals as needed.
An equal sign character can be represented as "\x3D" and a double-quote character as "\x22".
Debugging
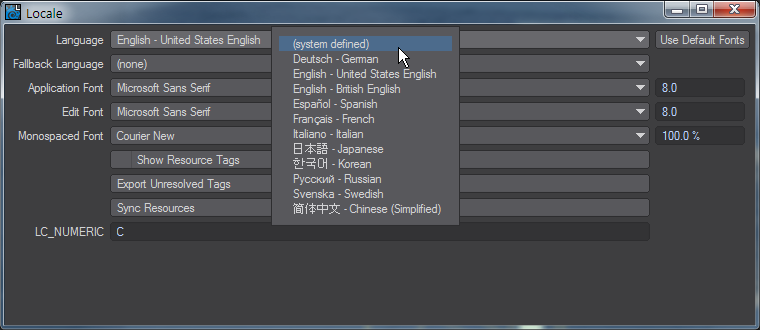
There is a LightWave command to run the Localization tool inside LightWave to avoid having to restart LightWave each time when you are checking your work. In Layout run Locale and in Modeler the command is locale. The language you choose in here will override Hub settings so you can check your work without needing to continually restart. Changes made in the command are persistent, but only affect the app the command is run in. Setting the language in the panel to system-defined will revert to the Hub choice.