Example - Getting Started with Bullet
Let’s start with a simple example just to try it out. For this we won’t even need to use Modeler, since we will use primitives in Layout to create all the geometry we need for the scene.
- To get going, we will make a standard cube. Add a Null (Ctrl-N) and go to Object Properties. Change Primitive Type from Mesh to Shape and select Cube. Make the Radius setting 0.5.
- We need a floor for our test object to collide with, so create another Null, call it Floor and visit Properties again. Change Primitive Type from Mesh to Shape and select Plane. Make the Radius 5.
- So far we can only see nulls. Select the cube null and visit the FX Tools tab and choose Dynamic Body > Rigid Body. You will see that your Rigid Body object has a wireframe overlaid. We'll need to do the same with our Floor, but will need to go a little further because a standard Bullet object is 1m. Our Floor is 10m square. Choose the Floor null and visit the FX Tools tab and choose Collision Body > Static Body. Open the Bullet Item Properties window, select your Floor object and change to the Transform tab. Change the Scale X to 10, Scale Y to 0.1 and Scale Z to 10.
- Next, we’ll make some clones of our cube, four should do the trick. We’ll need to move the cubes up from Y=0, separate them and rotate them to different angles to give them some distance to fall and more visual interest and you should end up with something like this:
- If you hit play now, you will see your cubes hit the floor in a realistic, if not very interesting fashion. Set your timeline slider to the beginning of the scene at 0 and let’s spice up the uninteresting column with a different type of dynamic object. Still using Primitives, make a sphere at 0.5m radius and position it at the lower left of the view shown for step 4.
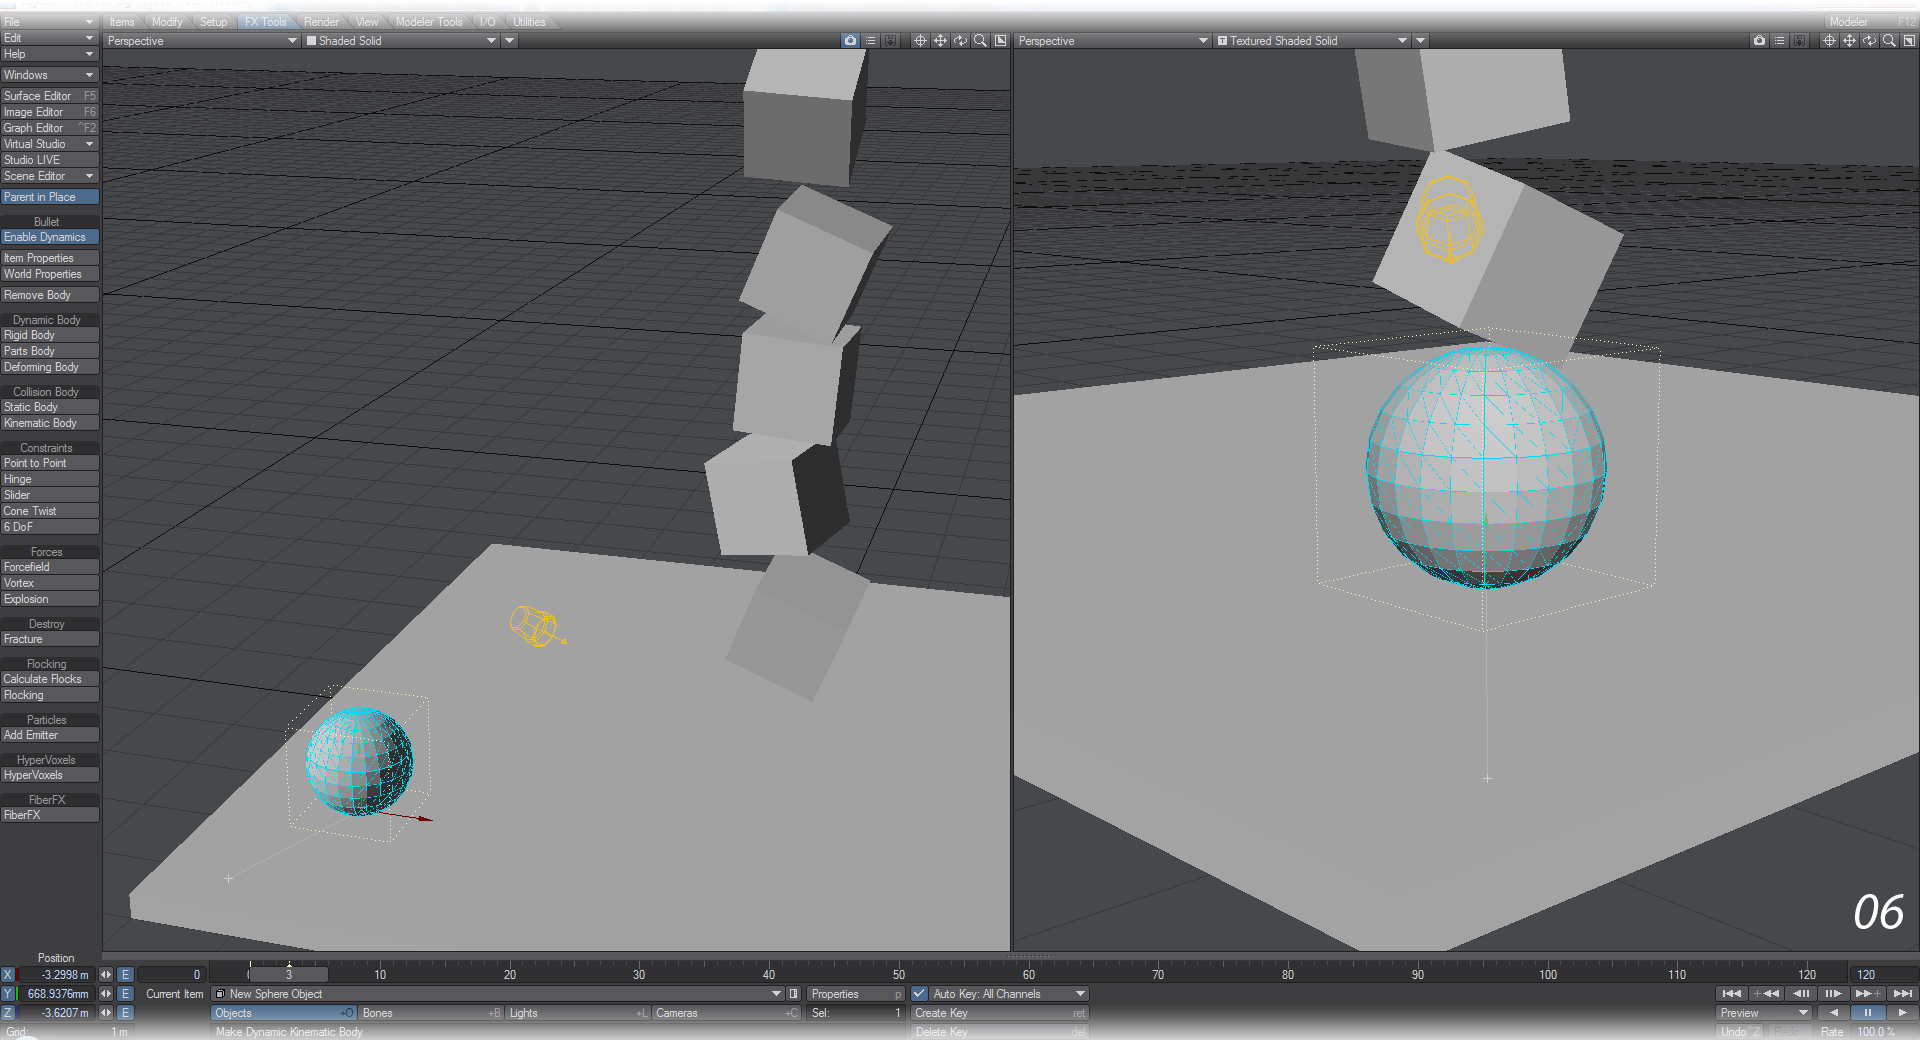
- Line up your Perspective view so that you are behind the sphere and can see your column of uninteresting cubes. We should be at frame 0 on our timeline still but move to frame 3. Now move the sphere towards the column and up a bit - as though you were firing the ball at the middle of the column (for that is what we’re about to do). If you press play now, the ball will stop in mid-air, but if we change the ball to a Rigid Body you will see that the Sphere gives a little bounce but only slightly bumps into the uninteresting column.
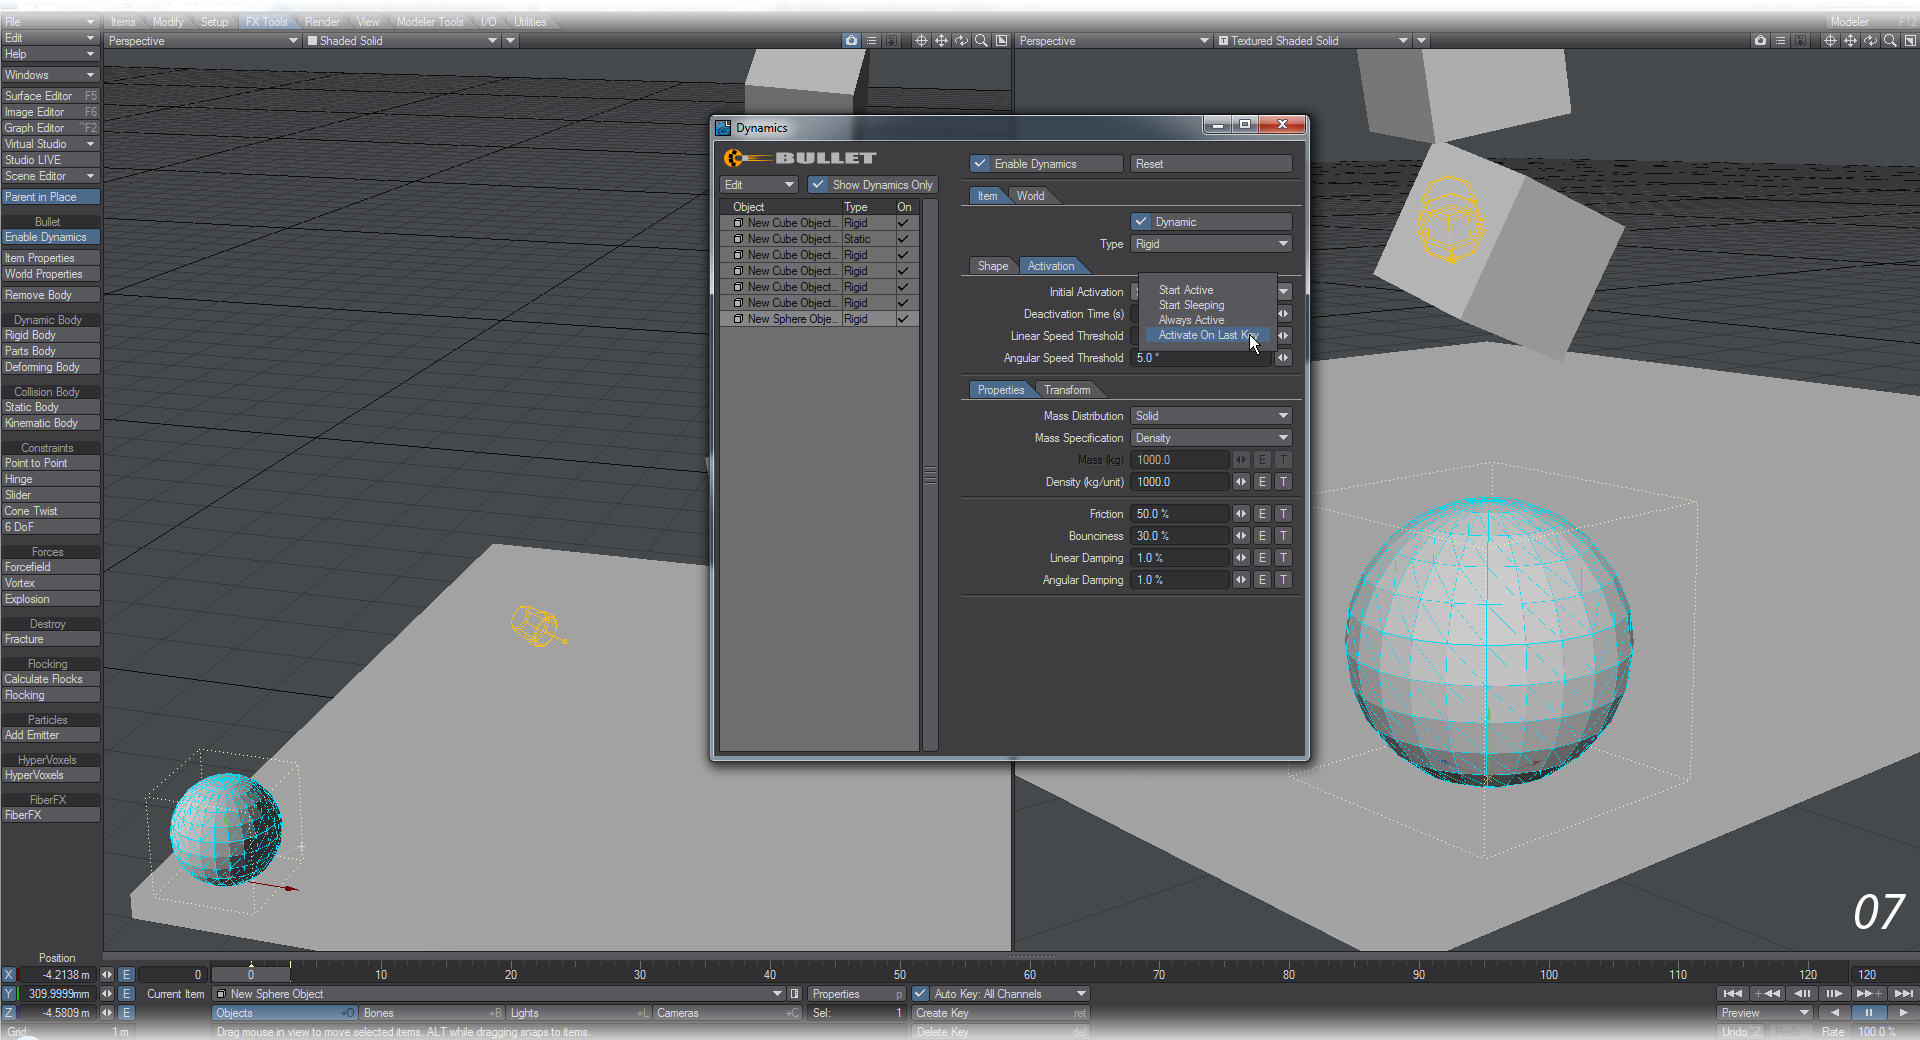
- Now we’ll go into the FX Tools > Item Properties window. Choose your Sphere object and click on the Activation tab. For Initial Activation choose Activate on Last Key. Your sphere should now fly faster and knock that column into a more interesting look.
For more variation, give your objects different properties in the Item Properties window.
Because LightWave primitives have no visible shape, try setting the Bullet World Properties Draw Bodies setting to All for this exercise. It will show all the objects we have made, not just the currently-selected item. We can also use Layout’s Modeler Tools to create our sphere for this quick example, for the best results with dynamic bodies always use a tessellation-type sphere, not a globe-type sphere. All those edges converging at the poles of a globe sphere makes for a weak spot, making it much easier to deform there than anywhere else on the sphere.