Example - Surface Baking Camera
Modeling
To begin our tutorial we'll start with some detailed modeling. Our example is not high polygon count but will serve to simplify our steps. This technique is used in video games all the time to allow realtime performance with seemingly detailed models.
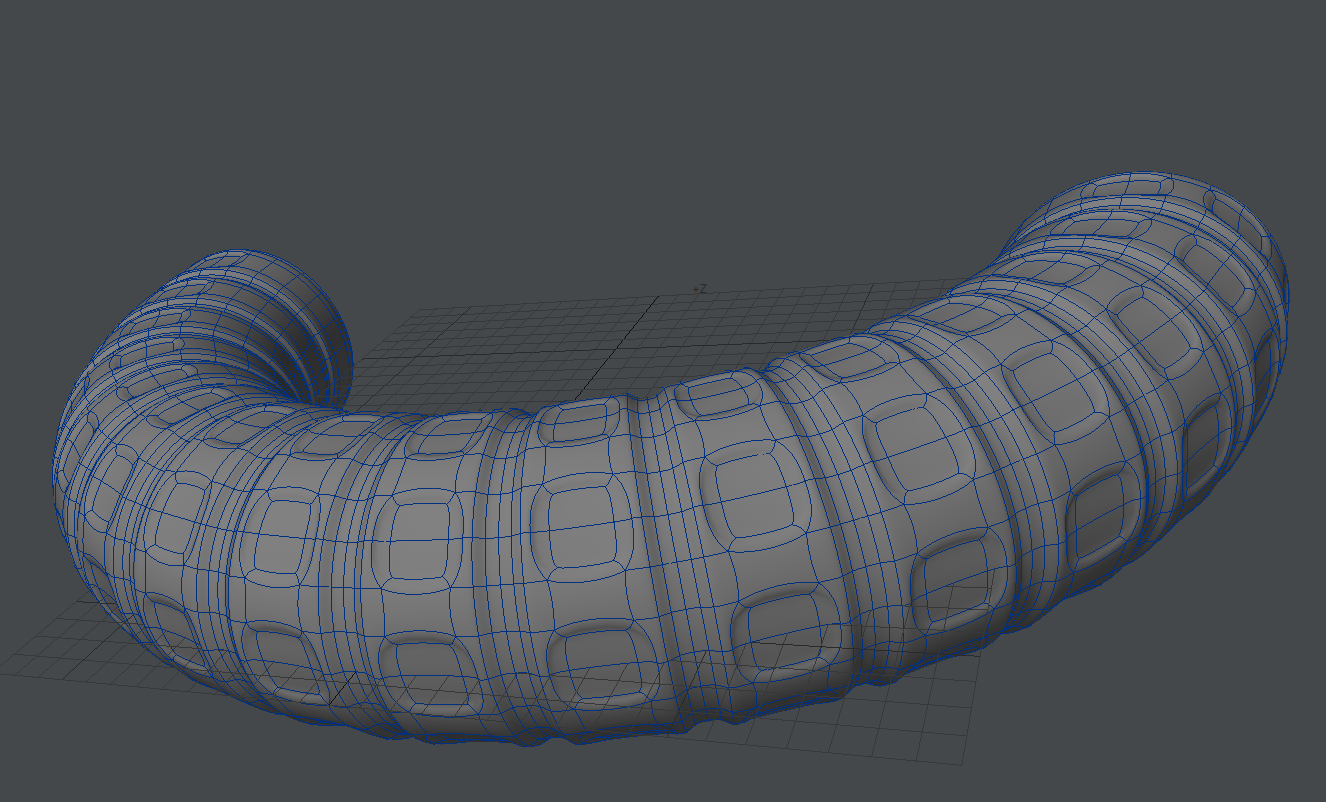
This shape consists of 3168 subpatches that at standard subpatch resolution resolve to some 28512 polygons. In our second layer we have the base for this object, which at 290 polygons is roughly 1000x less:

We want to bake the detail from the first shape into the second to reduce the polygon "weight" of our scene. This technique requires a UV map for the low-polygon version of the object. We will select a line of edges and use the ABF Unwrap function to create a quick UV map.


Use the Stretch tool (H), with the mouse at the left edge of the UV map and Ctrl held down to scale the UV map to fill the space.
Buffering
In Layout, we have added a Color custom buffer to our scene to capture purely the color of our surface with no additional information. We do so in the Render Properties panel - Buffers > Edit... > Create Custom Buffer. Call this custom buffer Color since that's what we want. A new entry has been added to your Node Editor's Surface destination node.

Surfacing
To create the texture for our surface, I am using some chained procedurals (Turbulence into Turbulent Noise into Crumple to feed the Principled BSDF Color input as shown. Note that the color from the last procedural in the chain - Crumple - gets put into our custom buffer input

Rendering
We need to set up the camera for our scene. First we need to set a resolution common to UV maps of 1024 x 1024 pixels in the Width and Height fields. Next, switching from the default Perspective camera to the Surface Baking Camera will present the normal Camera Properties window with an extra panel.

In this additional panel we need to select several things. In our example we need to set our Mesh to the low-polygon count version and the UV map to the Unwrap map created by the ABF process. If we render now, we will see there are holes in our render. These are caused by the camera being too close at the default setting of 100 um. We can increase that little by little to get exactly the right distance, each time you make the distance greater a little less of the object should appear in the final render buffer. The renders don't take long as can be seen from my screenshot, but for this example, a distance of 23 mm is just right - the final render buffer is completely black and the Camera_Tangent_Space_XYZ and Color buffers are complete.

The Camera_Tangent_Space_XYZ and Color buffers should be saved in an HDR format - EXR is the most modern - and can then be applied to the low-polygon object.
Mapping
Take the low-poly object's surface and input the Color buffer map into the Color input on the Principled BSDF material, and the Normal Map node should contain the Camera_Tangent_Space_XYZ buffer image. You will need to invert X to make sure it reacts the same way to light as the original. The Normal Map output goes into the Normal input on the Surface destination node.

We can see from the silhouette that the foreground object has a much lower polygon count than the original in the background, but for many uses including background objects or games, this is ideal.