Example - First OpenVDB Liquid
Introduction
Liquids in LightWave have never been as easy as now. We give you the tools to create OpenVDB-based liquids and gases. We can use tools that have been in LightWave for many years like the FX Emitter to generate a flow of particles that you can transform into flowing liquid.
The playback rate in Layout has been halved to gain a better appreciation of the movement for the GIF animations on this page. Your liquid will flow twice as fast as that shown on this page
Steps
Particle FX
- Create a Null and call it Emitter. We'll add an FX Emitter on the Emitter tab of Object Properties, and we need to set a few things up.
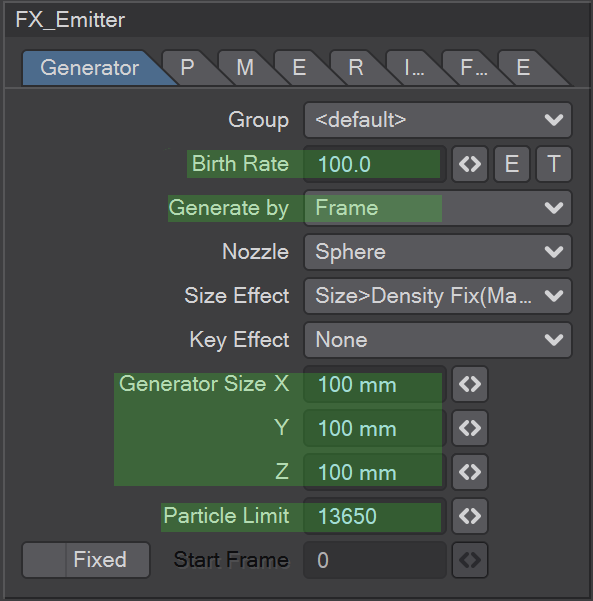
To start with, raise the null from 0, 0, 0 and create an animation of the null moving around. We create a loose spiral. Next, add an FX Emitter from the FX tab, and we'll add some details:- Generator tab - Leave the Birth Rate at 100, but change Generate By to Frame. Change Generator Size to 100 mm in X, Y, and Z. Increase the Particle Limit from 1000 or we'll run out of particles. We've set it to around 14000
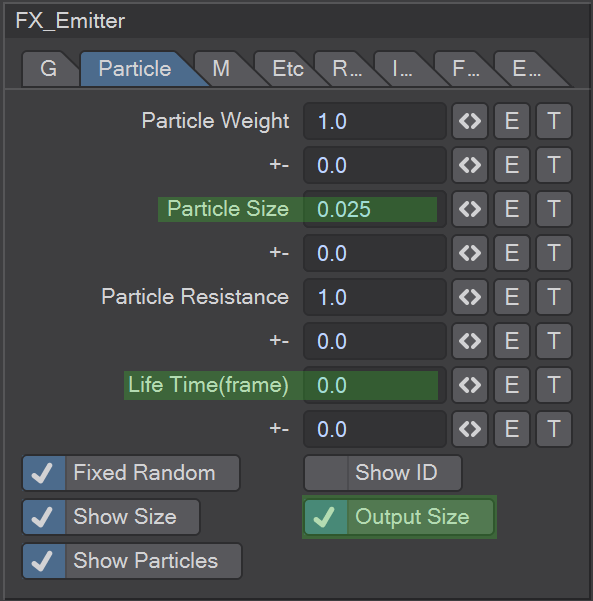
- Particle tab - It's essential that you set a Particle Size and check Output Size. We've set our particles to 0.025 and changed their Life Time to 0 to make sure they live for the whole scene
- Motion tab - Haven't changed much here apart from to add a little Explosion and Vibration

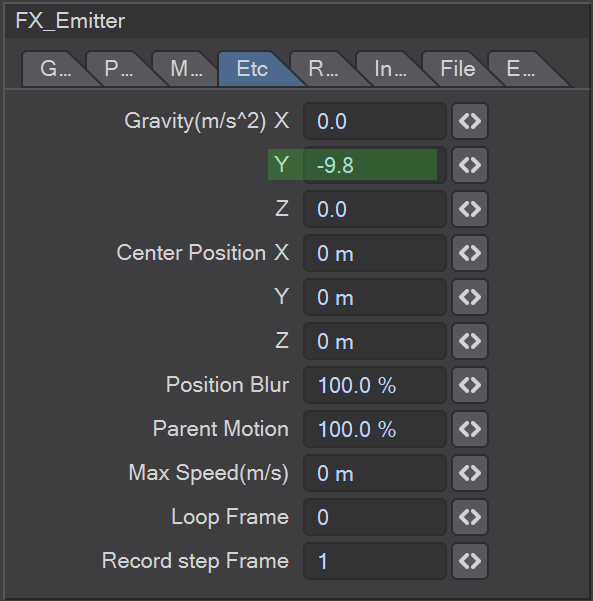
- Etc tab - Set Gravity to -9.8 in the Y channel
- Rotation tab - No change
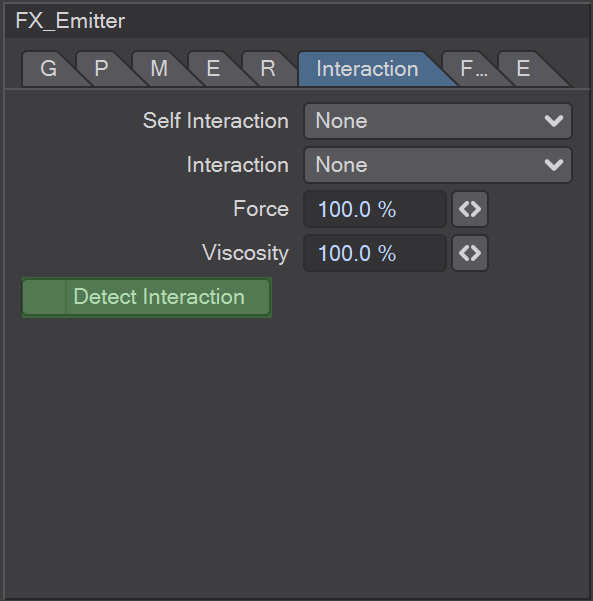
- Interaction tab - Uncheck Detect Interaction
- Generator tab - Leave the Birth Rate at 100, but change Generate By to Frame. Change Generator Size to 100 mm in X, Y, and Z. Increase the Particle Limit from 1000 or we'll run out of particles. We've set it to around 14000
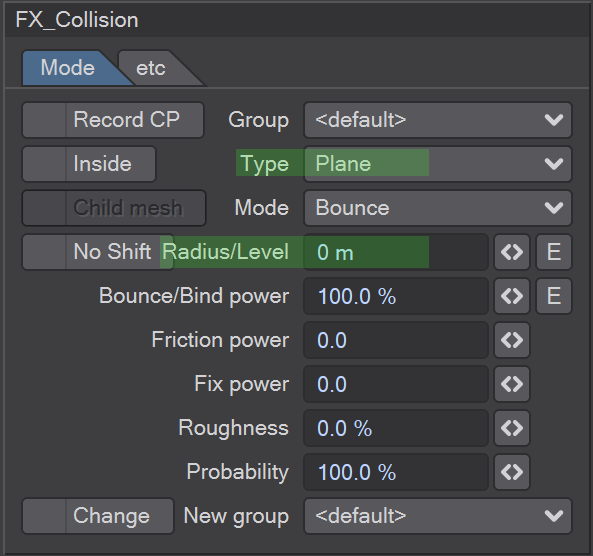
- Add a floor for the emitter particles to hit, it can be as simple as another Null (called floor) with an FX Collision added. The only things that you need to change are the Type to Plane and the Radius/Level to 0 m
- If you play your scene now, you should have something like this:
- Once you are happy with your particle motion, visit the File tab. There you should click Save Motion, which will bake your simulation to a pfx file. If you need to make further changes to your particle sim edit what you need to and click the Update button to refresh your simulation. Baking your simulation will ensure that LightWave can concentrate solely on creating the VDB mesh.
OpenVDB
Now, we'll start to add the OpenVDB liquid to our scene. Adding fluid starts with a new Null, which you should name "VDB." On the Primitive tab, in the Object Replacement dropdown select OpenVDB Evaluator. If you click the Properties button next to the Evaluator menu choice, you will open a Node Editor. In the OpenVDB group, select From Particles, double-click and choose your Emitter's particles. Hook the Grid output to the Grid input on the destination node. There are two possibilities - 1. That you see your OpenVDB flow or 2. You continue to see the particles. The Voxel size you set in the From Particles node is vital in this. Too big and it will overwhelm the voxel space, and no VDB will be displayed. Too small and the particles won't stick together nicely - they'll look like a bunch of spheres. Once you can see your VDB, try the difference between Sphere and Trail in the From Particles node. Sphere will generate orbs, as the name implies, but Trail will create a series of spheres in a direction inverse to the velocity vector, getting smaller and smaller.
Because you are creating a virtual mesh, entirely created in Layout, its geometry and properties are tied to the scene file in Layout.
- Right now, our "liquid" isn't very convincing. Several nodes can help, and a combination can make a more convincing stream. For this tutorial, we will aim for a more conclusive result. The industry standard method for this is to "Dilate, Average and Erode" to enlarge the active voxels, blur the results and shrink the resulting voxels to get rid of any noise. We can do this in LightWave using the Filter node. Add it to your scene in the OpenVDB Evaluator node editor. First, choose the Close filter type - this will tighten the mesh removing as many holes as possible. Add a second filter and make it the Mean Curvature Flow filter type. It will flatten the lumps produced by stray particles to provide a smoother surface while preserving significant changes in curvature. Lastly, we will chain a third Filter node with the Gaussian filter type, which will smooth the final mesh.

For this exercise, we don't need to change the settings available; we can see the results.