Anti-Aliasing
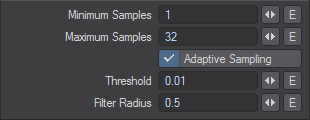
On the Camera Properties panel, there are two main controls for anti-aliasing - Minimum Samples and Maximum Samples. If Adaptive Sampling is unchecked, Maximum Samples is ghosted and you only need to concentrate on the Minimum Samples value. When using only Minimum Samples, this is similar to the standard Anti-aliasing levels in previous versions of LightWave.
Minimum Samples
This value determines how many camera rays are generated per pixel. As the name suggests, this allows you to set how many samples are ALWAYS taken per pixel on the first pass of the image. When Adaptive Sampling is active, setting a higher minimum value will result in fewer Adaptive Sampling passes, because the image has already been through initial anti-aliasing. This does not always lead to faster renders; leave Minimum at 1 unless you are sure of what you are doing.
Maximum Samples
Available when Adaptive Sampling is on, this allows you to limit the number of samples LightWave will ever get to during the Adaptive Sampling process. Previously in LightWave, it was difficult to set a limit to this stage of the process, meaning that LightWave could keep on refining in the Adaptive Sampling stage, even when no more anti-aliasing was really needed, or visible. This can result in equivalent or improved quality at equal or faster render times than previous versions.
As with previous versions of LightWave, finding a good balance between render quality and speed is very scene dependent. You may need to experiment with the Maximum Samples and Adaptive Sampling Threshold on a smaller area of your scene using the Limited Region render.
You will probably need to massage your settings to get the best balance between speed and quality for your final image. Start by raising your Max Samples setting in Camera Properties to 16 and if you are using traditionally noisy lights or surfaces you might consider raising the Lighting and/or Shading Samples but slowly, perhaps to 2 or 3. Examples of noisy lights would any other than Point now since all other lights are sampled. Noisy surfaces would be things like blurred reflections or CarPaint - things that in previous versions would have had a Samples or Quality setting.
You should think of the Lighting/Shading Samples and Max Samples settings as being multipliers. For example, your Shading Samples are set to 8 and multiplied by the Max Samples setting in Camera Properties. If we imagine that you have set this to 16, then 16 x 8 would fire a maximum of 128 shading samples in total for every pixel of your image. If you also set your Light Samples to 8, you would have 128 shading samples and 128 light samples per pixel, and this starts to become quite heavy to render.
Adaptive Sampling is by necessity slower than straightforward anti-aliasing (AA) because LightWave needs to determine whether AA is necessary for any given pixel based on the Threshold and Filter Radius settings. It's there by default because it is more likely to give a good final result when in the testing phase, but should, ideally, be turned off for final sequence rendering.
Threshold
Threshold is the difference between the color values of neighboring pixels that triggers additional sampling. It is also used to see if additional sampling passes improve the pixel quality (variance) but that only is used when there is a high max adaptive samples. Only the final pixel color is used for the threshold. The additional buffer samplings are driven from the pixel color differences and the threshold.
Filter Radius
Filter radius is exactly that. It is the radius of the filter applied to each pixel sample. Each pixel sample is located somewhere inside the edges of a pixel (0-1 in x and y). The filter is a shape (for example a circle) that is used to blur the sample. This way a sample near the edge would affect both the pixel and one or more neighboring pixels. Typically you want a radius between 0 and 1 for the Filter Radius. Values larger than 1 are possible but are an inefficient way to blur your image - post-processing is far better. 0 means no filter at all.
Reconstruction Filters
The LightWave 3D renderer includes a full implementation of reconstruction filters. These filters determine how the rendering data is combined into a final image at a sub-pixel level in order to produce a final image. Reconstruction filters have been a subject of research over many years and the names of these filters are often derived from the research that led to their development. Reconstruction filters are not set on the Camera Properties panel, but rather per buffer in the Buffer tab of the Render Properties panel.
Different buffers can have different filtering applied but beware of mixing different filters on buffers for the same render since it will be difficult and perhaps impossible to reconstruct a final image.
LightWave filters are outlined below:
Box

This is the most common form of filtering, and the method that most traditional applications use to reconstruct an image from raw rendering samples. These samples are simply places in a pixel “box” and averaged. Although this technique is fast, it can exhibit significant artifacts on motion and when there is fine image detail. From a signal processing point of view, this is a very poor technique for reconstructing an image from the raw data that comprises it. This mode is very close to the traditional LightWave modes.
Circle

Based on Box, it uses a 6x6 matrix based on the Filter Radius size. Anything within the filter radius is given full importance. Anything outside is cut off.
Triangle

Based on a cone with filtering taking place on pixels in a 6x6 matrix.
Gaussian

Gaussian filter based image construction takes the samples that compose the image and builds the final pixel data by weighting their contributions based on a Gaussian kernel of approximately one pixel in size. This technique typically performs quite well, although images tend to have a “soft” look. In practice this mode can be very valuable for video output where it can help hide some of the artifacts introduced by fielded or reduce bandwidth content.
Mitchell

Mitchell filtering is a technique that is now very popular and was suggested as an alternative to Lanczos filtering (see below). It does not suffer many of the ringing artifacts of Lanczos filtering and generally is a very good starting point for most situations.
LanczosSinc

Lanczos filtering is arguably the technique that yields the closest to the perfect results for image reconstruction. This technique is based on a windowed sinc function (a sinc function being the optimal infinite image reconstruction filter). Unfortunately in practice Lanczos image reconstruction tends to produce overly emphasized edges and “ringing” in high contrast areas of the image.
Usage Tip
Box, Circle, Triangle and Gaussian may provide better results for moving images, whereas Mitchell and LanczosSinc may be more suited to stills due to their tendency to sharpen the image.
Additional Notes
Old scenes loaded into LightWave are not aware of the Minimum Samples and Maximum Samples settings, and therefore will be set to their defaults. This could mean that your old scene appears to render either slower or faster but noisy. You will need to adjust the values to suit your scene.
Due to changes in the way samples are generated, the Rays Per Evaluation and Secondary Bounce Rays in the Global Illumination panel are affected. This means in order to get similar results to previous versions of LightWave, you will need to increase these values, often doubling them. It won’t take any extra render time, but is needed to account for the differences in number of GI samples generated with the new system.
When the Use Gradient option is checked in the Global Illumination panel LightWave uses the old sampling method for Global Illumination only. When off then it uses the new sampling.
Anti-aliasing Using Edge Detection
By default, LightWave uses Adaptive Sampling (edge detection) to determine which areas of an image should be anti-aliased. This focuses the anti-aliasing process primarily on the edges of objects. With Adaptive Sampling active, you can tell LightWave which areas to anti-alias by entering a sampling Threshold value. If the Adaptive Sampling option is inactive, LightWave will anti-alias the entire frame.
The adaptive sampling Threshold functions by comparing the brightness of two neighboring pixels. A value of 0 will anti-alias everything in the scene, but values between .0314 and .1255 work well in most situations - the higher the level, the fewer edges are detected and, thus, the lower the rendering time.
A value of 1 is the maximum brightness difference in a 24-bit color space; however, internally LightWave can work with pixels brighter than RGB 255, 255, 255. Since you might want anti-aliasing only when nearby pixels differ by more than 1, the adaptive sampling Threshold can be set higher than 1. If you want to ensure that extra anti-aliasing is never performed, use a large Threshold value.