Installing LightWave - Render node

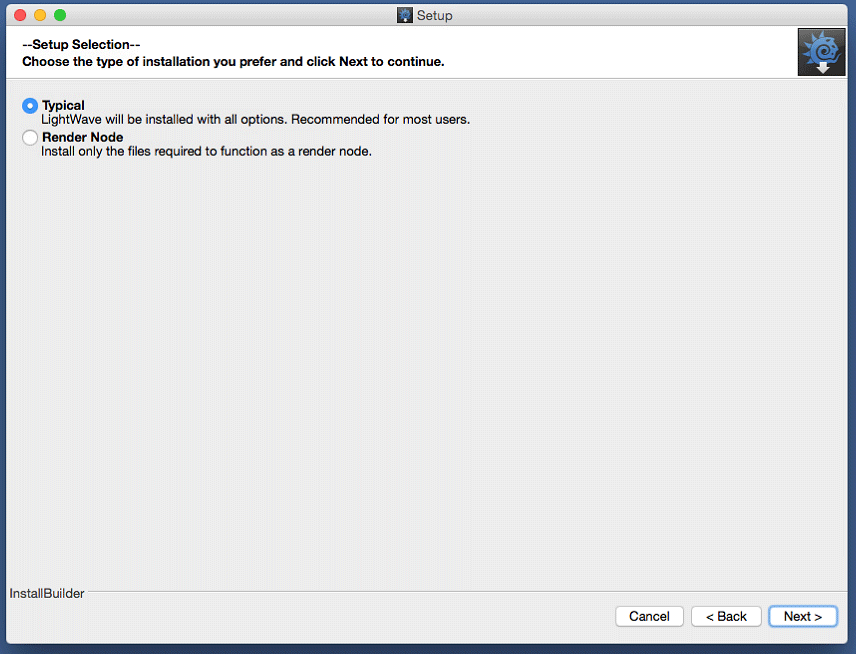
When you launch the installer for LightWave you are presented with the choice of how to install. In addition to the Typical and Custom (Windows-only) choices, LightWave 2019 includes a Render Node option. This installs just those files needed to configure the host system as LightWave render node. After installation, the render node runs automatically in the background, without any user interaction needed. The machine will then be ready to appear in the NRC list of available computers.
For completely unattended access on PC, select to configure advanced options for NRC and set to Windows Service. On Mac, select System Service.
IPv4 Discovery
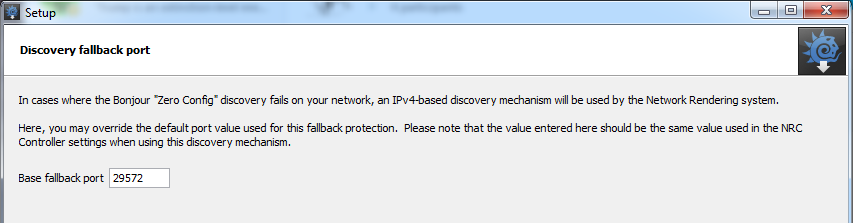
By default, render node discovery relies on the popular Bonjour zero-configuration network technology. However, if you wish, you can opt to use IPv4 discovery instead. This will work automatically, but if your network requires the default port number of 29572 to be changed, this needs to be set up when installing. To do so, choose to configure advanced options for the Network Render Controller. There are several options to configure here, but if all you want is to change the port number, click Next three times to get to the following screen:
The screen after is the naming for the NRC Service Identifier.
For completely unattended installation, perhaps necessary when installing on machines not present at the install location, you can run the installer from the command line with arguments to select the various options without running the GUI. Run the installer executable from the command line with the " --help" option to see all the values that can be specified.