General Group
Bone Edit Mode
Bone Edit Mode allows you to edit your character rigs quickly and easily within the scene you are creating.
Enter Bone Edit Mode
(default keyboard shortcut Shift E)
Entering bone edit mode will do a number of things to help you work on character rigs in your scene.
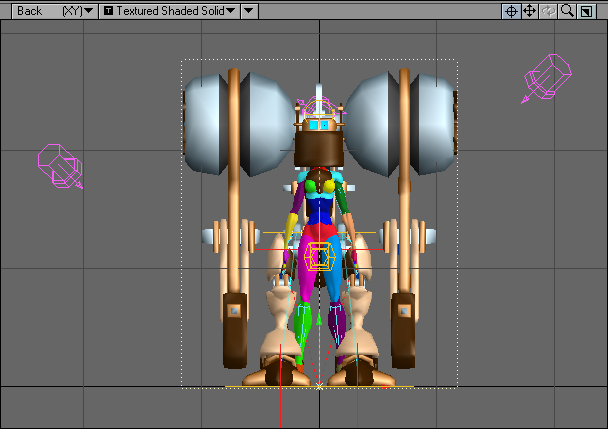
When it is invoked it will turn off the visibility of all items in the scene except the object that you have selected and will take you to frame 0. All of the items that have been hidden will also be locked so there can be no accidental selection of another object. Enable IK will also be toggled off but can be turned back on when needed.
If you use the Scene Editor while in Bone Edit Mode make sure you only edit the character that you had selected in Bone Edit Mode.
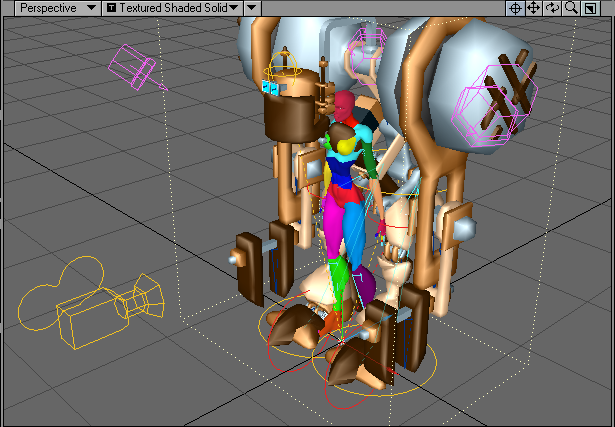
Before entering Bone Edit Mode.

After entering Bone Edit Mode (note that a red border appears around the viewport).
The other character that shared the same origin has been hidden and locked.
Exit Bone Edit Mode
(default keyboard shortcut Shift D)
Exiting Bone Edit Mode will restore all visibility and locked items to their original state. You will have to move to the original frame manually.
After exiting Bone Edit Mode.
Moving the time slider from frame 0 will cause LightWave to exit Bone Edit Mode.
The objects do not need to share an origin for Bone Edit Mode to work. Selecting any object in the scene and invoking Bone Edit Mode will work. But some of the Bone tools (Mirror Hierarchy) are easier to use if the character is worked on at X= 0, Z= 0.
Bones On/Off
Turns all bones on or off.
Enable IK
(default keyboard shortcut Shift F8)
When Enable IK (Setup > General > Enable IK) is active LightWave’s IK will be applied to all items with IK set up on them.
It is sometimes necessary to disable IK when editing a rig.
Enable Deform
(Setup > General > Enable Deform) will toggle on or off LightWave’s ability to deform a mesh with bones.