Modify Group
Joint Move
(default keyboard shortcut Ctrl J)
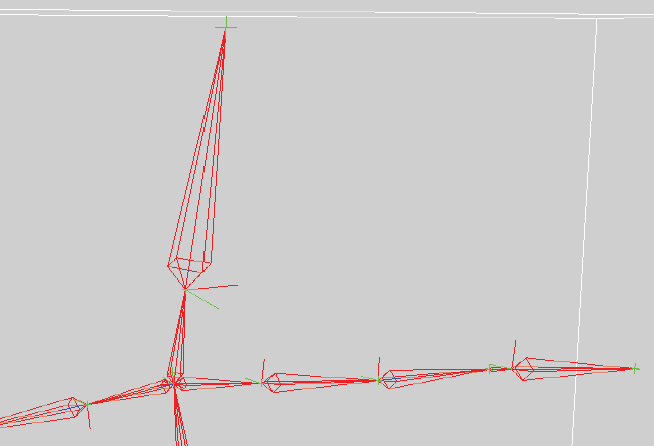
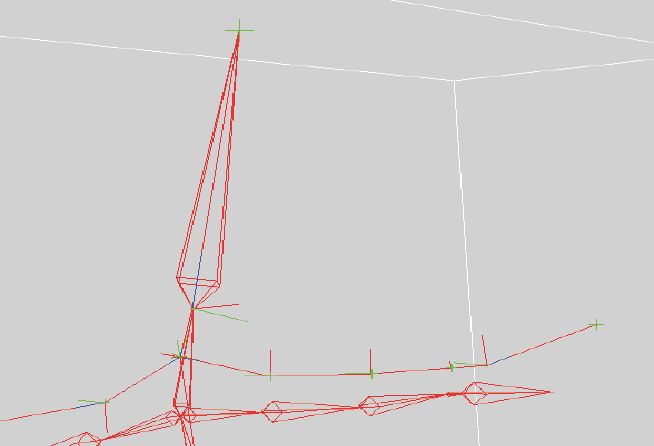
Joint Mover draws lines along each bone and puts a cross hair at the base of the child bone(s), which is usually coincident with the tip of the parent (but need not be).
In any view, you can then click the LMB and drag the cross hairs to the new location where the tip of the parent and base of the child should be, in effect, moving the joint location between two bones. After the mouse button is lifted, hit the space bar to actually change the bones. Using the RMB will constrain the bone to move along its length.
Attributes edited in LightWave will be the parent’s rest rotation and rest length, and the children’s rest rotation, rest position, and rest length.
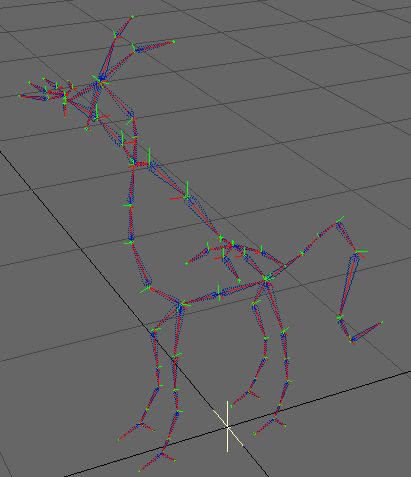
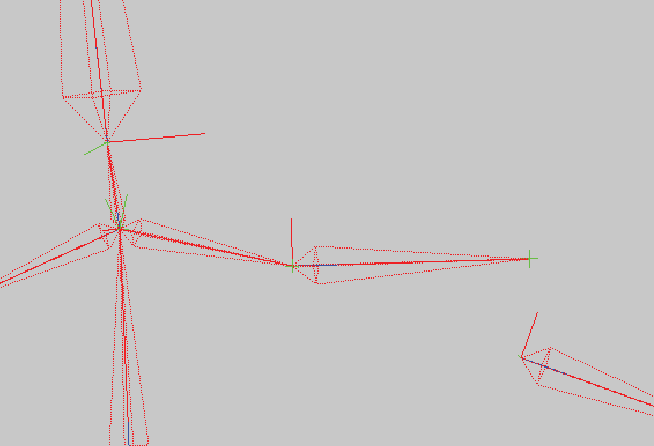
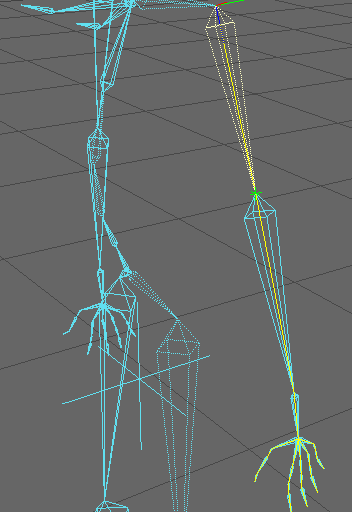
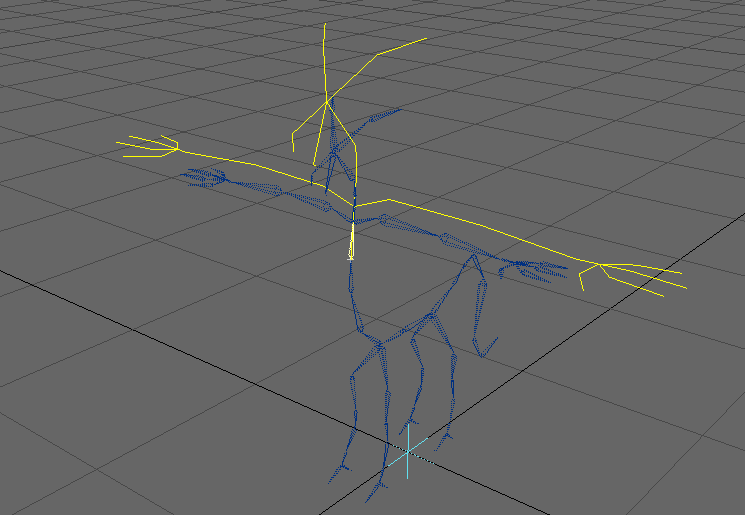
If you select the object and run Joint Mover, the tool will be drawn through the entire hierarchy.
Here is a hierarchy with Joint Mover active. You can see the green cross hairs that are drawn at the joints and at the tip of the single bone at the end.
Using the LMB each one of the joints and the tip of the bone at the end has been moved (one at a time) to a new location.
After all the editing is done, hitting the space bar will exit Joint Mover and move all the bones to the new locations.
If you want to execute your edits but keep Joint Mover active just invoke Joint Mover again instead of hitting the space bar. This will move the bones and keep Joint Mover on.
These edits cannot be undone.
A bone’s tip can be moved away from the base of its child by selecting the bone you want to edit and running Joint Mover. The tool will only be active in the selected bone which is not the case when the object is selected and the tool is drawn through the whole hierarchy.

This will allow you to move the tip of the bone away from its child’s base.
After the tool is dropped (hit space bar), the bone is moved to its new position.
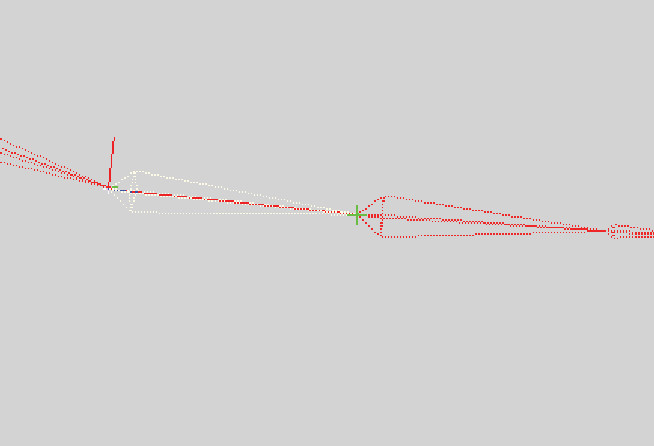
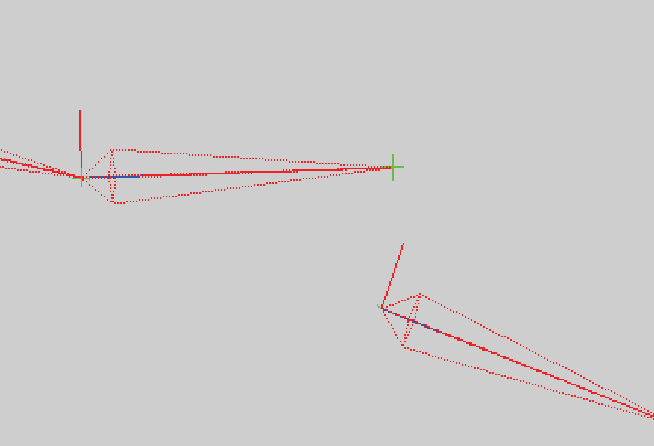
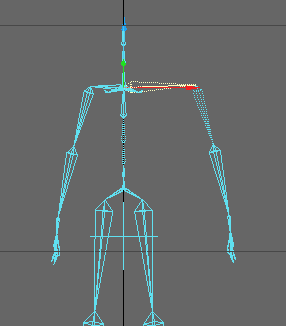
If you have bones whose tips have been offset, Joint Mover can still be used to edit the joints’ position.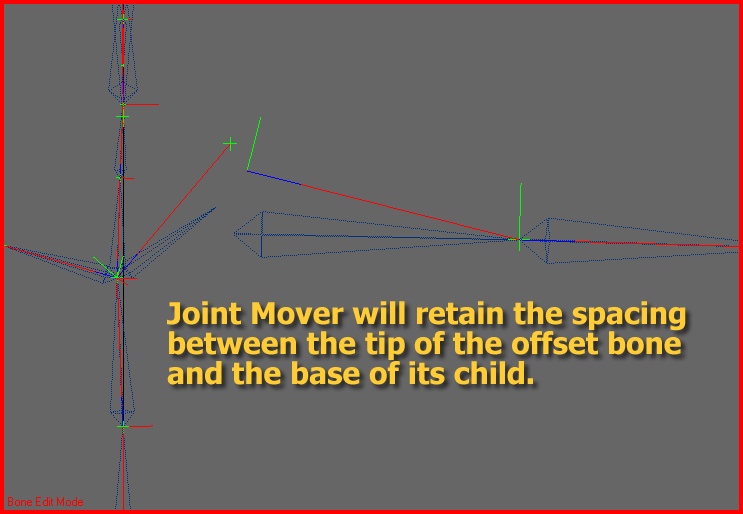
The tool will behave just as it does when the parent’s tip and its child’s base are touching.
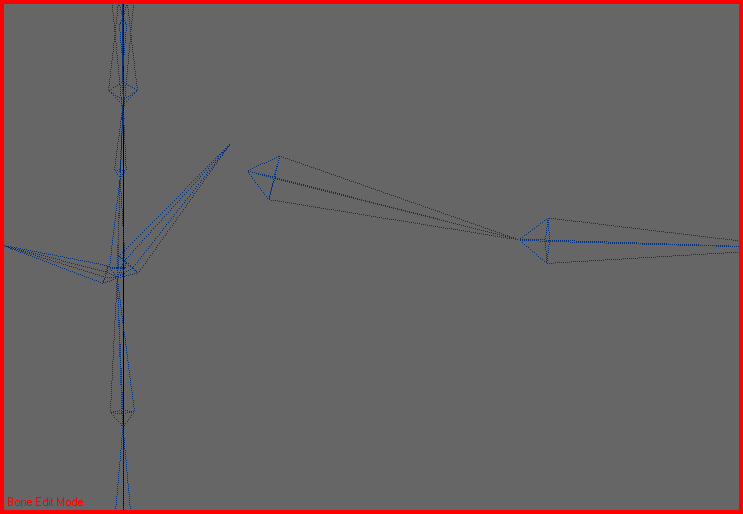
This is the result of that edit. The spacing is maintained even with the bones in their new position.
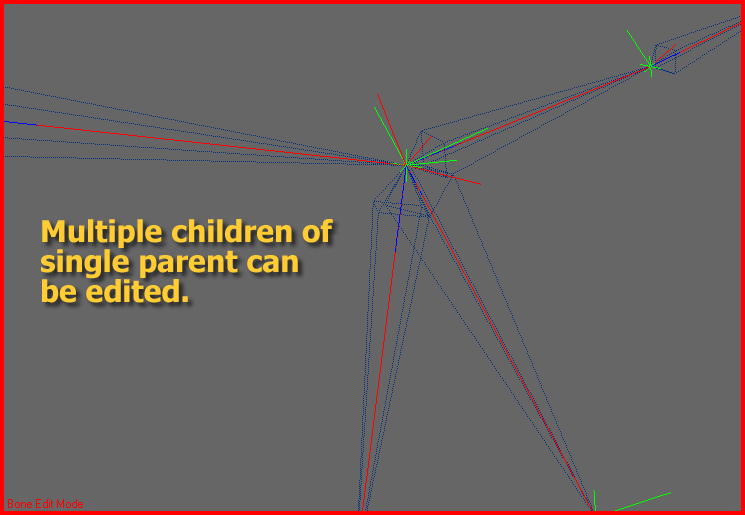
If multiple child bones share a joint with the same parent you can move them by selecting the object and drawing Joint Mover through the entire hierarchy. Or you can choose the bones individually.
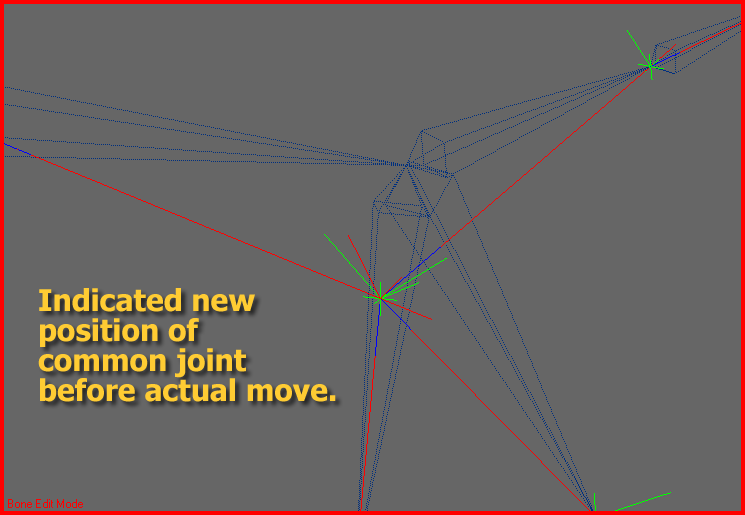
Use the LMB and drag the common joint where you want it to be.
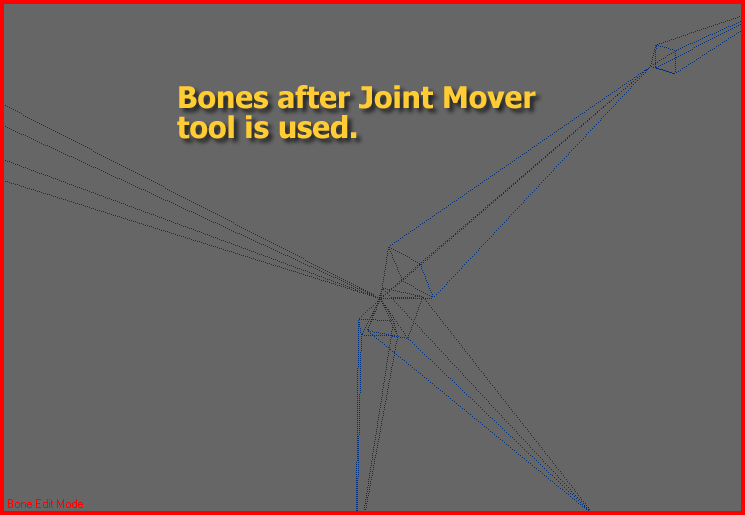
Once the edit has been executed, the bones will be drawn in the new location still connected.
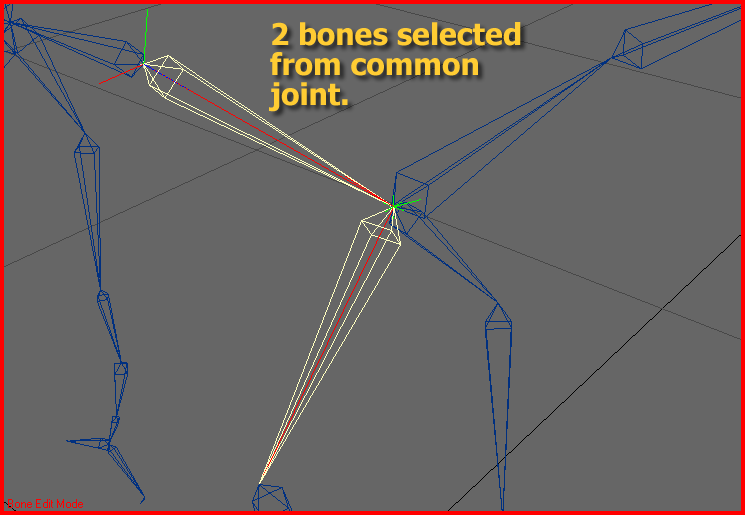
You can choose what bones in a common joint you want to move. As long as the parent is selected, as many of its children as need be can be selected and moved.
Tip Move
(default keyboard shortcut Ctrl T)
Tip Move will allow you to move an entire hierarchy by moving the tip position of the hierarchy’s parent bone. Attributes edited in LightWave will be the bone’s rest rotation, rest position, and rest length.
Single Bone
If a single bone is selected, Tip Move draws a line along the bone and puts a cross hair at the tip of the bone. If there is a hierarchy with a child relationship to the selected bone a yellow line is drawn through the remaining bone but there will be no cross hair at the tips. Only the tip of the selected bone will be editable.
If you use the LMB to move the selected bone’s tip, its hierarchy will move along with it. Even though the parent bone’s angle and size change the hierarchy, it will maintain its original configuration. If the RMB is used on the selected bone’s tip, it will expand along its own length.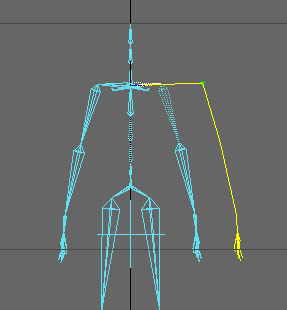
Once you get the selected bone’s tip where you want it you can hit the space bar and all the bones will be moved to the correct place. Or if you want to continue using the tool just select Tip Move again. All the bones will be moved and Tip Move will stay active.
Entire Contiguous Hierarchy
If the object itself is selected and Tip Move is activated. The tool will be drawn through the entire contiguous hierarchy.
In this mode every joint will be editable instead of just a single bone. But the same rules apply to the child/hierarchy of the tip that is being moved. Even though the parent bones’ angle and size change the hierarchy, it will maintain its original configuration. If the RMB is used on the selected bones’ tip, it will expand along its own length.
Once you get the selected bones’ tip where you want it, you can hit the space bar and all the bones will be moved to the correct place. If you want to continue using the tool just select Tip Move again. All the bones will be moved and Tip Move will stay active.
Bone Twist
(default keyboard shortcut Ctrl K)
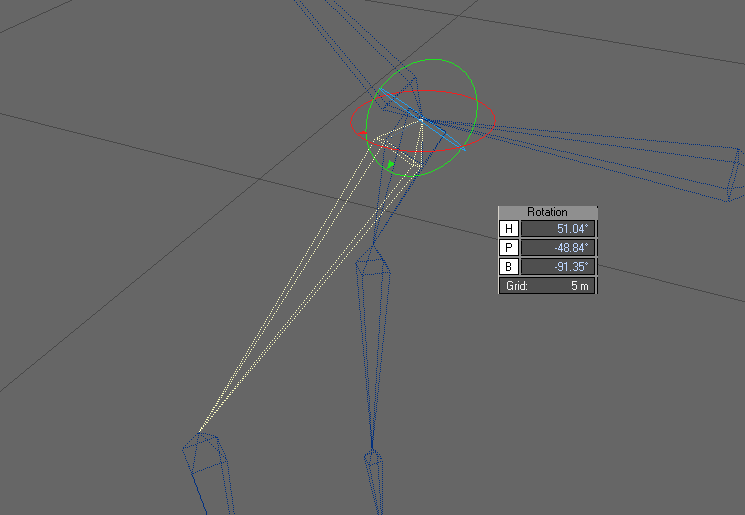
Bone Twist allows you to change the bank rotation of a bone while leaving children of that bone unaffected. If no bones are selected, the tool will allow you to go bone to bone and adjust each bone’s bank. When invoked, this tool draws a circle around the base of the selected bone in blue, and draws representations of the three axes of the bone (in local coordinates). These drawn axes represent the right, up, and forward (x, y, and z) orientation vectors.
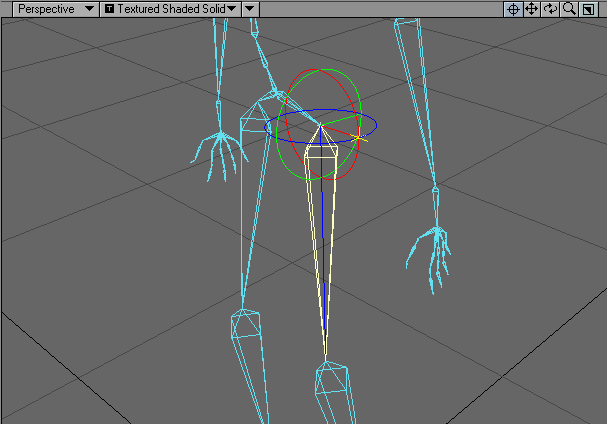
When the LMB is held down on the yellow cross and the mouse dragged right, the drawn axes rotate in a positive direction, when the mouse is dragged left, rotation is in the negative direction. Rotation is the similar to doing a Rotate operation in LightWave’s standard interface, and changing the bank angle by dragging the yellow cross in the blue circle.
However, the children of the selected bone will remain in place with Bone Twist. After the mouse button is lifted, hit the space bar to actually change the selected bone’s bank angle, or invoke the Bone Twist tool again to have the rotation of the bone occur with the tool remaining active.
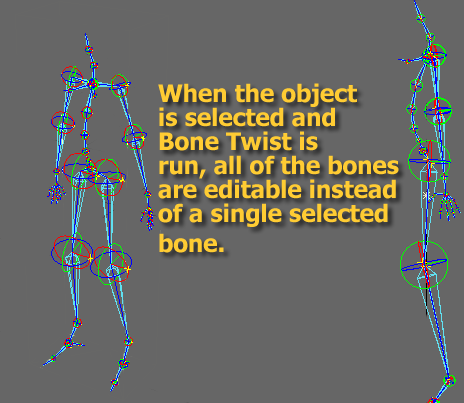
Selecting a bone and running Bone Twist will allow you to edit the bone selected and that bone only. Selecting the object containing the bones and running Bone Twist will allow you to edit all bones contained in the object. The reason for this is to give you the ability to isolate a bone that may be difficult to see when all bones have the tool active.
Scale Hierarchy
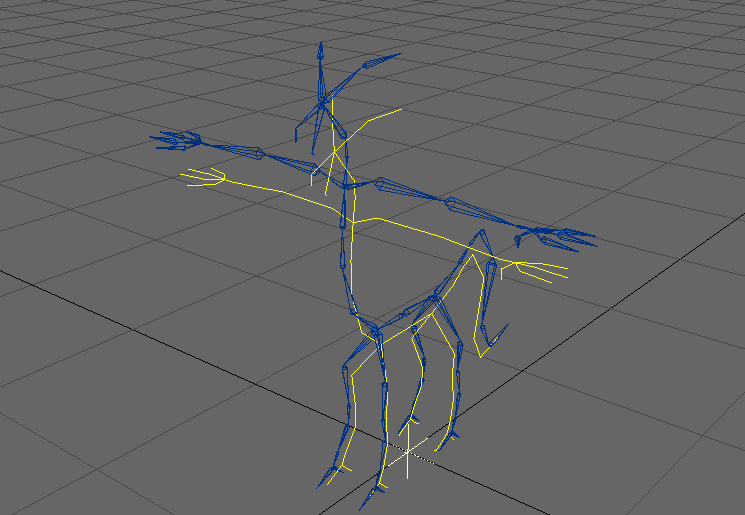
Scale Hierarchy will allow you to scale a hierarchy up or down. This can help you when you import an existing hierarchy into a new mesh or if you are reusing pieces of your rig in another part of your object.
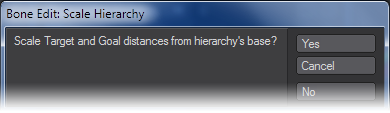
Select the object to scale the entire bone structure. If you want to only scale a section, select the parent bone of that particular hierarchy. You can also choose to scale targets and goals along with the bones.
Depending on the configuration of the hierarchy you may have to adjust the target and goal positions manually.
Selecting the parent bone of a hierarchy will allow you to scale just that part if needed.
Use the LMB to make coarse changes and the RMB to make fine changes.
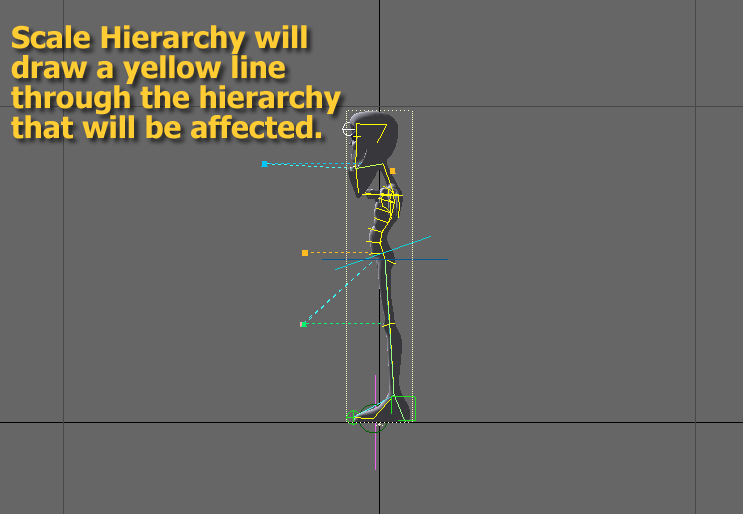
In this example the object has been selected so Scale Hierarchy will affect all the bones.
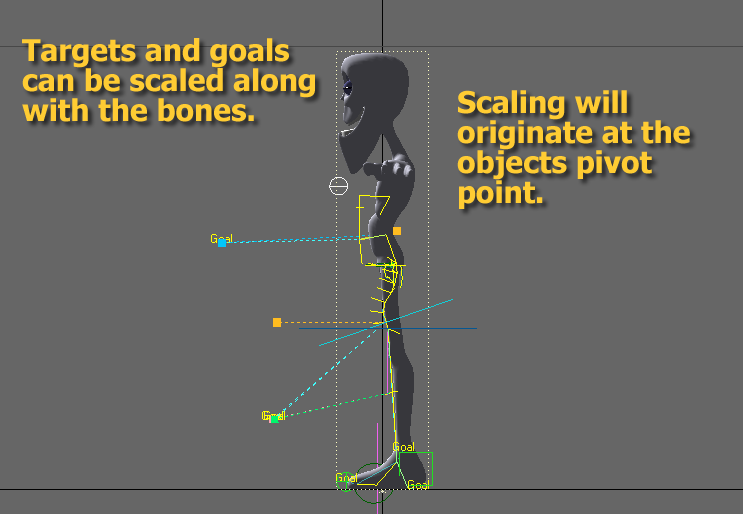
If you choose to scale targets and goals. Scale Hierarchy will attempt to move them along with the bones.
Orientation
Align Pitch
Twists the selected bone so that its pitch rotation axis is coplanar with that of its parent.
To use Align Pitch:
- Select the child bone whose pitch you want to align with its parent.
- Run Align Pitch located under Setup > Modify > Orientation > Align Pitch. Align Pitch will change the bone’s rotation and automatically move to the next child bone. This makes it easy to just step down a chain you want to align.
Ensure that IK is disabled and that Bones are turned off. An easy way to do this is to use Bone Edit Mode. Setup > General > Bone Edit: Enter Bone Edit Mode.
This operation cannot be undone. Please save your work before executing the tool.
Record Pivot Rotation
(default keyboard shortcut Shift P)
(Setup > Modify > Orientation > Record Piv Rot) RPR is used to zero out the current items’ rotation at its current physical rotation. Basically it masks the real rotational values and allows LightWave to see H=0, P=0, B=0 after it is set. This can help avoid problems with Gimbal Lock.
Before RPR is applied in this example the bones heading (the red circle) is not aligned with its bone.
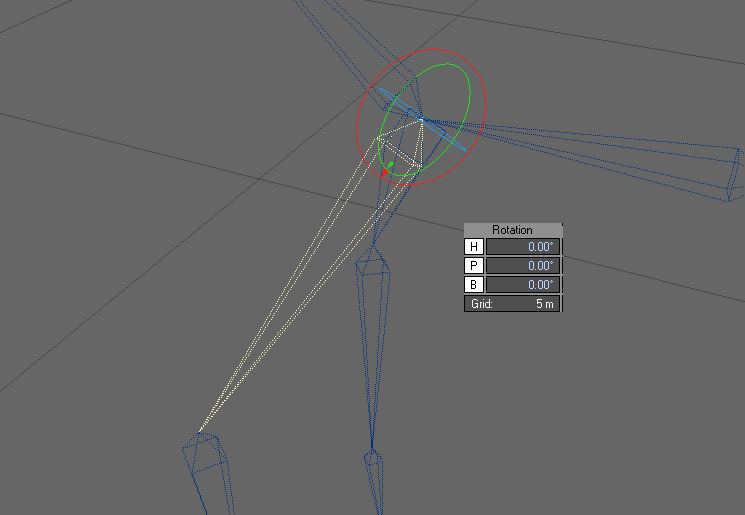
After RPR is applied the bones heading (the red circle) is now aligned with the length of its bone.
Record Bone Rest Position
(default keyboard shortcut R)
Once a bone is placed and keyframed you must set its rest position and activate it. Usually, you will use the keyboard shortcut for the Record Bone Rest Position command, which is the lowercase R key. This does two things: records the rest position and activates the bone. From then on, any changes to the bone will deform the object.
When adjusting a chain of bones individually you’ll need to keyframe each bone (or use Auto Key Create) before moving on to the next bone.
When you use the Record Bone Rest Position command, LightWave sets the rest position by copying the bone’s current position and rotation values to the Rest Position and Rest Direction values (Bones Panel). This creates a point of reference, so that if you later move the bone (not the object), it can influence the object’s shape.
If you need to reset the rest position, you may want to deactivate the bone before reapplying the Record Bone Rest Position command. Alternatively, you could manually edit the Rest Position and Rest Direction values.
All of the Bone Edit tools (Joint Move, Tip Move, Bone Twist) will record the bone’s rest position automatically.
Remove Pivot Position
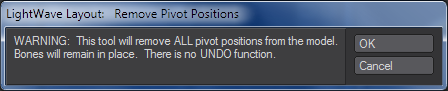
Setup > Modify > Orientation > RemovePivotPos will remove Record Pivot Position from the entire rig. When invoked, a warning will be displayed. Press OK and RPP will be removed.
Remove RPR
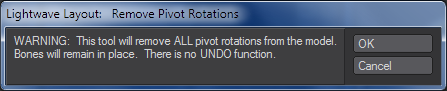
Setup > Modify > Orientation > Remove RPR will remove Record Pivot Rotation from the entire rig. When invoked, a warning will be displayed. Press OK and RPR will be removed. The rotational values of the bones that had RPR applied will no longer read 0 degrees.