Textured Point
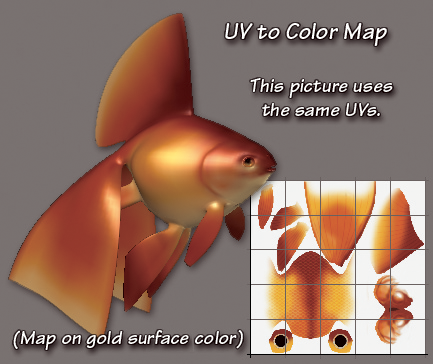
This button allows you to assign the luminosity values of a normal LightWave Texture (image, procedural, or gradient) to a Weight or Morph Map, or the Color values to a Color Map. Bear in mind, though, that the texture is assigned to points, not polys (hence the name) so, unless you have a very heavy mesh, you won’t get the detail you’d get by using the textures on a surface. Other than that, though, it works in a very similar way.
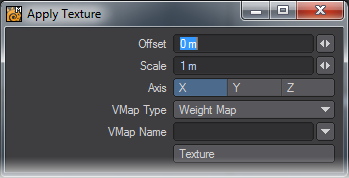
Offset
Offset will move a 3D texture through the surface.
Scale
Scale changes the scale on all three axes simultaneously.
Axis
Axis allows you to change the Projection Axis for the texture.
VMap Type
Choose the type of map you want to apply the texture to from the VMap Type drop down menu. The available choices are Weight Map, Morph Target, or Vertex Color.
VMap Name
Type the name of the Vertex Map you would like to work on into the Name field, or choose it from the drop down list to the right. The list contains all the names of all the maps of that type used during the current session, whether or not the objects remain open, and whether or not the maps have any points assigned to them.
You can also type a new name into the field to start a new map. In the case of a Color Map, you can choose (new) and then type one in; but be aware that, as always, you won’t be able to see it until it’s been assigned to a Surface. (To do that, you’ll need to open the Surface Editor, go to the Advanced Tab, and choose the map from the Vertex Color Map drop down.)
Weight Maps, Morph Maps, or existing Color Maps that have been assigned to a visible surface, will become selected in the VMap Bar, and will be visible in any viewports capable of showing them. (ie. Weight Maps will be shown in viewports using the Weight Map Render mode, Color Maps in Smooth Shade, Texture, and Textured Wire, etc.)
Click on the Texture button to open the familiar LightWave Texture panel. This works the same as it does everywhere else. You’ll find that the Gradient parameter choices are limited to Previous Layer, X, Y, Z, Distance to Center, and Weight Map; but other than that it’s what you are used to.
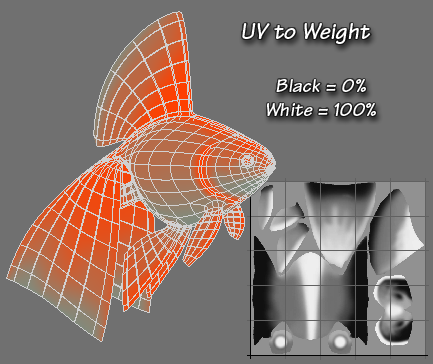
As you work, you’ll be able to see the texture affecting the map in real time. Colors will change, weights will go from red to green, and morphs will distort as you watch.
Although you can change the orientation and scaling from within the Texture dialog, as you normally would, you can also change them in the Textured Point dialog (labeled Apply Texture)