Color Spaces
Before we delve into surfacing proper, an increasingly important part of graphics workflow today is making sure you have the correct color workspace set for your target support for your graphics. Rendering for print is different to rendering for the screen, and even there, rendering for the web is different to rendering for the cinema screen. LightWave supports loading and saving color space information to work within pipelines requiring it. This is called Linear Workflow.
What is Linear Workflow?
Color is not just the simple triplet of 0-255 RGB values we’ve always known. When you view work on a computer screen it has a “gamut”, that’s to say a range of colors the screen can present. Images are displayed with a value called Gamma to match the initial colors with what the monitor can show. A Gamma value is an exponent of the curve that is created from the input voltage to your monitor to the output light intensity. Ideally, this would be linear but in reality follows what is called a powerlaw function. Gamma compensates for this curve by applying a reverse curve that flattens our output line.


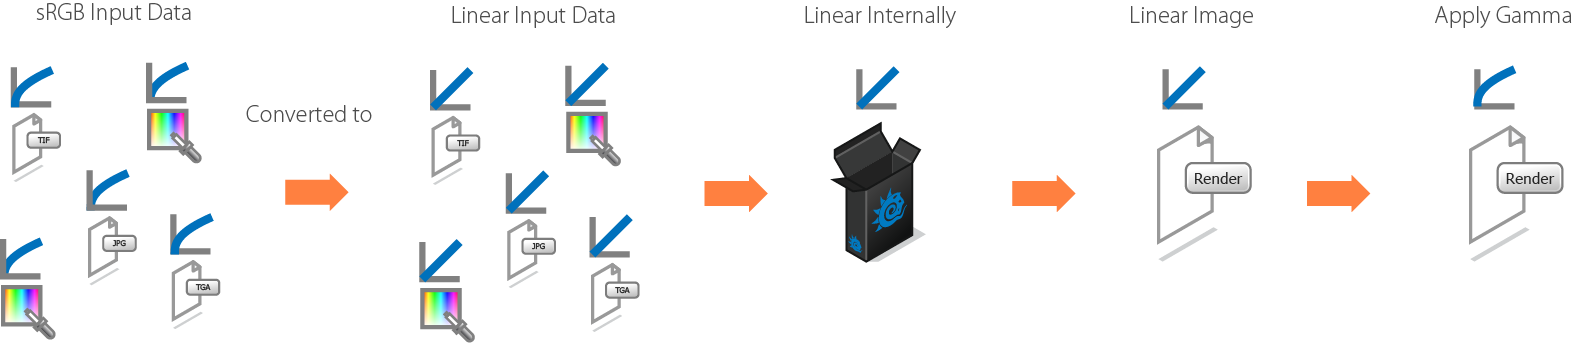
LightWave’s render engine is linear internally, meaning there is a 1:1 relationship between Input Signal and Light Intensity, but images that you will use for textures and colors you pick in the color picker will have gamma applied so that they display correctly onscreen. What LightWave’s Color Space settings do is to bring everything to a linear state so that you are comparing like with like. It also prevents the problem where images, that already normally have Gamma applied, don’t have it applied again needlessly washing out textures. It does this by stripping the gamma correction from an image (purely the image loaded in LightWave, not the one on disk) to make it linear and then only applying Gamma correction to the rendered image.
The Gamma correction applied differs depending on the final destination of the image. For a computer screen, the color space used is called sRGB; for images destined for HDTV you will want to use Rec. 709. The Cineon color space is most often used for cinema, while ciexyz is the complete gamut of visual light. In addition you can load custom Look Up Tables (LUTs) in order to suit a custom pipeline. These settings can also be saved as presets making reuse simple.
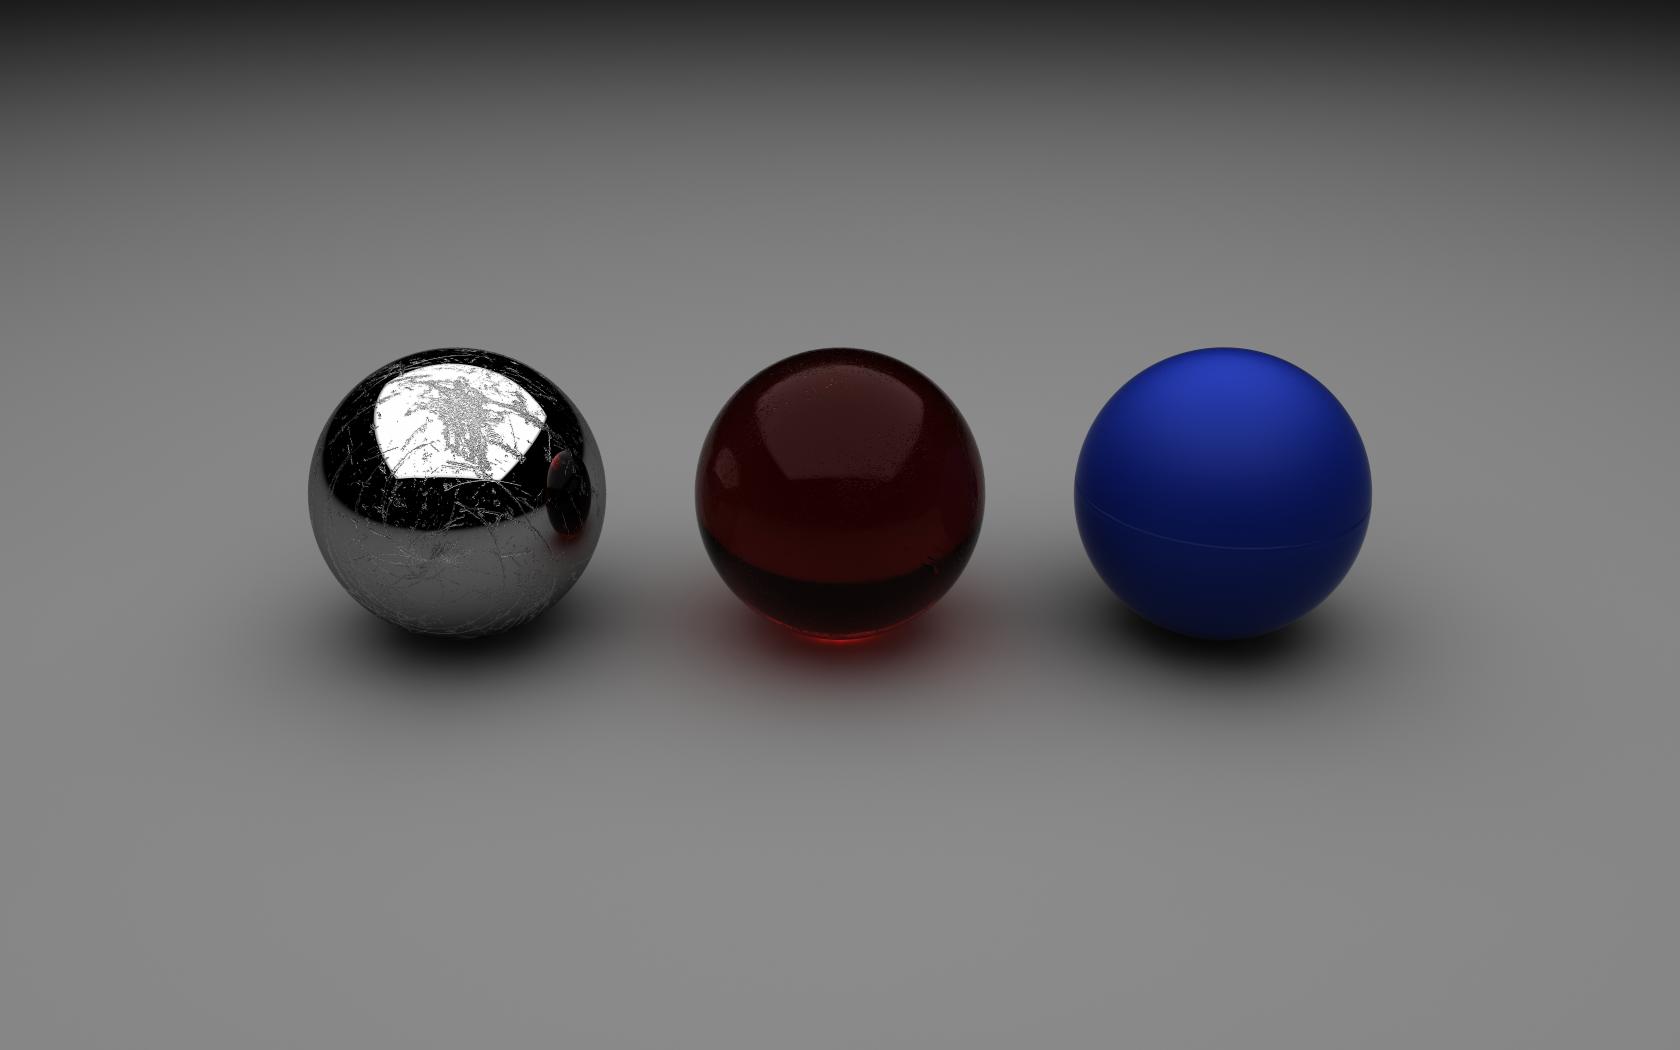

Materials rendered in Linear and with sRGB color space applied - no changes were made to lighting
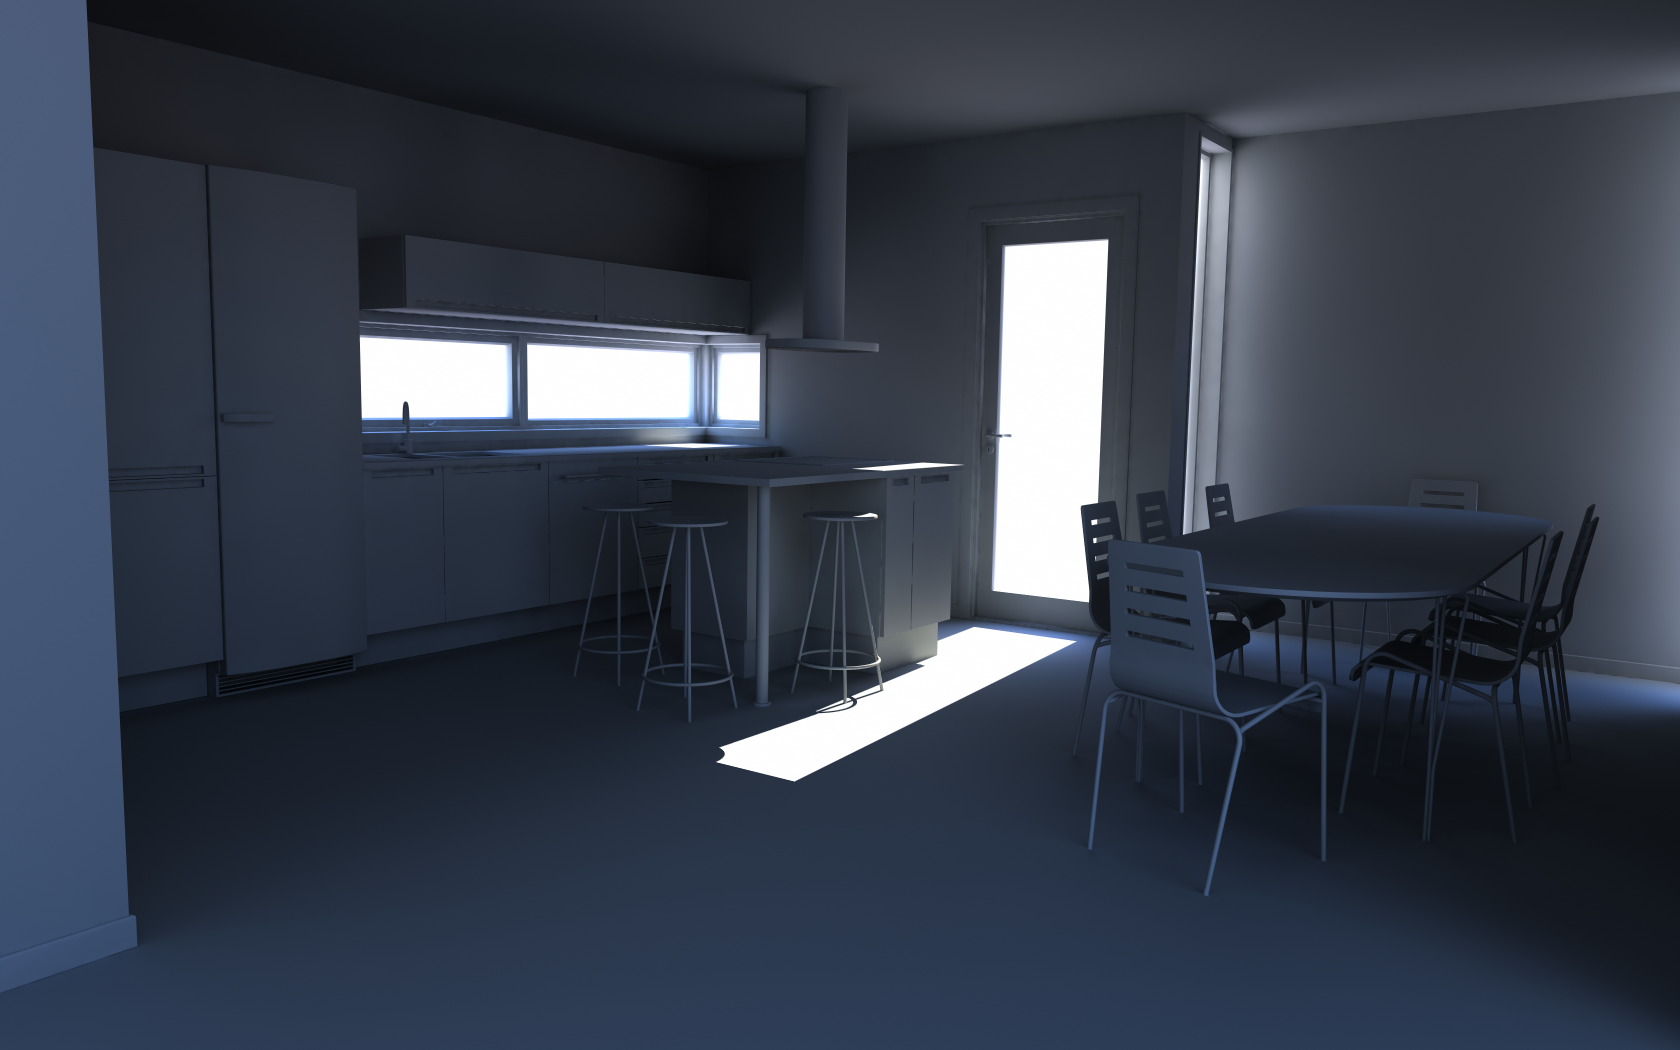
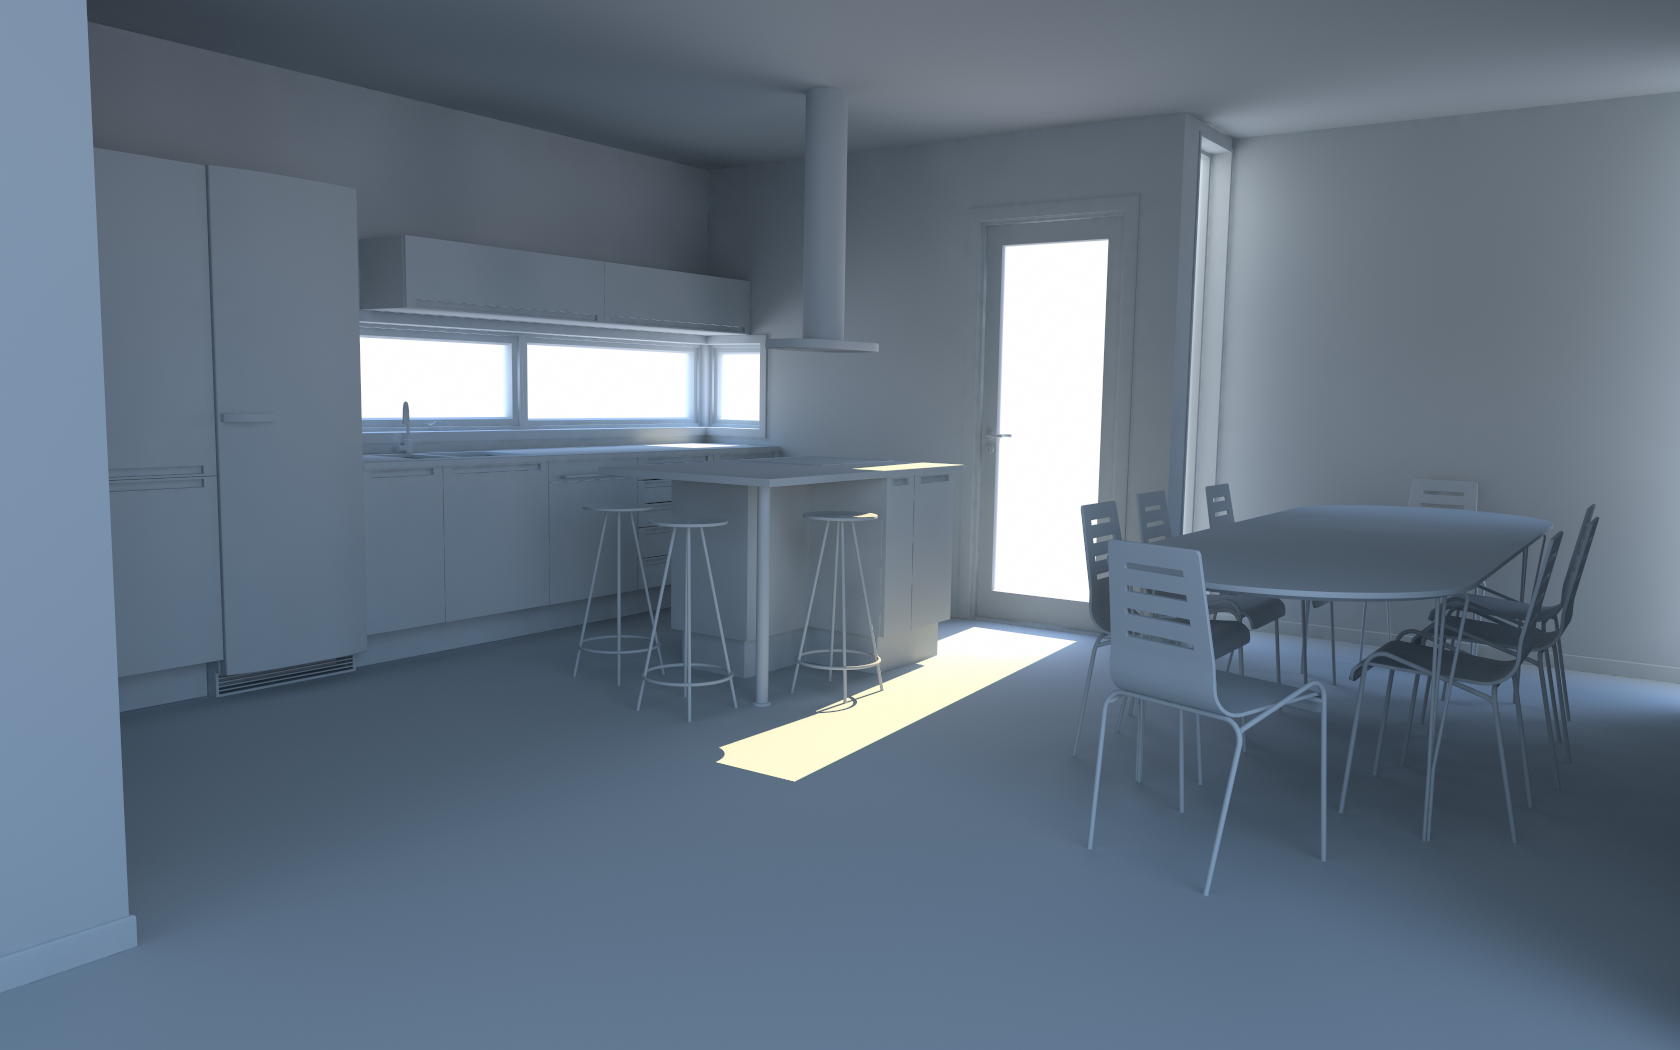
Kitchen rendered in Linear and with sRGB color space applied - no changes were made to lighting
Linear workflow
LightWave has the ability to load *.csp, *.3dl and *.cube LUTs
Using LightWave’s CS Settings
Since LightWave 10, LightWave has been able to use Color Space information to give better results, above all with images used for texturing. Color space conversion is performed in four places in LightWave.
- On loading, an image can be converted from its native color space format to linear.
- When sent to the Image Viewer, an image can be converted from linear to another color space.
- When saved from the Renderer, an image can be converted from linear to another color space.
- When picked from the Color Picker, a color can be converted from and then to linear color space.
By default, LightWave is set not to do any conversion - the Linear setting, but to better suit work for the monitor, switch to sRGB. For better work for cinema choose Cineon and for widescreen high-definition TV choose Rec.709. These choices will help convert images that may already have color space definitions and keep their colors pure.
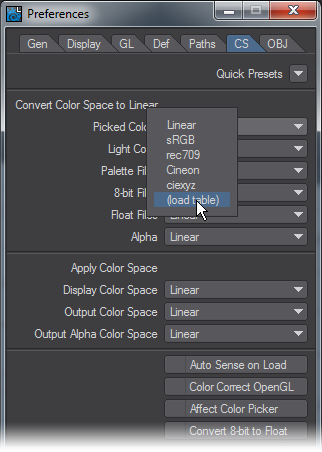
LightWave provides presets for sRGB and rec.709 but a personalized mix can be set up with the dropdown choices for each of the different elements and saved as a preset for future use. You can also load in color space definitions to exactly match existing setups. A color table can be loaded by using Load Table from the pop-up. The color tables are stored in the project directory, in a directory called ColorTables.
The options are as follows:
Convert Color Space to Linear
- Picked Colors - Colors chosen from the LightWave or other color picker
- Light Color - The color chosen for lights
- Palette Files - Palettes loaded into LightWave
- 8-bit Files - 8-bit here refers to images that are 8 bits per channel such as JPGs, PNGs or TGAs, previously known as 24-bit or 32-bit. These benefit the most from color space conversion.
- Float files - Images using floating point colors schemes don’t benefit from color space conversion, indeed it would cause severe banding and thus this should always be left on Linear
- Alpha - Again, alpha images need to be preserved exactly as they are since the level of gray indicates distance. As such they don’t require or want color space conversion
Apply Color Space
- Display Color Space - What Layout looks like. Normally, this should be left at sRGB unless you are working on a cinema screen or loom or something
- Output Color Space - This is the color space for your renders. Again, if they are for the monitor choose sRGB
- Output Alpha Color Space - This should be left at Linear as for the conversion settings
Other Options
- Auto Sense on Load - when you load a scene LightWave detects what CS setting were already in use and changes to them automatically when this option is activated
- Color Correct OpenGL - to better match the colors of polygons and lights when not viewig in VPR or a render
- Affect Color Picker - Best left checked since otherwise the colors you choose in the color picker won’t be those you get in the render
- Convert 8-bit to Float - Converts 8-bit per channel files, otherwise known as 24-bit, to floating point files. This increases the memory overhead a lot for textured images. It will increase the fidelity of the results but is not always needed