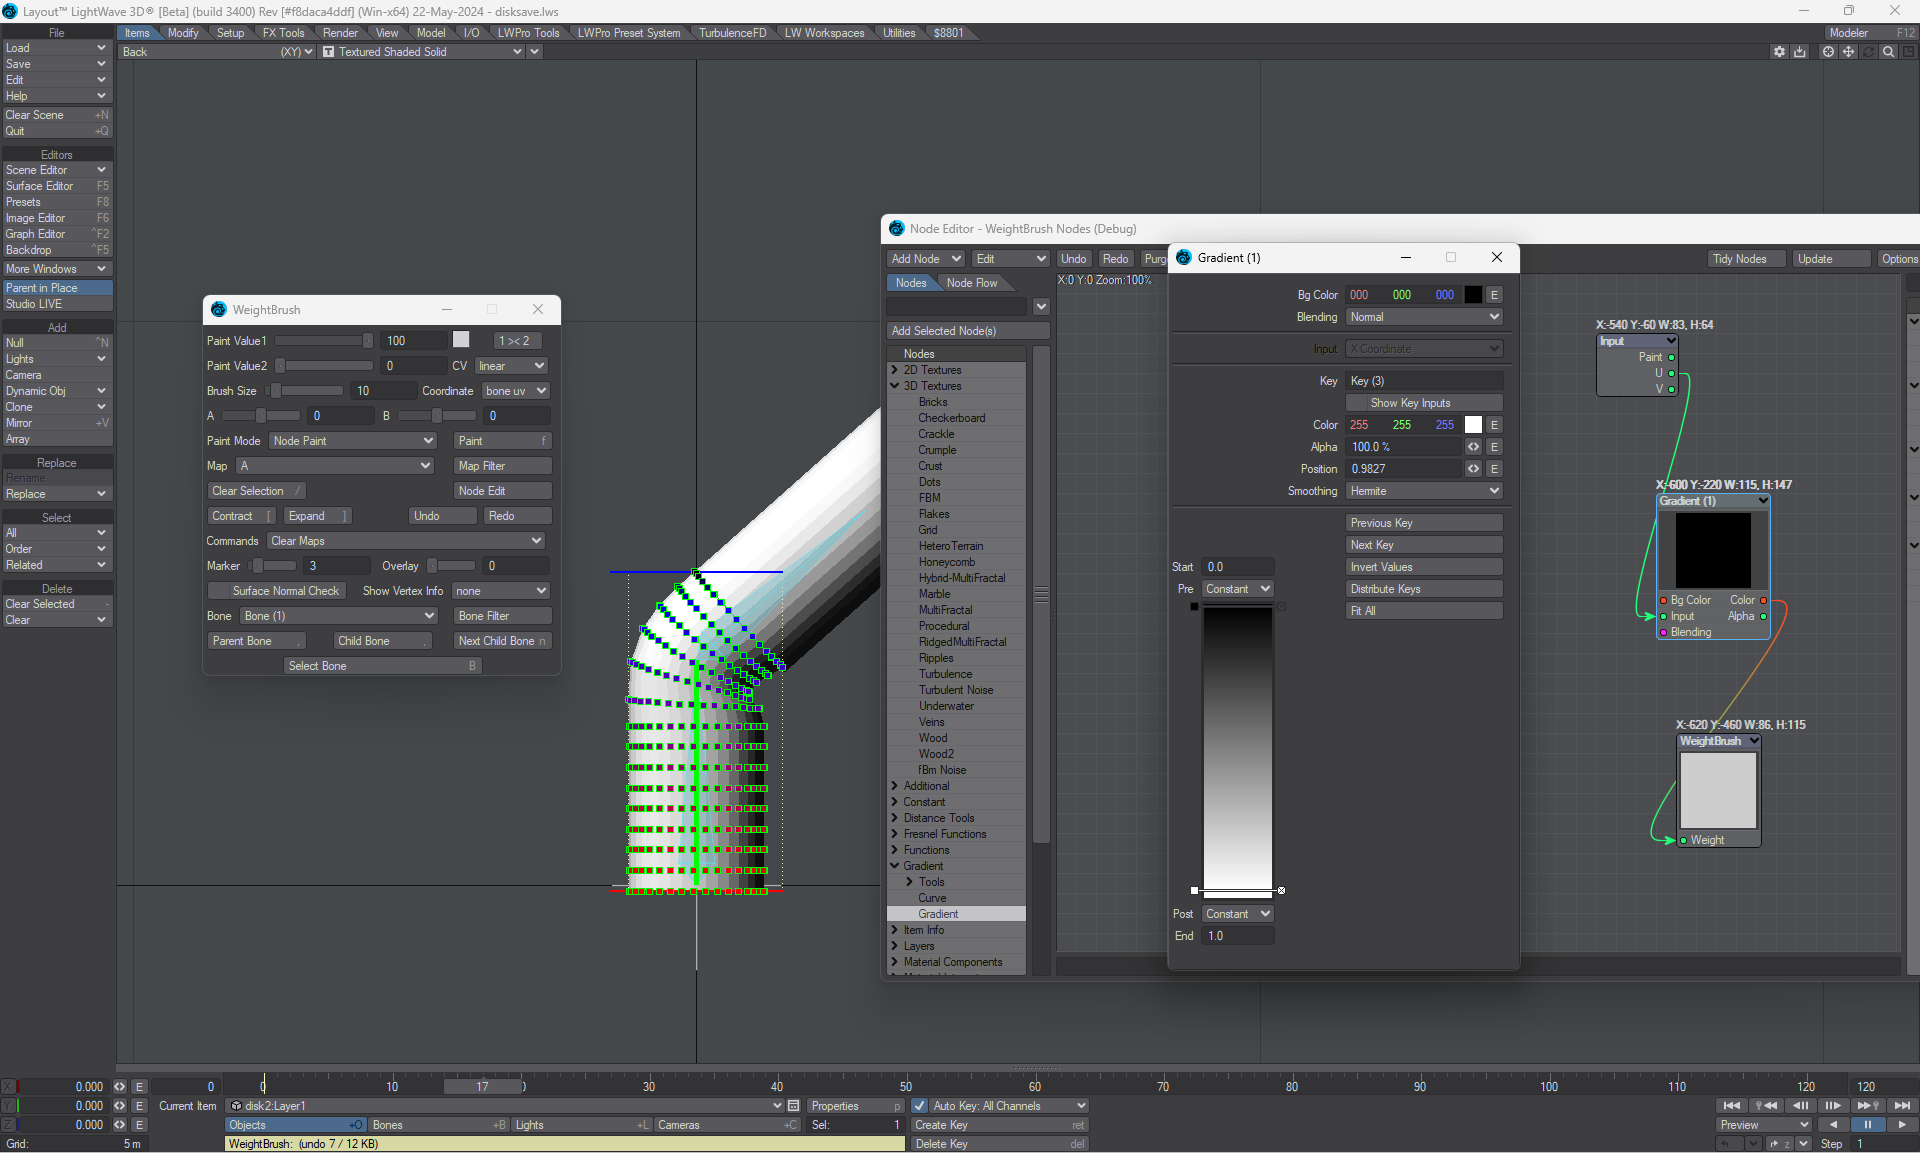
Weight Brush
A new addition to LightWave 2024 is a tool to paint weights directly in Layout, no need for Modeler weight mapping. The Weight Brush button at the bottom of the Modify tab.
Hold LMB to select points, RMB to box select. CTRL using either button deselects.
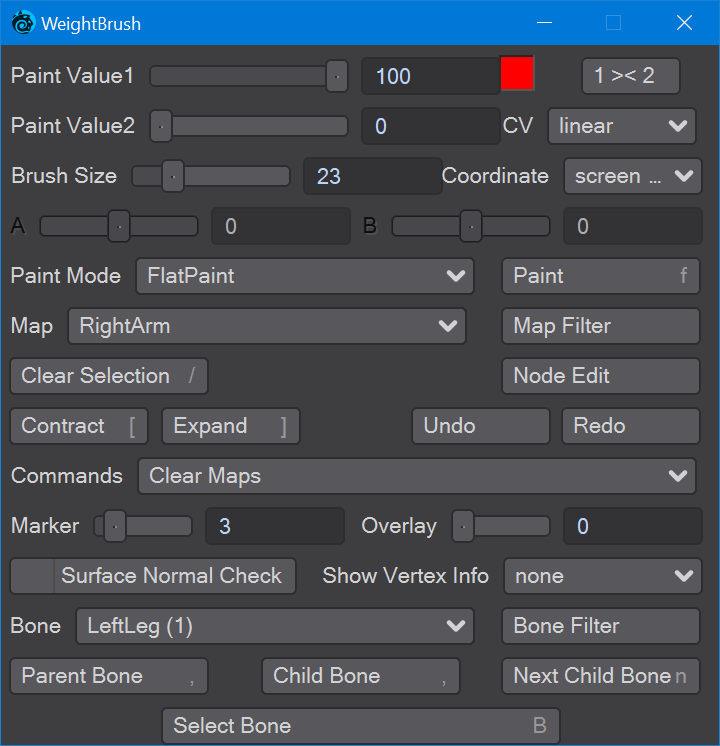
- Map
This dropdown presents a choice of weightmap. Choose your weightmap as the first step when using Weightbrush.
- Map Filter
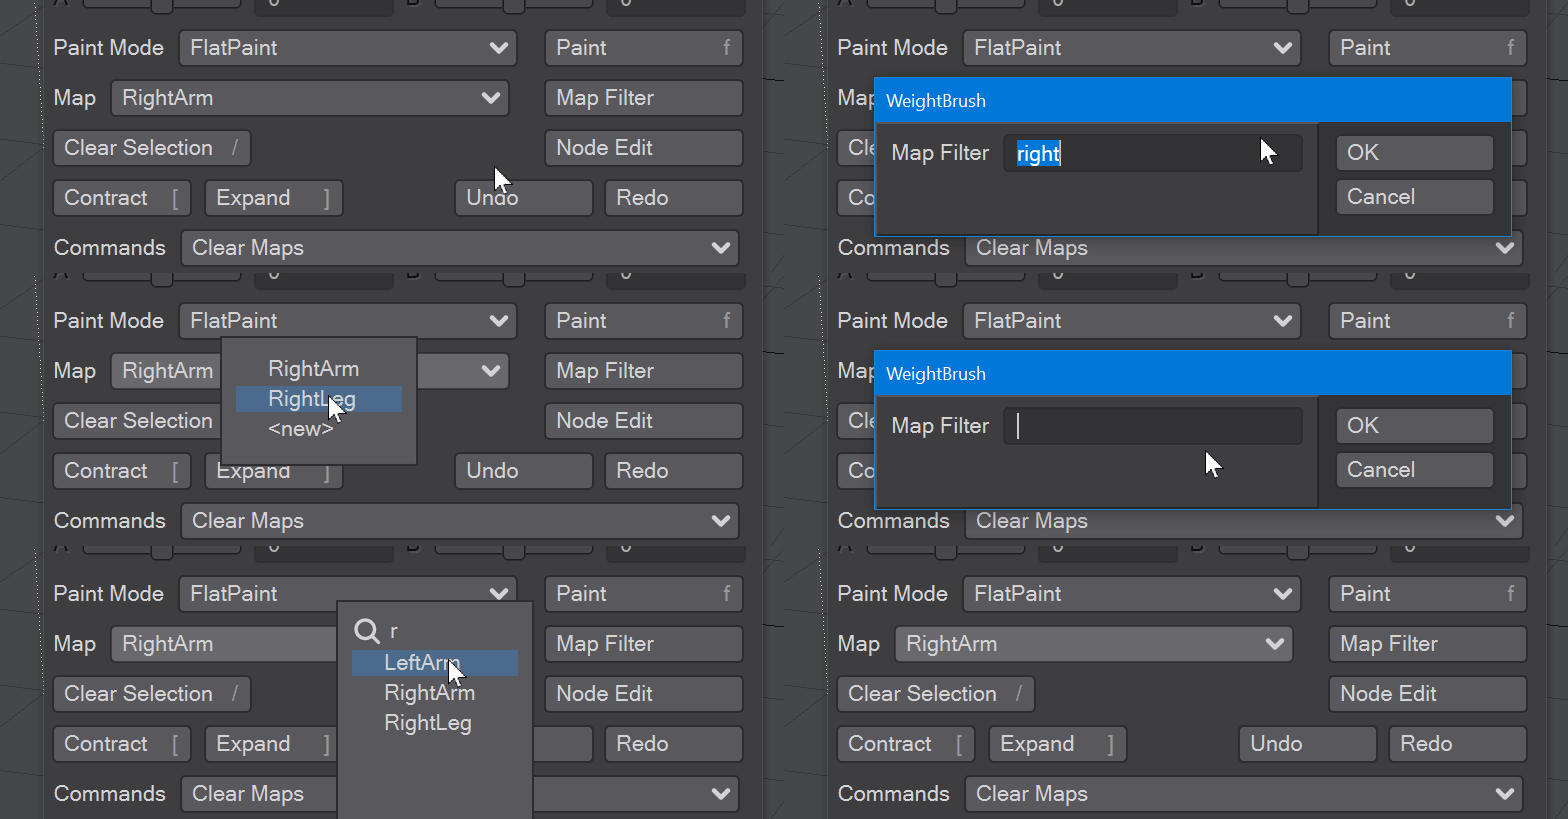
Type in here to limit the choices in the Maps dropdown on a more permanent basis than typing in the menu. To remove the filter, delete any text in this field. The Map Filter field will be conserved if you drop the WeightBrush tool.
- Paint Button
Keyboard shortcut F. This fills your selected vertices with the weight(s) you have chosen.
- Mode
Presents a dropdown with a choice of Paint style:
DirectPaint - The user can paint weights with the LMB. The RMB is used to resize the brush. You need to use FlatPaint mode first to select the vertices you wish to change. The keyboard shortcut is D
Flat Paint - Use this mode to select the vertices you wish to paint. If you just wish to have a unified weight, just set the Paint Value1 field and hit F.
Gradient Paint H - Creates a horizontal gradient between PaintValue1 and PaintValue2
Gradient Paint V - Creates a vertical gradient between PaintValue1 and PaintValue2
Gradient Paint H2 - Creates a horizontal gradient between PaintValue1 and PaintValue2 in the middle and back to PaintValue1
Gradient Paint V2 - Creates a vertical gradient between PaintValue1 and PaintValue2 in the middle and back to PaintValue1
- Paint Value1
This is the value ascribed to a point when you use Direct Paint or hit the Paint button (or press F). The swatch will change colours to match your paint value and the Paint Mode displays the swatch as a flat colour or different gradient types.
- Falloff
A dropdown menu is presented with three choices:
linear - a straight line from Paint Value1 to Paint Value2
ease-in - starts slowly
ease-out - ends slowly
smooth - starts and ends slowly, similar to setting tension to 1 for two keys in the Graph Editor
- Paint Value2
This is the value ascribed to a point when you use one of the gradient paint modes.
- ⇵
The ⇵ button switches the Paint Value1 and Paint Value2 fields. When the WeightBrush tool is active, X will switch values.
- Backface Cull
Stops displaying vertices on the reverse side of polygons.
- Brush Size
Your brush size is displayed on-screen when you click the LMB in the viewport. It can be changed using this slider. If you are in DirectPaint mode, using the RMB also adjusts brush size
- Coordinates
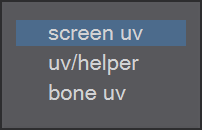
The screenspace coordinate types used:
screen uv - The default option uses the screen as a 2D plane. You will select vertices all around the object you are working on unless you have Back Face Culling switched on.
uv/helper - In this mode, you can realign your selection using the cross in the middle or resize the selection box using the handle at the lower right, better for the weight map. Your initial selection will still be painted, but values outside the box will be at the maximum or minimum. Think of it as a clamp function. For a horizontal gradient, the boxes vertical position won't matter and the reverse is true for a vertical gradient. For a radial gradient, both are important.
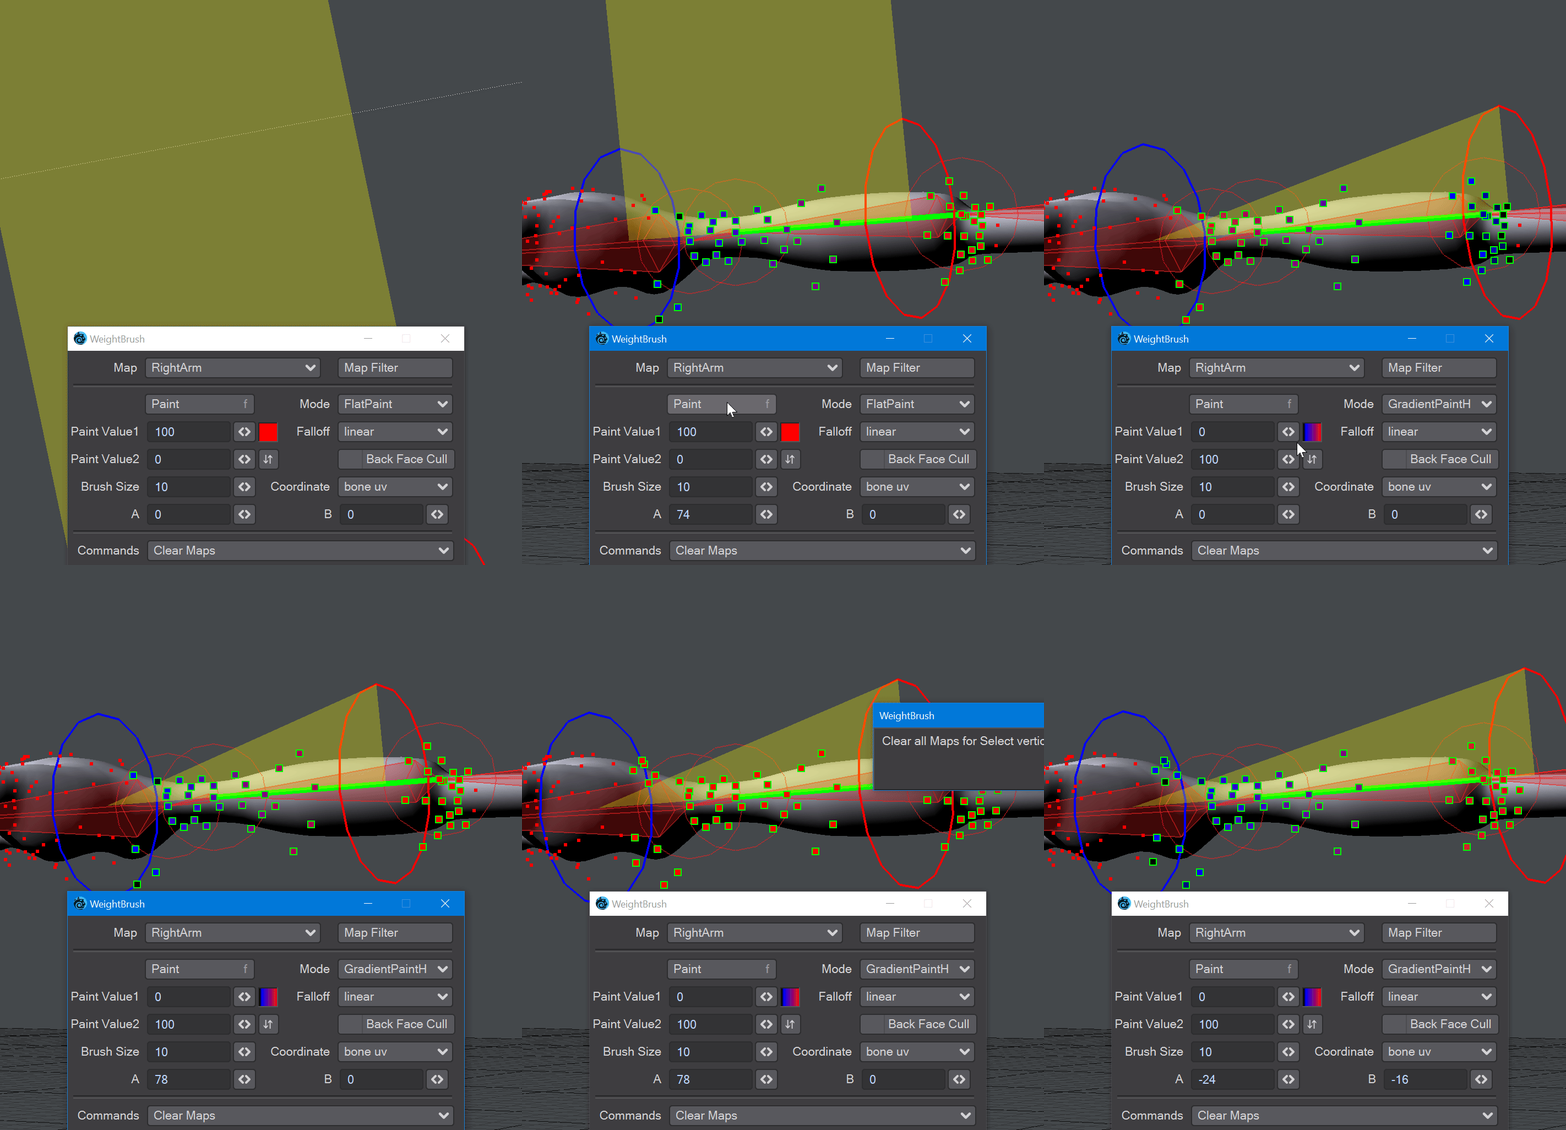
bone uv - Select the bone associated with the weightmap, and two rings will appear. Like the UVHelper, you can control the position of these rings, selected vertices outside the rings will get minimum or maximum values as appropriate.
- AB Sliders
You need to be in Bone UV mode and have the correct bone selected for these to appear; they will control the area for the Paint mode you want to use - selected vertices outside the rings will still be painted. They will receive either PaintValue1 or 2
- Paint Mode
A dropdown with these options:
FlatPaint
 - The default option ...
GradientV
 - Creates a vertical gradient between PaintValue1 and 2
GradientH
 - Creates a horizontal gradient between PaintValue1 and 2
GradientV2
 - Creates a vertical gradient between PaintValue1 and 2 and back to PaintValue2
GradientH2
 - Creates a horizontal gradient between PaintValue1 and 2 and back to PaintValue2
GradientRadial
 - A radial gradient rather than a linear one
Node Paint
 - You can further control your weightmap using nodes.
Direct Paint
 - keyboard shortcut
D. This is the only mode that paints like PhotoShop. It's also the only mode where you can't select vertices.
_
To reverse the gradient direction, press X or use the ⇵ button
- Map
A dropdown with all the weightmaps for the object. At the end of the list is a <New> weightmap button.
- MapFilter
A text entry field to allow you to filter maps on a more permanent basis than merely typing in the dropdown.
- Expand
Enlarges the selection. Keyboard shortcut ]
- Contract
Shrinks the selection. Keyboard shortcut [
- Undo / Redo
Use these buttons to step back and forth through your WeightBrush operations
- Commands
A dropdown menu with the following commands:
Clear Maps - Zeroes out all selected vertices. This needs to be done to create a new map
Rename Map - Renames the current map. Cannot be undone
Smooth Map - Smooths hard transitions between vertex map values
Normalize Maps - Brings values inside the 0-100 % range
Joint map commands described separately
Set Map Value - (Default option) Sets the weightmap to whatever values you have chosen in whatever paint mode
Select by Map - Choose this and it will make a selection based on the current weight map. Change weight map and click Select by Map again and the selected vertices will update.
Save LWO - Saves the mesh you are editing as a LightWave object file (LWO)
- Joint Map Commands
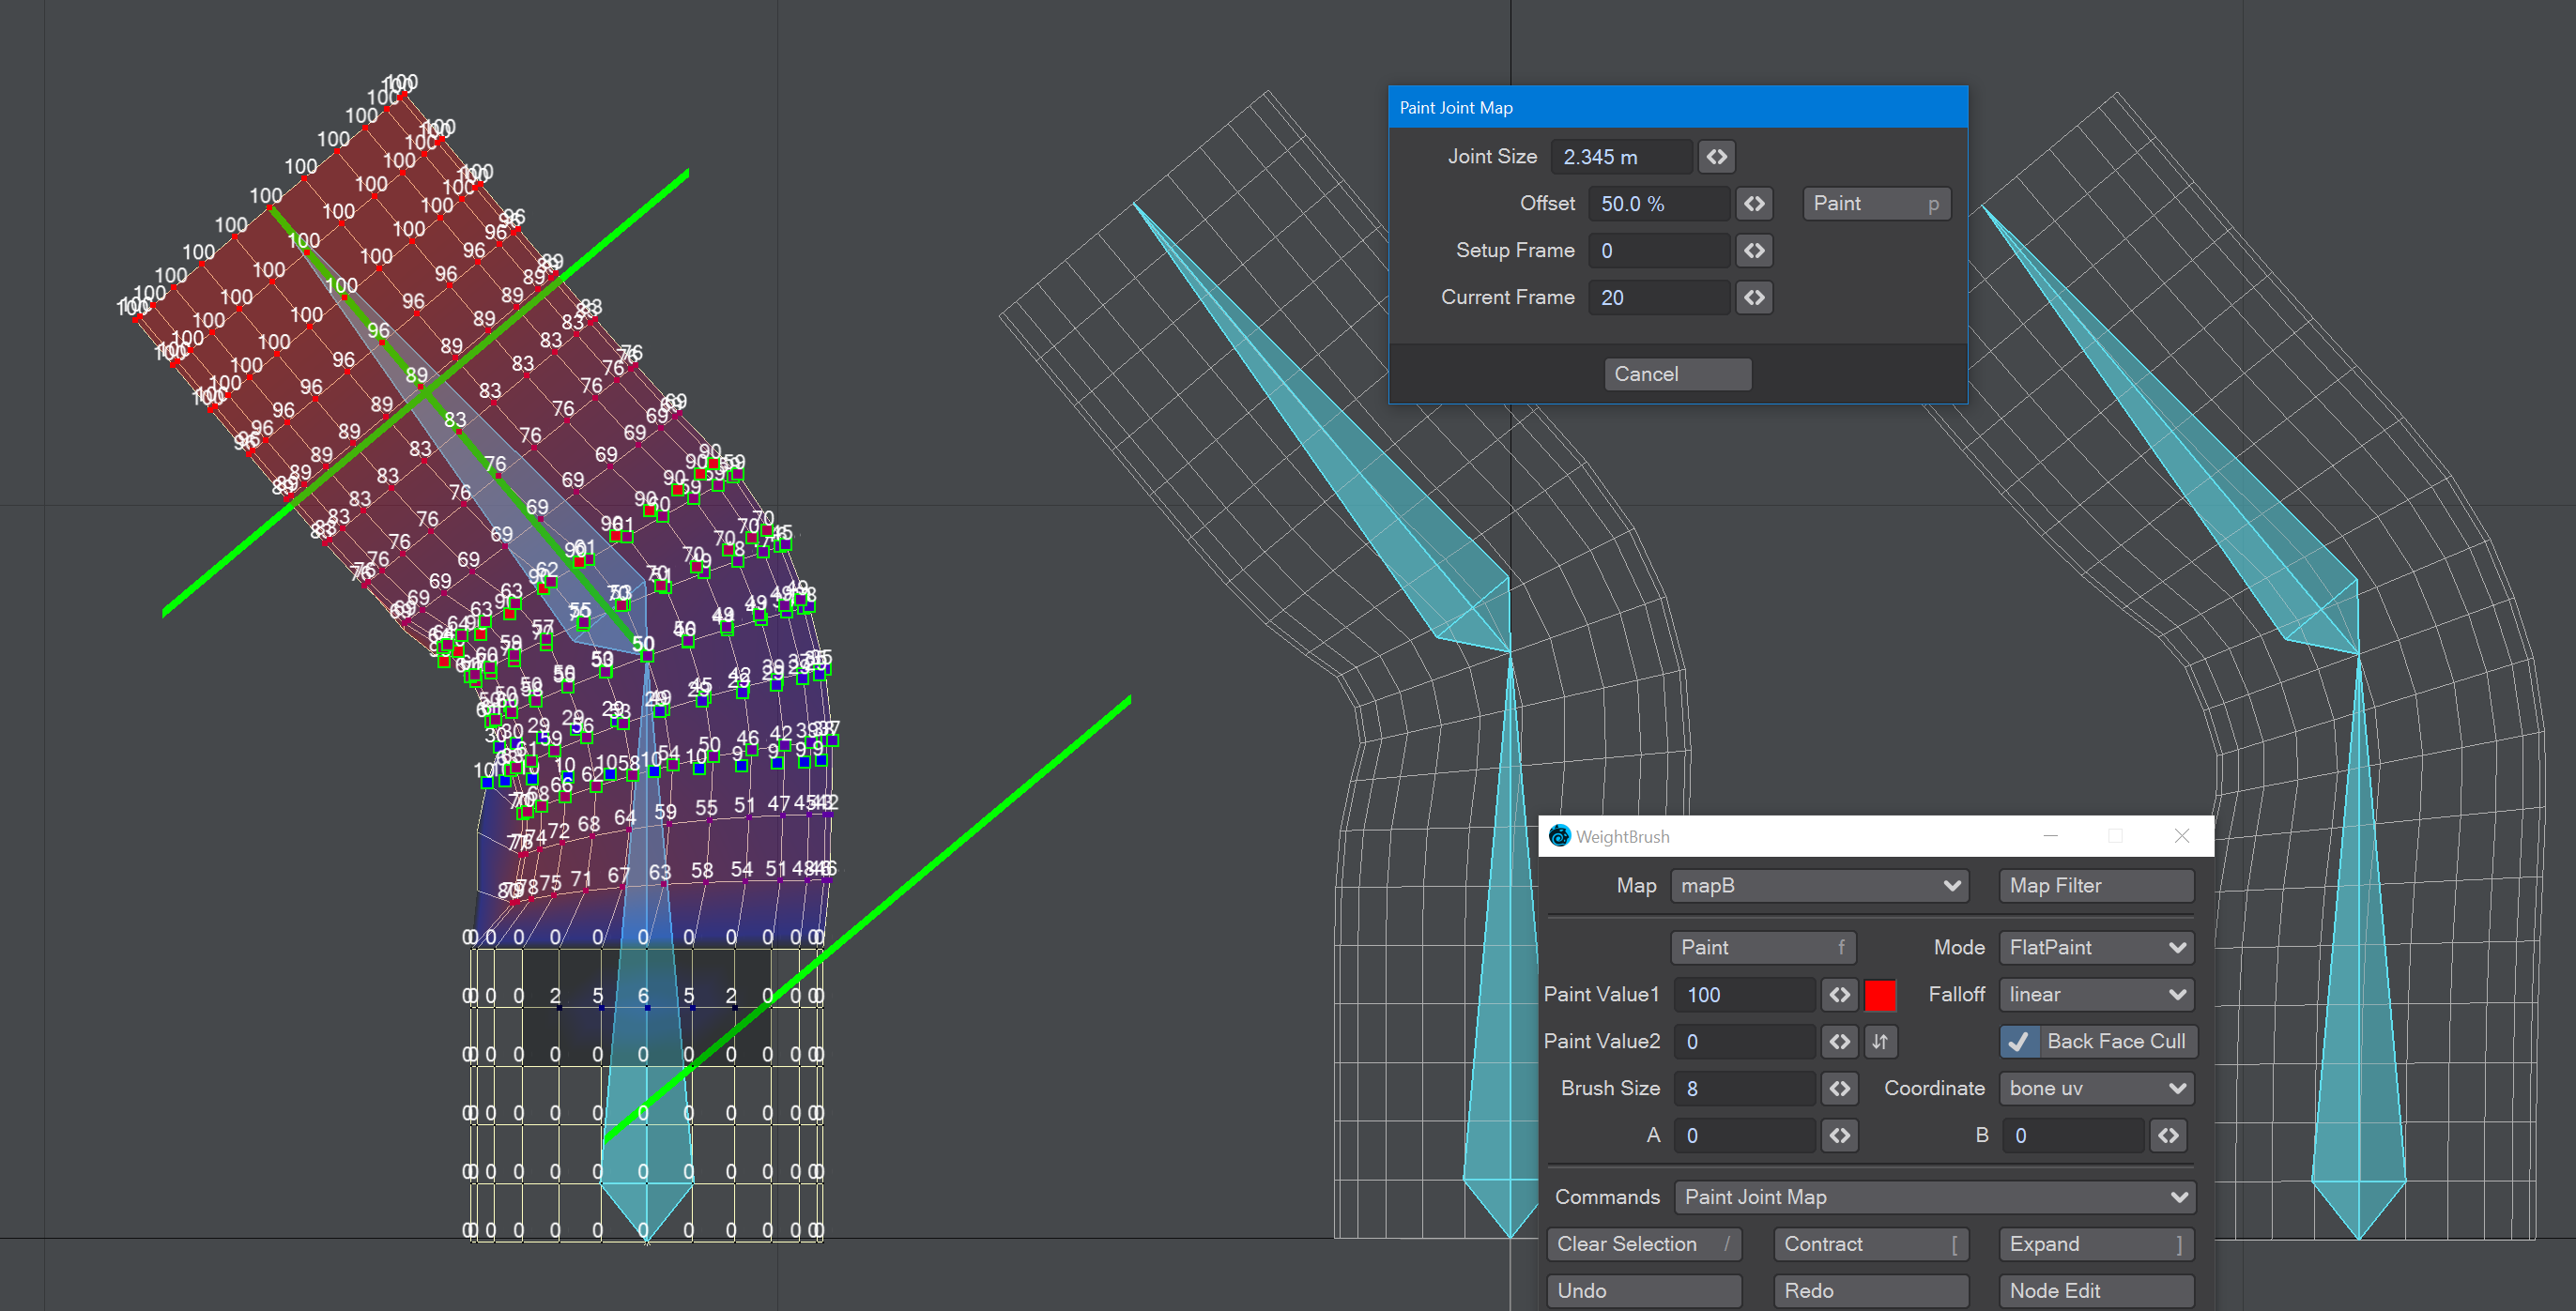
Painting a Joint Map requires a mesh with at least two bones; two weight maps; a WeightMap selection corresponding to the bone selection and a selection of vertices going between the two weight maps. You then have the choice of three options:
Paint Double Joint - Paints the selected vertices for the double joint
Make Double Joint - Create an additional bone for complex joints
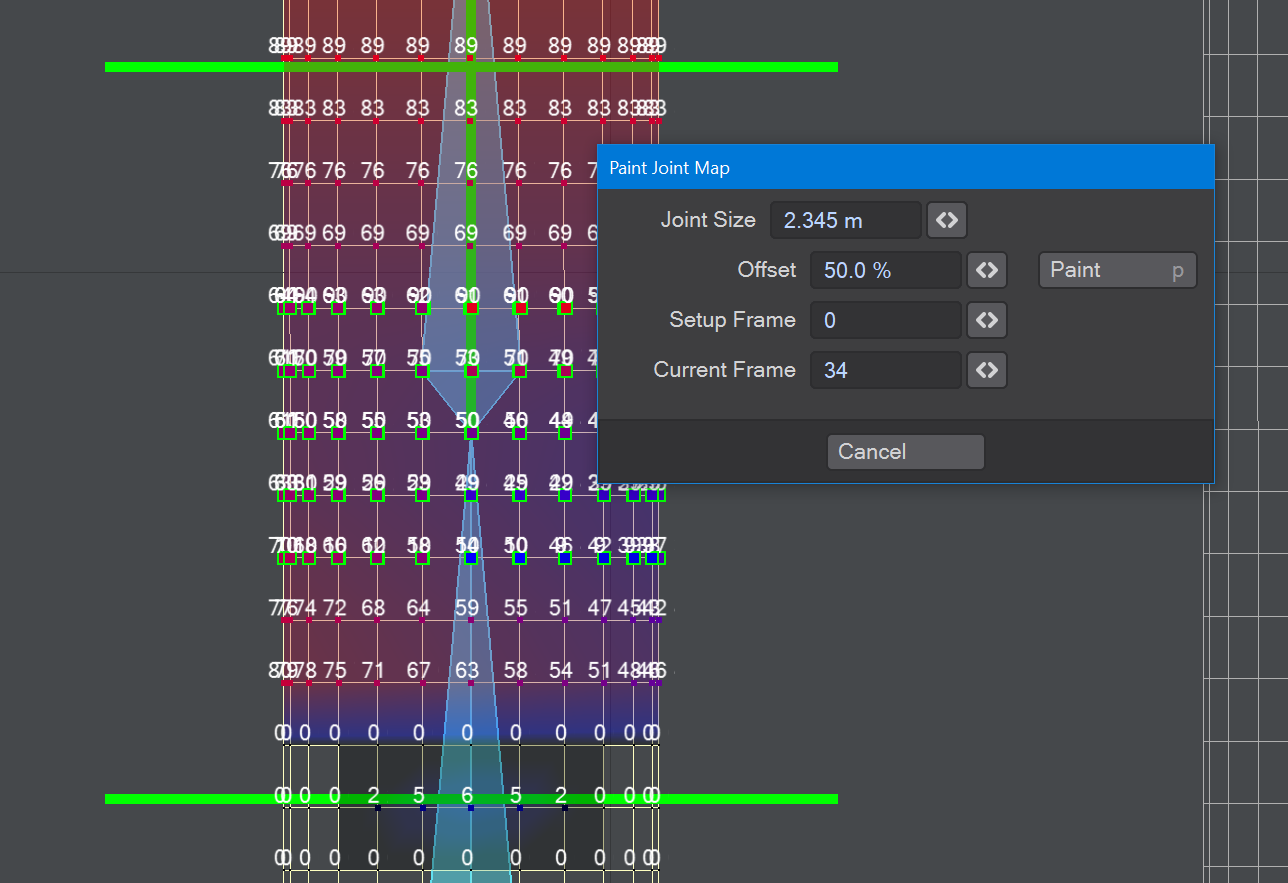
Paint Joint Map - Once you have your bone and appropriate weight map selected, click on Paint Joint Map and a new window will appear. The green lines (really circles, but we are in an orthographic view) show the extent of the joint map you are creating. It can be changed using the field or mini-slider for the Joint Size. Offset sets the amount of overlap between the two bones. You can edit when you want this joint map to exist based on the Setup and Current frames. Once you have painted the map, hit the Cancel button to close this window.
- Select Bone
Select the bone controlling the vertices. Keyboard shortcut Shift-B
- Bone
A dropdown containing all the bones associated with your object
- Bone Filter
A text entry field to allow you to filter maps on a more permanent basis than merely typing in the dropdown.
- Parent Bone
Pressing this selects the next bone up the hierarchy. Keyboard shortcut ,
- Child Bone
Pressing this selects the next bone down the hierarchy. Keyboard shortcut .
- Next Child Bone
Selects the next child bone in the hierarchy. Keyboard shortcut N
- Marker
This slider controls the size of the vertex display (larger shows the assigned weight better, but takes up more of the display)
- Overlay
This slider controls how brightly-coloured the overlay is on the polygons
- Show Vertex Info

A dropdown with three options
None - Don't show any vertex information
Selected Only - Show vertex info only for selected vertices
All - Show vertex info for all vertices
Tips & Tricks
Go above 100 for Paint Value
Use a negative brush size to get harder edges and crisper lines
Use a negative marker value to see your weight maps clean and still be able to paint on them
Node Editor texture maps do not work with UV Mapping (due to SDK limitations)
Brush Size
The first image has a brush size of 50 and the second image has a brush size of -50.
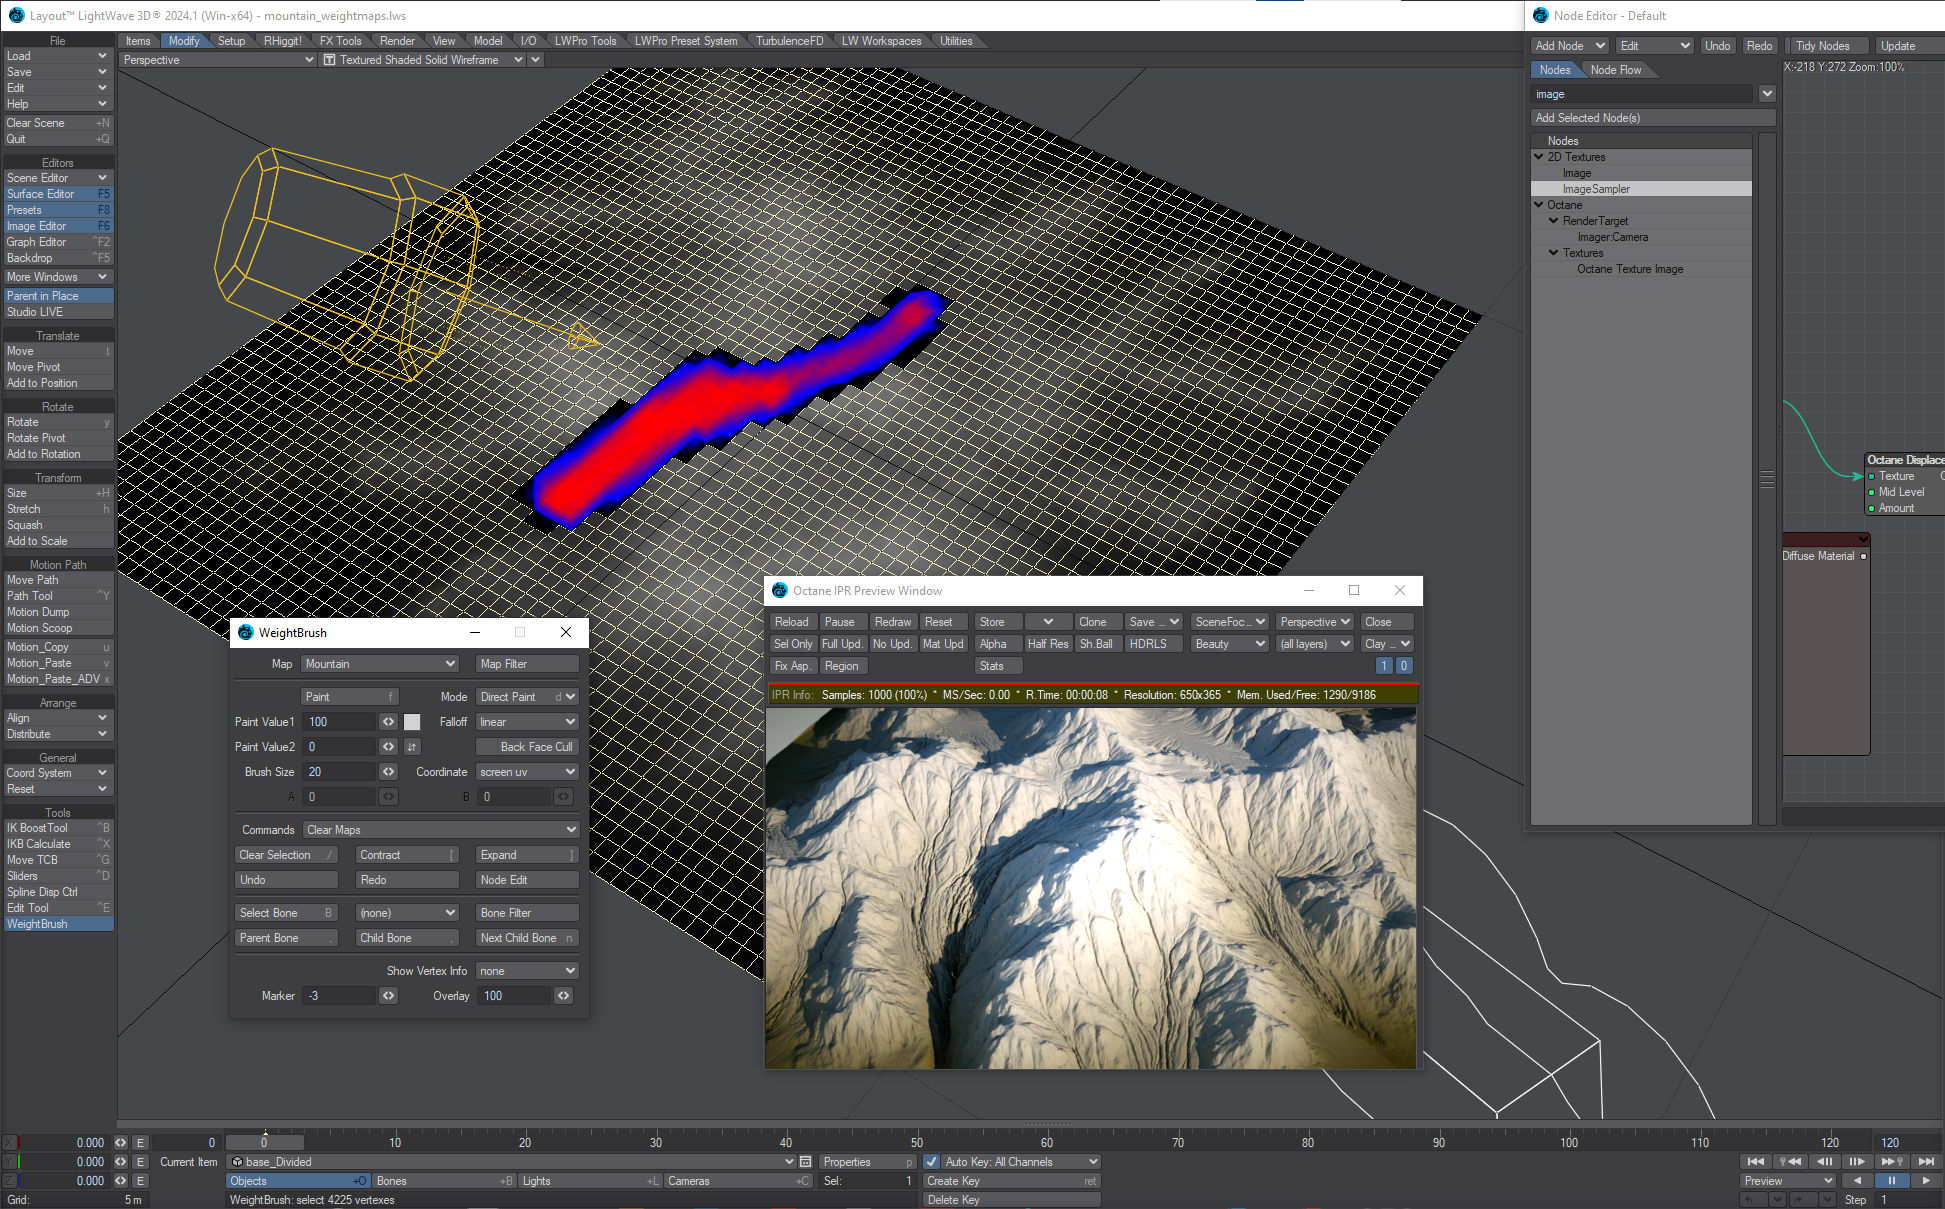
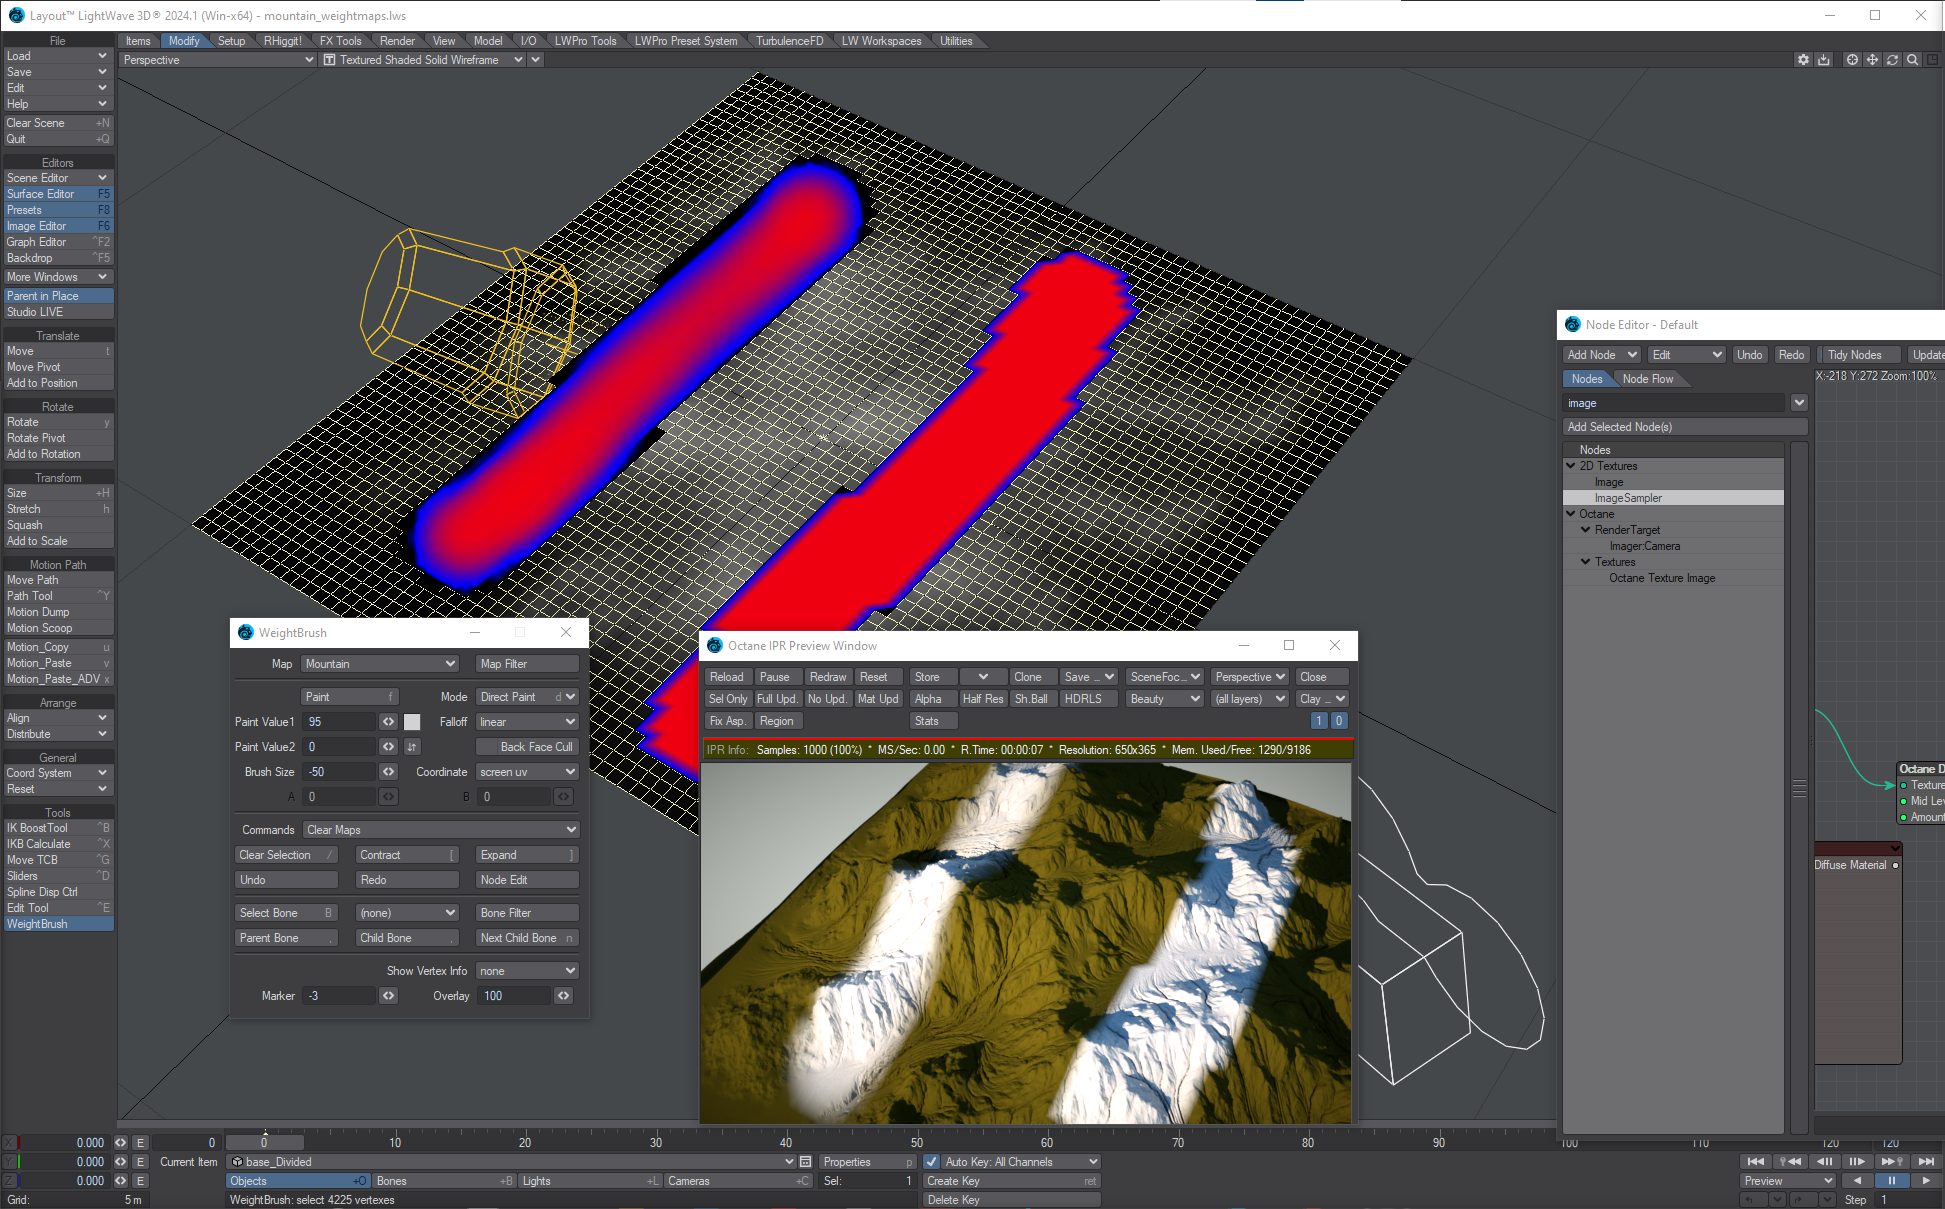
A brush size of 50 is smoother and softer, and brush size of -50 is crisper and not as soft.
So, smaller brush sizes are like the Photoshop hard brush and larger brush sizes are like the Photoshop soft brush.
