Camera
Introduction
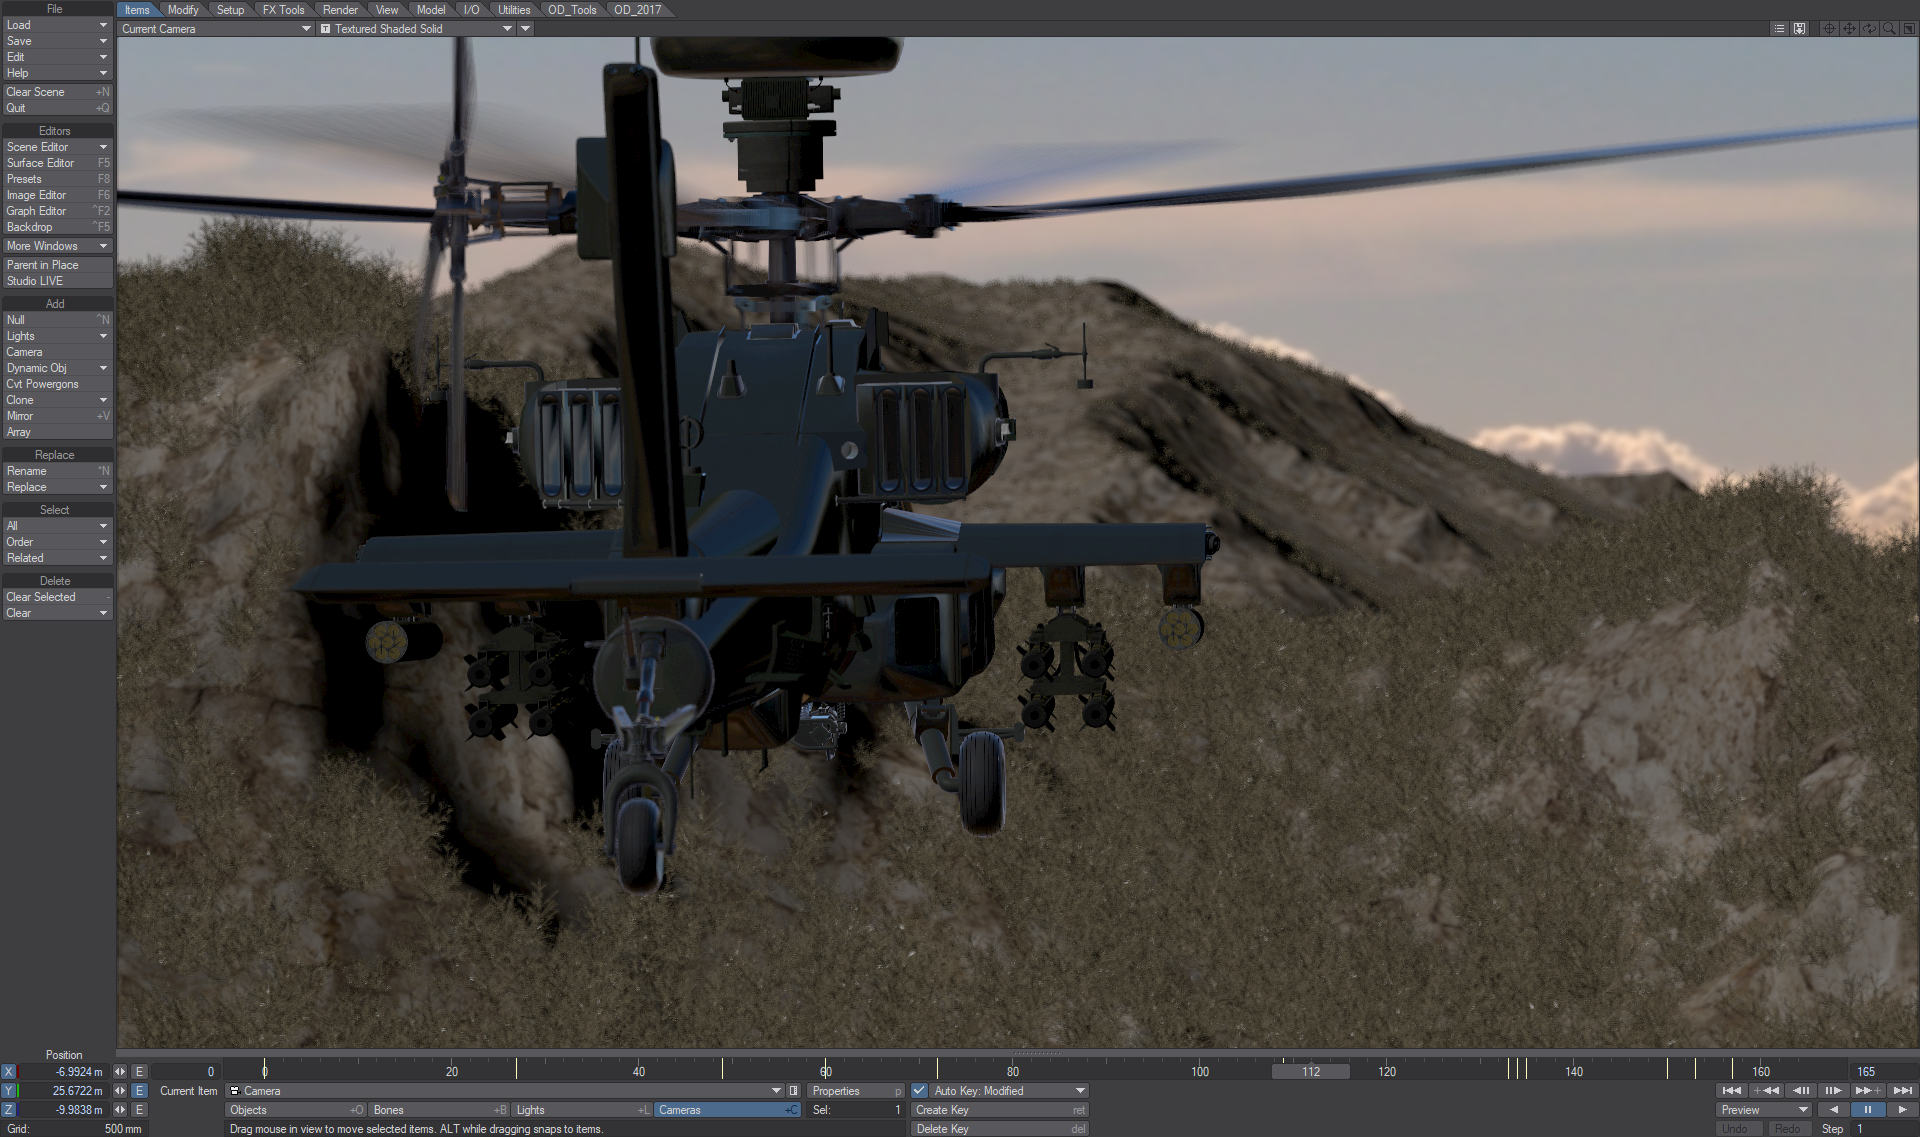
Image courtesy Kevin "Q" Quattro, Inhance Digital
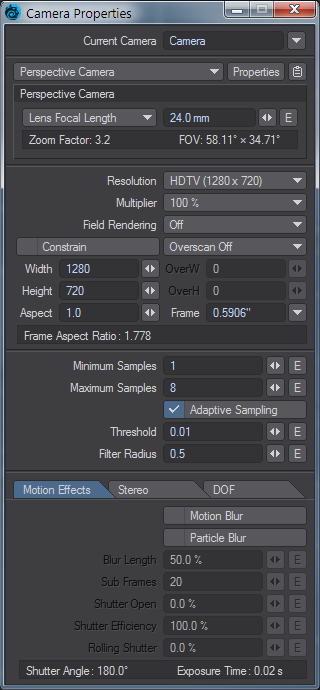
The camera is the conduit for your imagination to a final image. When creating your render you need to decide what it will be used for, what its destination will be. Will it be an image for film or broadcast, print or computer screen?
Whatever your image’s destination, there are two defining characteristics for it. One is how big it is, the other is the shape of the pixels that make it up.
You can make all these decisions in the Camera Properties window, which will appear when you pick a camera and hit the P button on your keyboard, or the Properties button on your LightWave screen.
Multiple Cameras
You can have as many cameras as you like in a scene. However, you can only render the current camera view. You add extra cameras into the scene by clicking on the Items > Add > Camera button, you can clone existing ones (with Ctrl-C) or you can use the Perspective view’s Viewport Options menu to Match Viewport Perspective to a selected or new Camera (or light) as shown below. If you have more than one camera in a scene, you can choose the camera you wish to be active, when in Camera mode, either in the Camera Properties Panel or the Current Item button under the main Layout window.
Matching Perspective to Camera or Light View
It’s often easy to set up what seems like a really good camera angle in the Perspective viewport and duplicating it in-camera isn’t as simple. Layout can match your Camera or Light View to your Perspective Viewport. You need to have your current Camera (or Light) selected at which new options become available in the third Viewport dropdown menu as shown:

You can choose to either copy the Perspective view’s orientation to the current camera (or light) or clone it and create a new one to which the Perspective view is copied.
To exactly match the Perspective viewport’s perspective, you should set the Camera’s Lens Focal Length to 30 mm instead of the default 24.0 mm
Independent Viewport Cameras and Lights

You can have multiple views from different cameras or lights, making setting up multiple viewpoints easier without needing to constantly switch between views. The above viewports show three different camera angles and a light view. When you switch between views you can always continue to use the current light or camera, or you can choose specific lights and cameras from a sub-menu.

Hitting F9 will render the Camera marked as Current Item in Layout
CameraSelector
This Master plugin allows you to switch between different cameras in Layout. The current camera is still the one being rendered but this can be used to preview camera switches in-scene or in a Preview.
To access the CameraSelector, click on the Master Plugins button in the Utilities Tab. This will bring up a window with a drop down menu in which you can select CameraSelector. Double clicking on its entry in the Master Plugins list window will open the CameraSelector plugin’s window. To create a list of camera changes all you need do is to scrub through your scene selecting the camera you want for each shot. Simply click on the Add button in the CameraSelector window for each camera change you wish to take place. If you then start playing your scene, you will see that the camera switches at the time you stated. If you wish to remove a camera change, select the change you want to get rid of and hit delete in the CameraSelector window.
If you would like to see your scene play through just one camera view, you can turn off Camera Selector by clicking the Enable Dynamic Preview switch, during scene playback.
For CameraSelector to work its magic, it needs information not normally available to master plugins. This is why it automatically creates a null object called “SpecialTriggerNull” whose only purpose in life is to serve CameraSelector. If you wish to use a different object, you can select it on the Trigger drop down menu but, normally, there is no reason to do so.
Perspective Match
Perspective Match can be found on the Render tab of Layout. It enables the matching of the perspectives of a background image to Layout’s setup to make compositing still images containing real world elements and computer graphics much simpler. In order to make use of it, you will need a digital photo that can be used as a background image, preferably with some obvious vertical, horizontal and depth lines that can be used for alignment.
Set Background Image
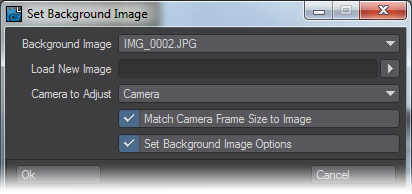
Although this is a separate tool and Perspective Match can be set up manually without it, Set Background Image automates things to a large extent. Choose the image you wish to use from those already loaded or load a new image.
- Match Camera Frame Size to Image - Will match the pixel size of the image used.
- Set Background Image Options - Will place the image chosen in the Effects > Compositing > Background Image field.
This script cannot pull data from the EXIF information in the picture. If you want to get the best possible match, then use the Real Lens camera and pull EXIF data that way, including lens focal length and Field of View. That said, Perspective Match does a very good job as it is.
If you use a huge image with Set Background Image you might need to add it to Effects > Compositing > Background Image yourself if the image isn’t made available to the script in time.
Numeric Panel
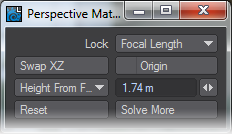
Perspective Match has a GUI panel which pops up with the n key (or whatever shortcut you have the Numeric command linked to). It has the following settings and options:
- Lock - what value to lock to solve for the perspective amount
- Zoom Factor - keeps zoom factor fixed, changes film size
- Focal Length - changes zoom factor and film size, keeping focal length fixed
- Frame Size - frame size remains fixed, changes zoom factor
- Origin - when on, places a gizmo in the scene with which you indicate where the world origin should be. This moves the camera in X and Z.
- Height - to solve for the camera Y position (in essence, scene scale)
- (Fixed Height) - leaves the camera at its current height.
- Height From Floor - adds a gizmo with which you can indicate the vertical height of something in the scene as measured from the floor (the XZ plane). Supply the height value in the provided widget.
- On Floor - adds a gizmo with which you can indicate the length of something in the scene as measured on the floor.
So if you have a person in the scene with a known height, use “Height From Floor”, enter the person’s height, and set the gizmo from their feet to the top of their head. Note that the direction of this gizmo does matter: the flat end should be on the floor, the arrow at the other end.
On the other hand, if for example you have a ruler lying on the ground (or on a table, or whatever horizontal surface you want to place the XZ plane on), the use the “On Floor” option. Enter the length of the ruler, and place the gizmo along the ruler (which end goes where does not matter).
- Swap XZ - swaps the X and Z indicators, because sometimes you change your mind what the X and Z directions should be in your scene. Effectively it spins the camera around by 90 degrees.
- Reset - resets the gizmo positions to their default.
- Solve More - runs the solver a few times every time you press the button, in case it hasn’t converged to a good solution completely yet.