Transform UV
This button allows you to adjust the UV values of selected polygons in several ways. If no polys are selected, it will act on all the visible polys in the current map.
How do I use this tool?
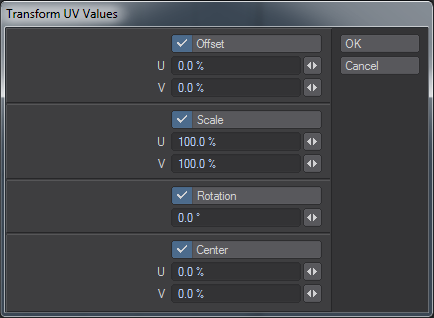
When you click the button, it will open a dialog which allows you to choose several ways to manipulate the UV values of selected points on your map. (If no points are selected, it will act on all of them.)
Offset
This option will move the points by the specified percentage of the UV space, in either the U (horizontal) or V (vertical) direction. Positive values will move them to the right, or up. Negative values will move to the left, or down.
Scale
This option will scale the points by the specified percentage, in either the U (horizontal) or V (vertical) direction. 100%, of course, is the current size. Larger numbers will increase the size, and smaller will decrease it. Unless you specify a different center, they will shrink or grow from 0,0, which is at the bottom left corner, where the black axis lines cross.
Rotation
This option will rotate the points around the center point. Positive values will move them clockwise, negative values will move them counter-clockwise. Unless you specify a different center, they will rotate around 0,0 or the bottom left corner, where the black axis lines cross.
Center
This option allows you to use a different center for the Scaling and Rotation, specified as a percentage of the UV space in either the U (horizontal) or V (vertical) direction. Positive values move the center to the right or up. Negative values move it to the left or down.
Of course, you can also use the normal Modify tools (Move, Drag, Snap, Scale, Stretch, Rotate, and so on) on UV Maps, with much the same results you would expect if you used them in a normal Modeler window. As long as you don’t use the Numeric Panel, nothing you do in the UV Window will affect the geometry of your model at all, since UV space is separate from X,Y,Z space.
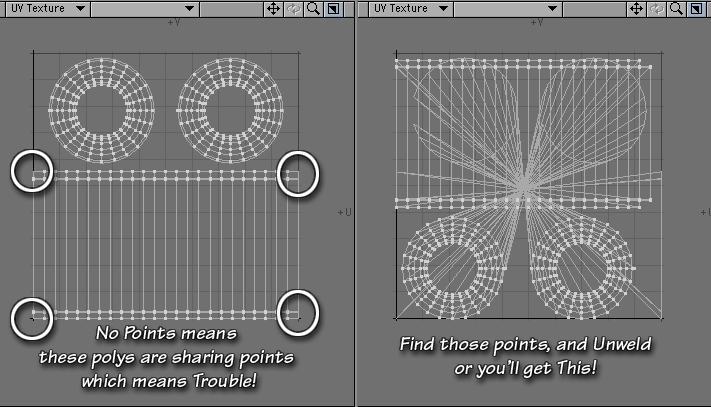
Be aware, though, that in order to do any of this successfully, you must be sure that you have unwelded all the seams on your model. If you don’t, any polys that aren’t showing a point will remain “stuck” to the map in that place, and will become severely stretched. (In the picture shown, you can see that there are points missing in the corners marked. There are also points missing all around the circumference of both circles. Whenever two polys share a point, only one will have it on the map, and it’s a problem if it’s on the edge)
This image shows the use of the Flip tool; but the same principle applies.
To fix it, undo, then select the points that are being shared (On the model, they’ll be on the poly next to the one without its point. If you select that poly on the map, it will light up on the model too, and you’ll be able to find which points to unweld easily.)
Go to Detail > Points > Unweld, and every poly will be given its own points.When all the edge polys are showing points, go ahead and manipulate them.