Example - QuickBolt QuickStart
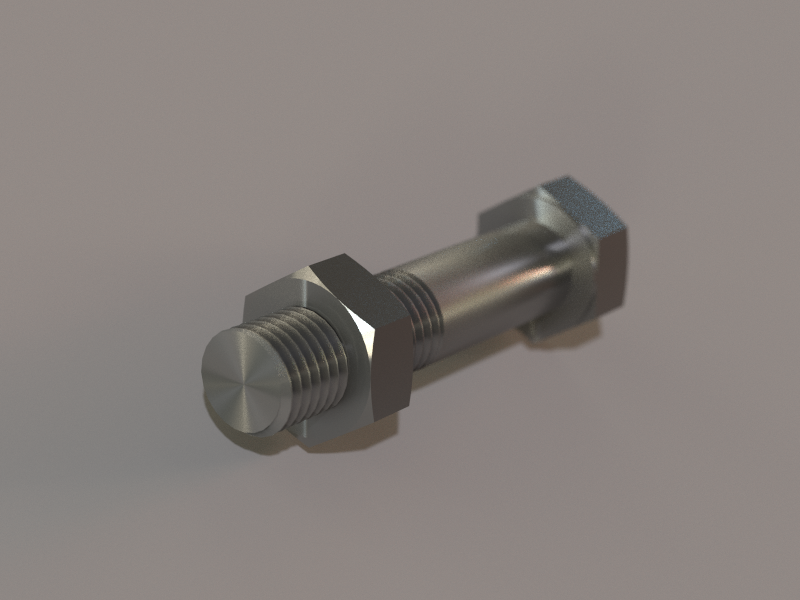
To provide you with a flavor of the QuickBolt workflow we are going to make a standard 1" UNC hex nut and bolt as shown in the above image. The bolt will have a shank and there will be a chamfer on the upper surface of the head and a shoulder on its under surface. The nut will have chamfers on both the upper and lower surfaces.
- Start the QuickBolt plugin and click on the "Reset To Defaults" button to make sure all selections are cleared and all values are returned to their defaults.
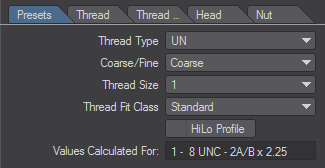
- On the Presets tab, select UN from the Thread Type dropdown and Coarse from the Coarse/Fine dropdown. From the Thread Size dropdown select 1 (i.e. 1 inch). Leave the Thread Fit Class on the Standard setting and HiLo Profile unchecked. In the Values Calculated for: display you should now see "1 - 8 UNC - 2A/B x 2.25", which confirms that values have been calculated for a 1", 8 Threads Per Inch, Unified National Coarse (i.e. UNC), Standard fit (i.e. 2A/B), and thread length of 2.25".
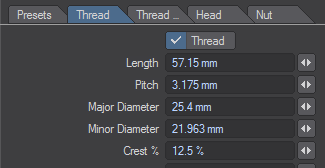
- Select the Thread tab. You should find Thread checked and all its values calculated. Nothing here needs changing!
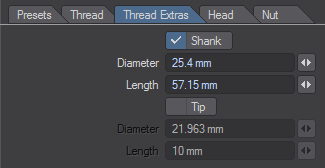
- Next select the Thread Extras tab. You will notice that neither box is checked, but the ghosted out values have been calculated. Check Shank.
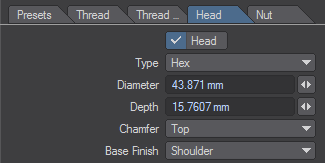
- Next select the Head tab. Again you will notice that nothing has been checked yet, but the ghosted out values have been calculated. Check Head to activate this option - the values and selectors for the head should all become accessible. Click on the Type dropdown and select "Hex" (if it is not already selected), then click on the head Chamfer dropdown and select "Top". Click on the Base Finish dropdown and select "Shoulder".
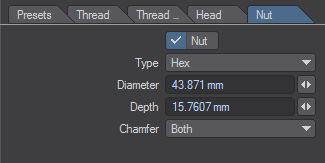
- Select the Nut tab and check Nut. make sure that the nut Type is set to "Hex", then select "Both" from the Chamfer dropdown.
- Click on the OK button at the top of the QuickBolt panel. After a few seconds the bolt should appear in the first layer, and the nut in the next available layer.
- Fit All with the A key to fit the bolt into the view port(s) and then shift-select the layers so that both the bolt and nut are selected. Click on the Polygon Selection button at the bottom of the Modeler window and then press the W key to bring up the Polygon Statistics panel. If there are any 1 or 2-point polygons present, click on the + sign in the left-hand column to select them and then press K to kill these polygons.
- Open the Surface Editor (F5) and select the Default surface for the nut and bolt. Activate Smoothing at the bottom of the panel and set the Smooth Threshold angle to 24 degrees (this smooths surfaces, but prevents loss of sharp detail in, for example, adjacent facets of the head and nut). For the example image on this page, you can use the attached surface to duplicate the look achieved. There is an HDR image in the scene and an Environment light to tint the colors reflected in the bolt.