Example - Avoid and Attract Mesh
Meshes can be used both as things for flocks to avoid and things to attract flocks. In this simple example, we’ll do both.
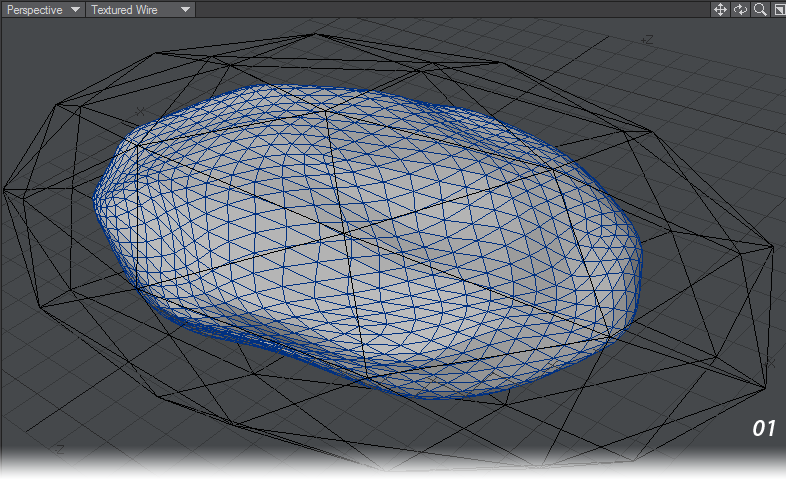
- You’ll need some asteroids. For this example, a level 4 tessellated sphere was used sized to about 1.5 m, sized in two dimensions to make it flatter and jittered to make it less regular. It was subpatched then frozen to give it more detail. In a second layer, a level 1 tessellated sphere was created and resized to be larger than our first layer. This is going to be our avoid mesh.
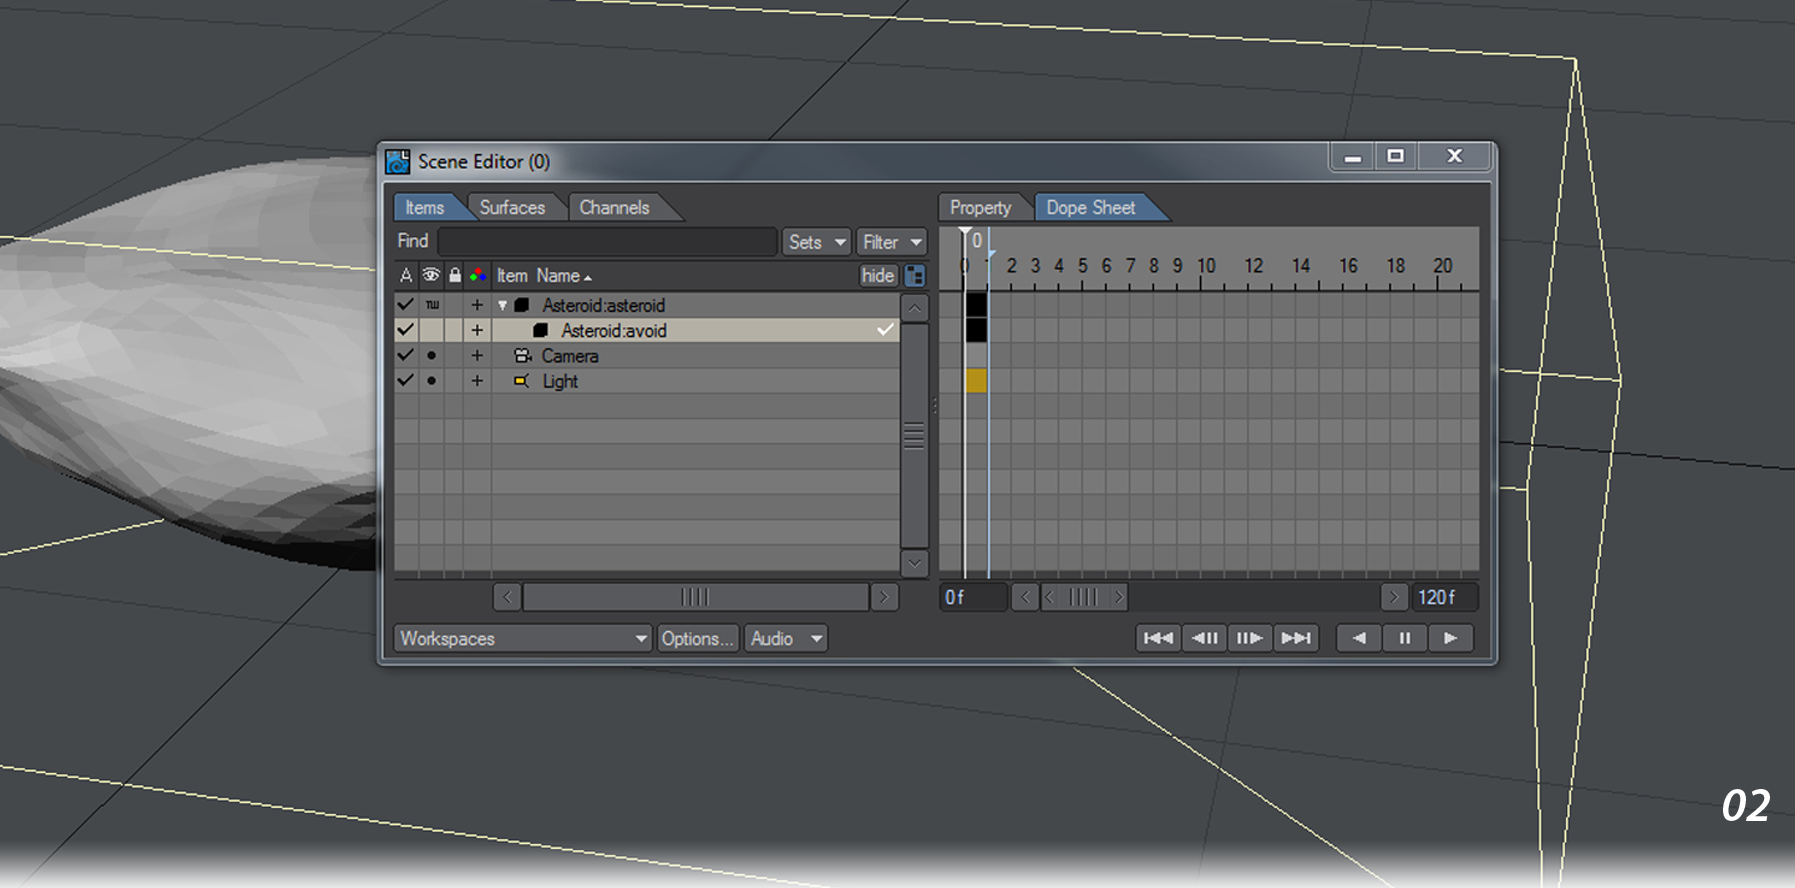
- With our asteroid made, send it to Layout. Parent the Avoid layer to the Asteroid itself so that it moves with it and you may want to use the Scene Editor to hide the Avoid mesh since we’re more interested in what happens with the asteroid.
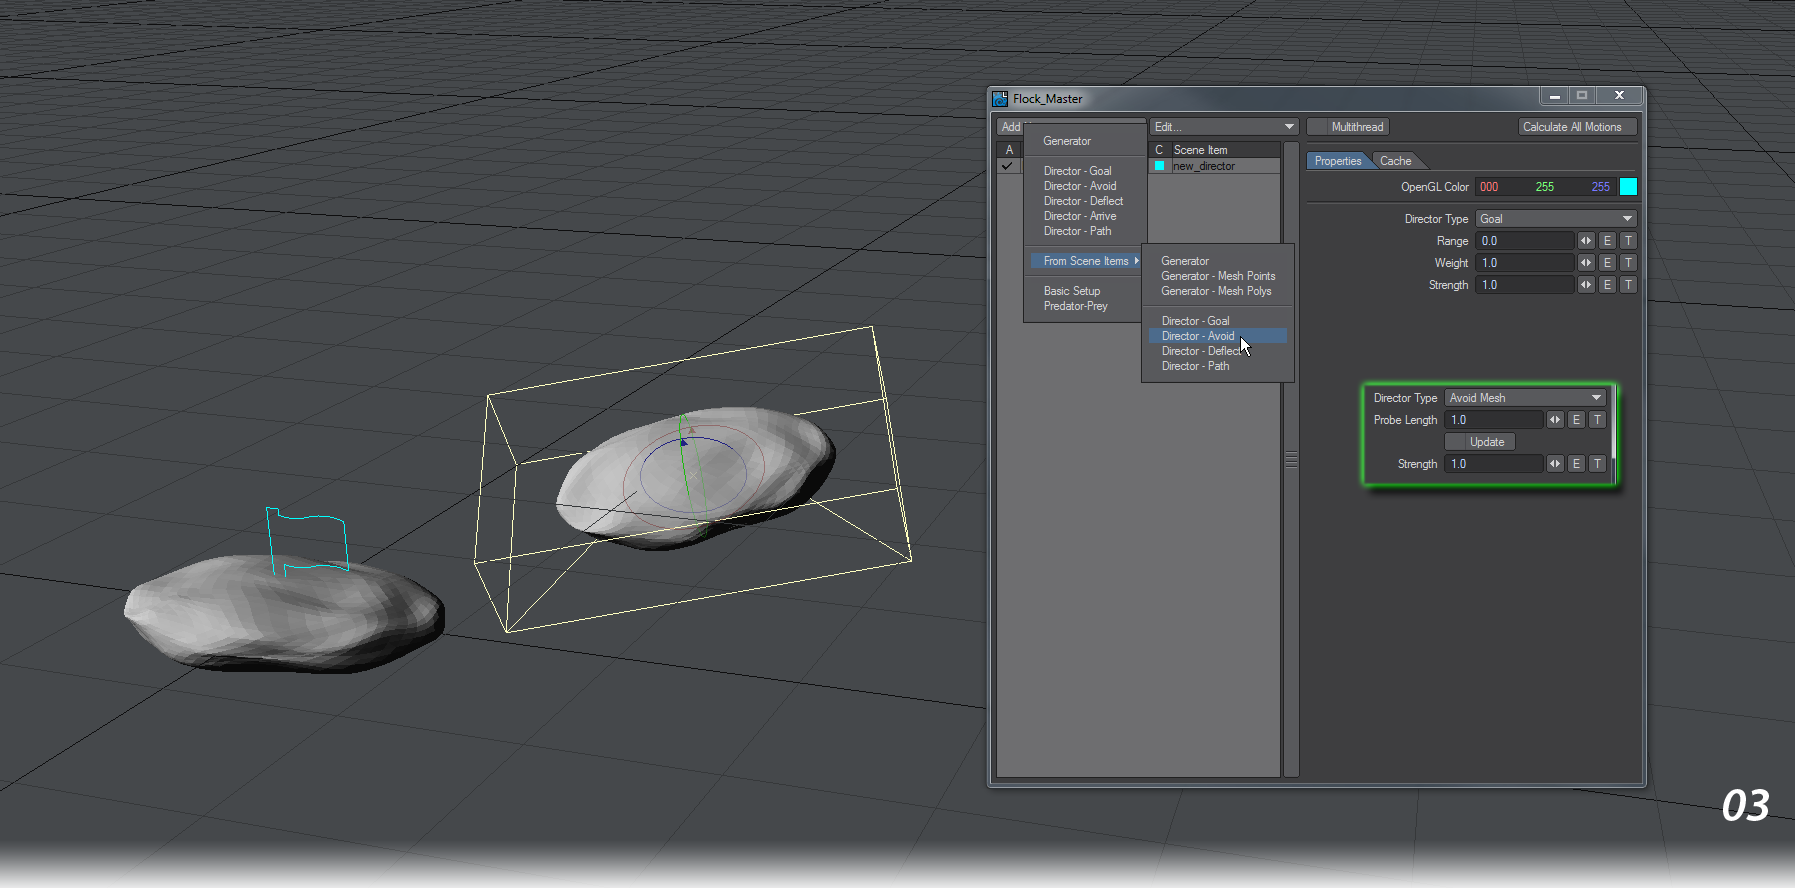
- Make a Clone Hierarchy of the Asteroid layer (so that the avoid layer is cloned too) and move and rotate it a bit in front of the first asteroid. Now we’ll open the Flocking Master window and first select our original asteroid and use Add New... > From Scene Items > Director - Goal. Now select the cloned avoid layer and choose Add New... > From Scene Items > Director - Avoid. Change the Director Type to Avoid Mesh (as shown in the green inset).
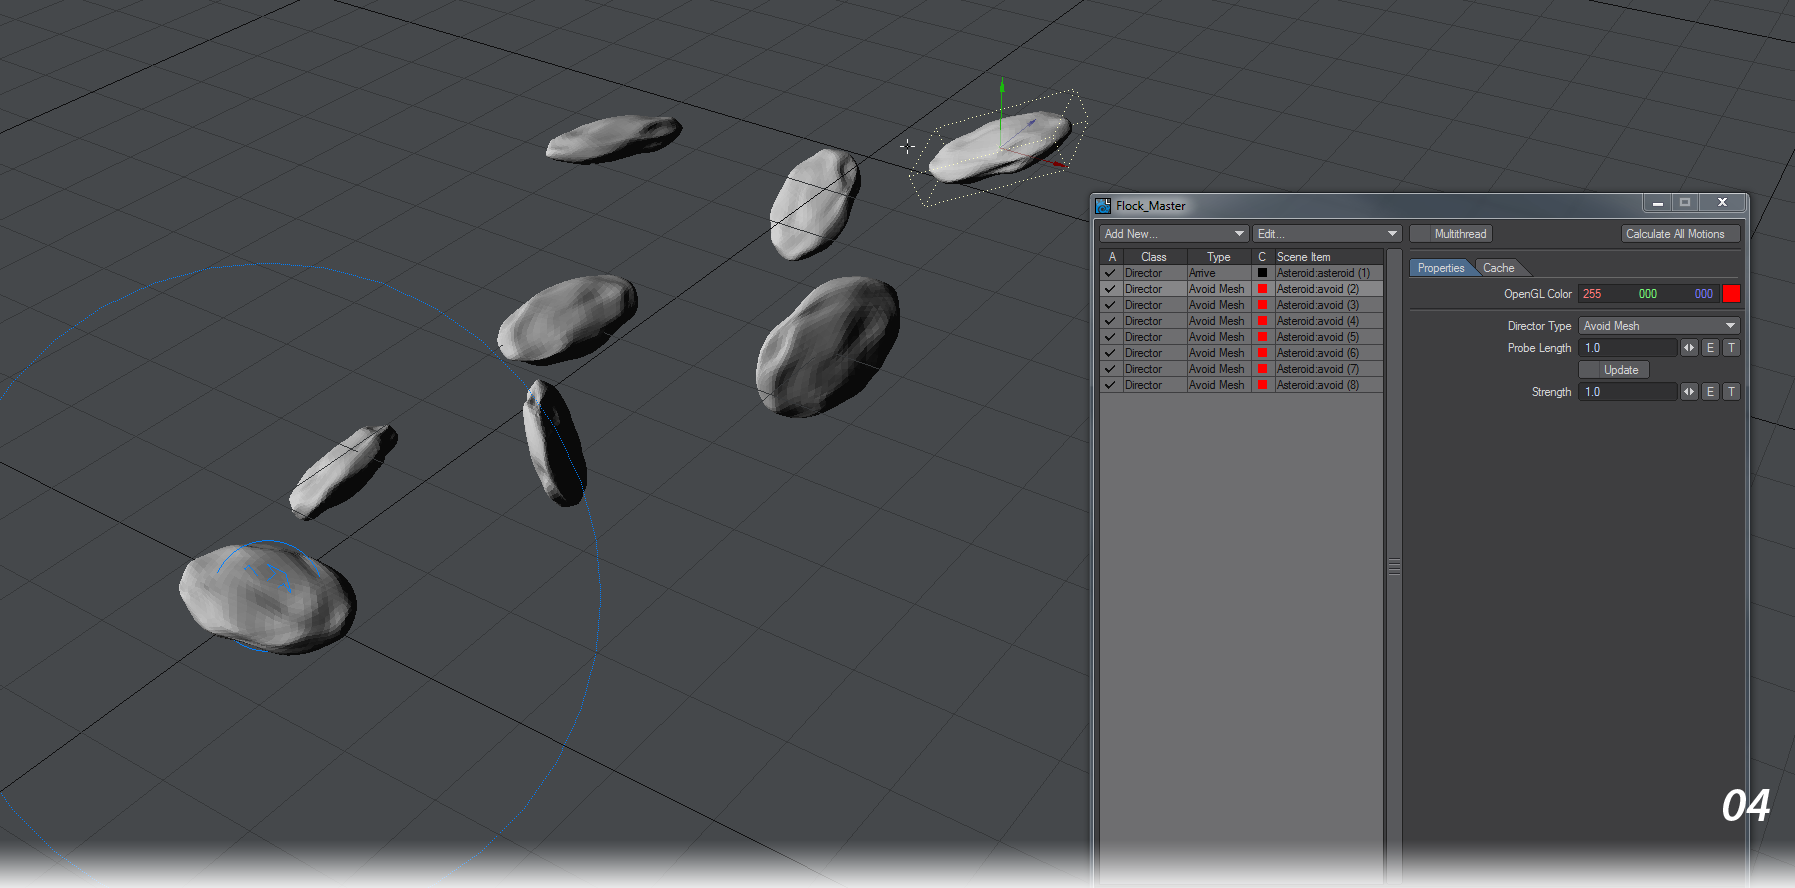
- Clone Hierarchy our cloned asteroid with its Avoid Mesh layer a few times so you can create an asteroid field. Position them in all three dimensions and change rotation on each to get more variation
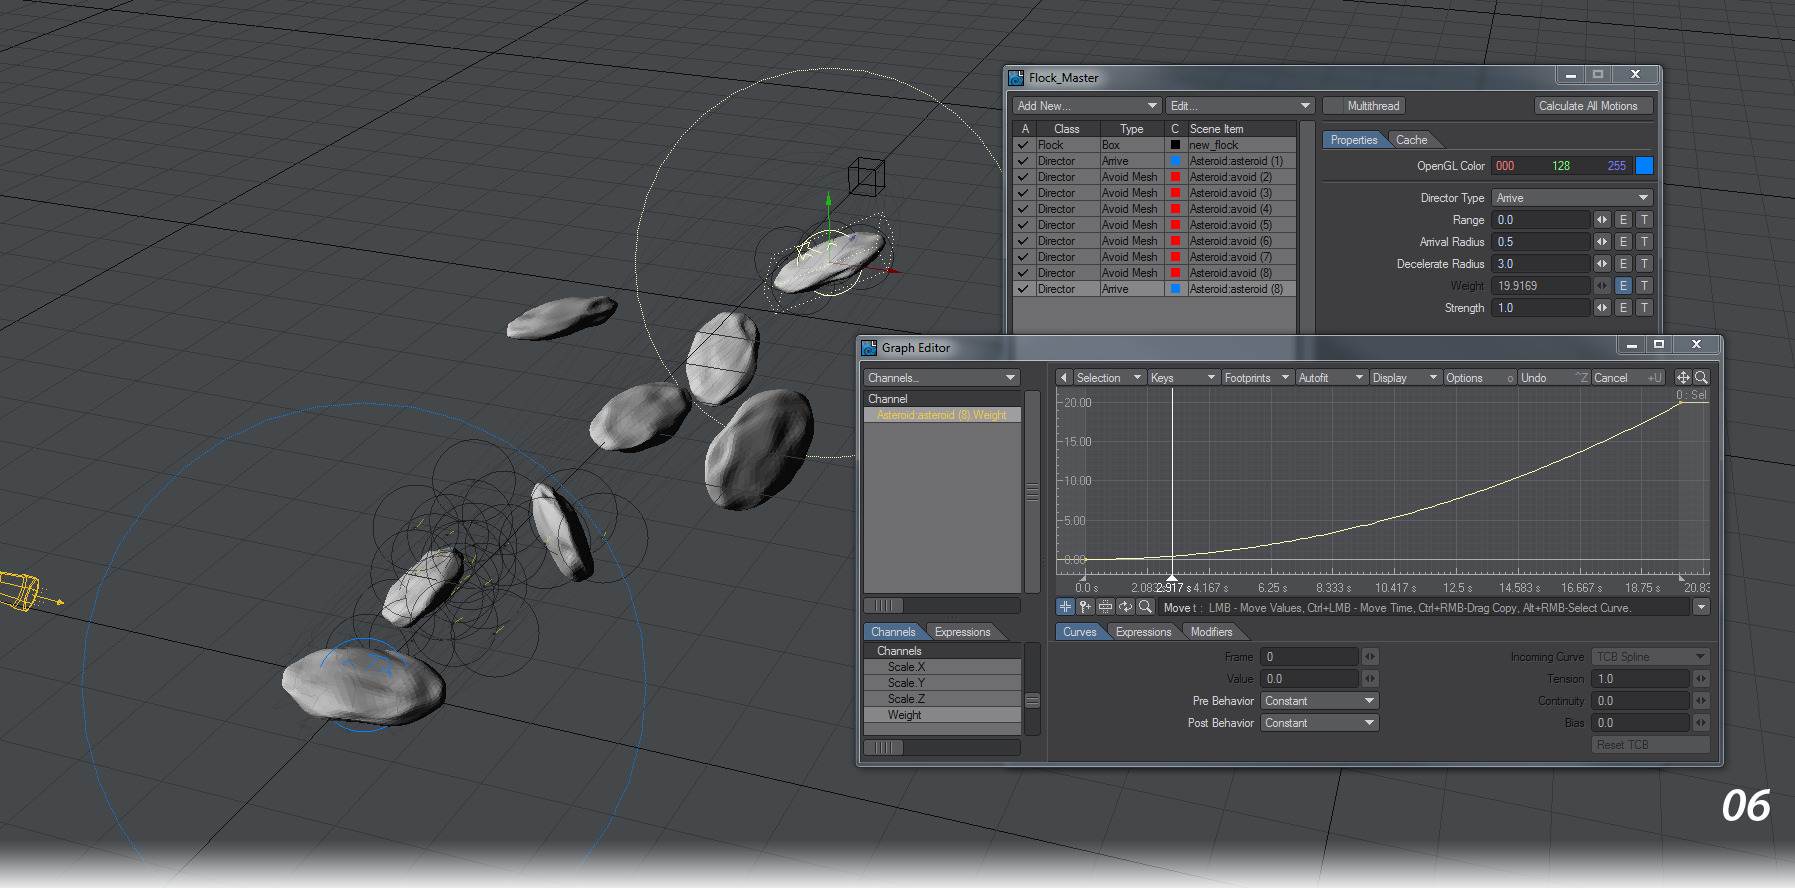
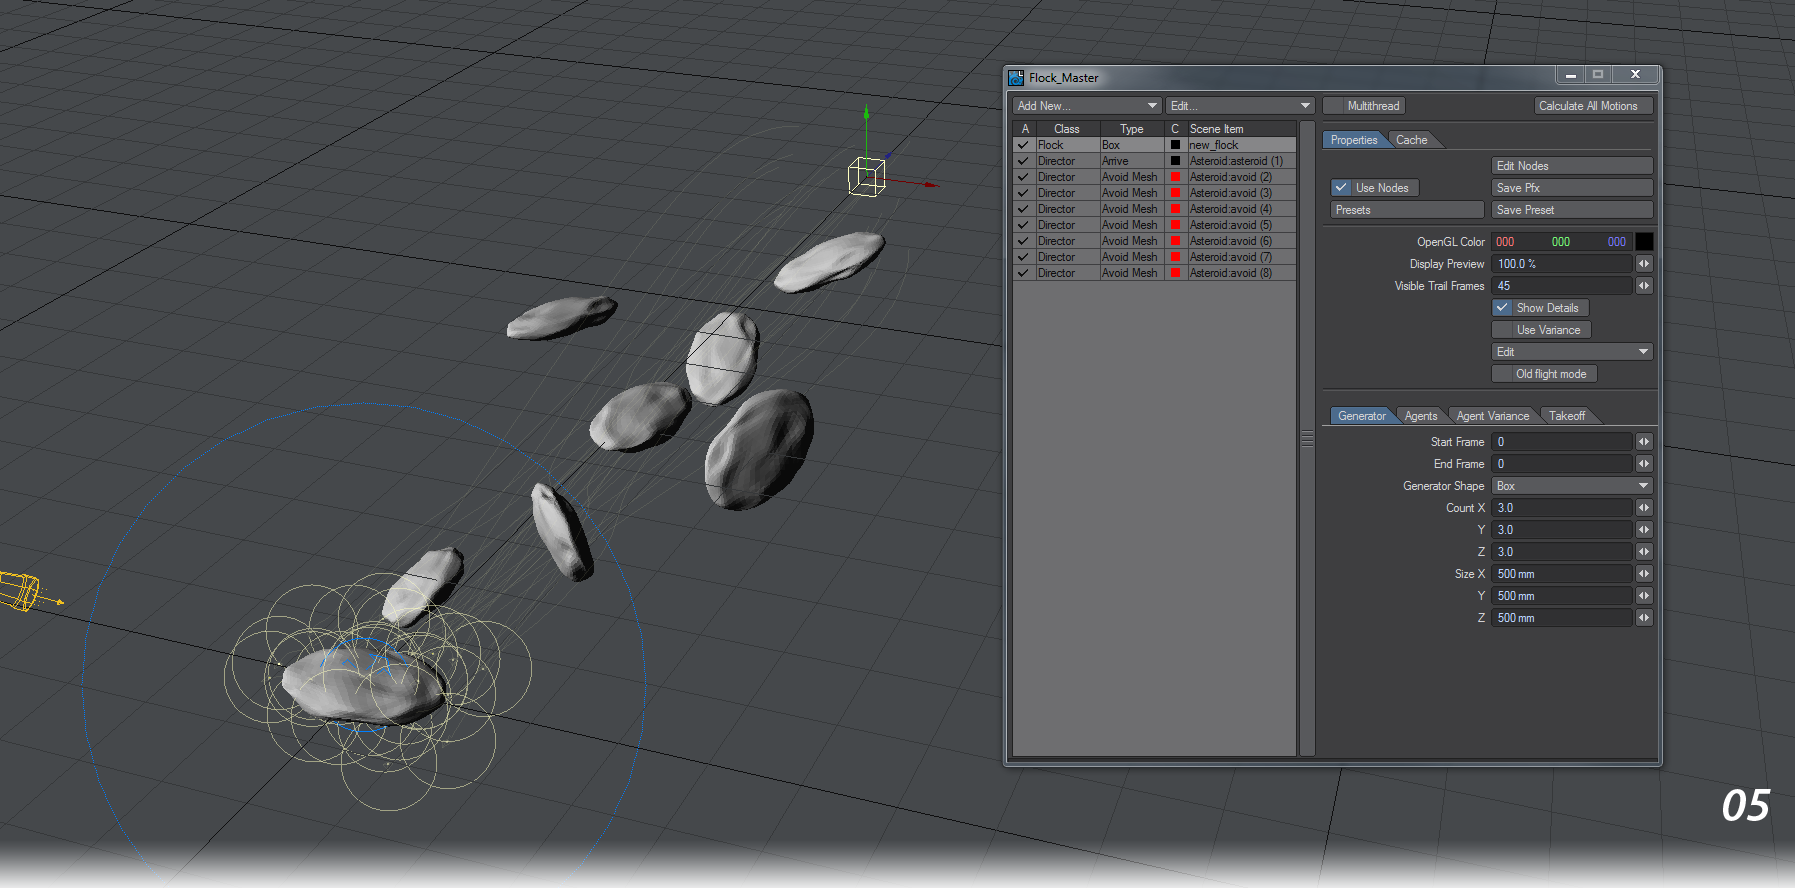
- Now create a generator in the Flocking Master window. Use Add New... > Generator. Move it away from the goal asteroid. In our example we’ve moved it to about 15 m away in Z with the avoid asteroids between the flock and its goal. Your scene elements are complete. Now hit Calculate all Motions in the Flocking Master window (or Calculate Flocks in the main FX Tools menu). Your flock should go to the goal asteroid and alight. If they don’t avoid the other rocks we need to set the Probe Length and Strength accordingly - by default they are at 1.0 and are sensitive to the scale of your scene. When you select an Avoid Mesh director you should see a pincushion effect. This is that director’s Probe Length. Setting it too short will mean the flock has less chance of seeing it, setting it too long will result in avoidance long before necessary. To get this good effect here we have set it at 1.2 for each of the Avoid Mesh Directors and upped the Strength to 10.
- This is a satisfying result, but let’s expand. Directors don’t have to stay as they are for the whole scene. Make your scene 500 frames. Using Envelopes, we can make the asteroid nearest to where they started more interesting. Select the asteroid nearest the Generator, not its child Avoid Mesh shell. Add a goal to it using Add New... > From Scene Items > Director - Goal. Add an envelope to this goal’s weight starting at 0 ending on 30 at frame 500. You can either change the TCB handles (as shown in the image) so that you have an increasing curve of weight or put in a third key somewhere in the middle so that the first asteroid doesn’t attract the flock before they have reached the other perch. Either way, your flock should avoid all the asteroids to get to the last one, land, then take off again to head back to the first asteroid before the scene finishes.