Example - Building a wall with Instances
Instances are excellent, the only problem that people have is trying to manipulate them individually. It can be frustrating to carpet a plane with instances only to find that one is badly placed and you want to move it. Likewise to use instances to create an animation, but nodes give us the tools we need to address individual instances - you just need to address them in a more abstract way.
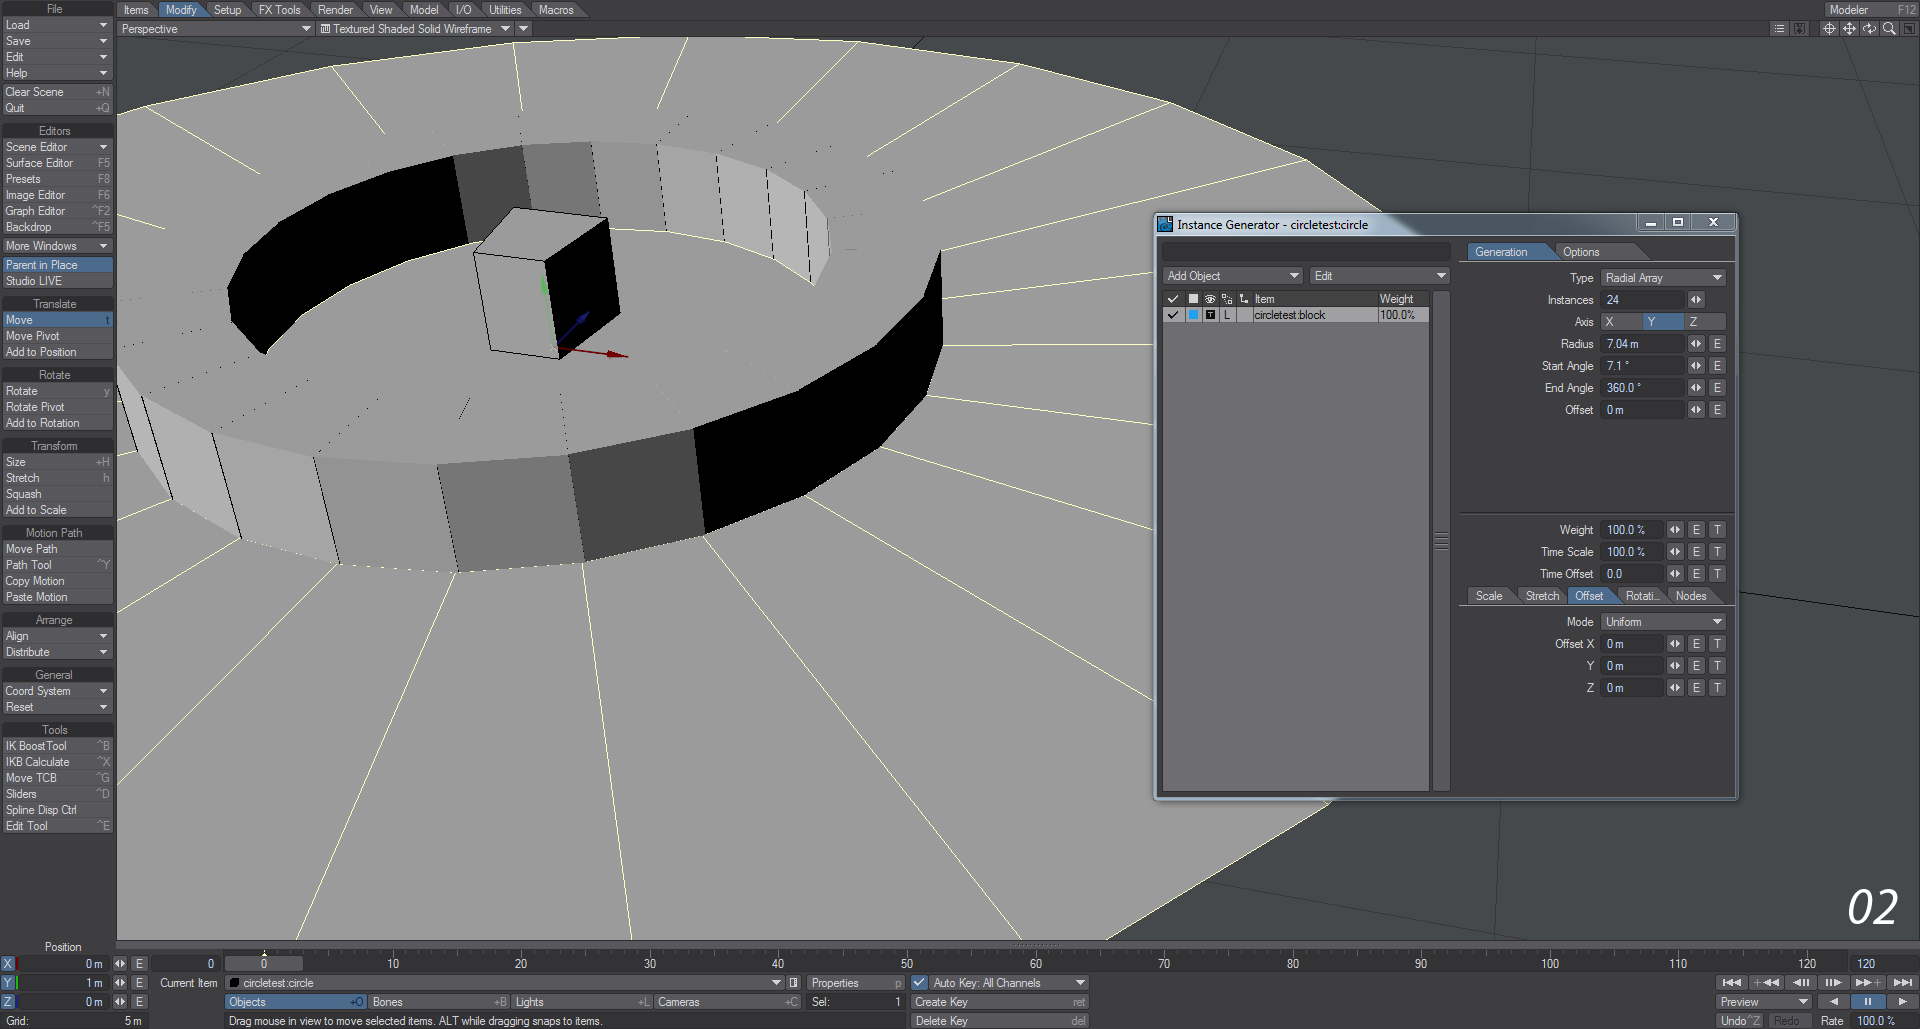
- For our test we want a wall to spring up, one block at a time on this red circle.

- To start with, we'll use our ground object with the circle and add an Instancer. We'll add our block, set it to Radial Array with a count of 24 and adjust Radius and Start Angle as necessary to fit our blocks over their corresponding red circle segments. Don't forget to use Local Coordinates for the blocks and to set the Offset tab to Uniform!
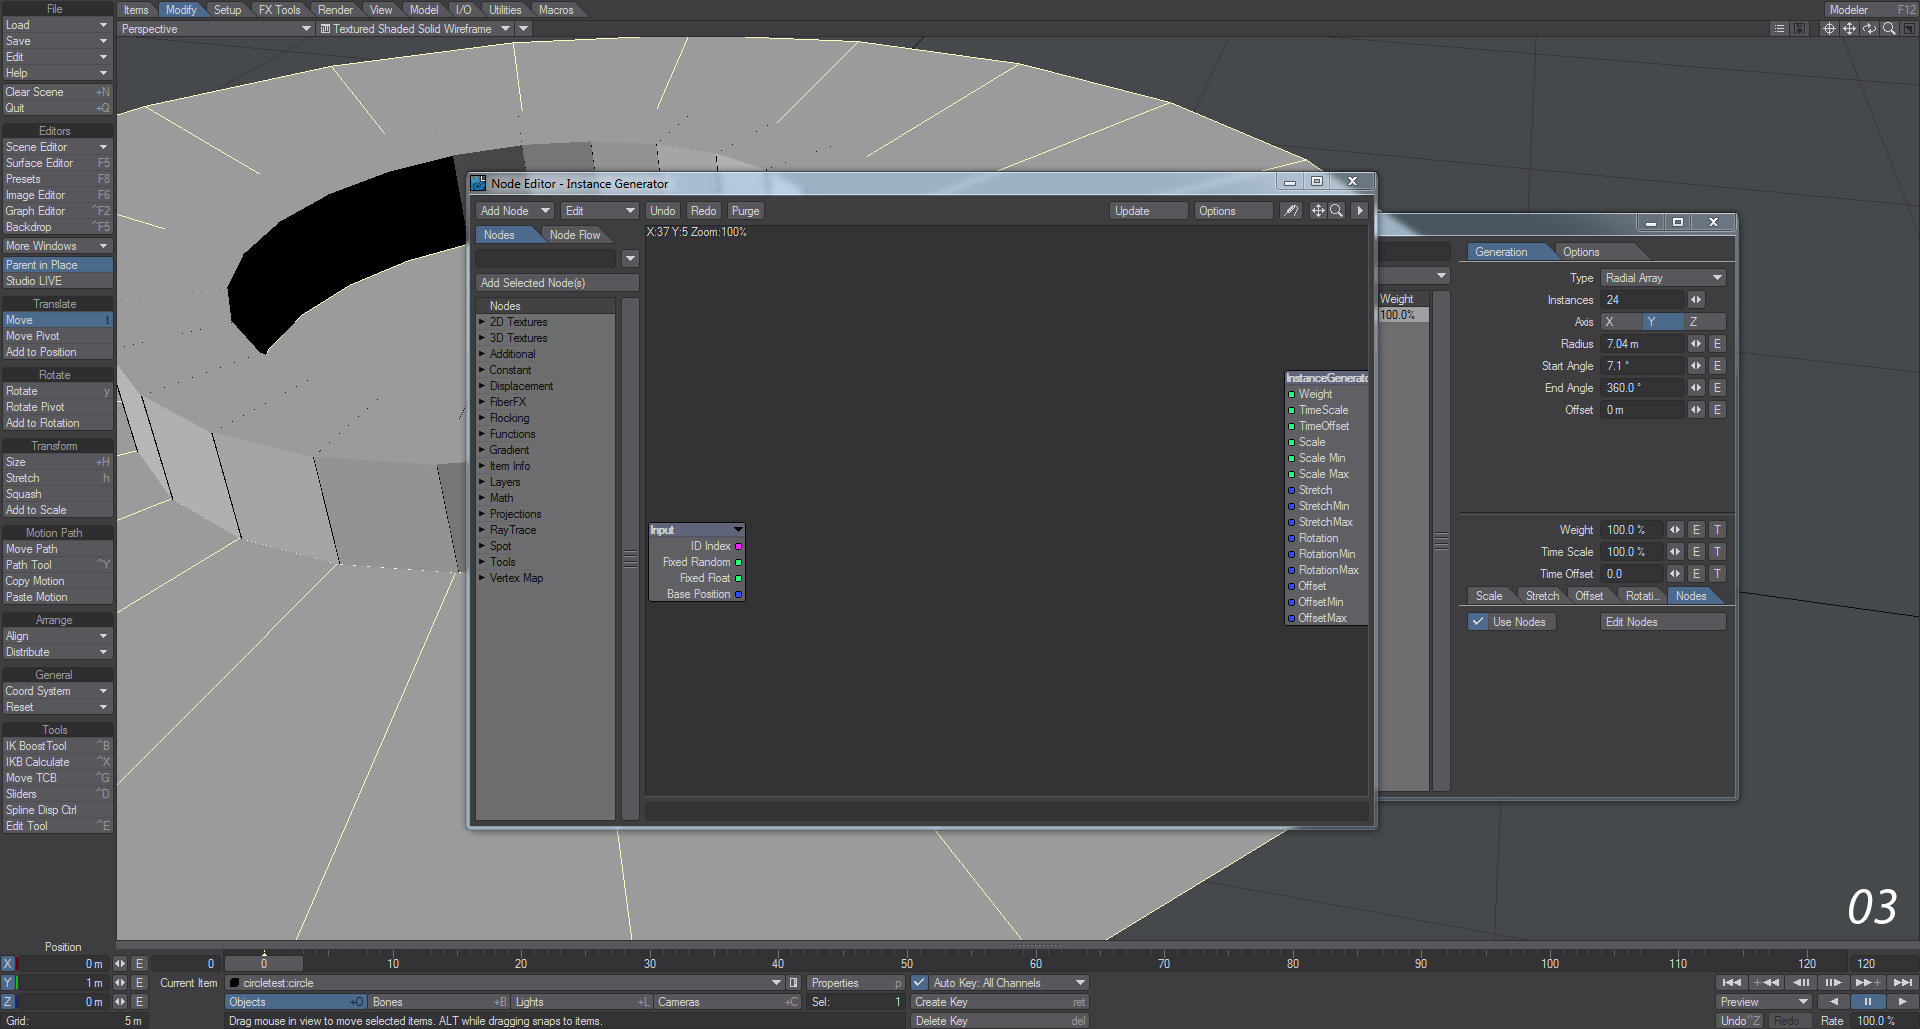
- Right now if we add an envelope to the Offset on Y we can have all the instances moving up at the same time, but we want the individual blocks to appear one by one. To do so, we need the power of nodes. Tick Use Nodes and then Edit Nodes.
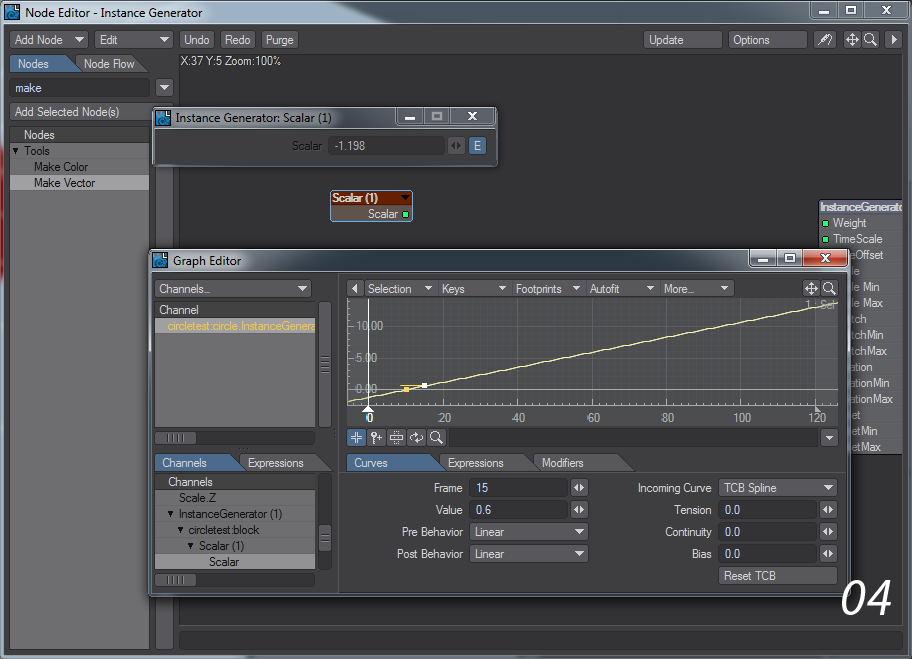
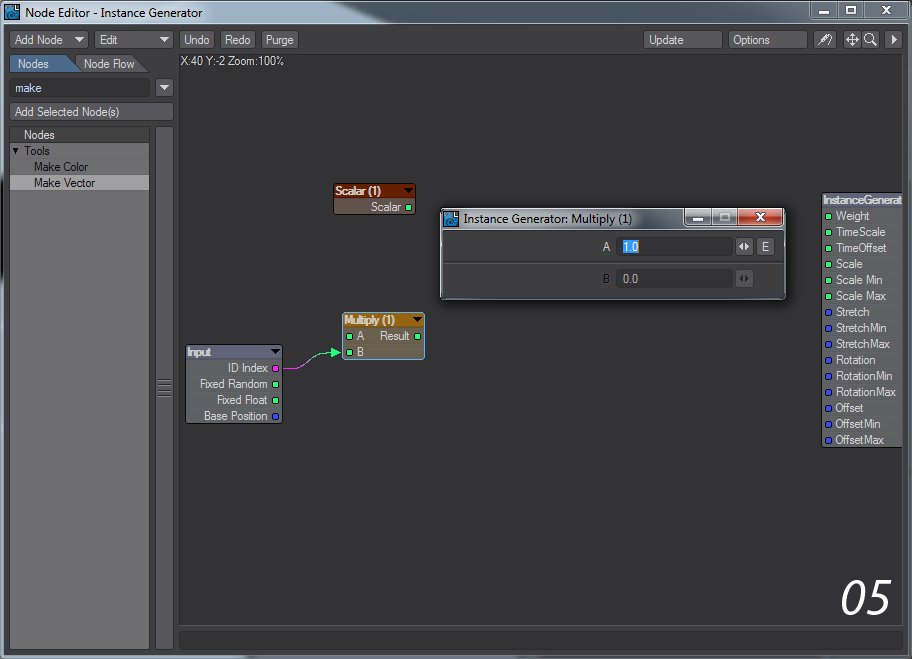
- In order to create the animation we want we will need several nodes. Start with a Constant > Scalar node that we can call Time. Double-click it and add an envelope by clicking on the E. In the Envelope, make the first key be at 0.0, add a new key and move it up to 0.6. Then set the Pre Behavior and Post Behavior for both to Linear.
- Next, add a Scalar > Multiply node. This one can be called Speed. It will be used to control the speed of "building the wall". Draw the ID Index from the Input node into B on the Speed, and set A to 1.0.
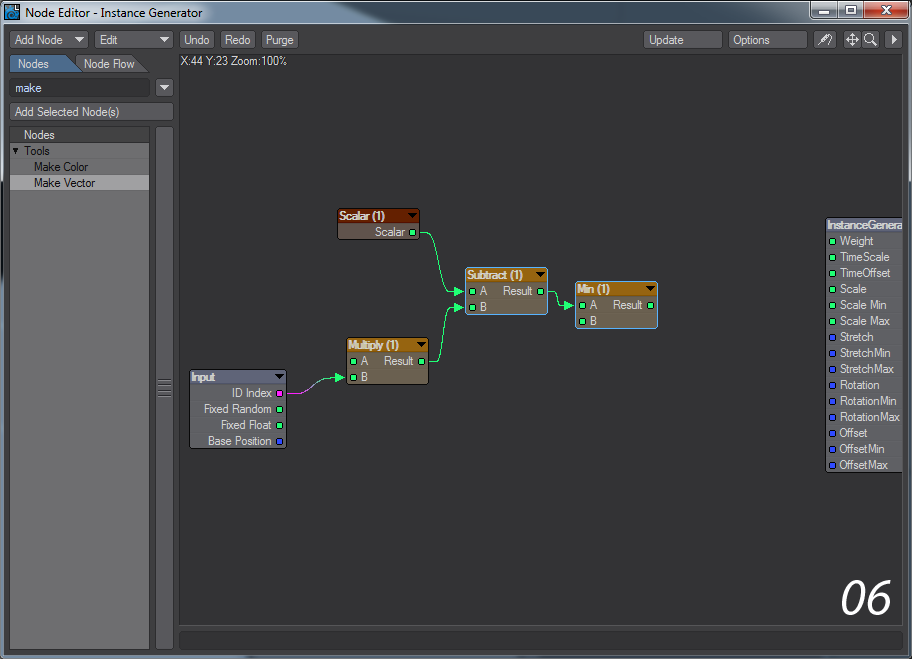
- The results from Speed and Time should go into a new Math > Scalar > Subtract node with Time into A and Speed into B and the result from that subtraction should go into A on a Math > Scalar > Min node. This will be our final height for the wall block once "built".
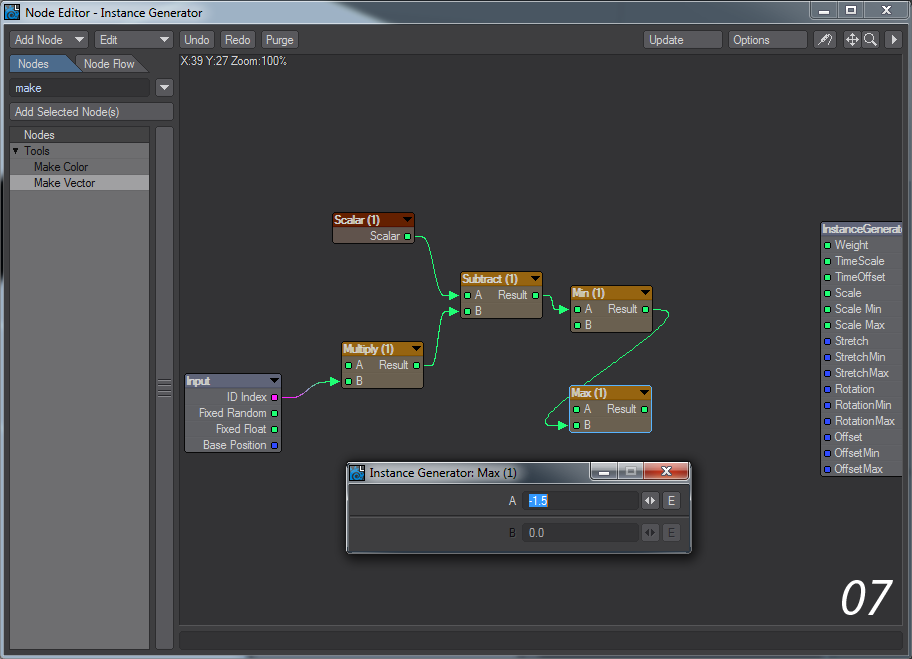
- The result from the Min node should go into B on a new Math > Scalar > Max node. The A value on this node should be to hide our blocks at the start of our animation and so wants to be a minus number: -1.5 is perfect to hide our wall blocks.
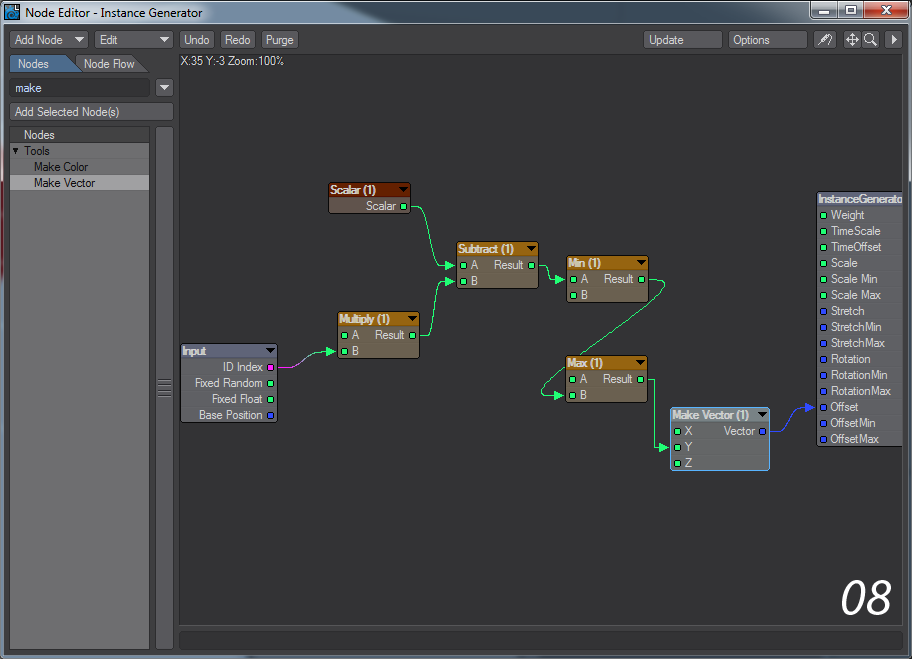
- Finally, the result from our Max node should go into the Y value on a Tools > Make Vector node, which converts our heights made by the Min and Max nodes into a Y height for the offset. Take the Vector output from this node and pipe it into the Offset input on the InstanceGenerator destination node.
- If you press play now, your wall should get built like this. If it is starting too early - the first block is already in place - slide the Time envelope along the time, so the first key is later in the timeline. You can also experiment with the speed by raising or lowering the second key. It should look much smoother for you than these GIF anims below. You can now also play with the speed settings in A in the Speed node. If you wish the wall segments to come up randomly, try using the Fixed Random into A on Speed, but you will need to increase B by a large amount for separation, try 30.