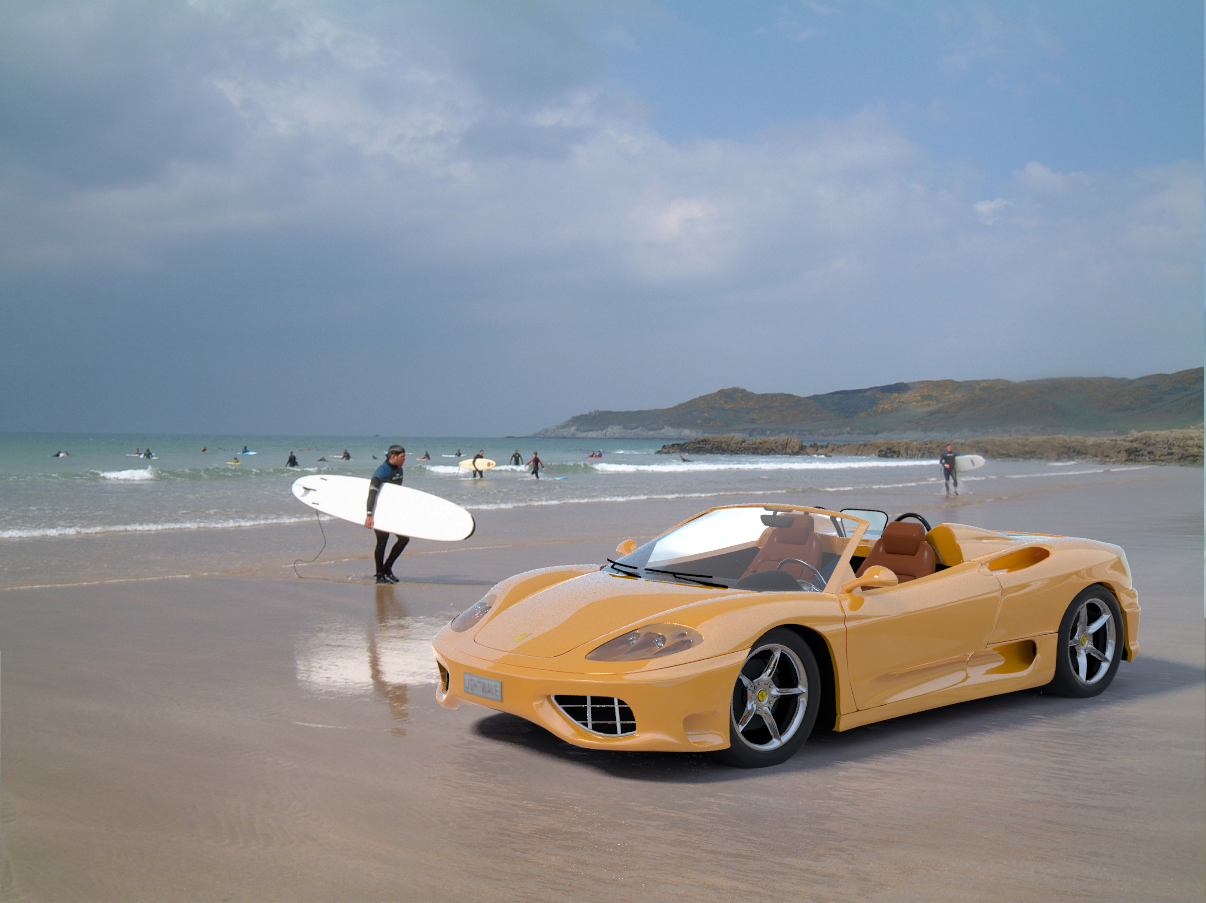
Example - Shadow Catcher: Spyder on the beach
 Spyder_on_Beach.7z (1.85 MB)
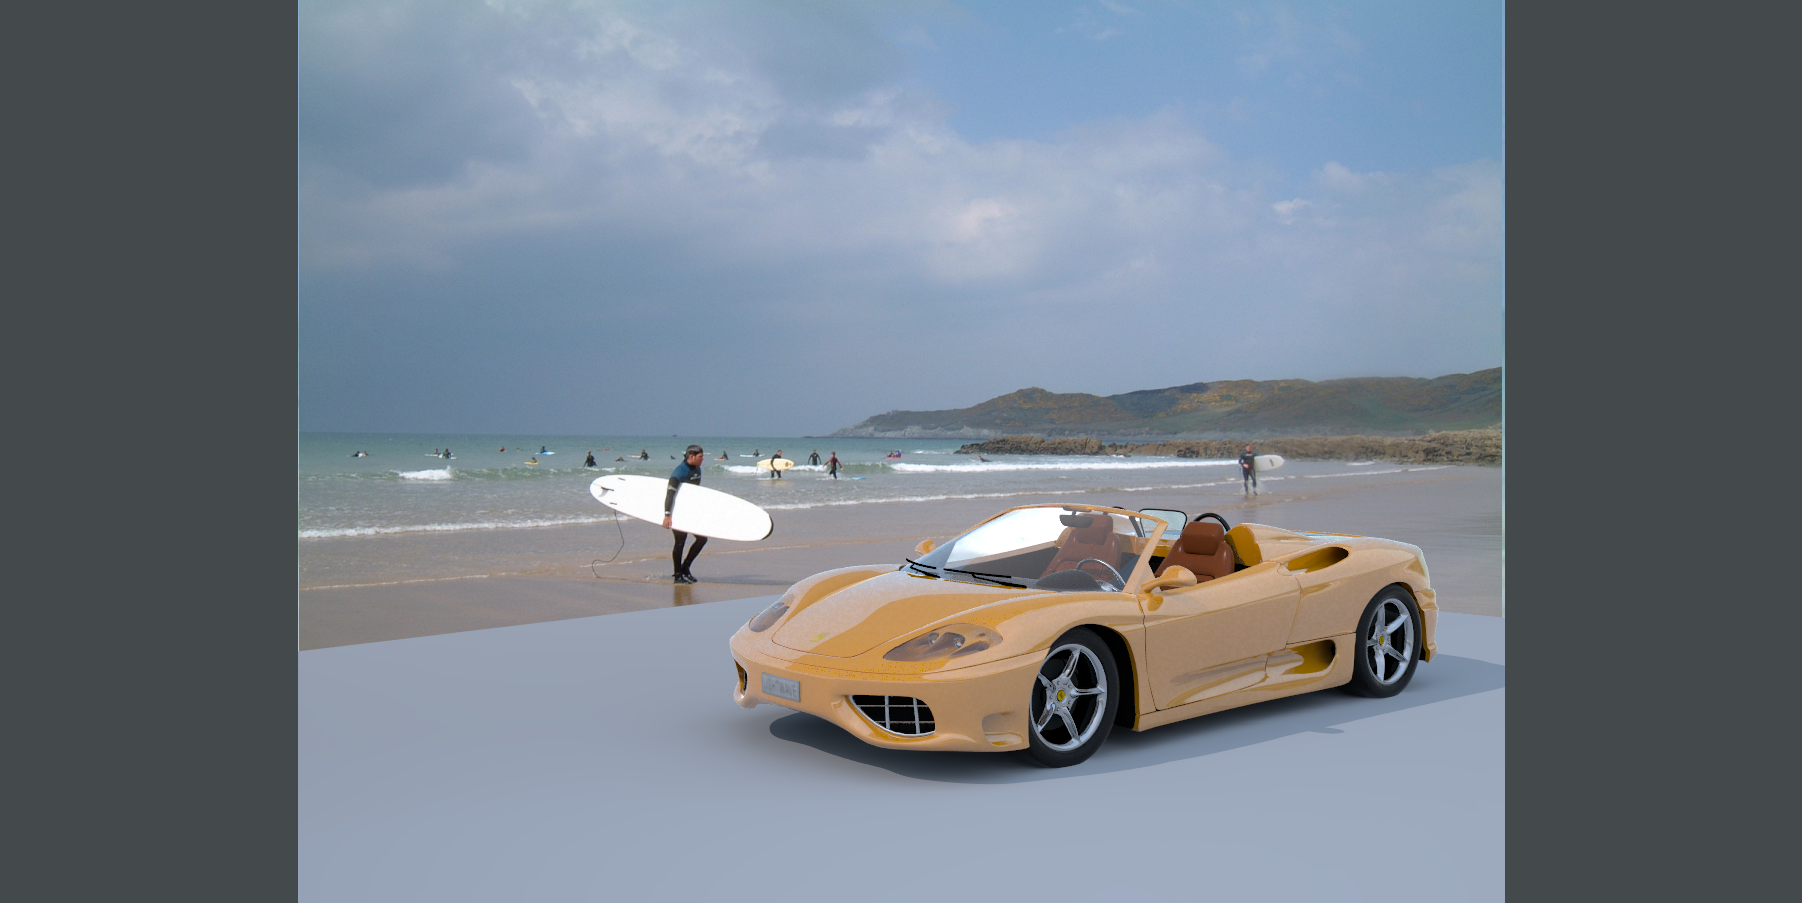
Let’s take a look at setting up a relatively simple compositing exercise. This beach photograph will provide a useful background plate to composite the car model onto, the sand is wet and provides a perfect example to illustrate the reflection catching aspect of the Shadow Catcher integrator. 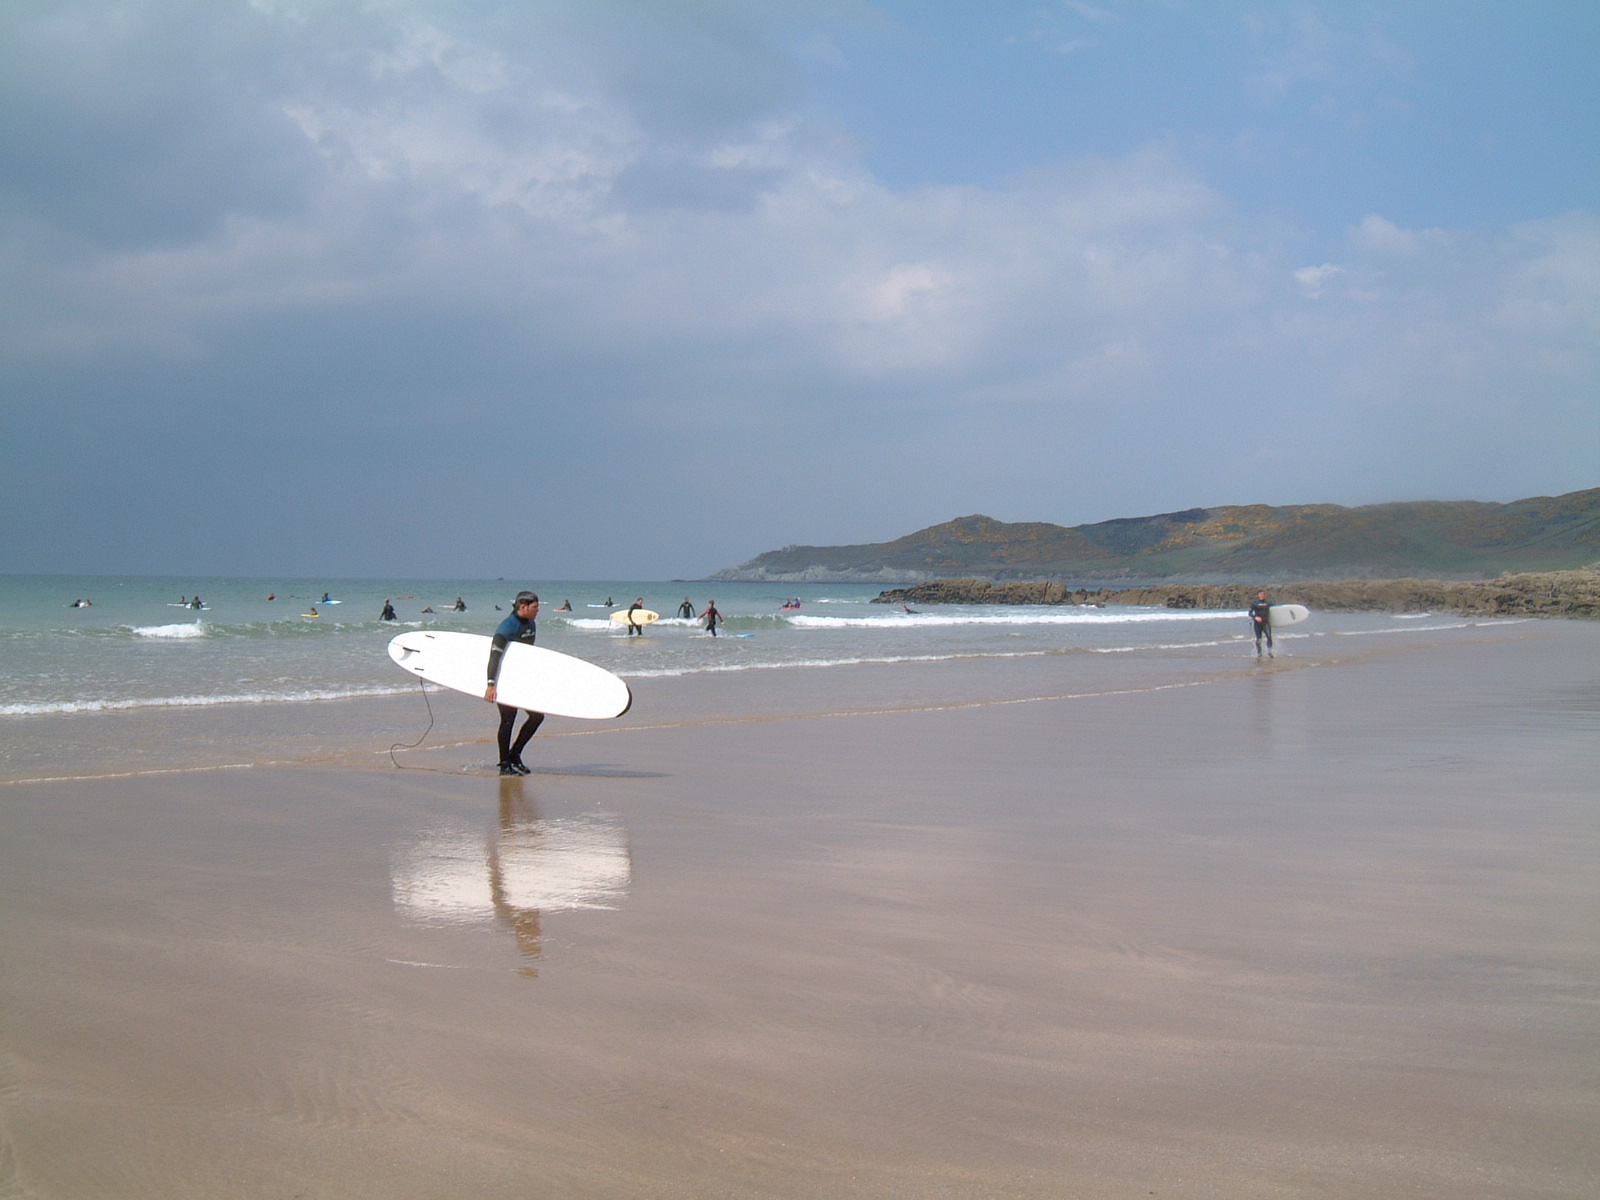
Setting Up the Background Plate
We first need to bring in the background plate we want to composite over, we’ll be using the Background Image method. Open up the Effects panel > Compositing tab (Ctrl F7) select (load image) from the Background Image dropdown menu and choose our image.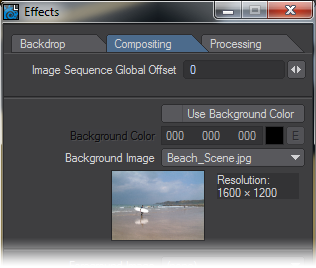
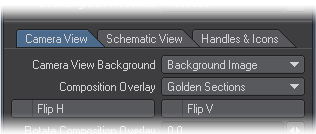
To help align items with the plate when we start placing objects into our scene, we need to see the background image in the camera view, it should be set by default. If it's not, open the Options panel > Display tab (D key) and set the Camera View Background to Background Image. You’ll need to set the viewport type to Camera to see the effect of this.
Setting Up the Camera
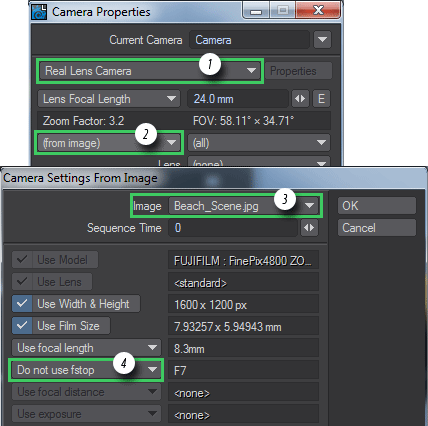
We now need to match the LightWave camera to that of the background photo. The easy way to do this is to use the Real Lens Camera. Select the Camera and bring up the Properties panel (P key).
Choose Real Lens Camera from the camera type dropdown (1), then choose (from image) in the camera type dropdown (2), select the image from the Image dropdown (3) and finally change Use fstop to Do not use fstop from the focal distance dropdown (4) as we don’t want to use Depth of Field (DOF) because this will also blur the background image which already has DOF in the image.
Matching the Background Image Perspective
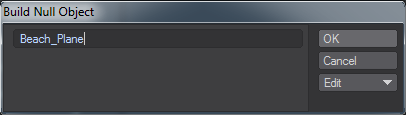
Once the background plate and camera settings have been set up, we need to position the LightWave camera in approximately the same location as the camera used to take the photograph so that our 3D objects match the same perspective as the background. Let’s start by adding the ground plane object that we will use to ‘catch’ the shadows and reflections.
In LightWave 2019, we can create scene objects that have no geometry. To do so, we'll start by creating a null that we'll call "Beach_Plane".
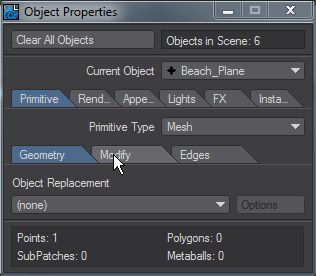
Hit OK and open the Object Properties panel with P
In case you don't see the GIF, we add a Shape Primitive to the null, choose Plane, and set the size to 5 m
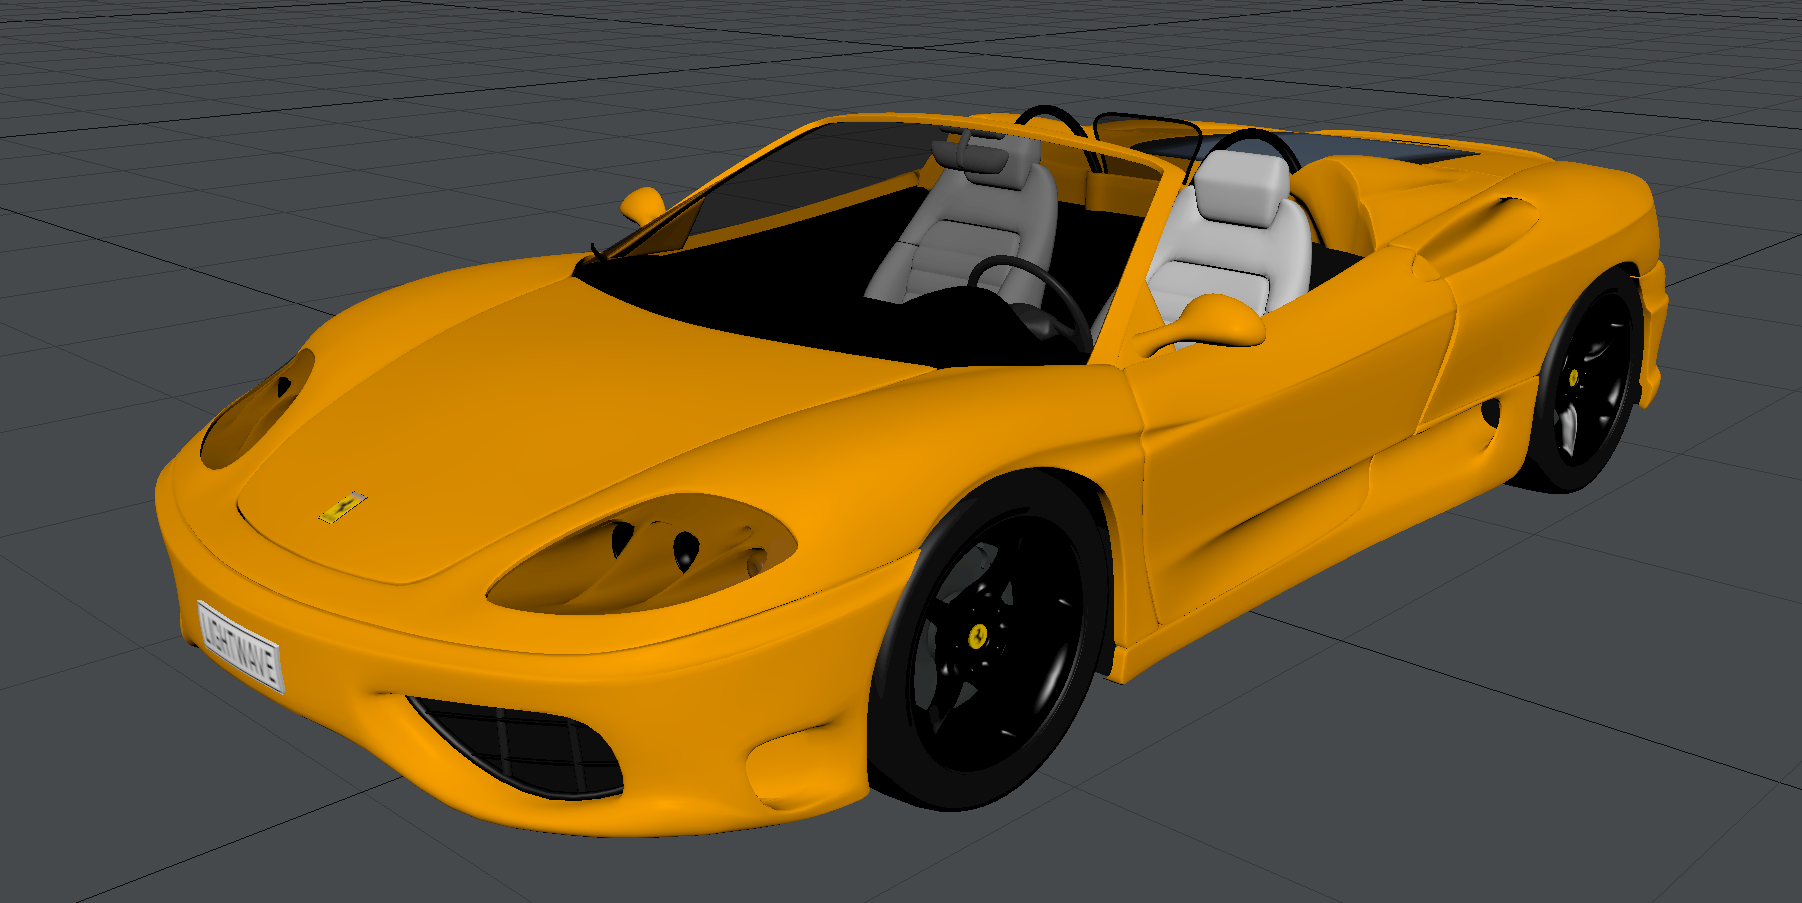
Now we have the ground plane created, let’s load the object we want to feature in the composite scene. Moving and rotating the camera into the original photo’s camera position will match the perspective. This part is very much a matter of eyeballing until it looks right. You can try to use the Match Perspective function but a beach doesn't offer much orthogonality.
When taking a photo for use in compositing, you should also note details that will help at the camera matching stage, such as camera settings, height, position from any key items in the photo, time of day, lighting conditions. Additional photos from different directions can also be used for reflection maps.
Our scene now looks like this:
Setting Up the Shadow Catcher Integrator
The Shadow Catcher works by only shading shadows and reflections from other objects in the scene onto surfaces the Shadow Catcher is applied to. Other material properties such as diffuse are simply ignored, which is why it gives the illusion of objects being part of the background image.
To apply the Shadow Catcher to the ground plane we created, open the Surface Editor (F5) and select the Beach_Plane object we created earlier.
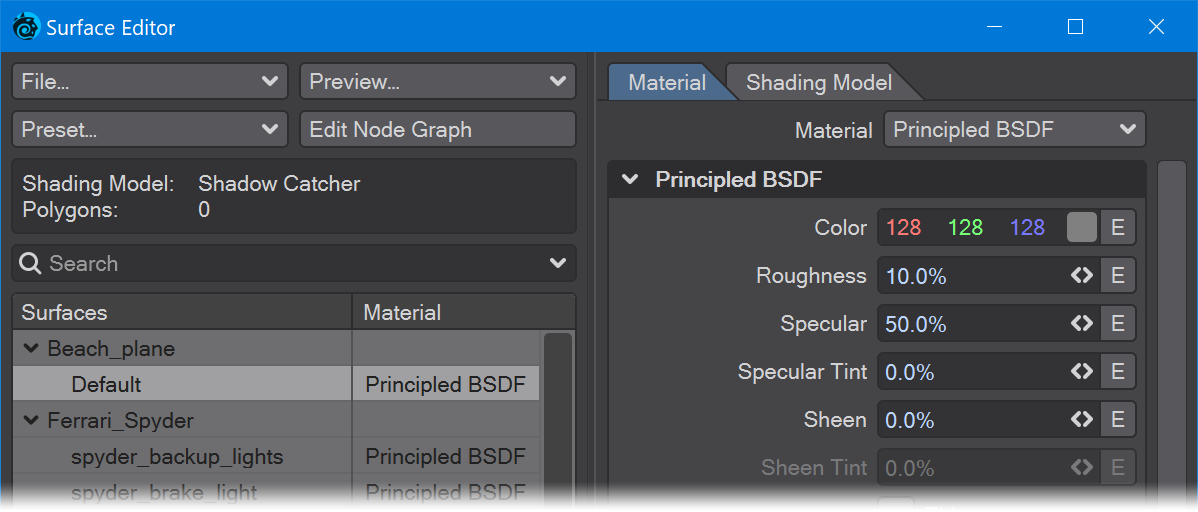
We don't need to worry about the material on the surface or what color it is. We're going to the Shading Model tab. If you have VPR on while you do this you will see the change immediately. Change the Integrator from Photoreal to ShadowCatcher and you will see the car sitting on the sand right away.
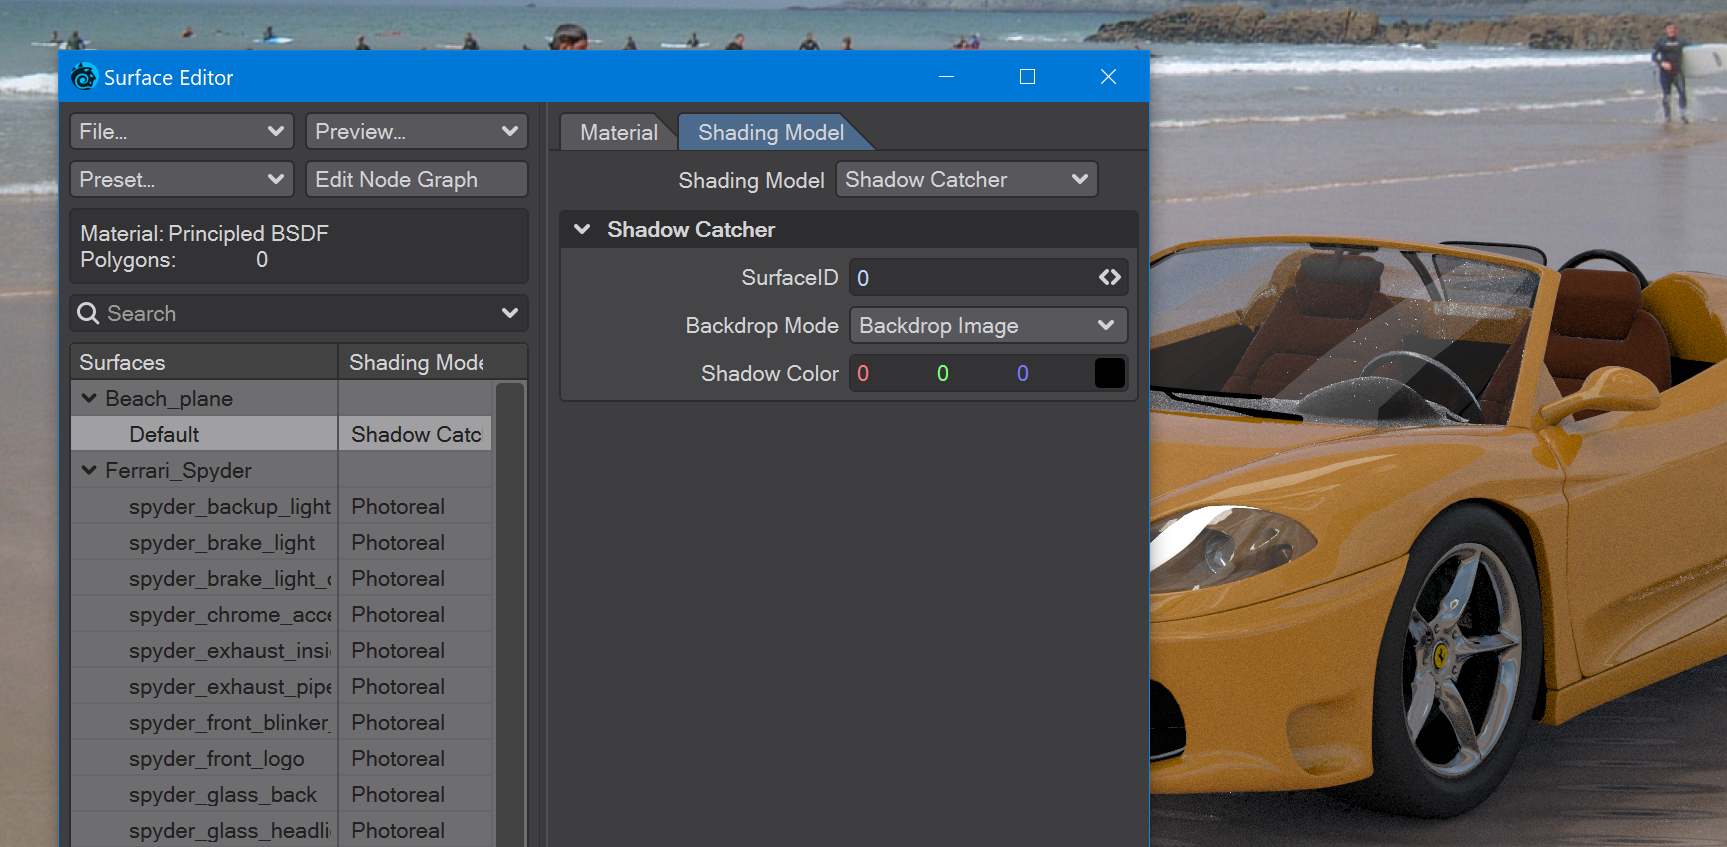
If the background image where your object will be placed has a reflective surface, here you can set the amount of reflection that matches, along with any roughness you judge the “ground” may have.
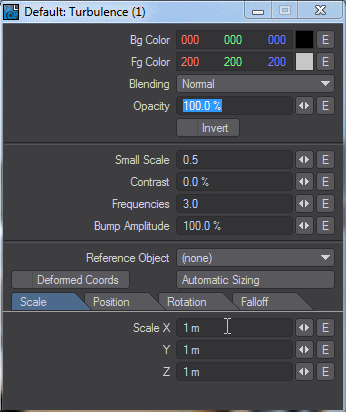
The beach under our car isn't perfectly flat, and the sand seems to be a little wet too, so we need to adjust our beach surface as well. Double click on the Default surface for Beach_Plane and you will open the Node Editor.
The default Principled BSDF settings aren't too bad and have a slight reflection of the car in the wet sand. To replicate the contours of the sand, just add a Turbulence node. I set the X and Z scale to 300 mm and 100 mm respectively and adjusted the Rotation heading to 5° to better match the sand of the beach.
Matching the Lighting
The last stage is to match the lighting and direction of the original background photo in your LightWave scene. For outdoor scenes like our example, you may want to use a Distant Light rotated to match the direction of the shadows in your photo (the light’s position doesn’t matter).
For sharper shadows use a low Angle for the Distant Light (5.2 is the actual diameter of sunlight falling on the earth on a clear day), higher angles result in softer shadows, For very diffuse overcast lighting, angles up to 90° may be required.
When rendered, your object should now look as though it was part of the original photo, as the shadows and reflections appear to interact with any shadow catcher objects (the ground plane in this example). Note the reflection in the wet sand as well as the shadow.