Example - Texturing the box with UDIM
We can go further with nodal texturing by using a single UV map created with UDIM tiles to texture our container. This will reduce the number of separate surfaces we need to manage to one, and greatly simplify our nodes. We will start by creating a UV map for our object.
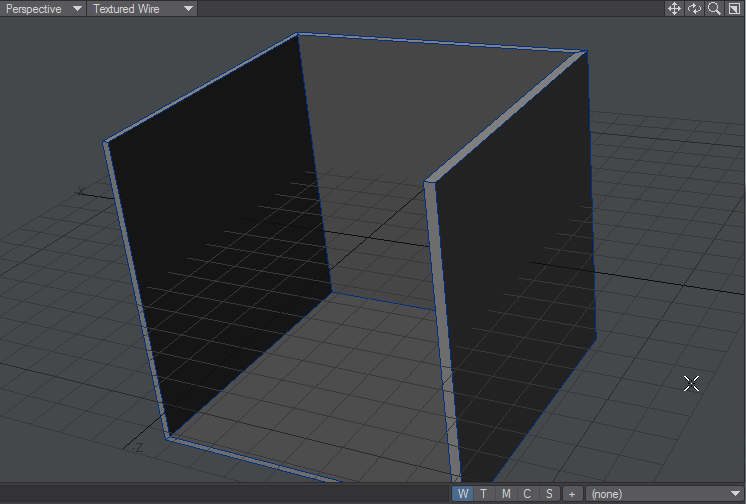
Let's start by selecting the four inner faces of our box and hitting Ctrl-U to unweld them. Once we have created our UV map we can merge them (M) to put them back together. Then, select the back wall. Select it and click the + button down at the bottom right of the Modeler interface to create a new Planar UV map.
Several things to note while we are creating our UV. Using Set as Default UV Map adds a bullet point (•) after the UV map name but, more importantly, a default UV map will be used when no explicit association has been made. We will see this in use later. Another thing to note is that Live Update has been checked. This will adds elements to a UV map as you create them. Hard to see here because I need to switch viewports, but with a dedicated UV viewport you will see how this speeds workflow.
The last new elements are the UDIM Tile Number entry and its associated Padding field. As you can see from UDIM Workflow, UDIM gives you the opportunity to have multiple full-scale image maps associated with a single UV map. Setting the padding to 5 % ensures that there's no overlap between tiles, but you can experiment.
Go through the individual polygons, using the same UV map name, setting each to the appropriate axis and increasing the UDIM tile number each time you add a new tile.
UDIM images have to be named in a specific fashion, with the number of the UDIM tile in the filename. We'll create four images named 1001-1004 to create images for the four UV-mapped polygons.


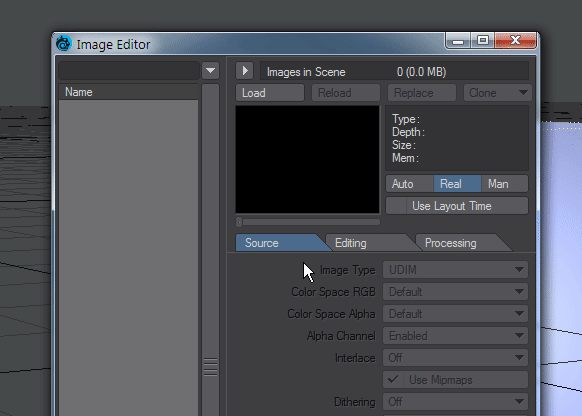
In the Image Editor, load the first image and set the Image Type to UDIM. This will bring the other UDIM sequence images in automatically.
Since we are now using a UV map to texture the inside walls of our box, it makes no sense to have separate surfaces for our inside box walls. Select the four inside walls and assign them a new surface "Inside".
In the Surface Editor, select this new surface and double-click its entry to edit nodes for the surface. We will add an Image node, load our UDIM and set the Projection to Object UV (which will use a default UV map).
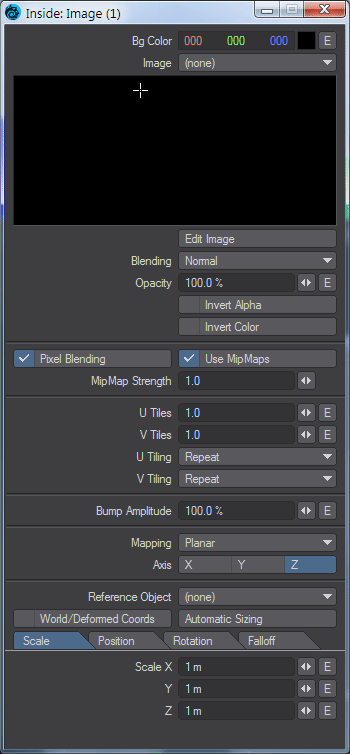
We can do the same with the Image Sampler node. This normally requires a projection node piped in, but if the object has a default UV map this will be used automatically.

We can see from our VPR render that our Right side wall is reversed. We can rectify by simply flipping the UV coordinates for this wall in Modeler.

Visit Modeler (F12) and go to the Map tab. In the UV/Texture section you will see Flip UVs. Start the tool and click OK (since we want to flip U). If you are presented with an error message, make sure the appropriate UV map is selected in the lower right corner. Save your object and return to VPR in Layout. You should see that the text is the right way around now.

Once we have the four inside walls - Base, Back, Left and Right assigned in the UV map, correctly textured and flipped where necessary we can merge our polygons back together with Merge (M). You should have 20 points eliminated.