How to do edge renders in LightWave 3D, a brief tutorial
This is a short blog post, which will describe how I go about edge renders in LightWave 3D. It’s really easy and I find it a great technique for renders that are not photorealistic.
I am using Lightwave version 11.6. I’m not sure how this works in other versions but it’s probably almost identical.
What do I mean by edge renders?
This is an effect that runs a line along various edges and boundaries. It can be used to emphasise fine detail, or to give a diagram effect. It works with transparency, and animates nicely.
Here’s an example.

Hale Telescope Edge Render
Note how features of the telescope are highlighted with fine white lines.
Ready to start?
A simple example.
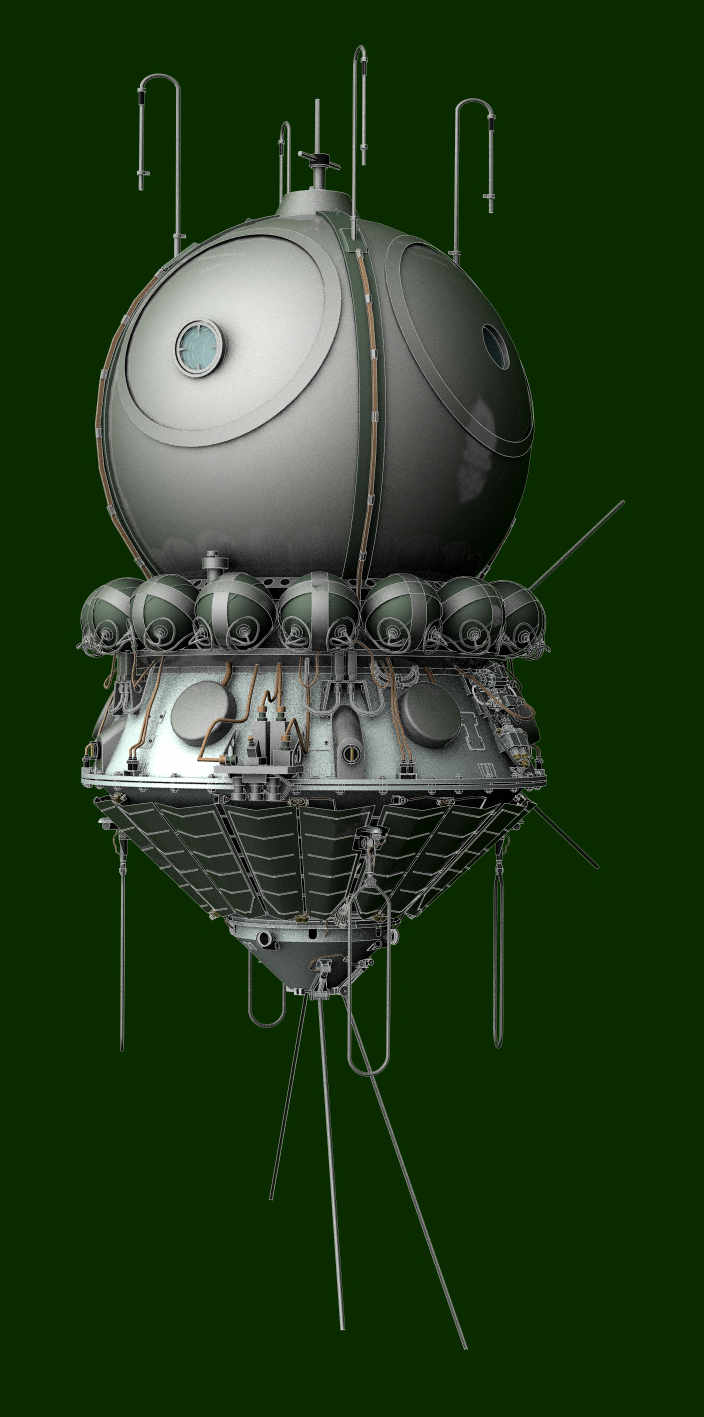
For your first try it’s probably easiest to start with a model which is all in one layer. Here’s my starting point, a normal render.
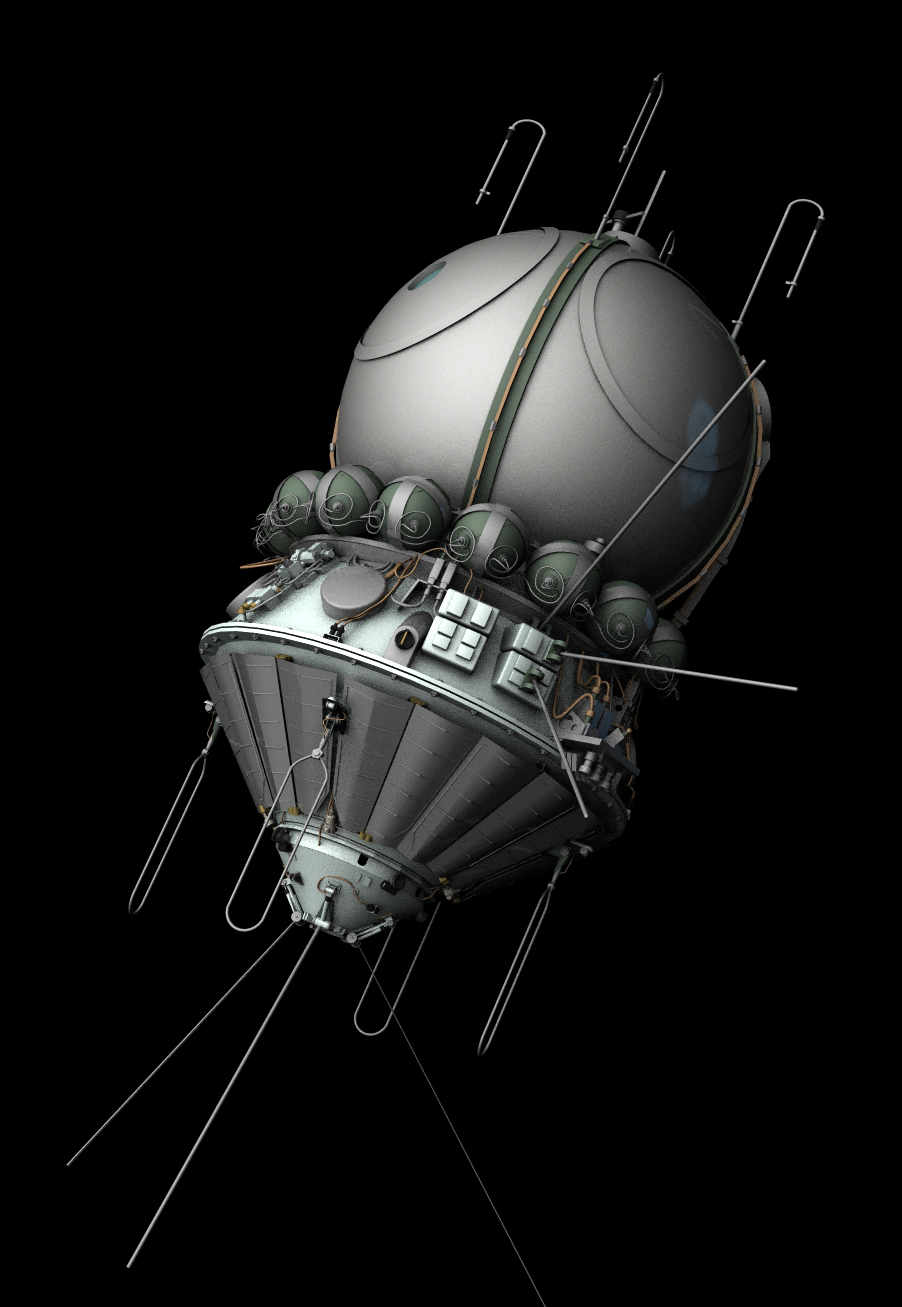
Vostok Sample
Now select the object in question, and click Properties, then the Edges tab.
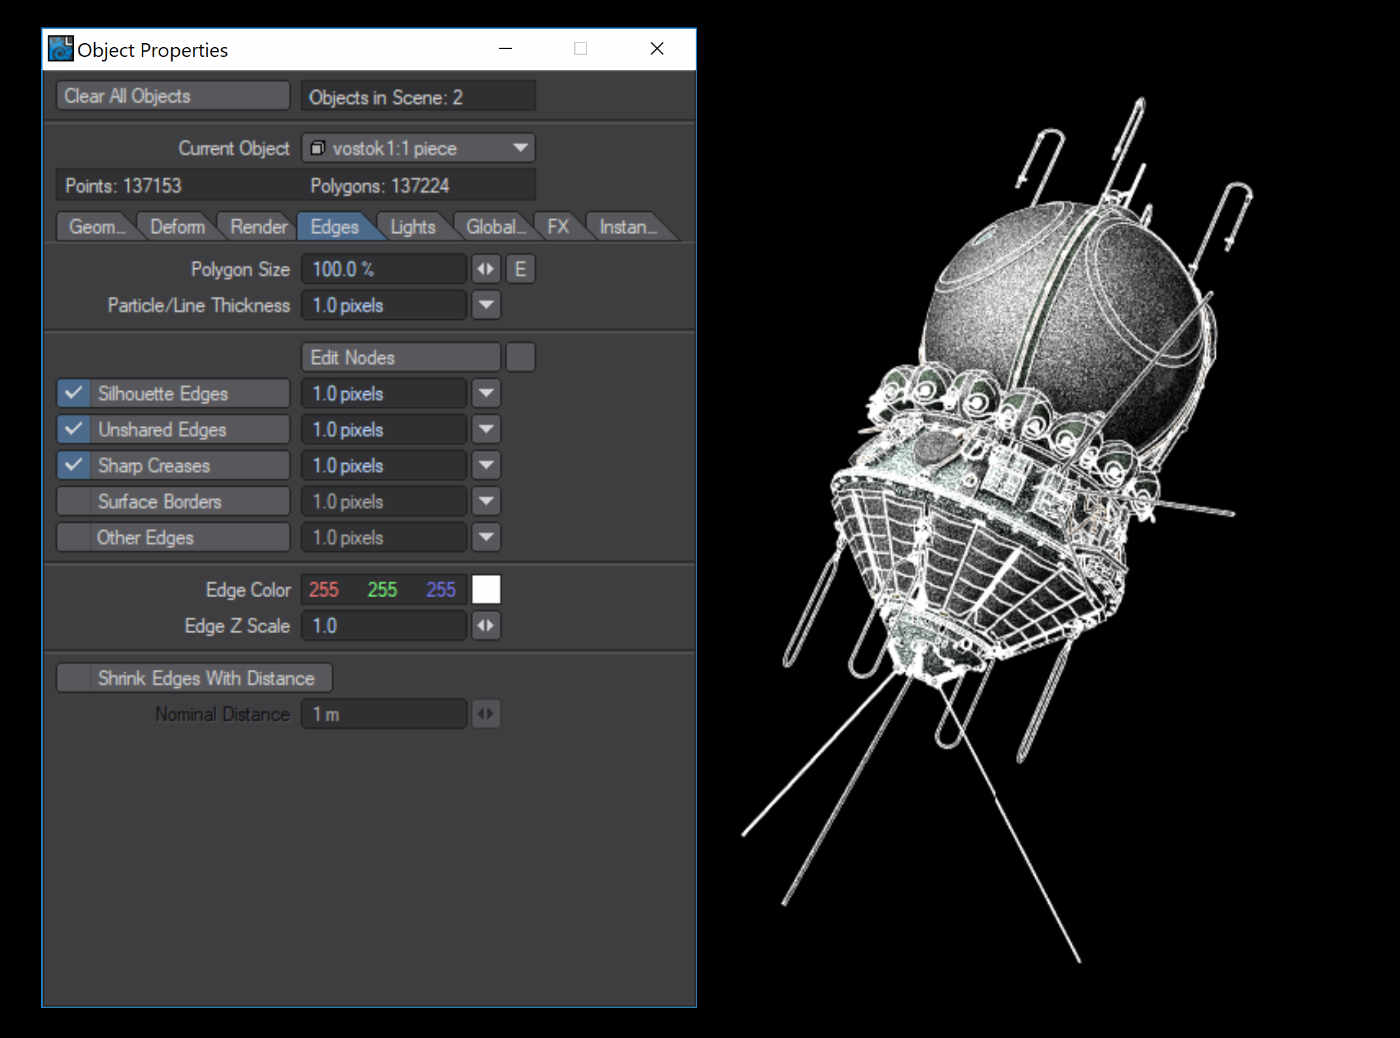
Vostok screen shot, click to enlarge
And here’s the Edges panel from Lightwave 2019.
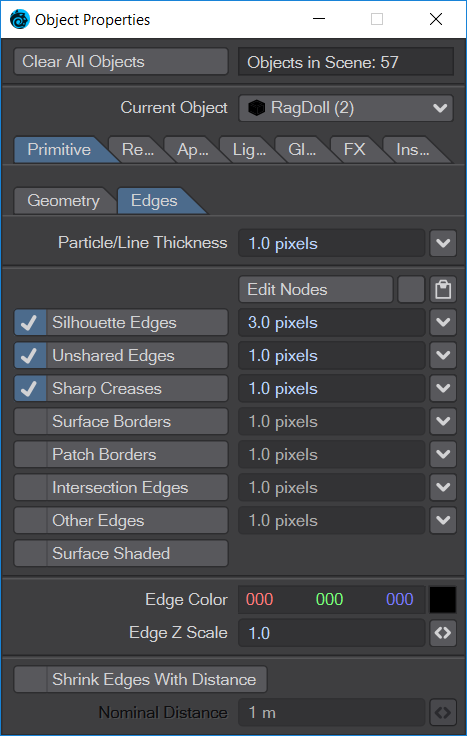
Lightwave 2019 edges panel
You will see the options to turn on edges in various places. I normally find that choosing the first 3 or 4 works well. If you have VPR enabled, as in this case, you can see exactly what the effect is. I rarely turn on 'Other Edges' as it shows every polygon.
Here’s the resulting render:
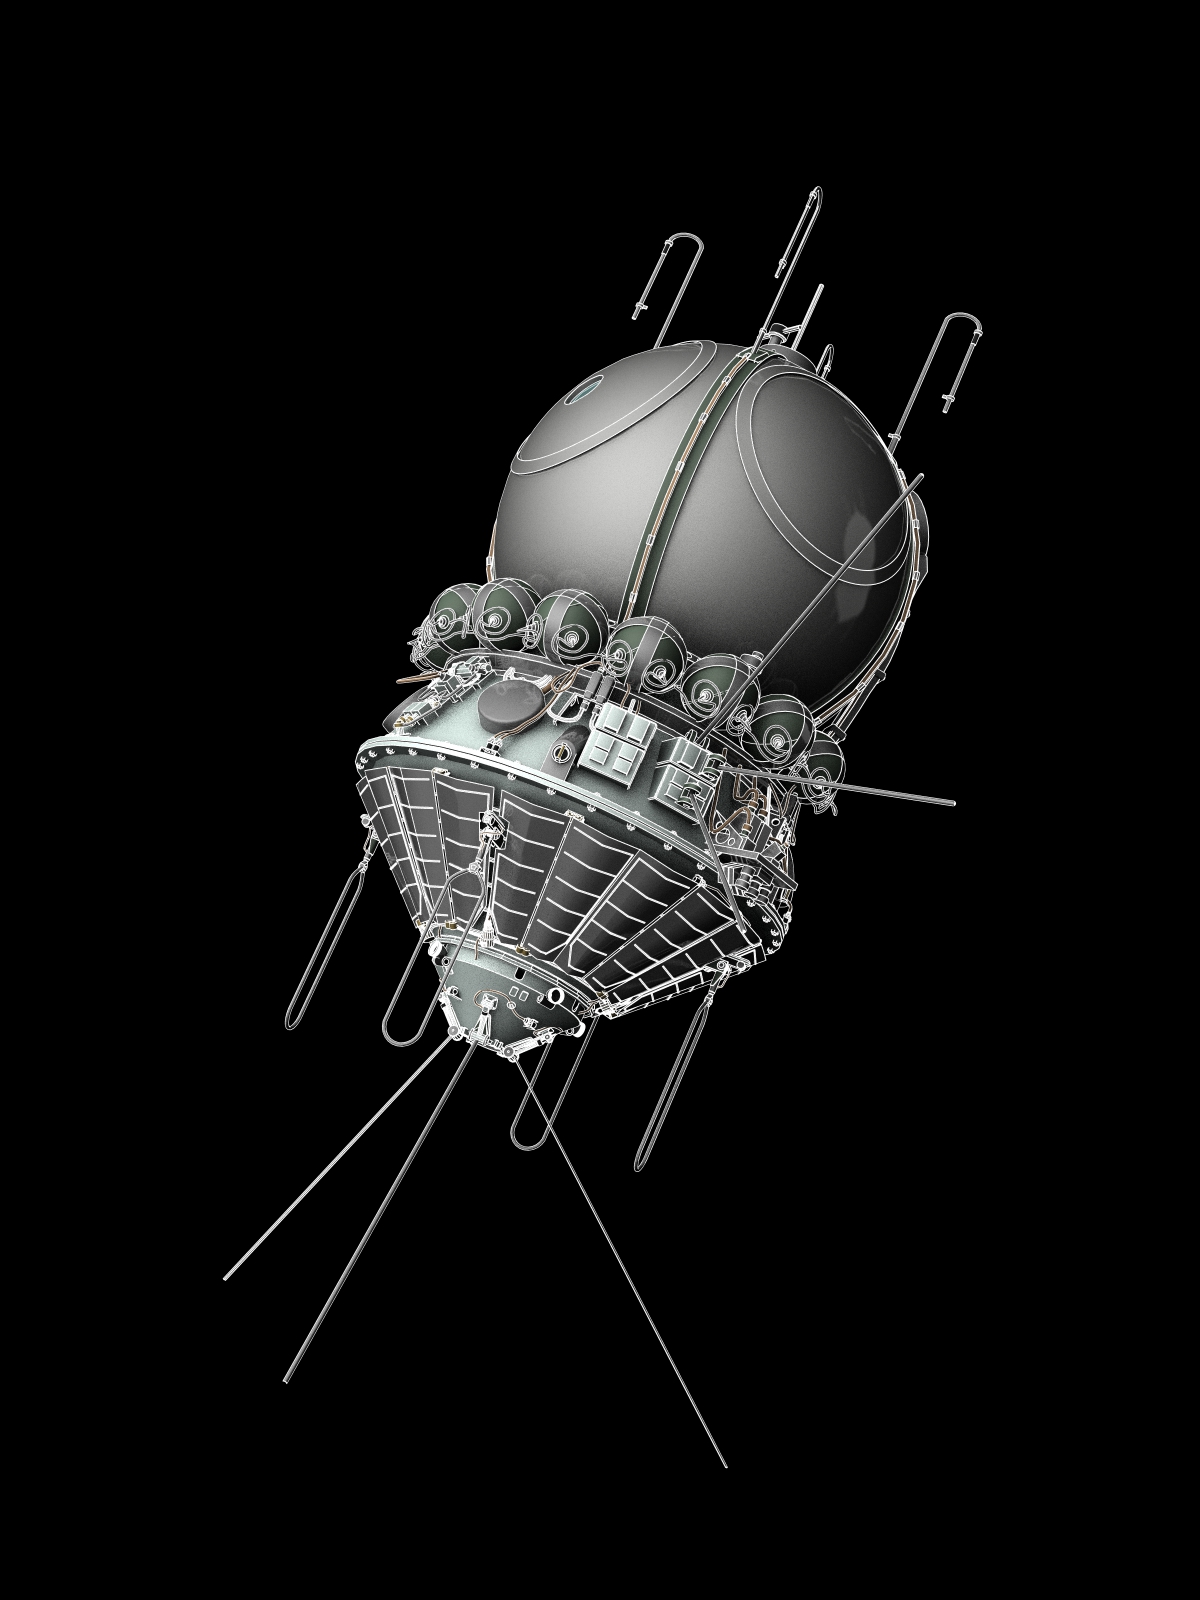
Vostok edge render 1
Now this is quite a bold effect, but you can tone it down, selecting a less obvious colour, such as grey, or by setting the line thickness smaller. You are allowed fractional pixel widths. Here’s the same object, with 0.5 pixel edges in grey.
Vostok subtle edges
I hope you will agree that this is much more subtle, and I find it very useful to help bring out all the fine details I have modelled that may not be apparent in a more conventional render.
Alternatively, you may find it useful to let the edges dominate completely, giving an effect like a diagram. For this I find it useful to use one surface for the whole object, and set it to a flat colour, with 0% diffuse, and 100% luminous. This also lets you turn off all lights, and get very fast renders!
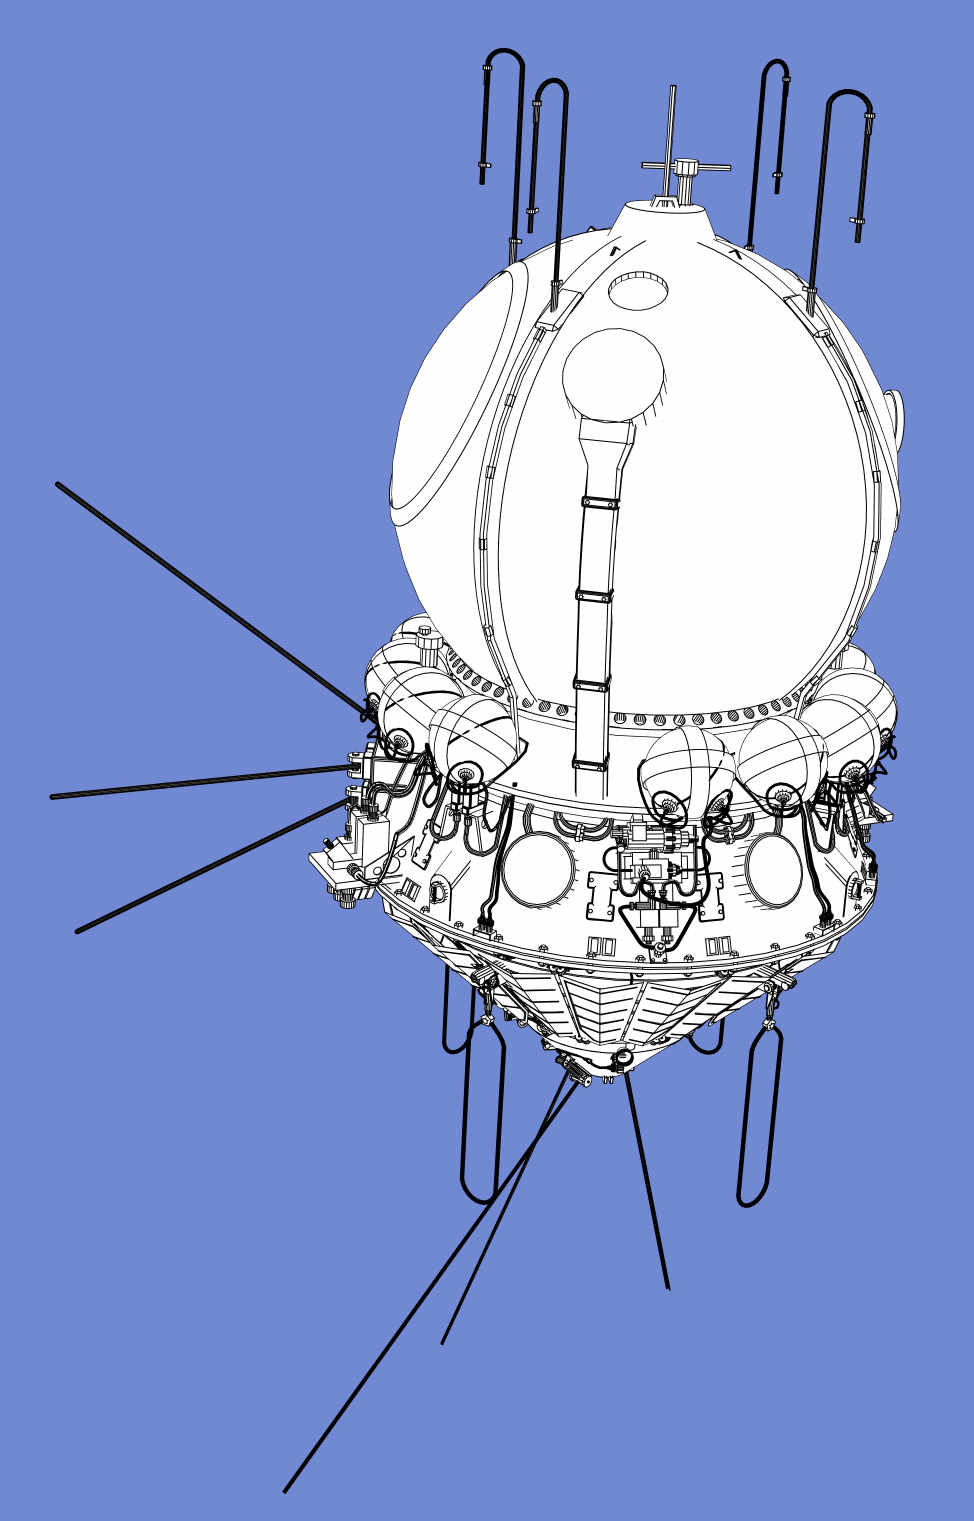
Vostok, simple edges
If you use this technique with the ortho camera, (perspective free) you can produce impressive technical diagrams.
Also because it renders fast, it’s really good for animations, even ultra high definition renders. Here’s a link to a 4k / UHD render I did of the Aries from 2001, on my Vimeo channel:
Objects with multiple layers
Multiple layers are no problem at all. As each is effectively a separate object, you can use different edge settings for each layer, but I generally use the same for all layers. And if you are going to do this, it’s a lot quicker to select all the layers at the same time, (using the scene editor), then you can see them all come to life at the same time, using the VPR preview.
Finishing up…
I hope you find this tutorial useful, plese let me know in the comments if anything is not clear. I’d also love to see what you produce, so if you are on twitter I’m @runnymonkey, mention me in your post so I'll be notified there’s something to see.
Note
At the time of writing this tutorial, Nick didn't have access to LightWave 2019's more advanced edge rendering possibilities, like Mesh Element Switch or the Global Edge Multiplier and Edge Vertical Points that could make his edge work even more exciting.