Modify - Tools Group
Ryan Roye has kindly shared his excellent guide to IK Boost in our User-Created Tutorials section
IK Boost
(default keyboard shortcut Ctrl-B)
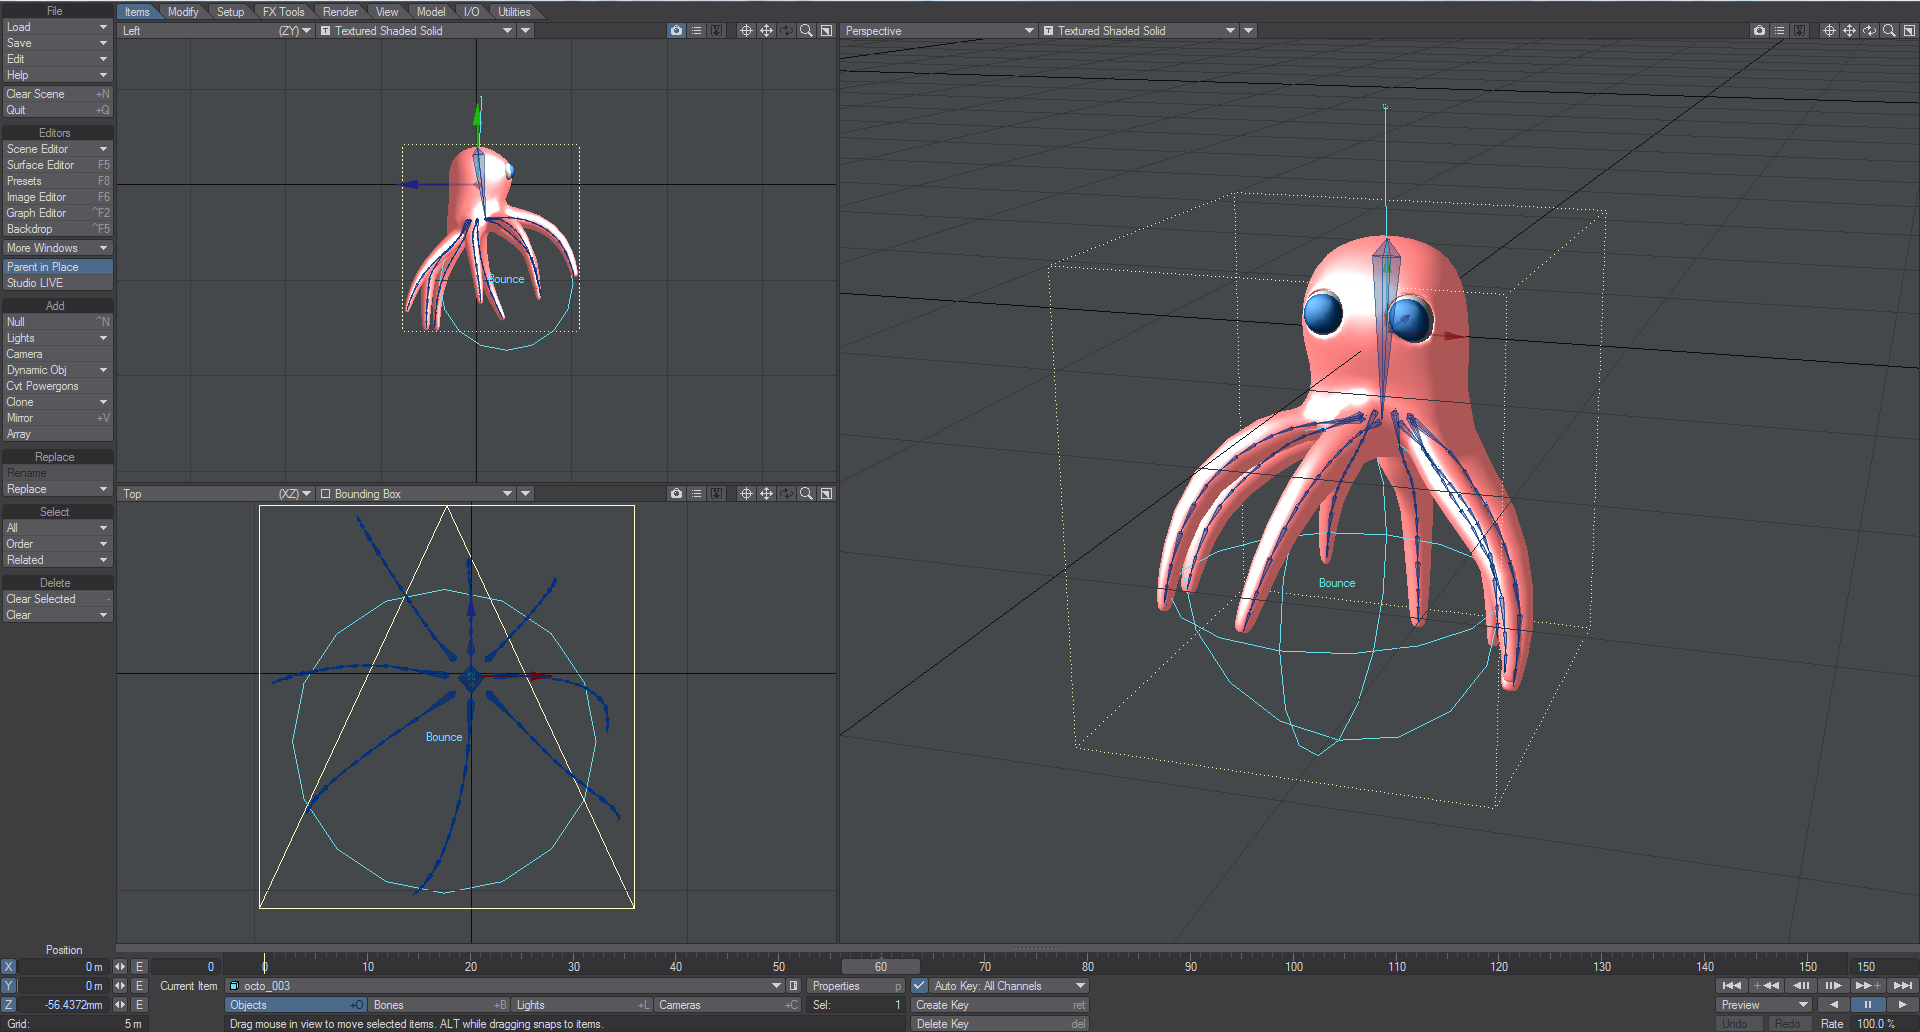
IK Booster (Modify > IK Boost Tool) is an animation system that can work independently from LightWave’s base Inverse Kinematics or it can be used with LightWave’s base IK. With IK Booster applied to an object you can gain access to Bone Dynamics and IK Booster character tools.
Applying IK Booster
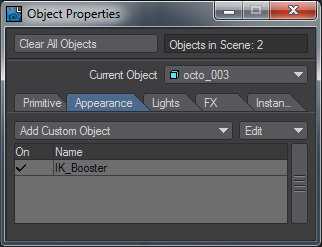
IK Booster can be applied to an object by adding it to the Custom Object list (Add Custom Object) in the Object Properties Panel.
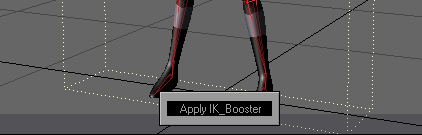
You can also add IK Booster to an object using the IK Boost tool (Modify > IK Boost Tool).
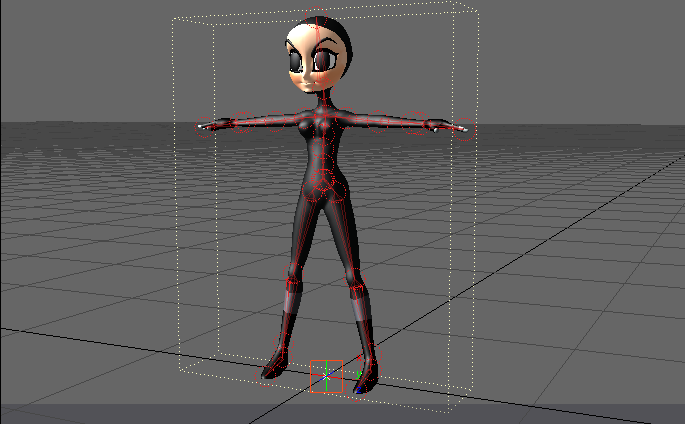
Select the IK Boost tool and Right-Click on the object pivot point to bring up the option to Apply IK Booster.
When IK Booster has been applied to an object all the bones in the object and all of the object’s children will be set up with IK. Although IK Booster is ideal for character rigs, it can be a powerful tool for mechanical rigs as well.
Steps for applying IK Booster:
- Load your object (s) into Layout and either create bones, or convert Skelegons to bones. In the case of a segmented object, make sure all parts are parented properly.

- Select the IK Boost tool (Modify > IK Boost Tool). Select the IK Boost tool and Right- Click on the object pivot point to bring up the option to Apply IK Booster. Select Apply IK Booster to activate IK Booster (IK Booster can also be applied in the Object Properties Panel as discussed above.)
- Although there are some cases where Step 2 would be the last step before animating, in most cases you will want to apply further settings discussed below.
Modes
KeyFrame Mode
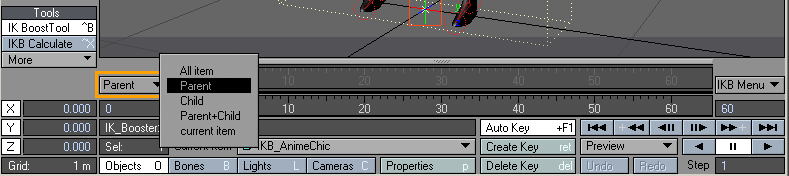
IK Booster has several keyframe modes you can choose from the Keyframe Mode drop down menu. If the DopeTrack is active, the Keyframe Mode button will be located on the left side of the track.
If the DopeTrack in not active, the Keyframe Mode selection will be located on the left side of the IK Booster track. The IK Booster Track is located at the bottom of the viewport windows.
The Keyframe Mode selector on the IK Booster track doesn’t bring up a drop down menu, instead it toggles between the modes as you click on it with the LMB.

KeyFrame Modes
- All Item - When this mode is selected, if you create a key on an item, it creates a key for that item and the entire hierarchy.
- Parent - With Parent mode, if you create a key on an item, it creates a key for that item and every parent up that item’s chain.
- Child - In Child mode, if you create a key on an item, it creates a key on that item and all of its children.
- Parent + Child - In this mode, if you create a key on an item, it creates a key for that item and every parent up that item’s chain, and every child down the chain.
- Current Item - With Current Item mode, if you create a key on an item, it only creates the key on that item.
IKB Menu
The IK Booster menu has several options to work with. If the DopeTrack is active, the IKB Menu will be located to the right of the DopeTrack.
If the DopeTrack is not active, the IKB Menu will be located on the right side of the IK Booster track. The IK Booster Track is located at the bottom of the viewport windows.

IKB Menu Options
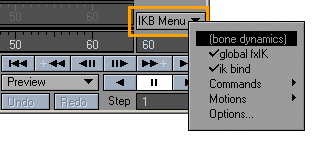
Bone Dynamics
This option enables and disables all bone dynamic functions for the object that IK Booster has been applied to.
Global fxIK
IK Booster provides a global IK on/off switch. When this option is active all hierarchies in the object will be solved with IK. When this option is not active only the current hierarchy will be solved with IK.
IK bind
IK Booster has the option to “fix” an item, which locks the position of the item’s controller. When IK Bind is active all fixed items will stay fixed. When it is not active, items that are fixed will ignore their “fix” setting and will no longer be locked to their position.
Commands
Reset Rotation - This command will set the rotational values of the item(s) back to their original value.
The KeyFrame Mode selected will determine the items affected by Reset Rotation.
re-BakeSpot-all - Any Bake Spot in the scene will be re-baked when this command is selected.
Any Bake Spot that was not previously baked will not be affected.
Motions
- IK Booster has several motion options to help speed up animating and increase productivity.
- Motion Copy - This function will copy the object’s entire motion to the clipboard.
- Motion Rollback - This function will paste the last motion that was copied to the clipboard. This will remove any work that you have done since the time of copying the motion.
- Motion Save - This function will save the entire motion data of the IK Booster object to a text file. This gives you the ability to re-use motions from your object on objects that share the same setup.
- Motion Load - This function will load an IK Booster motion data file that was previously saved using the Motion Save command.
Options
This brings up the IK Booster Options Panel.
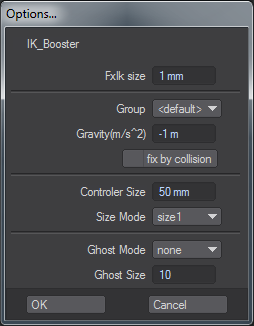
- FxIk size - This setting determines the accuracy of the IK solving. The higher the number the less accurate the IK solving will be.
- Group - you can group Dynamic objects with a user-defined name to prevent unwanted interaction. This also works with Particle FX controllers. This becomes very handy when you are working on a complex scene and you want certain Wind emitters to only affect certain objects.
- <default> Includes all groups.
- <new group> Creates individual group. Can associate functions within a group.
You can assign IKBoost settings to a group shared with Particle FX.
- Gravity - Setting for downward (-y) gravity. This option only applies to objects that have Bone Dynamics active.
–9.8 in the Y is considered the value of earth gravity. If you are simulating any terrestrial effect, make sure you use this value..
- Fix by Collision - This function will fix items that pass through a collision object. This option only applies to objects that have Bone Dynamics active.
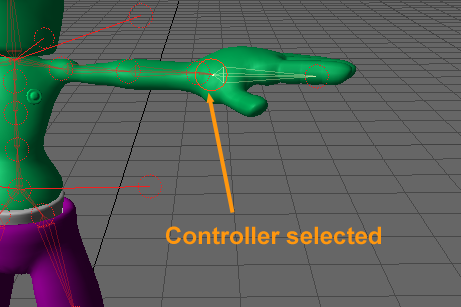
- Controller Size - Use this setting to change the size of the controller when it is unselected.

Controller Size: 50mm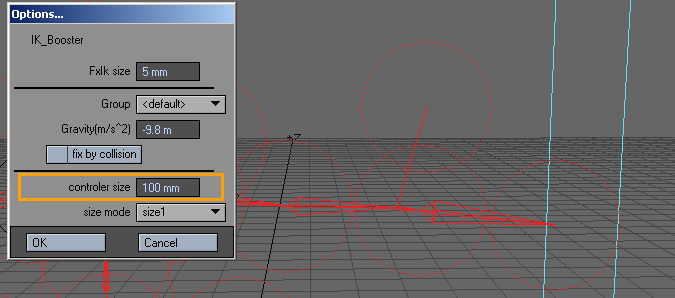
Controller Size: 100mm - Size Mode - This setting determines the size of the controller when it is selected.
- Size 1 - Smallest selected size.
- Size 2 - Medium selected size.
- Size 3 - Largest selected size.
- Not Change - The selected controller size will be based on Controller Size. The controller size when selected and unselected will be the same.
IK Booster and the Dope Track
When the DopeTrack is active while in IK Booster mode, there are two different menus that can be used, the Right Click menu, and the Right Click and drag menu. You will also see the Keyframe Mode and IKB Menu buttons that are unique to IK Booster discussed earlier.

Right Click Menu
Right clicking on the dope track will bring up a menu with several functions described below.

- Copy key from current - This function will copy a keyframe from the current frame (the frame the time slider is at), and paste the keyframe on the frame you right clicked on.
- Make Key - This function will create a keyframe at the frame you have right clicked on. If you would like to create keyframes for a range of frames, use the Bake Keys function in the Right Click and Drag Menu.
- Delete Key - This function will delete the Keyframe at the frame you have right clicked on. If you would like to delete a range of frames, use the Delete Keys function in the Right Click and Drag Menu.
- Save Pose - This function will save an external file that contains the keyframe data of the IK Booster object for the frame you right clicked on.
- Load Pose - This function will load a previously saved Pose file on the frame you right clicked on.
Right Click and Drag Menu
Right clicking and dragging to select a desired time range on the Dope Track will bring up a menu with several functions described below.
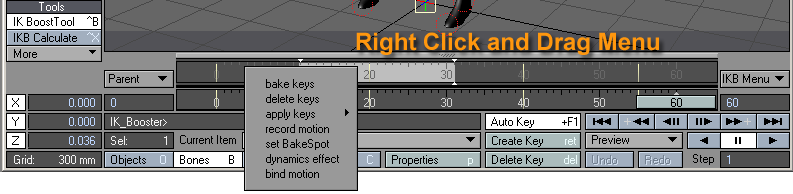
- Bake Keys - This function will create keyframes for the selected time range
Left: Time Range Selected, Right: After Bake Keys - Delete Keys - This function will delete keyframes in the selected time range.
Left: Time Range Selected, Right: After Delete Keys
Apply Keys
Apply keys is for making overall changes to densely keyframed animation. An example would be for correcting or making changes to an existing animation such as motion capture. All three "applies" use the first and last keyframe in a range as boundaries, and the keyframe that the slider is currently sitting on (Current Frame) as a control point.
- Soft - In the case of “Soft Apply”, a Hermite spline is generated using these keyframes as points to smooth out the intervening keyframes. Default Hermite coefficients are used
- Linear - “Linear Apply” uses the same keyframes, but simply “increments” the keyframe values between the control points.
- Flat - “Flat Apply” snaps all intervening keyframes to the value of the control keyframe (the one the slider resides on).
Record Motion
This function will record the motion of the selected controller at fixed distance intervals.
Right Click and drag to select the time range, select Record Motion, and set the options in the Record Motion Panel.
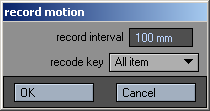
- Record Interval - The set distance for each keyframe.
- Record Key - Determines what items motion will be recorded using the various Keyframe Modes.
After you set the options for Record Motion, the IK Booster track will display red to show that you are recording. After you have moved the controller through the time range the track will return to the default mode.

- Set Bakespot - This function will create a Bakespot in the select time range. A Bakespot is a time range in which you can bake keys into the desired time range so that they will remain for future operations.

Use the Bakespot Handles to adjust the time range for the bakespot at any time.
Bakespots have a right click drop down menu that gives you the following options: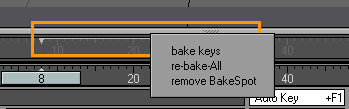
- Bake Keys - This function will create keyframes for the selected bakespot.
- Re-bake-All - Any Bake Spot that has been baked in the scene will be re-baked when this command is selected.
- Remove Bakespot - Clears the bakespot from the track.
Dynamics Effect
This function will apply dynamic motion to a controller over the selected time range. When this function is selected the Dynamic Effect Preview Panel will appear.
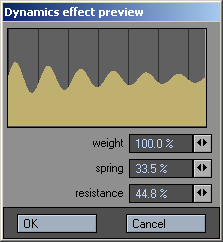
The graph in the preview, displays the motion that will be applied to the controller.The line in the background represents one second intervals. This graph gives you a visual representation of the motion that will be applied.
- Weight - Defines the weight of the controller. You can achieve heavy motions by increasing the Weight value, and you can create light motions by decreasing Weight.
- Spring - Controls the springiness or stiffness of the controller. Reducing the Spring coefficient creates soft motions, while raising the Spring coefficient produces motions with a stronger repelling force. Setting the coefficient to an extremely large value creates stiff motions.
- Resistance - Controls the amount of air resistance.
Once applied a keyframe will be placed on every frame in the selected time range.
No calculations are needed when using this function.
Bind Motion
This function will bake keyframes for the entire time range based on the keyframe of the first frame in the range.
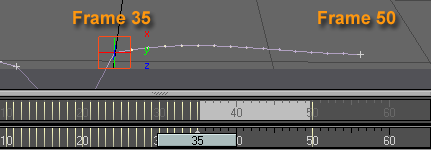
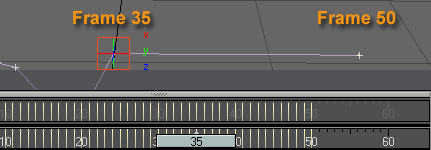
The example above shows bind motion in action. The Time range selected is from frame 36 to 49. When Bind Motion is selected every frame in the time range uses the data from Frame 35.
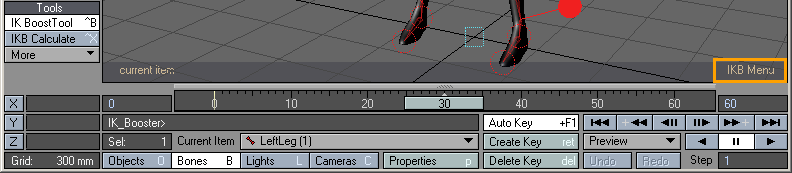
IK Booster Track
If the DopeTrack is not active while in IK Booster mode, the IK Booster Track becomes functional. The Keyframe Mode and IKB Menu buttons appear on the track as discussed earlier and all operations for IK Booster that were available on the Dope Track are available for the IK Booster Track.

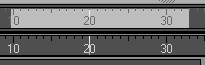
IK Booster Track Time Ranges - The IK Booster track displays time ranges differently then the DopeTrack. The time range will be shaded as it is in the Dope Track, but only the first and last frame numbers will be displayed unlike the DopeTrack.

Time Range Keyframe Shifting - You can use the IK Booster Track to shift a selected area of keyframes. This function is unique to the IK Booster Track and can be very useful.
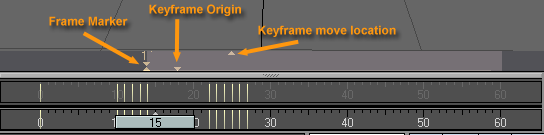
IK Booster Frame Marker - Place a frame marker by left clicking on the IK Booster Track. The Frame Marker is the frame on the track that marks the frame that the time range ends or begins depending on which side of the marker you click and drag in.
To remove the frame marker, simply left click on it.
Keyframe Origin - This marker shows the original location of the keyframes before any movement has taken place.
Keyframe Move Location - This marker shows where the Keyframe Origin is being moved to.
The Time Range will be shaded to display what area of time is being affected.
The items that are affected by Time Range Keyframe Shifting are determined by the Keyframe mode.
IK Booster Viewport Controllers
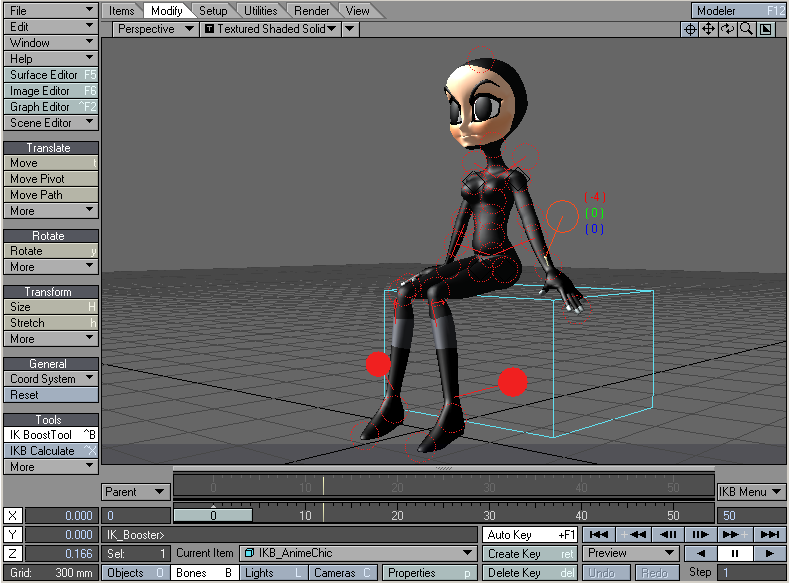
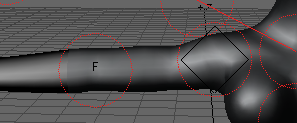
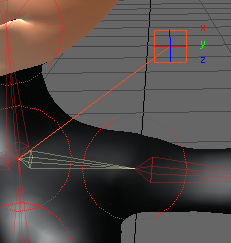
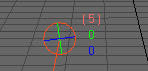
Once you have applied IK Booster to your object you have many options for displaying and working with the controllers that are created for each item. The controllers appear as circles while in Rotate mode and boxes while in Move mode.


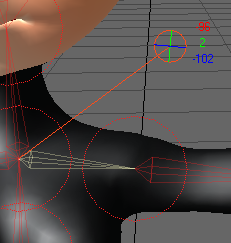
Left clicking and dragging on the controller will allow you to move and rotate the controller freely. You can also left click and drag on individual channels to constrain the movement of the controller.
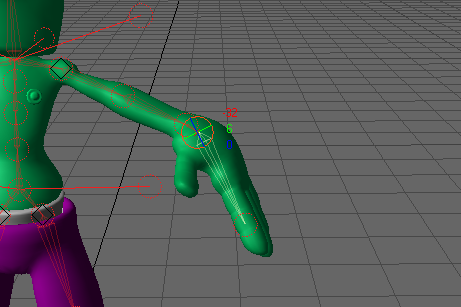
Rotate Mode:
- Red - Heading Channel
- Green - Pitch Channel
- Blue - Bank Channel
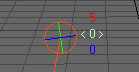
Move Mode:
- Red - X Channel
- Green - Y Channel
- Blue - Z Channel
Controller Right Click Menu
Right clicking on the controller will bring up the controller menu.
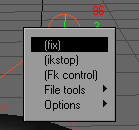
- Fix - This function will lock a controller in place. The controller will be displayed as a solid circle to indicate that it is fixed.
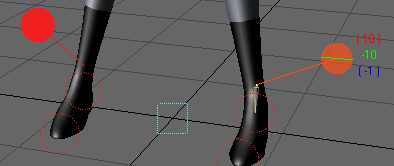
Ankle Controllers are fixed - IK Stop - This function will make the selected controller the new base of the IK chain, and only controllers farther down the chain are affected by any IK operation.The controller will display a diamond shape to indicate that IK Stop is active.
A good example of using IK Stop is wagging the tail of a dog. Imagine a string of bones inside a solid dog object, extending down its tail. You want the tail to follow the dog as it moves about, but you do not want the dog’s body to wag as the tailbones are animated. You activate IK Stop for the bone at the base of the tail to accomplish this.
This function is similar to Unaffected by IK of Descendants.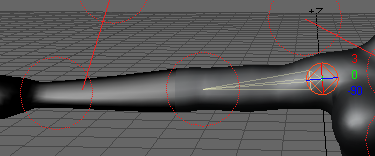
The Shoulder Controller has IK Stop applied. - FK Control - This function will change the controller from Inverse Kinematics to Forward Kinematics (FK). Forward kinematics is the standard type of motion generated in LightWave when you rotate/move any parents in a chain. The position of the last controller in the chain is determined indirectly by the combination of all positions of any parent controller up (i.e., forward) through the chain. (For instance when you move your upper arm, your forearm and hand also move with it.)
- File Tools - The options listed below are file management tools for a controller.
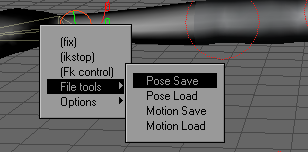
- Pose Save - This function will save an external file that contains the position of the selected controller for the frame you are currently on.
- Pose Load - This function will load a previously saved Controller Pose file at the frame you right clicked on.
- Motion Save - This function will save the entire motion data for the selected controller to a text file. This gives you the ability to re-use motions from the selected controller.
- Motion Load - This function will load a controller’s motion data file that was previously saved using the Motion Save command.
Controller Options
The Options drop down menu has several functions to work with.
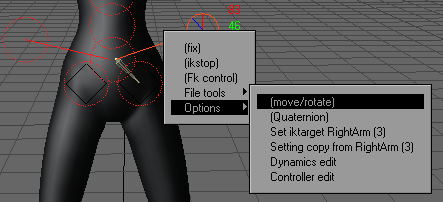
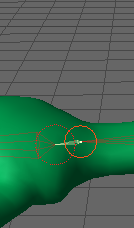
- Move/Rotate - This function will toggle the control between Move and Rotate mode.
Left: Rotate, Right: Move - Quaternion - This function will activate quaternion inverse kinematics solving for the selected controller. Quaternion IK will help any controller that suffers from gimbal lock and the controller will be displayed with a “Q” to indicate that Quaternion is active.
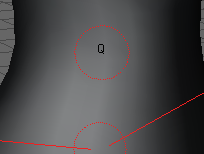
Interesting side note: The quaternions are members of a non-commutative division algebra first invented by William Rowan Hamilton.
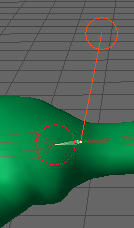
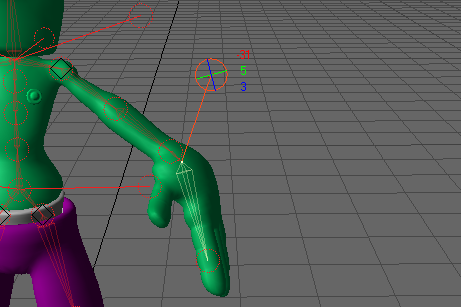
- Set IK Target - This function will allow one controller to drive another controller’s motion. In other words, the currently selected controller drives the previously selected controller. The controller will be labeled with a “T” to indicate that Set IK Target has been applied. Choose Reset IK Target to remove the target setup from the controller.
Steps for setting an IK Target:
- Select the controller that you want to animate.
- Select the controller you want to drive the animation.
- Select Set IK Target. The target is setup and ready to go. Use the Target controller to drive the controller in step a.
- Setting Copy - This function will copy the settings from the previously selected controller. This can be a real time saver when setting up controllers on like items. One example would be setting up the left leg and copying the settings over to the right leg.
- Dynamics Edit - This function will activate Dynamic Edit mode. Dynamic Edit mode allows you to set the dynamic properties for your controllers.
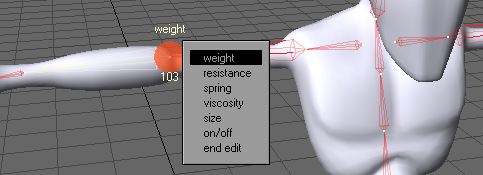
To change the values for Weight, Resistance, Spring, and Viscosity, simply left click and drag on the control. Dragging left will decrease the value while dragging right will increase the value.
- Weight - Defines the weight of the controller. You can achieve heavy motions by increasing the Weight value, and you can create light motions by decreasing Weight.
- Resistance - Controls the amount of air resistance.
- Spring - Controls the springiness or stiffness of the controller. Reducing the Spring coefficient creates soft motions, while raising Spring coefficient produces motions with a stronger repelling force. Setting the coefficient to an extremely large value creates stiff motions.
- Viscosity - Controls the impact of a collision. A controller with a higher Viscosity value tends to keep its shape more. If a controller bounces, a higher Viscosity value will have less bounce motion because the Viscosity absorbs the bouncing force.
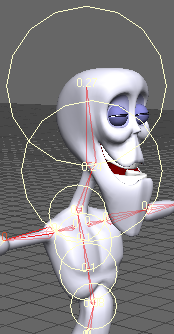
- Size - This setting determines the area of influence the controllers have. The image below shows various sizes on the controllers that make up the head and torso area of this character.
- On/Off - This function will determine whether a controller will be affected by dynamic calculation.
- End Edit - This function will take you out of Dynamic Edit mode.
Bone Dynamics must be active for these settings to be calculated.
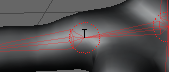
Controller Edit
This function will activate Controller Edit mode. While in Controller Edit Mode you can freely move the controllers by left clicking and dragging them to a location.
Left: Before Edit, Right: After Edit
Controller Edit Mode has several options that can be used to customize your Controller settings. Right click to bring up the Controller Options menu.
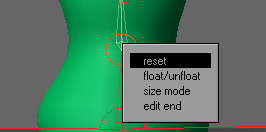
- Reset - This function will reset the controllers back to its default setup.
- Float /Unfloat - This function toggles the controller between Float and Unfloat.
- Float - The controller moves along with the item.
- UnFloat - The item moves but the controller is anchored.

- Size Mode - This setting determines the size of the controller when it is selected.
- Size 1 - Smallest selected size.
- Size 2 - Medium selected size.
- Size 3 - Largest selected size.
- Not Change - The selected controller size will be based on Controller Size. The selected and unselected controller size will be the same.
- End Edit - This command will exit Controller Edit mode.
Channel Menu
Right clicking on an individual channel will bring up the Channel menu. Each channel can be configured independently.
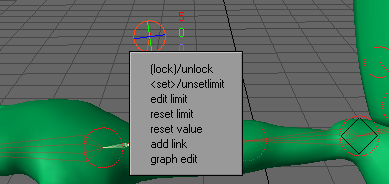
- Lock/ Unlock - This function will lock and unlock a channel. When it is locked, the number is surrounded with ().
The Controllers Heading Channel is Locked - Set/ Use Limit - This function will limit the channels value range. When a channel has a limit, the number is surrounded with <>.
The Controller’s Pitch channel has a limit
By default the limits are –180 to 180. This is not ideal in most cases so you will want to edit the limits.
- Edit Limit - This command brings up the Edit Limits Panel.
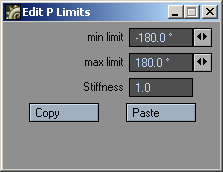
You can independently limit heading, pitch, and bank rotations between maximum and minimum values. You can prevent actions like bending a leg backwards at the knee (unless you’re animating a sports injury). To use the limiting feature, set the Min and Max values on the Edit Limits Panel.
Setting rotation limits can be particularly important when using inverse kinematics. When setting the Min/Max Limits, you will see a visual guide in the viewport that represents the limits.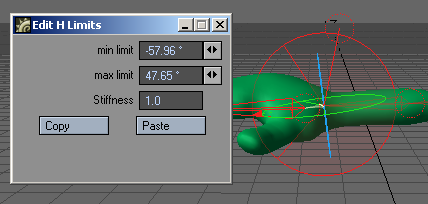
The maximum value must be greater than the minimum.
- Stiffness - Controls the springiness or stiffness of the limit. Reducing the Stiffness coefficient creates soft motions, while raising the Stiffness coefficient produces motions with a stronger repelling force. Setting the coefficient to an extremely large value creates stiff motions.
- Copy and Paste - Use these commands to copy and paste settings between channels.
- Reset Limit - This function sets the maximum and minimum settings of the limit to a present value. When Reset Limit is applied, you can edit the Maximun value by holding down the Ctrl key + left click and drag to the value that you want the limit to be set at.
- Reset Value - This function will set the value of the channel to zero (0). This is very handy when you need to quickly set the channels value back to zero.
- Add Link - This command will add a Booster Link to the selected channel. The reference controller will be the last controller selected.
Graph Edit
This command will launch the Graph Editor with the selected Channel active.
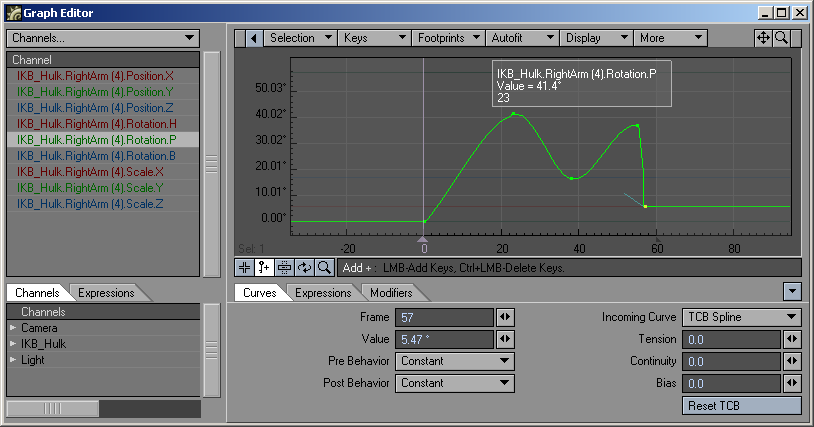
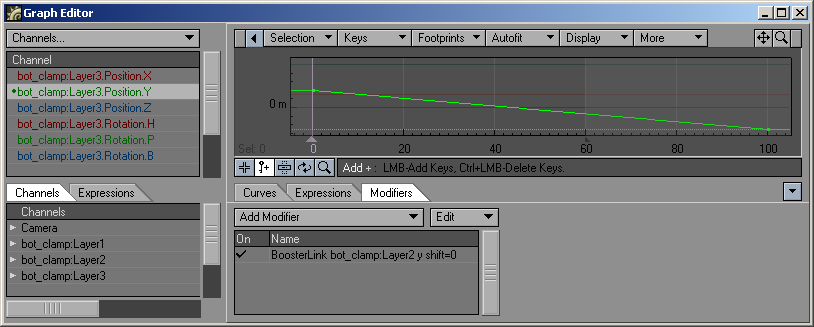
IK Booster Link
IK Booster Link can be used to link a channel from one controller to a channel in another controller. The Linked controller can be driven by the referenced control. This is very similar to how expressions can be used without writing any expressions.

- Remove - This command will remove the Booster Link Modifier from the channel.
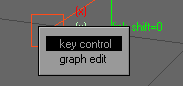
- Change Shift - This function will adjust the motion of the linked controller at different times during the referenced controllers motion. To remove Change Shift from a channel, simply right click on the channel and choose Key Control.
- Change Item - This function will change the reference controller to the last controller selected. This option can be changed in the IK Booster Modifier Panel under the Reference Item drop down menu as well.
- Change ch - This command will allow you to change the channel that drives the selected controller. This option can be changed in the IK Booster Modifier Panel under the Reference Ch drop down menu as well.
- Copy and Paste - These commands will copy and paste Booster Link settings.
- Edit Graph - This command will launch the Graph Editor.
IK Booster Link will abide by any limits that have been set on the channel that is driving the current controller.
IK Booster Link Modifier Options
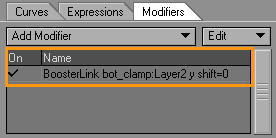
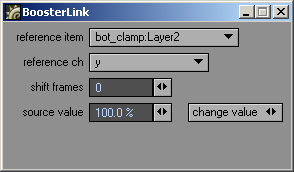
- Reference Item - This function will change the reference controller. The reference controller is what drives the linked controller.
- Reference Ch - This command sets the channel of the Reference Item that drives the linked controller.
- Shift Frames - Delays the linked motion by the number of frames specified. Entering “5” moves the frames -5, and -10 moves it +10.
- Source Value - This function sets the percentage between the minimum and maximum value of the referenced channel that will be used.
- Change Value - This function will change the value of the selected channel.
IKB Calculate
(default keyboard shortcut Ctrl X)
The IKB Calculate operation (Modify > IKB Calculate) is used to calculate IK Booster’s Bone Dynamics and generate keyframes based off those calculations. A keyframe will be created on every frame much like motion-capture data.
Bone Dynamics need to be properly set up before this will work. Otherwise, clicking it causes an error.
The IKB Calculate button will also calculate dynamic objects as well. For more information about IK Booster and Bone Dynamics see the IK Booster section.
Move TCB
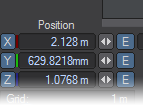
Another tool in the Modify menu will directly affect your motion path. At the bottom of the Modify list you will find Move TCB. This allows you to set the biases discussed in the Graph Editor section of the manual, but from Layout, rather than having to visit the Graph Editor itself. To use it, move to a keyframe, click on the Move TCB tool and you will notice that the lower left corner now displays T, C, B instead of the more familiar X, Y, Z or H, P, B.

You can enter figures in here for what you wish your TCB settings to be, or you can use the mouse:
- LMB: Moving left and right alters the Tension
- Ctrl+LMB: Moving left and right controls the Continuity
- RMB: Moving left and right controls the Bias
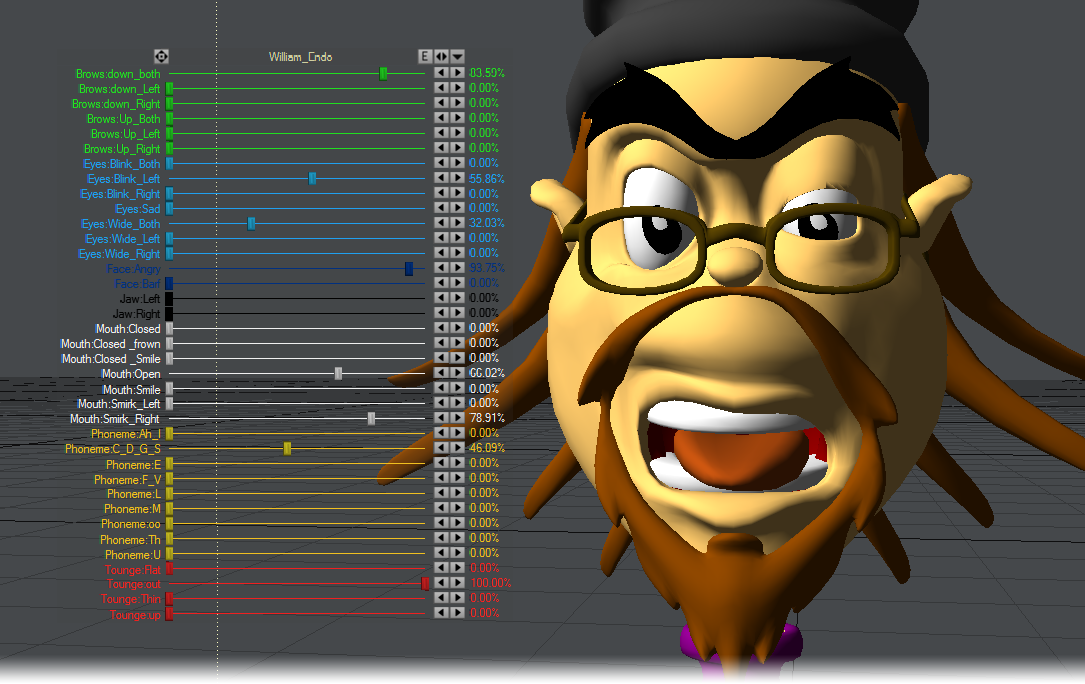
Sliders
(default keyboard shortcut Ctrl D)
Sliders (Modify > Tools > Sliders) are slider gadgets that are displayed over viewports. An individual slider is tied to a specific animation channel. A slider will indicate the current value of a channel and also let you interactively adjust that channel value. Sliders are useful for all kinds of animations, especially character animations. A good example can be an animated hand, with multiple bone movements for multiple fingers.
To use sliders in a scene:
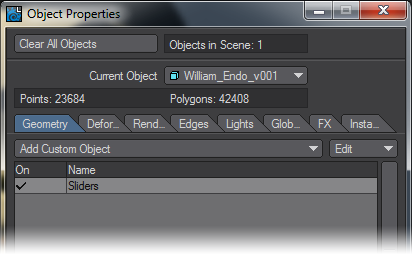
Add the Sliders custom object (Object Properties Panel) to any object.
To display and interact with the sliders, choose Modify > Tools > Sliders. The sliders for the last current object (with the Sliders custom object) will be editable when the Sliders tool is active. Keep this in mind if you have more than one object with the Sliders custom object.
Remember, as with all Layout tools, you’ll need to select another tool (Move, Rotate, etc.) to deactivate the Slider tool.
To configure your sliders:
Open the Sliders Custom Object settings dialog from the Object Properties Panel.
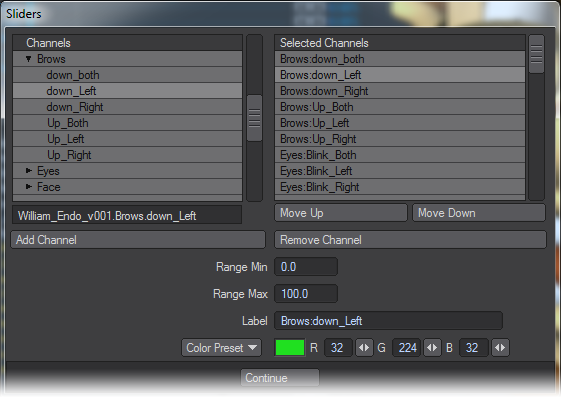
The left window (Channels List) will list all of the channels in the scene. To attach a slider to a channel, simply select the channel in the left window and double click or click the Add Channel button. Selected channels in the right window can be removed with the Remove Channel button.
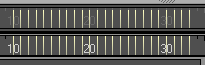
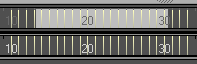
The Range Min and Range Max settings define the interactive range of the slider. The underlying channel can go beyond these values, but the slider’s range of control and feedback will be limited to this range. If the underlying channel goes outside the range, the slider value will turn red.
Clicking on the slider handle will immediately change the channel to the slider’s corresponding value.
The description Label will default to the channel name, but you may edit that if you desire. You can also set the color used for the slider with the Color preset pop-up menu or specific RGB values.Working with OpenGL Sliders:

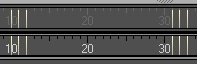
There are three controls along the top. Drag the far-left one to move the slider group. The Envelope (E) button will display the Graph Editor with the associated channels in the curve bin. The right/left arrowhead (<>) button can be dragged to scale the size of the slider group. The arrowhead button on the right will minimise/maximise the slider display.
In the individual slider entries, the handle can be grabbed to slide to any value in the range set up and the arrows at the right end are to jump from keyframe to keyframe.
To simplify using sliders, use the Add Slider Bank generic plugin command (Not assigned to the interface by default). It will add a null object, apply the sliders custom object to it, and open the sliders interface, all in one step.
Spline Displacement
Spline Displacement is not a new tool. It used to be called SplineControl
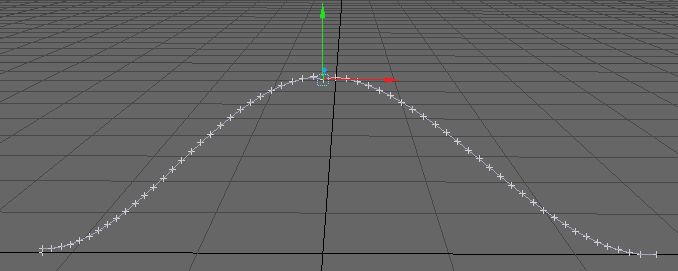
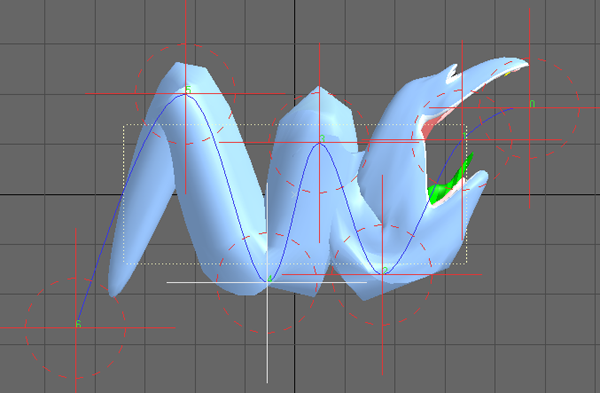
The Spline Displacement Tool (Modify >Tools > Spline Disp Ctrl) is a simple way to animate hoses, tentacles, etc. using a spline with control handles. This tool will create a spline the length of the object with a user specified amount of control points that can be used to deform an object.
To use Spline Displacement
- Select the object that you would like to animate with Spline Displacement.
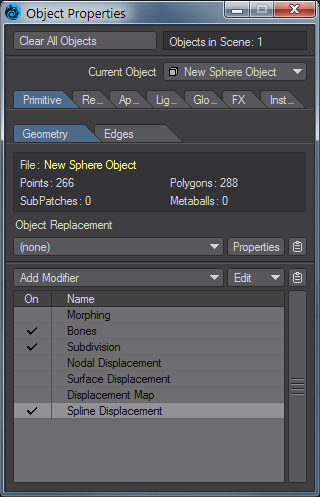
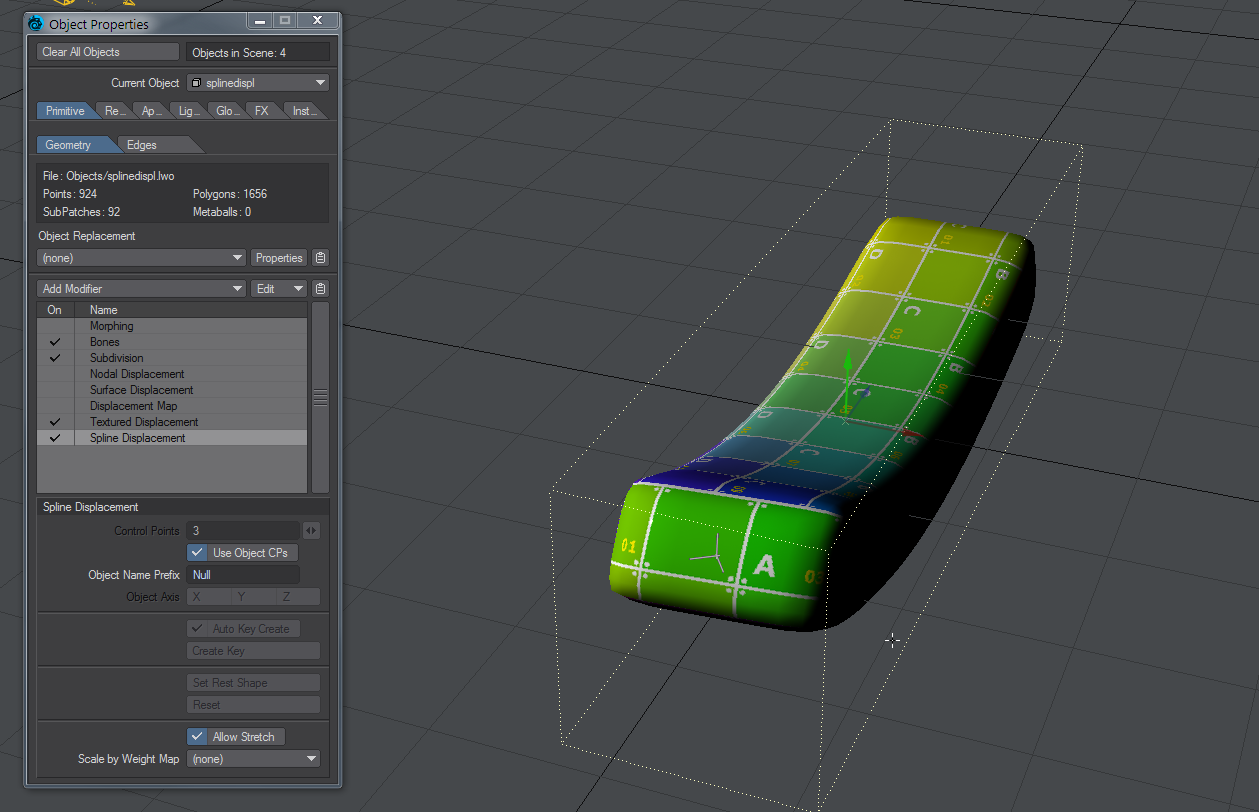
- In the Object Properties window, Primitive tab, Modifier section, choose Spline Displacement from the Add Modifier Dropdown menu.
- Double-click Spline Displacement to open its interface.
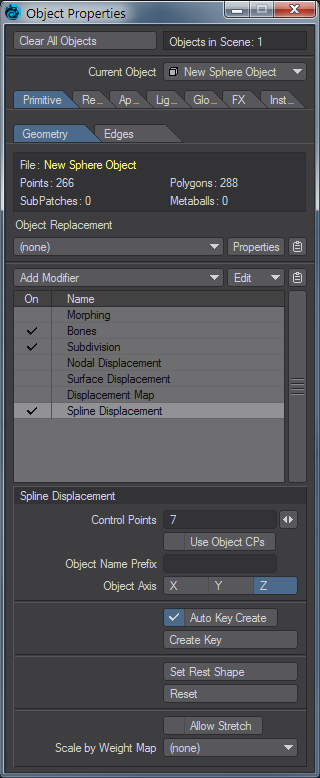
- Choose how many Control Points you want (you can change this later, but doing so might lose any animation set). The slider will set a minimum of 5 and a maximum of 256, but a minimum of 3 can be typed if desired.
- Use the Spline Displacement button (Modify > Spline Disp Ctrl) to activate and move the nodes around.
Spline Displacement Options
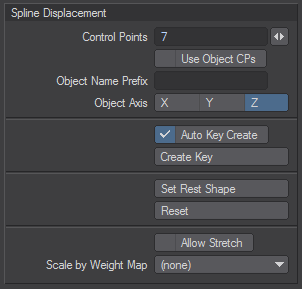
- Control Points - This field will determine the number of control handles that will be generated.
Each control point will be numbered starting from 0. This number will appear in OpenGL.
- Use Object CPs - Uses nulls with the names given in Object Name Prefix placed in scene as control points for the spline displacement
Object Name Prefix - Prefix for naming nulls for spline displacement
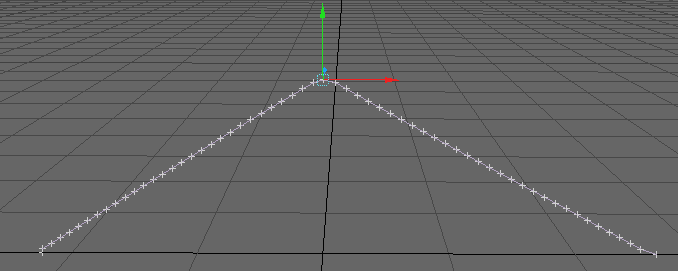
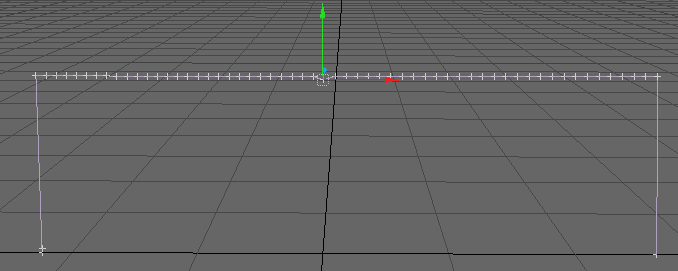
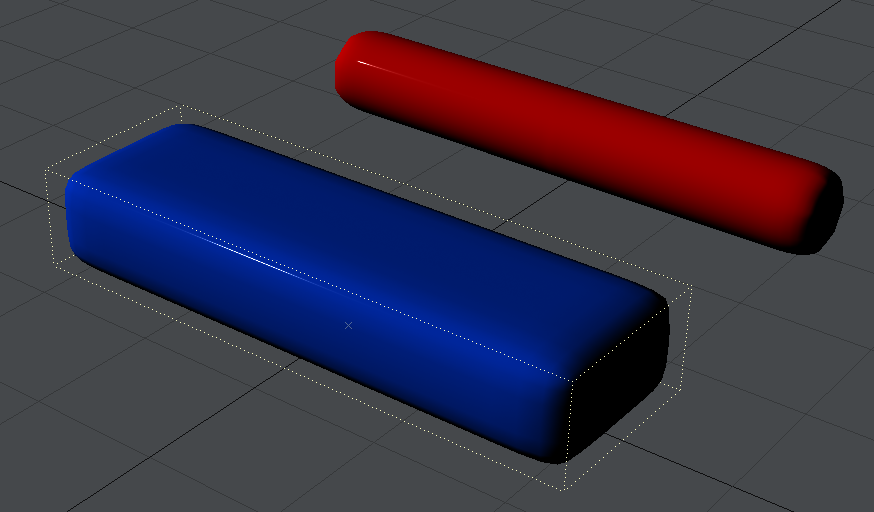
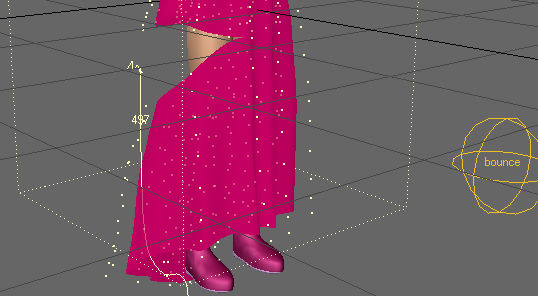
Spline Displacement can use other objects as controllers for the displacement. Here we look at moving our bar with null objects.
- Object Axis - Defines the axis the control spline will be drawn on.
- Auto Key Create - Similar to Layout’s standard Auto Key in that it will automatically create a keyframe as you move a control point. The only difference is that it will always create when on frame zero regardless of whether or not this option is active.
- Create Key - When Auto Key Create is not active use this to create a keyframe.
Hitting Enter on the keyboard will not set a keyframe for a control point.
- Set Rest Shape - Use this to change the default rest position of the control points in relationship to the object.
- Reset - This function works like undo, however instead of just undoing the last move it will reset all control points to their rest position.
- Allow Stretch - When this option is activated the object is able to be stretched past its original scale.

Left: Allow Stretch OFF, Right: Allow Stretch ON
- Scale by Weight Map - This option will use the Weight Map selected and only deform that area of the mesh.
Edit Tool
(default keyboard shortcut Ctrl E)
The Edit tool (Modify > Tools > Edit Tool) activates the ability to edit points on dynamic objects and particles. You will be able to visually see that you’re in Edit Mode in the viewport. All the points that make up the object will become highlighted and all the Edit tool functions will become active.
For more information about the Edit tools and some of its options, see the Dynamics and Particles sections.