Layout General Options
(default keyboard shortcut O)
Choose Edit > General Options to bring up the General Options Tab on the Preferences Panel.
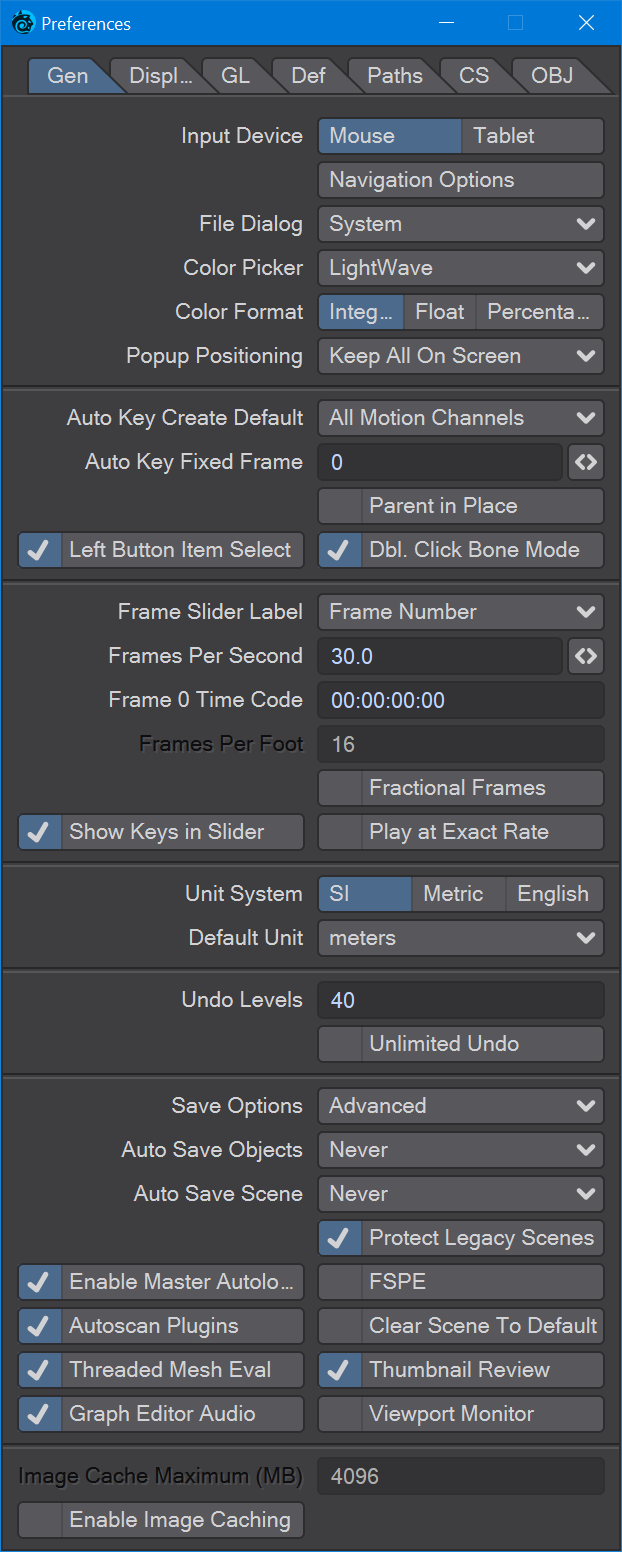
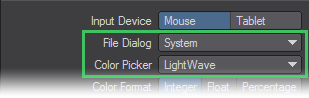
Input Device
The Input Device pop-up menu lets you select either a Mouse or Tablet as the primary input device. When you choose the input device, the default system drivers for the appropriate device are used.
File Dialog and Color Picker Selection
The File Dialog and Color Picker pop-up menus let you use custom LightWave dialogs for file loading/saving and picking colors. Selecting Default will use your standard system dialogs.
The Visual Browser
You can make the LightWave visual browser the default file dialog for Layout by choosing VB File Requester on the File Dialog pop-up menu. This appears on the Interface Tab of Modeler’s Display Options Panel (Edit > Display Options).

Color Format
The Color Format setting determines the scale used where the color selector appears next to the color swatch in Panels and Dialogs. Integer uses values 000 to 255, Float uses .00 to 1.00, and Percentage uses 0% to 100%.
Popup Positioning
- Center On Selected - This is the method where the selected item is always centered on the popup button. This can cause the menu to be partly truncated if it falls partly outside of the screen, which means that the user may have to scroll through the menu to get at the desired item.
- Keep All On Screen - this is the method which ensures that the whole popup menu is always shown on screen. This may require the menu to be moved so that the selected item is no longer centered on the popup button.
Automatically Creating Keyframes
The Auto Key button on the lower part of the main interface turns the overall auto key mode on or off. When active, existing keys are automatically adjusted if an item is modified.
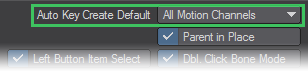
The pop-up menu on the General Options Tab has three settings:
- Off - Off will modify only the settings of an existing keyframe for the current item.
- All Modified Channels - All Modified Channels creates a keyframe, but for only the modified motion channel group (e.g., XYZ or HPB). So, for example, if you change only an item’s heading, a key is created only for the current item’s heading, pitch, and bank at the current frame.
- All Motion Channels - All Motion Channels creates a keyframe for all motion channels.
- Fixed - Keys will only be placed at the Auto Key Fixed Frame set below.
This feature can be a nice time-saver when compositing still images or initial keyframes, but can be a detriment when changing a feature like a position, as a test to see if you like it.
Parent in Place
When Parent in Place is active, an item will maintain a constant position, size, and orientation when it is parented or unparented.
Left Mouse Button Item Select
When Left Mouse Button Item Select is active, you may click on an item with the LMB to select it in a viewport. (Those of you with three-button mouses can always use the MMB.) The reason to turn this item off is to prevent accidental selection of other items while trying to move, rotate or scale your current item.
Dbl. Click Bone Mode
With Double Click Bone Mode activated, bone mode is selected when a bone is double-clicked on.
Frame Slider Label
The Frame Slider Label pop-up menu lets you choose a type of measurement on the frame slider, which is the ruler-like control on the main interface.
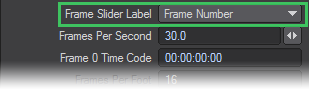
You can select between Frame Number (the default), SMPTE Time Code (HH:MM:SS:FF, where HH is hours, MM is minutes, SS is seconds and FF is frames), Film Key Code, or Time in Seconds.

Frame

SMPTE

Film Key Code

Time in Seconds
Frames Per Second
The Frames Per Second rate is specific to the calculation of texture velocities and other internal information that can be accessed by LightWave’s plugin architecture. If you had based a moving texture velocity so that it appeared to repeat every 30 frames, but your output was going to film (at the film rate of 24 frames per second), you would want to set this value to 24 so that the repeating nature of the pattern repeated properly. Change this frame rate if you are working on film or another medium that has a frame rate different than video (30 fps).
Frame 0 Time Code
Enter a starting SMPTE time code for frame 0 in this input field if it is other than 00:00:00:00. This can be important, even if you are not using SMPTE Time Code as your Frame Slider Label, but are using it in the Data Overlay setting on the Render Options Panel (Render > Render Options).
Frames Per Foot
When using Film Key Code, you can specify the Frames Per Foot.
Fractional Frames
When Fractional Frames is turned on, the frame slider can be placed at non-integer frame values, either by adjusting the frame slider, jumping to the previous or next key, or typing into the Go to Frame requester.
Changing this value does not move keyframes. Keyframes are located based on time rather than frames so they’re always allowed to lie on fractional frames. If you want to move fractional keyframes to integral frame values, use the Snap Keys function in the DopeTrack.
Show Keys in Slider
When Show Keys in Slider is active, a line will appear in the slider where a keyframe exists for the selected item(s).

Play at Exact Rate
Play at Exact Rate causes forward and reverse playing of the scene to ignore the frame step and instead play in real-time, waiting or skipping frames as needed. It has no effect on preview animation playback.
Measurement Unit System
LightWave supports several units of measurement. You can choose to work in different notations; however, you may input a value using a unit of measurement other than the default, and it will be converted on the fly. For example, you may be using meters, but if you type in “5 ft” LightWave converts it to 1.524 m. (Metric is basically the same as SI except that it also uses centimeters.) The Unit System setting determines what units of measurement Layout uses and displays. 
- SI - SI is the International System of Units. (SI is the abbreviation of the French “Le Système International d’Unités.”) Unit measurements in Layout will now use a base system of meters. Grid sizes and distances can be measured in megameters, kilometers, meters, millimeters, micrometers, and nanometers.
- Metric - Metric is the same as SI with the addition of centimeters.
- English - The English system refers to measurements in miles, feet, and inches.
We strongly suggest that you use SI or Metric since that measurement type is generally assumed for exercises and tutorials.
Setting the Default Unit
If a unit is not specified in an input field, the default is used. You can select the default unit using the Default Unit pop-up menu.
We strongly suggest that you use the SI or Metric Unit System and meters as the default unit. Use other settings only for special situations. Both systems are based on 10, which will make your Modeling and animation life easier. The Default Unit of meters is assumed for exercises.
Undo Levels
The number of available undos is determined by the Undo Levels setting found in the General Options Panel. You can set a specific number of levels by typing in a number in the Undo Levels entry field, or you can click to activate the Unlimited Undo option.

The Autokey Management option will delete the keyframe when an undo is performed.When Autokey Management is deactivated, the last action will be undone, but a keyframe will be left in place. Unlimited Undo will keep a history of all undoable actions from launch.
Save Options
There are three different Save Options:
- Disabled - When you clear scene, load a new scene or close Layout it happens immediately with no warning if things are unsaved.
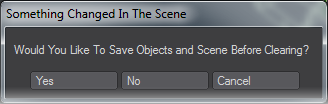
- Simple - This brings up the above message if you clear scene, load a new scene or close Layout without having saved first.
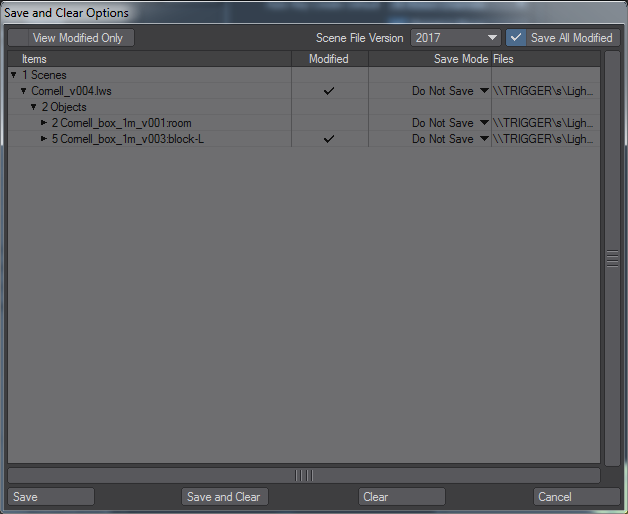
- Advanced - The default option brings up a panel where you have control over what you wish to save, and how:
- View Modified only - Shows only items that need saving
- Scene File Version - 2018 is the current save format and default, but scenes can be saved as earlier versions to support people that don’t have the latest LightWave. Obviously these older scene formats won’t include features that were only introduced in later versions.
- Save All Modified - Overrides the Save Mode column that indicates whether an item should be saved, saved under a new name or saved as an incremental version.
- Save Mode - Defaults to Do Not Save , but this only applies if Save All Modified is unchecked. If is unchecked then the choice can be made individually for each scene item whether to Save , Save As , Incremental .
- Save, Save and Clear, Clear and Cancel - These four options finalize the saving, or not, of a scene.
Auto Save
You can set Layout to auto save objects and scenes to the current content directory in a folder named Backup. This folder will contain sub-folders for sorting dates and times. The times that can be set are 1 min, 5 min, 15 min, 30 min, 1 hour. The auto save does not to save if there have been no changes made.
Be warned that saving endless backups can rapidly fill a hard disk!
Protect Legacy Scenes

When this switch is checked (as by default), a warning will appear when loading a scene from a previous version of LightWave. There have been sweeping changes made to LightWave 2018 rendering it less compatible with legacy versions. Enabling this option will copy the scene to a new content directory of your choice before opening the new copy, preserving your content made with previous versions of LightWave.
Enable Master Autoload
This toggle will automatically load Master plugins when loading a scene. Normally it should be left checked, but studios with a specific Master plugins policy can disable it.
FSPE
A toggle has been added for FSPE (Full Scene Parameter Evaluation), which was previously a hidden feature. You can find it in the General Options panel in Layout. FSPE is a legacy plugin which was intended to take IK data into motion plugins.
It is recommended to keep FSPE disabled. A continuous loop can be added if a child object is dependent on the motion of the parent object.
FSPE and Fixed Near Clip Distance are set back to the default settings upon Clear Scene or New Scene.
Autoscan Plugins
If checked on, Autoscan Plugins scans the plugins folder and creates a file “ Extension Cache” with contains a list of all of your plugins. If you leave Autoscan Plugins off, you can fill the “LWEXTxxxx” configuration file by running Scan Directory.
Autoscanning is a process to look for plugins in specific locations for the current session. To speed up this process in subsequent sessions, the new extension cache file remembers the previous autoscanning and allows comparisons with the new session to see if these specific plugin locations have added or removed plugins from their folders. Plugins founds through this approach are tagged internally as ‘non-persistent’, since they may not be around the next session. Manual scanning of plugins (the Edit Plugins panel, either adding a single plugin or scanning a folder) makes the system aware of ‘persistent’ plugins, which are plugins you have specifically chosen to use regardless of any non-persistent (autoscanned) plugins. Knowledge of persistent plugins is kept in the usual “LWEXTxxxx” config. Persistent plugins supersede non-persistent plugins if they should ever conflict, thus giving the user more control of what plugins are used. It is recommended you have autoscan enabled and manually add plugins that are not in the pre-determined plugin locations. If you turn off autoscan, you are still able to manually add persistent plugins, but no non-persistent plugins will be available.
Clear Scene to Default
![]()
When this option is enabled, if a default scene exists in the Scenes directory of the current content path, it will be loaded into Layout whenever the user successfully performs a “Clear Scene”.
Layout recognizes a “default.lws” scene. If you save a scene named “default.lws” in the Scenes directory of your Content Directory, each time you open Layout it will open this scene.
Threaded Mesh Evaluation
Threaded Mesh Evaluation will use however many cores you have and may help speed up mesh deformations..
The multithreading only happens in Layout for interactive work, not when rendering. Currently the following parts of the mesh evaluation have been multithreaded:
- Morphing
- Bone deformation
- Motion (application of item move/rotate/scale to mesh)
Thumbnail Review
When this is checked and the Render Scene (F10) function is running, a series of thumbnails will appear in the Render Status Panel, showing the last several renders in the sequence..

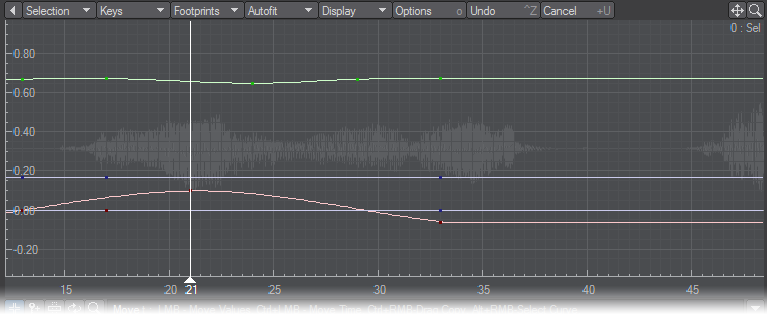
Graph Editor Audio
This option enables the graphical representation of audio in the Graph Editor. Obviously you need some audio to show. Audio files can be added to Layout in the Scene/Dope Editor.
 Enable Image Caching
This feature is intended to allow you to have an alternative to having all images active in RAM during the work session. If Image Cache is enabled, then the most-used images, or parts of images, are kept in RAM, and the least-used are stored in an on-disk image cache folder. This conserves memory and may even speed up rendering because the cache is stored as parts of images. If only a small area of a large image is needed for the render, this will be faster than fetching the whole image only to concentrate on a tiny part of it.
The feature is activated via toggle in the Preferences Panel > General Options tab. The user should ensure that their cache drive has sufficient space to accommodate caching by the nodes and is rapid enough for the read/write operations that will need to be performed.
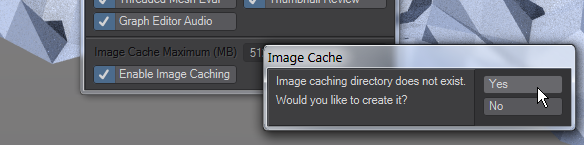
When you first start the Image Cache, you will be asked to create a directory to store offline images. By default, a new folder called lwimagecache will be created in your User\Temp directory (%TEMP%\lwimagecache on Windows, ~/Library/Caches/lwimagecache on Mac OS). The image cache will rapidly be filled with slices of the images in the loaded scene.
The image cache system is handling both those images that are present in the application that have not yet been saved and those that have a source file on disk. Exceptions are render buffers and LightWave image plugin-based loading - these images cannot be added to the cache until loading is complete. All cached images are saved in the internal working format for LightWave. This provides very quick handling for saving and for reloading. This also eliminates the need for repeating the time-costly processing steps that would be required for the source files from disk if they were to be simply loaded and cleared multiple times throughout the work session.
The image cache will flush when the feature is disabled or you quit LightWave.
The Image Cache Maximum (or "RAM Limit for Images") entry is the total amount of RAM that you wish to allow for images, collectively, before caching to disk is engaged. The default setting is for systems with small RAM capacity. If you have more than four gigabytes of RAM, you will likely want to use higher settings. The maximum setting is one terabyte, but as a rough guide half of system RAM will give a good compromise between speed and usefulness.
On systems with large RAM capacity, you will gain some speed in image handling by turning the feature off; if you are using large images or a lot of images, this will, however, take up considerably more memory than when Image Cache is on.
Network rendering is complicated by this caching technique. Care needs to be taken to create a cache on individual nodes. To that end, choosing an appropriate directory on the originating machine is vital. The default location of %temp%\lwimagecache should be available to every Windows machine, but be careful if you choose a different location.