Scene / Dope Editor
Introduction
(default keyboard shortcut Ctrl F1)
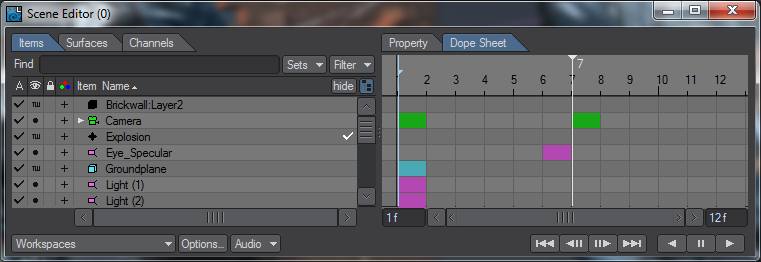
The Scene Editor gives you the “big picture” of your scene. The Scene Editor is a data viewing and editing hub for many of the properties with Layout that pertain to items and surfaces. It does not intend to encompass all properties in Layout nor act as a complete replacement for those that it does support. But, it does intend to offer ease and speed when modifying data about multiple items or multiple surfaces. It also intends to allow users to have chosen data appear simultaneously within a single panel instead of having to jump around from panel to panel to make changes.
Not only are properties about items and surfaces presented, but also any channel data that is attached to these item types. “Items” refers to Layout Items that may consist of Objects, Bones, Cameras, or Lights. Surfaces refer to surfaces currently loaded within Layout. Since surfaces are always attached to Object Items, an object item must exist in Layout before a surface can exist.
The New Scene Editor is a user configurable scene overview tool. It is used to see everything that exists in a given scene, and can be used to edit most attributes of any item or groups of items in the scene, all from a single location. Multiple instances of it may be opened at any time, and each can be configured independently of the others. This would allow you to configure one Scene Editor specifically for settings that relate to a character in a scene, while another can be set up with options relating to the environment. A third may also be added that configured specifically to control lighting, etc. Each Scene Editor stores its own set of configurations, so they’re “remembered” each time that particular scene is reloaded. Different configurations can be saved for different scenes. You have full control over how these can be set up.
Since all instances of the Scene Editor are displaying the same scene information, changes made in one will automatically be updated in all other instances, so all Scene Editors are displaying the current state of all the scene properties at all times.

To launch the new Scene Editor, click on the Scene Editor drop down menu and choose “New Instance”. You also have the option of choosing the Classic Scene Editor as well as multiple instances.

You can have multiple instances of the new Scene Editor open at once to allow multiple views of scene items. Shutting these windows does not remove the Scene Editors from the scene, merely closes their windows temporarily. If you wish to definitively shut down one or more Scene Editors, open the Master Plugins window (Ctrl-Q), choose the Scene Editor instance you wish to close, hit the RMB and choose Remove.

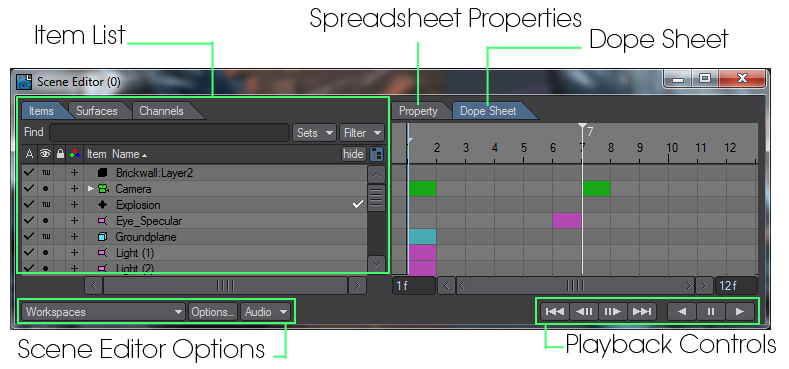
The Scene Editor has five main sections to it, each with a specific purpose. These areas are the Item List, Spread Sheet Property Panel, Dope Sheet Panel, Scene Playback Controls, and the Scene Editor Options.
- Scene / Dope Editor - Item List
- Scene / Dope Editor - Properties
- Scene / Dope Editor - Dope Sheet
- Scene / Dope Editor - Playback Controls
Workspace
A workspace is a collection of user specific settings that can be stored and recalled quickly. Settings include: panel width and height and location, view dimensions within the panel, Item view selection, filter options, display options, Property view bank and custom bank choices, dope sheet settings, etc. These Workspace settings are stored on a per user basis. A user-specific configuration file is used. The initial workspace data to use is built-in as a default workspace.
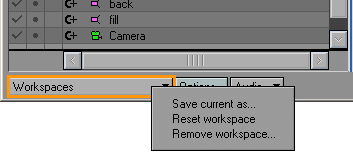
The menu presented will show the existing workspaces available as well as options to save one, reset it, and remove one. Selecting a named workspace will transfer its settings to the current Workspace settings. Changes to the current workspace do not affect any stored workspaces unless that workspace is overwritten via the ‘Save current as…’ option.
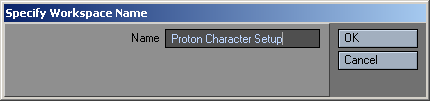
- Save current as… - Allows user to pick a name for the workspace. Using an existing workspace name will overwrite that workspace; otherwise, a new storage workspace is created.
- Reset workspace - The current Workspace settings (not any of the storage Workspace settings) are reset to their built-in values.
- Remove workspace… - A pop-up menu displays the existing workspaces, which can be removed. Choosing one results in losing that stored workspace; this has no affect on the settings of the current workspace.
Scene Editor Options
The Scene Editor options are categorized via the part of the GUI they affect: General, Items, Properties, and Dope Sheet. A separate panel is used to adjust these options, which are stored as part of the current workspace.

General Options

- Background color (odd rows) - click to change color of odd numbered rows.
- Background color (even rows) - click to change color of even numbered rows.
- Hierarchy indent (pixels) - (unsigned short) set to number of pixels used as a gap for each additional child depth when displaying hierarchical data like layout items.
- Highlight color (RGB) - color of background for highlighted items.
Items Options

- Default Object Color (RGB) - new objects are created in this color
- Default Bone Color (RGB) - new bones are created in this color
- Default Light Color (RGB) - new lights are created in this color
- Default Camera Color (RGB) - new cameras are created in this color
- Auto-apply selection to viewports - This will select items in viewports as they are selected in the Scene Editor
-
 Always highlight view port selection - Will highlight the scene editor selection with item chosen in the viewport. Will not open up hierarchies in which the item chosen may reside
  Always show full view port selection - Will highlight items chosen in the viewport without overriding Scene Editor selection
Properties Options

- Multiselect cells must have matching units - This is useful when selecting multiple channels and properties. When enabled, only those cells that share the same ‘storage’ units (e.g. length, angle, percentage) will be selectable. It may be useful to turn this off when you would like to select position, rotation, and/or scaling values simultaneously.
- Limit color component values to 255 - When enabled, color values are limited to the 0-255 range. Some properties do interpret and benefit from color component values outside this range. (Light intensity for example)
- View and edit color as HSV - This uses the Hue, Saturation, Value approach to displaying and editing colors within a cell.
- Show cell selection order - When enabled, each cell will contain a small numeric indicator of what order that cell was selected. This can be useful when applying values that depend on the sequence of how the cells were selected in a multi-cell selection.
- Open graph editor via ‘E’ button: (Boolean) - Normally, pressing on a cell’s ‘E’ button will add an envelope and then open that envelope (channel) in the Graph Editor. When this option is disabled, the Graph Editor will not be altered from its current state. When working with many cells at once, it may become cumbersome to have the Graph Editor open up when you only wanted to add the envelope.
Dope Sheet Options
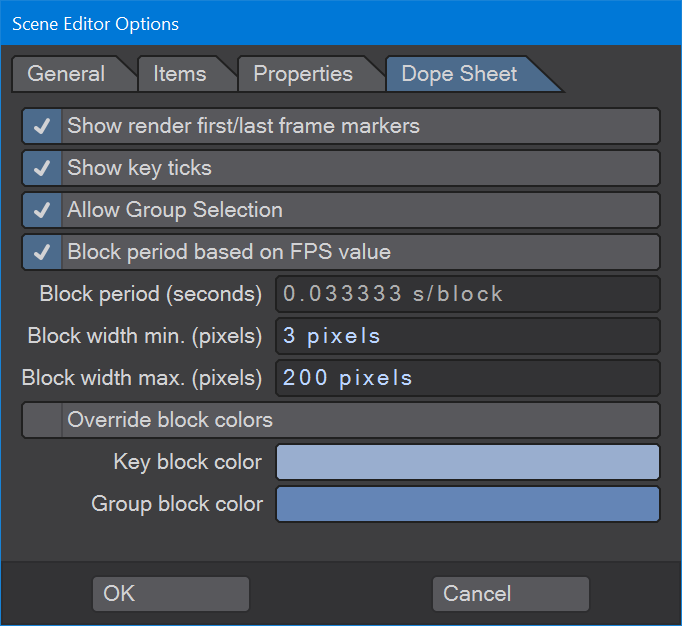
- Show render first/last frame markers - When enabled, the gadgets for the Render Start Frame and Render Stop Frame are presented and can be moved with the mouse by clicking on them with the left mouse button.
- Show Key ticks - This will allow the precise location of a key in time to be displayed.
- Allow Group Selection - determines if groups of channels can be selected and manipulated when collapsed. If disabled, only channels can be manipulated and never groups of channels. If enabled, a group of channels can be manipulated by simply manipulating the group blocks (as long as the group item is not expanded). When expanded, only the desired channels will be manipulated even if the parent group is also highlighted.
- Block period based on FPS value - Uses the current frames per second value in layout to determine the block period (or amount of time a block represents). When disabled, you can specify the custom time amount that a block should represent.
For example, an animation may be intended for 30FPS rendering, while the creation of the animation may depend on a music rhythm based on a tempo of 96. So, you could set the block period so that each block represents a 1/4 note or 1/8 note. - Block period - This is how much time each block in a dope sheet should represent. Normally this is one frame but may be larger or even fractions of a frame. This is currently measured in seconds per block and defaults to 1/30th s/block.
- Block width min. - This is the minimum pixel width that a block (that contains key frame data) should be.
- Block width max. - This is the maximum pixel width that a block (that does not contain key frame data) should be.
- Override block colors - This setting will use the Key block color and Group block color instead of the default block colors.
- Key block color - Choose a color for blocks that represent a single data channel that contains one or more keys.
- Group block color - Choose a color for blocks that represent multiple data channels in which at least one of the data channels contains one or more keys.
Scene Editor Audio Options
A Menu button is located at the bottom of the panel that controls some basic audio support features available in Layout.
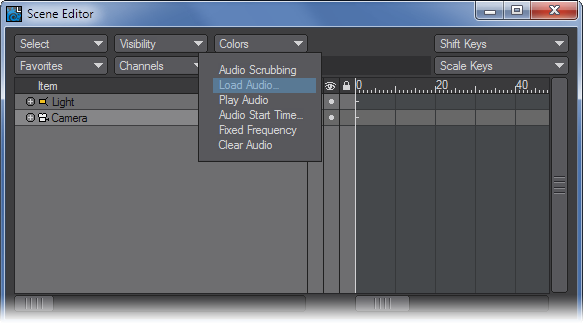
- Play Audio - This will play a loaded audio waveform from start to finish.
- Load Audio… - presents a file requester to get an audio file to be loaded. The audio waveform is loaded and can be seen in the main Layout window within the timeline. Not much detail about it is available however.
- Audio Start Time… - This requests the scene time when the audio should start.
- Audio Scrubbing -When checked, the loaded audio will play whenever the timeline is scrubbed. If it is unchecked, no audio will play. The loaded audio file will record with previews.
- Fixed Frequency - This is a toggle option. When enabled, the audio will play at its intended sampled rate. If time scrubbing does not maintain real time playback rates, then gaps or skips in the audio may occur. When disabled, the pitch of the audio will vary as a result of the playback sample rate changing to accommodate the actual time scrubbing rate.
- Clear Audio - clears out any audio currently loaded.